Advertisement
Quick Links
Advertisement

Summary of Contents for INSTACHEW PURRFLOW
- Page 1 PURRFLOW SMART PET FOUNTAIN INSTRUCTION MANUAL...
-
Page 2: Table Of Contents
TABLE OF CONTENTS PACKING LIST PRODUCT OVERVIEW APP SETUP PRODUCT SETUP PRODUCT CLEANING FREQUENTLY ASKED QUESTIONS RETURN POLICY WARRANTY... -
Page 3: Packing List
PACKING LIST Please read this manual carefully before use to ensure safe use of Purrflow Smart Pet Fountain. PURRFLOW*1 ADAPTER*1 CABLE*1 INSTRUCTION MANUAL*1 PRODUCT NAME: PRODUCT MODEL: RECOMMENDED PET TYPE: Purrflow Smart Pet Fountain IC868 Small to medium pets PRODUCT SIZE:... -
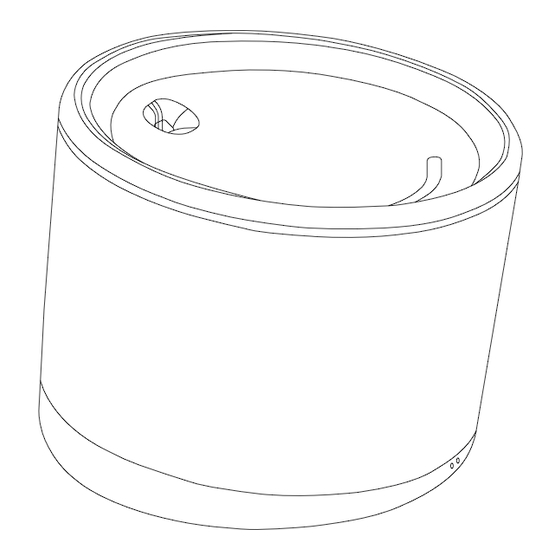
Page 4: Product Overview
PRODUCT OVERVIEW Top cover Filter slot Water tank Body Power interface Reset Button Indicator light FOR ALL PRODUCT INFORMATION, CLICK HERE OR SCAN THE QR CODE... -
Page 5: App Setup
3. After registering a new email, 4. Start setting up your profile, 5. You’re all set! It’s now time to link 1. Launch the Instachew Infinity App. 2. Click “Register” to create a new input the received verification adding your and your pet’s your device, by clicking “Add... - Page 6 9. Enter the main interface of the 10. You can turn on the UV light and fountain. You can choose to make sure the Purrflow is being instantly water by clicking POWER. cleaned by clicking the UV Light button.
- Page 7 14. You can also get notified whenever you would like to maintain for mode which allows you to manually the filters need to be changed, the Purrflow needs cleaning to each watering session. Choose control the watering, and the Smart ensuring a safe and healthy...
-
Page 8: Product Setup
PRODUCT SETUP FOR ALL PRODUCT INFORMATION, CLICK HERE OR SCAN THE QR CODE 1. Lift the top cover. 2. Fill the water tank with water. WARNING: NEVER USE HOT OR BOILED WATER ! -
Page 9: Product Cleaning
PRODUCT CLEANING It is recommended to wash at least once a week to remove dirt and hair, and to change the water thoroughly to prevent the filter tank from coggling and causing poor water quality or poor water output. 1. Remove the water storage top 2. -
Page 10: Frequently Asked Questions
Friendly reminder: use broken power core will have a hazard on pets, please replace it in time. What are the most suitable sizes of pets for the Purrflow? Suitable for adult cats and small medium dogs. - Page 11 What does the UV light do for the water within the fountain? The UV light offers a filtration for the water to help keep it clean. FOR MORE FAQS AND INFO ABOUT THE PRODUCT, CLICK HERE OR SCAN THE QR CODE Call us: 1-866-922-5554 Inquiries: info@instachew.com Support: service@instachew.com...
-
Page 12: Return Policy
30-DAY SATISFACTION GUARANTEED RETURN POLICY All of our products purchased directly from Instachew.com are returnable within 30 days from the date of delivery. Please email service@instachew.com with your proof of purchase and reason for return. For larger products, The Purrclean, directly purchased from Instachew.com only, are returnable within 60 days from date of delivery. -
Page 13: Warranty
The warranty for our product will be valid for a duration of one year starting from the purchase date. To be eligible for the warranty, you will need to provide a proof of purchase, such as a receipt from Instachew or one of its authorized retailers. - Page 14 You will need to provide the order number received by the purchaser if it was directly For items received as a gift purchased from Instachew or a copy of the proof of purchase if purchased from one of our authorized retailers.
- Page 15 @theinstachew...
Need help?
Do you have a question about the PURRFLOW and is the answer not in the manual?
Questions and answers
How to replace the filter
To replace the filter in the INSTACHEW PURRFLOW:
1. Gently remove the filter element from the top cover.
2. Clean the filter element tank, top cover, and filter groove to remove hair and dirt.
3. Clean the water pump and the inner wall of the water storage bucket.
4. Dry the outer wall and crevices.
5. Install the cleaned or new filter back on the top cover.
6. Check that the bayonet (locking mechanism) is securely closed.
This answer is automatically generated