
Summary of Contents for Nexa INVICTO 2023
- Page 1 NEXA INVICTD AUDIO MANUAL • Keep with vehicle at all times• Contains important information on audio operation Part No. 01999-TK640 June,2023...
- Page 2 This Audio Manual applies to vehicles produced by MARUTI SUZUKI INDIA LIMITED. Type A VOL- VOL+ 11l- Type B VOL- VOL+ Disclaimer: All information in this manual is based on the latest product information available at the time of publication. Due to improvements or other changes, there may be discrepancies between information in this manual.
- Page 3 Quick guide • Basic system overview • Information to be read before operation Basic function • Setting initial settings before operation ® • Connecting the Bluetooth device • Listening to the radio Audio system • Enjoying music and video Speech •...
-
Page 4: Table Of Contents
TABLE OF CONTENTS Introduction........3-3. Media operation Reading this manual......USB music player ....USB video player ....Quick guide iPod player......® Bluetooth audio....1-1. Basic function 3-4. Audio remote controls Buttons overview ....Steering switches....Home screen ......3-5. - Page 5 TABLE OF CONTENTS Phone 6-1. Phone operation (Hands-free system for cellular phones) Some basics .......106 Placing a call using the ® Bluetooth hands-free system ..........108 Receiving a call using the ® Bluetooth hands-free system ..........113 ® Talking on the Bluetooth hands-free system ....114 6-2.
-
Page 6: Introduction
Introduction Multimedia owner’s manual This manual explains the operation of the system. Please read this manual carefully to ensure proper use. Keep this manual in your vehi- cle at all times. The screen shots in this document and the actual screens of the sys- tem differ depending on whether the functions and/or a contract existed. -
Page 7: Reading This Manual
Reading this manual Explains symbols used in this manual Symbols in this manual Symbols Meanings Symbols Meanings WARNING: Explains something that, Indicates the compo- if not obeyed, could nent or position being cause death or serious explained. injury to people. NOTICE: Safety instruction Explains something that,... - Page 8 ing. Unavailable screen buttons are dimmed. WARNING For safety, the driver should not ● operate the system while he/she is driving. Insufficient attention to the road and traffic may cause an acci- dent. QR code The word QR Code is registered trademark of DENSO WAVE INCORPORATED in Japan and other countries.
-
Page 9: Quick Guide
Quick guide 1-1. Basic function Buttons overview ....Home screen ...... Indicator list ......“Setting” screen .... -
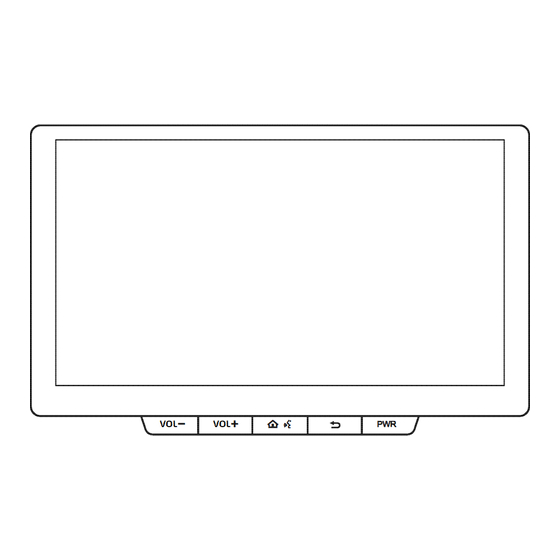
Page 10: Buttons Overview
1-1. Basic function 1-1.Basic function Buttons overview Operations of each part 8-inch display model By touching the screen with your finger, you can control the selected functions. (P.17) Touch to turn the audio system on and off. Touch to return to the previous screen. Touch to display the home screen. - Page 11 1-1. Basic function 10.1-inch display model By touching the screen with your finger, you can control the selected functions. (P.17) Press to turn the audio system on and off. Press to return to the previous screen. Press to display the home screen. (P.10) While Apple CarPlay/Android Auto is connected, press and hold to start Siri/Google Assistant™.
-
Page 12: Home Screen
1-1. Basic function Home screen Home screen operation Select button to display the home screen. Displays the indicators for warnings, errors and status icons. (P.12) Displays the clock. (To set the clock: P.34) Select “<” or “>”, or flick to display the desired main widget. Select other than buttons on the widget to display the full screen. - Page 13 1-1. Basic function Select to display the “Setting” screen. (P.13) When an Apple CarPlay connection is established and this button is dis- played, select to display the home screen of Apple CarPlay. (P.29) When an Android Auto connection is established and this button is dis- played, select to display the home screen of Android Auto.
-
Page 14: Indicator List
1-1. Basic function Indicator list Indicators Conditions Indicates that the USB Indicators are displayed at the hub device connected to the USB port is not sup- top of the screen. ported. Indicates that a device is Indicator explanation connected to the USB port. -
Page 15: Setting" Screen
1-1. Basic function “Setting” screen Indicators Conditions ® Indicates the Wi-Fi con- “Setting” screen nection. ® Indicates that Wi-Fi Select the button, then select not connected. “Setting” to display the “Setting” screen. The items shown on the : 8-inch display model only “Setting”... -
Page 16: Basic Function
1-1. Basic function... -
Page 17: Basic Information Before Operation Initial Screen
Basic function 2-1. Basic information before operation Initial screen ....... Touch screen...... Entering letters and num- bers/list screen operation . Display settings ....2-2. Connectivity settings Registering/Connecting a ® Bluetooth device..... ® Bluetooth settings ..... 2-3. Apple CarPlay/Android Auto Apple CarPlay/Android Auto ......... -
Page 18: Initial Screen
2-1. Basic information before operation 2-1.Basic information before operation Initial screen When the power switch is turned to ACC or ON, the initial screen will be displayed and the system will begin operat- ing. Caution screen After a few seconds, the caution screen will be displayed. -
Page 19: Touch Screen
2-1. Basic information before operation Touch screen Touch screen gestures Operations are performed by touching the touch screen directly with your finger. Operation method Outline Main use Touch Selecting an item Quickly touch and on the screen release once. ... - Page 20 2-1. Basic information before operation Flick operations may not be performed smoothly at high altitudes. ● Touch screen operation NOTICE To prevent damaging the screen, ● This system is operated mainly lightly touch the screen buttons with your finger. by the buttons on the screen. ●...
-
Page 21: Entering Letters And Numbers/List Screen Operation
2-1. Basic information before operation touched by or covered with a Entering letters and metal object, such as the follow- numbers/list screen ing, it may not operate properly: operation • Magnetic isolation cards • Metallic foil, such as the inner pack- Entering letters and num- aging of a cigarette box bers... - Page 22 2-1. Basic information before operation tion being used. If this button appears, drag to scroll pages up/down. Select to make a space on cur- sor. Indicates the position of the dis- played entries in the entire list. Select to close the keyboard. Select to confirm the entry.
-
Page 23: Display Settings
2-1. Basic information before operation Display settings Changing the wallpaper Display the display settings Displaying the display set- screen. (P.21) tings screen Select “Wallpaper”. Select the button. Select the desired wallpaper group. Select “Setting”. Select the desired item. Select “Display”. Select the desired items to be set. - Page 24 2-1. Basic information before operation Select “General”, “PhoneMirror” or “Camera”. Select the desired item. “Contrast” “+”: Select to strengthen the contrast of the screen. “-”: Select to weaken the contrast of the screen. “Brightness” “+”: Select to brighten the screen. “-”: Select to darken the screen.
-
Page 25: Connectivity Settings
2-2. Connectivity settings ting of your cellular phone is set 2-2.Connectivity settings Registering/Connecting to off. ® a Bluetooth device Select the button. To use the hands-free system, Select “Phone”. it is necessary to register a ® Select the desired Bluetooth ®... - Page 26 2-2. Connectivity settings Respond and operate the OPP (Object Push Profile) Ver. 1.2.1 ® Bluetooth device according to the confirmation message. • This is a profile to transfer contacts data. Apple CarPlay settings may be PBAP (Phone Book Access Pro- displayed.
-
Page 27: Bluetooth ® Settings
2-2. Connectivity settings Control Profile) Ver. 1.6.2 ® Bluetooth settings • This is a profile to allow remote con- trol the A/V equipment. When an Apple CarPlay con- nection is established, some This system is not guaranteed to ● ® functions may be unavailable. - Page 28 2-2. Connectivity settings portable device you want to use. PIN code used when the ® Select to set automatic the Bluetooth device was regis- phonebook transfer on/off. tered. Can be changed to a desired It may take time if the device connec- ●...
- Page 29 2-2. Connectivity settings time” from step 5. (P.23) ® Reconnecting the Bluetooth ■ phone Follow the steps in “Registering ® ® a Bluetooth phone for the first If a Bluetooth phone is discon- time” from step 4. (P.23) nected due to poor reception from ®...
- Page 30 2-2. Connectivity settings Select the desired settings. Changing passcodes ® Display the Bluetooth settings screen. (P.25) Select “PIN Code”. Enter the number you want and select “OK”. : Select to delete a single entered digit. Hold for over 1 second to delete all digits.
-
Page 31: Apple Carplay/Android Auto
2-3. Apple CarPlay/Android Auto 2-3.Apple CarPlay/Android Auto Apple CarPlay/Android Establishing an Apple Auto CarPlay connection (USB) Apple CarPlay cannot be used Apple CarPlay/Android Auto depending on the iPhone set- allows some applications, tings. such as Map, Phone, and Enable Siri on the device to be Music, to be used on the sys- connected. - Page 32 2-3. Apple CarPlay/Android Auto Follow the registration proce- played. ® dure for your Bluetooth device. Establishing an Android When you see the Apple CarPlay settings message, Auto connection enable the Apple CarPlay set- Check that the Android Auto tings. (P.23, 27) application is installed to the device to be connected.
- Page 33 2-3. Apple CarPlay/Android Auto without notice depending on the con- • iPhone XS Max nected device’s operation system, • iPhone XR hardware and software, or due to • iPhone X changes in Apple CarPlay/Android • iPhone 8 Auto specifications. • iPhone 8 Plus •...
- Page 34 2-3. Apple CarPlay/Android Auto NOTICE Do not leave your smartphone in ● the vehicle. In particular, high tem- peratures inside the vehicle may damage the smartphone. Do not push down on or apply ● unnecessary pressure to the smart- phone while it is connected as this may damage the smartphone or its terminal.
-
Page 35: Other Settings
2-4. Other settings is used for identifying this product when 2-4.Other settings System settings connecting this product with other devices. Settings are available for The default device name is “Maruti clock, keyboard, etc. Suzuki”. “Phone Name Order” Displaying the system set- Select to sort contacts by the first name tings screen or last name field. - Page 36 2-4. Other settings and open source license information. turned off, the clock can be manu- ally adjusted. : 10.1-inch display model only Select “Set Time Automatically” : 8-inch display model only to set to off. Clock settings Select “Time Adjustment”. Select “+”...
- Page 37 2-4. Other settings Personal data cannot be recovered Apple CarPlay device set- once it is deleted. Take ample care tings when resetting system settings. : 8-inch display model only Display the system settings screen. (P.33) Select “Apple CarPlay Device”. Select to set the Apple CarPlay on/off for the desired device in the list.
- Page 38 2-4. Other settings...
-
Page 39: Audio System
Audio system 3-1. Basic operation Some basics ....... 3-2. Radio operation AM/FM radio ....... 3-3. Media operation USB music player ....USB video player....iPod player......® Bluetooth audio....3-4. Audio remote controls Steering switches ....3-5. Setup Audio settings ..... -
Page 40: Some Basics
3-1. Basic operation 3-1.Basic operation Some basics Selecting an audio source Select the button. This section describes some of the basic features of the audio Select “<”/“>” or flick on the system. Some information may main widget for the desired not pertain to your system. - Page 41 3-1. Basic operation if it is not turned on. WARNING The USB connection cable must be ● placed where it does not interfere with safe driving. A USB connection cable is required ● for connecting an iPod or a smart- phone.
-
Page 42: 3-2. Radio Operation
3-2. Radio operation 3-2.Radio operation AM/FM radio Operating from the full screen Overview To display the full screen, touch an area other than a touch screen but- The widget can be reached by the ton on a widget. (P.40) following methods: P.38 ... - Page 43 3-2. Radio operation be different from the one you stored. This is due to a function of the radio that automatically searches for the same station around the current fre- quency. This is not a malfunction. • This function is available only when receiving FM stations.
- Page 44 3-2. Radio operation When the button is displayed as ● the scan function is activated. FM settings Select on the FM screen. Select the desired item. “FM Radio Text”: Select to set the FM radio text feature on/off. RDS (Radio data system) This feature allows your radio to receive station and programmed information from radio stations...
-
Page 45: 3-3. Media Operation
3-3. Media operation 3-3.Media operation USB music player Operating from the widget Overview This system can play music files saved in a USB flash drive. Only MP3/WMA/WAV/AAC playback is supported. This system does not support picture files. The widget can be reached by the Select to change the video wid- following methods: P.38 get. - Page 46 3-3. Media operation Select to display the audio set- ting screen. (P.58) : 8-inch display model only : 10.1-inch display model only Some functions may not be available ● when the vehicle is in motion. The first 5 songs are displayed on the ●...
-
Page 47: Usb Video Player
3-3. Media operation USB video player Select to switch to the video file ● list. Overview Repeat playback The widget can be reached by the following methods: P.38 Select Connecting a USB memory (P.38) Each time is selected, mode changes as follows: WARNING list repeat ... - Page 48 3-3. Media operation Operating from the widget Select to change the image size. (P.47) Select to change the music wid- Select to change the music con- get. (P.43) trol screen. (P.43) Select to change the file. Select to display a full screen •...
- Page 49 3-3. Media operation • Select and hold to playback in slow display limit. Select the buttons motion. to scroll the display. • Select again to change the playback : Displayed when the speed in 4 stages. number of characters of a name •...
-
Page 50: Ipod Player
3-3. Media operation cal or horizontal edge of the iPod player video reaches the edge of screen. Overview Zoom mode: The video image is The widget can be reached by the enlarged without changing the following methods: P.38 aspect ratio until it fills the entire screen. - Page 51 3-3. Media operation devices may not function correctly WARNING even when conforming to the sup- ported types. Do not remove the iPod connection ● cable or operate the iPod while driv- ● Depending on the iPod model or the ing. This may cause accident or firmware version, it may sometimes injury.
- Page 52 3-3. Media operation first track. ton on a widget. (P.50) If there are a large number of music ● tracks saved on your iPod, it may take some time until the playback starts. : Displayed when the num- ● ber of characters of a name exceeds the displayable limit.
- Page 53 3-3. Media operation ting screen. (P.58) Each time is selected, mode : 8-inch display model only changes as follows: track repeat all repeat off Depending on the firmware version of ● the connected iPod, the available ● The order in which repeat settings functions and displays may vary.
- Page 54 3-3. Media operation • iPhone 6s Flick to change the track. • iPhone 6s Plus Select to change the track. • iPhone 6 • Select and hold to fast rewind/fast • iPhone 6 Plus forward. • iPhone SE Select to play/pause. •...
-
Page 55: Bluetooth ® Audio
3-3. Media operation tion Ver. 5.0 ® Bluetooth audio • Profile (8-inch model): Advanced Audio Distribution Profile (A2DP) Ver. 1.3.1 ® Before using Bluetooth Audio/Video Remote Control Profile (AVRCP) Ver. 1.6.1 audio • Profile (10.1-inch model): Advanced Audio Distribution Profile ®... - Page 56 3-3. Media operation ® Connecting a Bluetooth audio NOTICE device (P.23) The frequency band used by this ● system is also used by industrial, scientific and medical devices, such ● If playback does not start automati- as microwave ovens, wireless sta- cally, select tion facilities that identify moving objects in factory production lines...
- Page 57 3-3. Media operation ® type or version of Bluetooth , avail- Operating from the full able functions and display may vary. screen Depending on media track from ● smartphone application, available To display the full screen, touch an functions and enable menu may vary. area other than a touch screen but- Some functions may not be available ●...
- Page 58 3-3. Media operation Repeat playback Select Each time is selected, mode changes as follows: all repeat album repeat track repeat off Depending on the type of portable ● device connected, this function may not be available. Random playback Select ...
-
Page 59: Audio Remote Controls
3-4. Audio remote controls 3-4.Audio remote controls Steering switches Seek switch Mode Operation/function Steering switch operation Press: Preset stations up/down Some parts of the audio system can be adjusted using the switches Press and hold: Seek on the steering wheel. up/down continuously When released, the Radio... -
Page 60: 3-5. Setup
3-5. Setup 3-5.Setup Audio settings Displaying the audio set- tings screen From the home screen Select the button. Select “Setting”. Select to set the fader/balance. (P.59) Select “Audio”. Select to adjust low-pitched Select the desired items to be tones. set. - Page 61 3-5. Setup • Adjustable range is “0” to “63”. • The default setting is “30”. • The volume can also be adjusted by selecting the “VOL+” or “VOL-” but- tons. Select to adjust the prompt vol- ume. • Adjustable range is “1” to “8”. •...
- Page 62 3-5. Setup...
-
Page 63: Speech Command System Operation
Speech command sys- 4-1. Speech command system operation Speech command system .. Command list...... - Page 64 4-1. Speech command system operation Microphone ■ 4-1.Speech command system operation Speech command sys- : 10.1-inch display model only The speech command system enables the audio, phone dial- ing, etc to be operated using speech commands. Refer to the command list for samples of speech commands.
- Page 65 4-1. Speech command system operation shown, or if no selections are NOTICE available, perform the following Do not touch and put a sharp object ● to return to the previous screen: to the microphone. It may cause failure. • Say “Go back”. ...
-
Page 66: Command List
4-1. Speech command system operation Command list : 10.1-inch display model only Command list overview Recognizable speech commands and their actions are shown below. Frequently used commands are listed in the following tables. For devices that are not installed to the vehicle, commands relating to that device may not be displayed on the screen. - Page 67 4-1. Speech command system operation Top menu ■ Command Action Displays the command list of the phone func- “Go to phone” tion Displays the command list of the audio func- “Go to Audio” tion “More hints” Displays more commonly used commands ®...
- Page 68 4-1. Speech command system operation : Available only for iPod/iPhone Radio ■ Command Action Changes the radio to the specified AM fre- “Tune to <frequency> AM” quency Changes the radio to the specified FM fre- “Tune to <frequency> FM” quency “Tune to preset <preset number>...
-
Page 69: Peripheral Monitoring System
Peripheral monitoring system 5-1. Rear view monitor system Rear view monitor system .. Rear view monitor system pre- cautions ......Things you should know ..5-2. Panoramic view monitor Panoramic view monitor func- tions ........Checking the front and around the vehicle ...... -
Page 70: Rear View Monitor System
5-1. Rear view monitor system 5-1.Rear view monitor system Rear view monitor sys- ● Be sure to back up slowly, depress- ing the brake pedal to control vehi- cle speed. The instructions given are only ● : If equipped guide lines. When and how much to turn the steering wheel will vary The rear view monitor system according to traffic conditions, road... -
Page 71: Rear View Monitor System Pre- Cautions
5-1. Rear view monitor system Rear view monitor sys- Screen description tem precautions The rear view monitor system screen will be displayed if the shift Area displayed on screen lever is shifted to the “R” while the power switch is in ON. The rear view monitor system dis- plays an image of the view from the bumper of the rear area of the vehi-... - Page 72 5-1. Rear view monitor system The camera uses a special lens. The ● NOTICE distance of the image that appears on the screen differs from the actual dis- The rear view monitor system may ● tance. not operate properly in the following cases.
- Page 73 5-1. Rear view monitor system even when they appear to be so. Be sure to check visually. The distances between the vehi- cle width guide lines and the left and right dividing lines of the parking space may not be equal, even when they appear to be so.
- Page 74 5-1. Rear view monitor system When approaching three- dimensional objects The distance guide lines are dis- played according to flat surfaced objects (such as the road). It is not possible to determine the position of three-dimensional objects (such as vehicles) using the vehicle width guide lines and distance guide lines.
- Page 75 5-1. Rear view monitor system Vehicle width guide lines Distance guide lines ■ Visually check the surroundings and the area behind the vehicle. On the screen, it appears that a truck is parking at point . However, in reality if you back up to point you will hit the truck.
-
Page 76: Things You Should Know
5-1. Rear view monitor system Things you should know If you notice any symptoms If you notice any of the following symptoms, refer to the likely cause and the solution, and re-check. If the symptom is not resolved by the solution, have the vehicle inspected by your Maruti Suzuki authorised workshop. - Page 77 5-1. Rear view monitor system Symptom Likely cause Solution Have the vehicle inspected The camera position is out by your Maruti Suzuki of alignment. authorised workshop. The vehicle is tilted If this happens due to these The fixed guide lines are (there is a heavy load on causes, it does not indicate very far out of alignment...
-
Page 78: Panoramic View Monitor Panoramic View Monitor Func- Tions
5-2. Panoramic view monitor 5-2.Panoramic view monitor Panoramic view monitor WARNING functions The panoramic view monitor is a ● device that assists you in checking around the vehicle. Always make : If equipped sure to visually check your sur- The panoramic view monitor is roundings while you are driving. -
Page 79: Panoramic View Monitor Func
5-2. Panoramic view monitor Display mode when the shift lever is in “P” ■ Navigation screen, audio screen, etc. Side views Wide front view & panoramic view Wide front view Pressing the camera switch Touch the display mode switching button Display mode when the shift lever is in “D”... - Page 80 5-2. Panoramic view monitor Side views Pressing the camera switch Display mode when the shift lever is in “R” ■ Rear view & panoramic view Rear view Touch the display mode switching button If the camera switch is pressed when the vehicle is moving at about 20 km/h or ●...
-
Page 81: Checking The Front And Around The Vehicle
5-2. Panoramic view monitor Checking the front and around the vehicle The panoramic view & wide front view screen provides support when checking the areas in front of the vehicle and around the vehi- cle when taking-off at T-intersections or other intersections during poor visibility. - Page 82 5-2. Panoramic view monitor Automatic display button Turns auto display mode on or off. When the shift lever is in “D” or “N”, wide front view & panoramic view will be automatically displayed in accordance with the vehi- cle speed. (P.82) Front distance guide lines Displays about 1 m in front of the vehicle.
-
Page 83: Checking The Sides Of The Vehicle
5-2. Panoramic view monitor Checking the sides of the vehicle The image from the both side cameras is displayed and assists the driver to check conditions on the sides of the vehicle or to confirm the safety of narrow roads. Shift the shift lever to “P”, “D”... - Page 84 5-2. Panoramic view monitor Parking assist-sensor mute button This button temporarily mutes the parking assist-sensor sound. The display position of the parking assist-sensor may not match the position of the ● obstacle displayed in the camera image. WARNING The position of the guide lines displayed on the screen may change due to fac- ●...
- Page 85 5-2. Panoramic view monitor 10 km/h (the shift lever is in any posi- tion other than “R”) Parking assist-sensor linked display Depending on the parking assist- sensor detection state, wide front view & panoramic view will be dis- played. The views are displayed auto- matically in the following case: •...
- Page 86 5-2. Panoramic view monitor...
-
Page 87: Display Mode When The Shift Lever Is In "R
5-2. Panoramic view monitor Display mode when the shift lever is in “R” To check for safety when parking the vehicle, an image is displayed from above the vehicle and from the rear camera. Shift the shift lever to “R”. ... - Page 88 5-2. Panoramic view monitor The display position of the parking assist-sensor may not match the position of the ● obstacle displayed in the camera image. WARNING The position of the guide lines displayed on the screen may change due to fac- ●...
- Page 89 5-2. Panoramic view monitor Displays course lines (yellow) that are linked to operation of the steering wheel. Vehicle center guide line Displays the center of the vehicle width guide lines. Vehicle width guide lines Displays course lines when the vehicle is being reversed in a straight line. •...
- Page 90 5-2. Panoramic view monitor Vehicle center guide line Displays the center of the vehicle width guide lines. Distance guide lines mode This mode only displays the distance guide lines. It is recommended for those who do not need the guide lines. Front distance guide lines Displays about 1 m (blue) in front of the vehicle.
- Page 91 5-2. Panoramic view monitor Displays about 1 m (blue) in front of the vehicle. Side estimated course lines Displays course lines (yellow) that are linked to operation of the steering wheel. Rear distance guide lines Displays the distance behind the vehicle. •...
- Page 92 5-2. Panoramic view monitor within the parking space and within the left and right dividing then reverse slowly. lines of the parking space. Parking space Vehicle width guide lines Once the vehicle width guide Estimated course lines lines and the parking space When the rear of the vehicle has lines are parallel, straighten the entered the parking space, turn...
-
Page 93: Precautions For The Panoramic View Monitor
5-2. Panoramic view monitor hand dividing line of the parking Precautions for the pan- space. oramic view monitor Always make sure to visually check behind you and your surroundings while driving. If not, collision with other vehicles or an unforeseen accident may occur. - Page 94 5-2. Panoramic view monitor ● The four corners of the panoramic WARNING view have a video composition pro- Do not use the panoramic view ● cessing region centered on bor- monitor in the following cases: ders of the cameras, and image clarity may decline.
- Page 95 5-2. Panoramic view monitor NOTICE The vehicle icon displayed in pan- ● oramic view is a computer gener- ated image, so the color, shape and size will differ from the actual vehi- cle. Therefore, nearby three-dimen- sional objects may appear to be touching the vehicle, and actual dis- tances to three-dimensional objects may differ from those displayed.
- Page 96 5-2. Panoramic view monitor Parts of objects not displayed on the screen Parts higher than the road do not appear on the screen. The black parts around the vehicle icon are not displayed by the camera. Visually ● check those areas. As the images are obtained from four cameras are processed and displayed on ●...
- Page 97 5-2. Panoramic view monitor Wide front view Both side views ■ ■ Area displayed on the screen Area displayed on the screen Objects not displayed on the The range that is displayed on the ● screen screen may differ due to the state of the vehicle and road surface.
- Page 98 5-2. Panoramic view monitor Rear view ■ Camera position The panoramic view monitor cam- eras are in the locations shown in the figures. Front camera ■ Side cameras ■ Area displayed on the screen Objects not displayed on the screen Areas close to both corners of the bum- pers will not appear on the screen.
- Page 99 5-2. Panoramic view monitor stuck to the camera, you will not be Differences between the able to see the image clearly. If that screen and the actual road happens, splash the camera with a large amount of water and then The composite images on the pan- wipe the camera lens clean with a oramic view monitor and guide...
- Page 100 5-2. Panoramic view monitor When the ground behind the ■ vehicle slopes down sharply The distance guide lines will appear to be further from the vehicle than the actual distance. Thus, objects on down-slopes will appear to be closer than they actually are. In the same way, there will be a margin of error between the guidelines and Margin of error...
- Page 101 5-2. Panoramic view monitor of the estimated course lines, WARNING and it does not look as if the When the parking assist-sensor dis- ● vehicle will collide with the object play is red, make sure to visually or vehicle. However, the vehicle check before moving the vehicle any further.
- Page 102 5-2. Panoramic view monitor Overhang of a wall Estimated course lines On the screen, a truck flatbed Distance guide lines ■ may appear to be outside of the estimated course lines and the vehicle does not look as if it will collide with the truck.
- Page 103 5-2. Panoramic view monitor you reverse to point , you will collide with the truck. On the screen, it appears that point closest followed by points . However, in reality, the dis- tance to points is the same, and point is farther than .
-
Page 104: If You Notice Any Symptoms
5-2. Panoramic view monitor If you notice any symptoms If you notice or are troubled by any of the symptoms below, check the issue again referring to the likely cause and solution. If the symptom is not resolved by the solution, have the vehicle inspected by your Maruti Suzuki authorised workshop. - Page 105 5-2. Panoramic view monitor Symptom Likely cause Solution Have the vehicle inspected The camera position is by your Maruti Suzuki misaligned. authorised workshop. The vehicle is tilted The guide lines are signifi- (There is a heavy load cantly misaligned on the vehicle, tire pres- Visually check the vehi- sure is low due to a tire...
- Page 106 5-2. Panoramic view monitor...
-
Page 107: Phone
Phone 6-1. Phone operation (Hands-free system for cellular phones) Some basics .....106 Placing a call using the ® Bluetooth hands-free sys- .........108 Receiving a call using the ® Bluetooth hands-free sys- .........113 ® Talking on the Bluetooth hands-free system ..114 6-2. -
Page 108: Phone Operation
6-1. Phone operation (Hands-free system for cellular phones) • Noise may be heard on the 6-1.Phone operation (Hands-free system for cellular phones) Some basics ® Bluetooth audio playback. • A noise may be heard during phone calls. The hands-free system enables calls to be made and ®... - Page 109 6-1. Phone operation (Hands-free system for cellular phones) incoming call is received, the call will WARNING be answered. ® • If the switch is pressed when a call ● Before using Bluetooth devices, users of any electrical medical waiting call is received, the waiting device other than implantable car- call will be answered.
-
Page 110: Placing A Call Using The Bluetooth Hands-Free System
6-1. Phone operation (Hands-free system for cellular phones) may increase. When talking on the Placing a call using the phone, speak clearly towards the ® Bluetooth hands-free microphone. system ● The other party may not hear you clearly when: • Driving on an unpaved road. (Making excessive traffic noise.) ®... - Page 111 6-1. Phone operation (Hands-free system for cellular phones) Select “Dial” and enter the Select “Contact” and select the phone number. desired name or phone number. You can enter telephone num- “Search”: To search a list of names or phone numbers that contain the bers of up to 32 digits.
- Page 112 6-1. Phone operation (Hands-free system for cellular phones) lular phone to transfer the phone Select “History” and select the book data. desired contact. Perform the transfer operation on the cellular phone while the phone book transfer screen is displayed. ...
- Page 113 6-1. Phone operation (Hands-free system for cellular phones) Select “Contact” and select the By speed dial desired name or phone number. Calls can be made using registered contacts which can be selected from a contact list. (P.111) Display the phone screen. (P.108) Select “Speed Dial”...
- Page 114 6-1. Phone operation (Hands-free system for cellular phones) Select “OK”. Select “OK”. Registering from histories Registering from the speed ■ ■ dial list Display the phone screen. (P.108) Display the phone screen. (P.108) Select “History” and select and hold the desired name or phone Select “Speed Dial”...
-
Page 115: Receiving A Call Using The Bluetooth Hands-Free System
6-1. Phone operation (Hands-free system for cellular phones) Receiving a call using Deleting speed dial ® the Bluetooth hands- Display the phone screen. free system (P.108) Select “Speed Dial”. When a call is received, the fol- Select and hold the number for lowing screen is displayed deletion (1-6) on the speed dial with a sound. -
Page 116: Talking On The Bluetooth Hands-Free System
6-1. Phone operation (Hands-free system for cellular phones) Talking on the Operating from the full ® screen Bluetooth hands-free system While talking on the phone, the following screen is displayed. The operations outlined below can be performed on this screen. Select to change handset Call screen operation modes between hands-free and... - Page 117 6-1. Phone operation (Hands-free system for cellular phones) Select the volume bar or drag Changing the call audio out- the adjustment slider to adjust the volume. During a call, the audio output can be changed between your car speaker system and your cellular phone.
- Page 118 6-1. Phone operation (Hands-free system for cellular phones) Select on the talking screen if the phone rings. Select to end call waiting. Ending call waiting will connect the call on hold and enable you to continue the original phone call.
-
Page 119: 6-2. What To Do If
6-2. What to do if... 6-2.What to do if... Troubleshooting When registering/connect- ing a cellular phone If there is a problem with the hands-free system or a A cellular phone cannot be reg- ® istered. Bluetooth device, first check the followings. An incorrect passcode was ■... - Page 120 6-2. What to do if... the cellular phone. operation has been confirmed on this system, check with your Maruti Suzuki authorised workshop. A cellular phone cannot be con- nected. Automatic contact transfer ■ function on this system is set ® Bluetooth function is not ■...
- Page 121 6-2. What to do if... The cellular phone is the most ■ likely cause of the symptom. Turn the cellular phone off, remove and reinstall the battery pack, and then restart the cellular phone. Enable the cellular phone’s ® Bluetooth connection.
- Page 122 6-2. What to do if...
-
Page 123: Appendix
Appendix 7-1. Appendix Useful Information ....122... - Page 124 7-1. Appendix 7-1.Appendix Useful Information The use of a cellular phone inside or near the vehicle may cause a noise from the ● speakers of the audio system which you are listening to. However, this does not indicate a malfunction. NOTICE To avoid damage to the audio system: ●...
- Page 125 7-1. Appendix Condition Possible cause Action The volume is not adjusted Select the volume buttons appropriately. to adjust the volume. This is not a malfunction. No sound comes out. The music is muted when The music will be output talking in handsfree mode. again when the handsfree mode is turned off.
- Page 126 7-1. Appendix noise is sometimes heard when Radio driving along a tree-lined road. This static and fluttering can be reduced by adjusting the tone control or turning off treble FM reception tips: Sometimes response until the disturbance the radio may appear to have a has passed.
- Page 127 7-1. Appendix ● We recommend making a backup of your data in case you acciden- tally delete it. If the USB flash drive is a non- ● branded product or has been dam- aged, it may not be possible to con- nect it, or the connection may be unstable.
- Page 128 7-1. Appendix • MP3 (MPEG Audio Layer 3): 8 to 320 Supported ID3/WMA/AAC tags ■ Supports Variable Bit Rate (VBR). In MP3/WMA/AAC files, you can Does not support Digital Rights Man- enter textual attribute information, agement (DRM). known as ID3/WMA/AAC tags ...
- Page 129 7-1. Appendix Video bit rate: 8 Mbps (Max.) Video+Audio:9,999 Frame rate: 30 fps (Max.) A configuration example of an MP3/WMA/AAC-supporting USB Audio bit rate flash drive • MP3: 8 - 320 kbps • WMA: 48 - 192 kbps •...
- Page 130 7-1. Appendix Copyright and Trademarks Use of the Made for Apple badge means that an accessory has been designed to connect specifically to the Apple products identified in the badge, and has been certified by the developer to meet Apple perfor- mance standards.
- Page 131 7-1. Appendix Google, Google Assistant™, Android and Android Auto are trademarks of Google LLC. ® The Bluetooth word mark and logos are registered trademarks owned by Bluetooth SIG, Inc. and any use of such marks by DENSO TEN Lim- ited is under license.
- Page 132 7-1. Appendix...
-
Page 133: Index
Index Alphabetical Index ...132... -
Page 134: Alphabetical Index
Alphabetical Index Alphabetical Index Entering letters and numbers ..19 List screen........20 AM ............ 40 Appendix ........122 Apple CarPlay/Android Auto ..29 FM.............40 Audio Audio source ........ 38 Operating the volume bar .... 38 Some basics ........ 38 Home button........8 Turning the system on and off .. - Page 135 Alphabetical Index Radio ..........40 ® Talking on the Bluetooth hands- RDS (Radio data system) .... 42 free system .........114 Radio data system (RDS)....42 Adjusting call volume ....115 Rear view monitor system ..... 68 Call screen operation ....114 Camera ........70 Call waiting/three-way calling..115 Differences between the screen and Entering numeric buttons ...115...
- Page 136 Alphabetical Index...
- Page 137 Alphabetical Index...
- Page 138 Alphabetical Index...
- Page 139 Prepared by RUTI SUZU 11 DI LI ITED Service Division June,2023 Part No. 01999-TK640 Printed in India For 24 X 7 assistance, contact Toll Free number 1800 102 6392# / 1800 200 6392# (NEXA) # No STD code to be prefixed.
Need help?
Do you have a question about the INVICTO 2023 and is the answer not in the manual?
Questions and answers