Table of Contents
Advertisement
Quick Links
Automatic Ice Maker
Instruction Manual
Model: HZB-45A
Thank you for purchasing this product! Please read the instructions carefully before using
your portable ice maker. If you have any questions about the product, please contact us via
Amazon Message or customer service number: 213-4467172 or 661-4358826
Advertisement
Table of Contents

Related Manuals for ROWAN ELECTRIC APPLIANCE HZB-45A


Summary of Contents for ROWAN ELECTRIC APPLIANCE HZB-45A
- Page 1 Automatic Ice Maker Instruction Manual Model: HZB-45A Thank you for purchasing this product! Please read the instructions carefully before using your portable ice maker. If you have any questions about the product, please contact us via Amazon Message or customer service number: 213-4467172 or 661-4358826...
-
Page 2: Table Of Contents
CONTENTS IMPORTANT SAFETY--------------------------------------------------------------------------------------2 SPECIFICATION---------------------------------------------------------------------------------------------4 DIMENSION/CONNECTION------------------------------------------------------------------------4 RATING---------------------------------------------------------------------------------------------------4 GENERAL INFORMATION--------------------------------------------------------------------------------5 MAIN UNIT CONSTRUCTION----------------------------------------------------------------------5 ICE-MAKING AND ITS WATER TANK PARTS-------------------------------------------------5 OPERATION PANEL----------------------------------------------------------------------------------6 EXPLOSIVE DRAWING------------------------------------------------------------------------------7 OPERATING PROCEDURE AND MAINTENANCE-------------------------------------------------9 UNPACKING YOUR ICE MAKER-----------------------------------------------------------------9 INSTALLATION LOCATION REQUIREMENT--------------------------------------------------9 ELECTRICAL REQUIREMENT & CONNECTIONS-----------------------------------------10 CLEANING YOUR MAKER BEFROE FIRST USING---------------------------------10 YOUR... -
Page 3: Important Safety
IMPORTANT SAFETY When using electrical appliances, basic safety precautions should be followed to reduce the risk of fire, electric shock, and injury to persons or property. Read all instructions before using any appliance. Use this appliance only for its intended purpose as described in this owner’s manual. This ice-maker must be properly installed in accordance with the installation instructions before it is used. - Page 4 appliance by a person responsible for their safety. WARNING: Children should be supervised to ensure that they do not play with the appliance. WARNING: This appliance must be earthed. And use the 110-120V/60Hz earthed power supply. WARNING: Do not store explosive substances such as aerosol cans with a flammable propellant in this appliance.
-
Page 5: Specification
SPECIFICATIONS 1) DIMENSIONS/CONNECTIONS W ater D rainage P ort W ater Inlet P ort 2) Rating MODEL HZB-45A POWER SUPPLY VOLTAGE 1Phase, 110-120/60Hz CLAIMATE CLASS 10-40℃ ELECTRICAL PROTECTION CLASS ICE MAKING RATING (Amps) 2.2Amp ICE HARVEST RATING (Amps) 2.5Amp ICE MAKING CAPACITY (KG/24H) -
Page 6: General Information
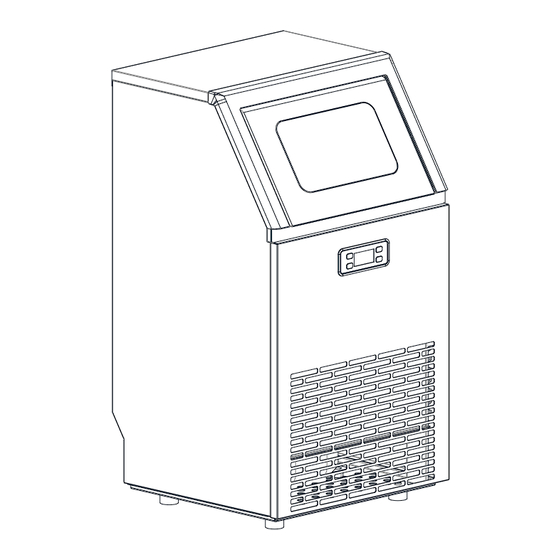
GENERAL INFORMATION 1) Main Unit Construction 1. Top cover 2. Clear window 3. Door for ice taking 4. Ice-making & its water tank assembly: Including ice-making evaporator, water tank, water pump and some detecting parts 5. Operation panel 6. Front panel 7. -
Page 7: Operation Panel
A. Water dividing pipe:with nine little holes, water will flow out from these little holes. And if there isno water flows out, it should be disassembled and cleaned. B. Evaporator (ice-making module). C. Ice full detecting board: Use to detect if the inner cabinet is full of ice or not, and to check the the ice-harvest process is over or not. -
Page 8: Explosive Drawing
4) EXPLOSIVE DRAWINGS Parts Name Material Qty. Left side plate 430 Stainless steel(Optional) Door for ice taking Door for ice taking lower cover Clear window Door upper cover of Ice taking Operation panel PCB Electrical and Electronic parts Operation panel PCB box Operation panel paper Ice shovel... - Page 9 Foaming bracket Zinc-plated steel board Compressor AC110-20V, 60Hz Condenser Copper tube and aluminum fin Front panel Stainless steel Drain joint Bottom plate Zinc-plated steel board Water outlet pipe of the inner cabinet Silicone pipe Adjustable foot ABS and bolts DC fan DC12V, Electrical parts Dry filter Copper...
-
Page 10: Operating Procedure And Maintenance
OPERATING PROCEDURES & MAINTENANCE UNPACKING YOUR ICE MAKER 1. Remove the exterior and interior packaging. Check if all the accessories, including the instruction manual, ice scoop, white water inlet pipe, 4 ways to 2 ways water quick connector and the water draining pipe, etc., are inside or not. -
Page 11: Electrical Requirement & Connections
necessary. When installing the ice maker under a counter, follow the recommended spacing dimensions shown above. Place electrical and water supplies and drain fixtures in the recommended locations as shown. Choose a well-ventilated area with temperatures above 50 Fahrenheit and below 90Fahrenheit. This unit MUST be installed in an area protected from the elements, such as wind, rain, water spray or drips. -
Page 12: Water Connection To Your Ice Maker
back the water drain pipe of the water tank and the cap of the unit water drain port, otherwise, the unit will not make the ice normally. And highly suggest that you should discard the ice-cubes made duringthe first ice-making cycle after cleaning. 4. -
Page 13: Operate Your Unit
Important: The water pressure of main water supply system must be 0.04-0.6 MPa at least. STEP 2:Screw the qucik-connector on the quick STEP 4:Install back STEP 1:Qucik-connector Quick water faucet by the screw thread, and the clipper and the water faucet remove the clipper Remove the Push inwards... -
Page 14: Automatic Self-Cleaning Program
the default is “0”, press“+”button one time the ice making time will add one minute, the ice will be thicker;Press the“-”button one time the ice making time will reduce one minute, the ice will be thinner. Restart the machine it will go back to the default“0”. Note: The time currently set only changes the next ice-making cycle. -
Page 15: Wiring Diagram
How to switch Fahrenheit(°F) to Celsius(°c)? Press +”or“-”button longer than 5s,It will automatically switch. WIRING DIAGRAM ELECTRICAL DIAGRAM Start Relay Overload Protector Power PUMP VALVE Supply AC Water Pump Relay DC Fan Motor Solenoid Vale for Ice-harvest DC Water Inlet Valve Main Control PCB WATER LEVEL DETECTING SWITCH... -
Page 16: Preparing Ice Maker For Long Storage
When you first start the ice maker, you may hear water running continuously. The ice maker is programmed to run a rinse cycle before it begins to make ice. Preparing the Ice Maker for Long Storage If the ice maker will not be used for a long time, or is to be moved to another place, it will be necessary to drain out all of the water in the system. -
Page 17: Exterior Cleaning
Periodic cleaning and proper maintenance will ensure efficiency, top performance, hygienic, and long life. The maintenance intervals listed are based on normal conditions. You may want to shorten the intervals if you have pets, or the unit is used outdoors, or there are other special considerations. What shouldn't be done Never keep anything other than the ice in the ice storage bin: objects like wine and beer bottles are not only unsanitary, but also their labels may slip off and obstruct the drain pipe. - Page 18 normally, but there is no water flowing out from the water dividing pipe or the water flowing is very small, please discharge this water dividing pipe and clean it carefully. Clean each little hole on the water dividing pipe displayed in the following illustration, make sure each hole is not clogged by something, then install it back to the original location.
-
Page 19: Ice Making Assembly System Cleaning
Suggestion: After cleaning the interior parts, install them back to their respective position, then make the machine return to work, and discard the first batch of ice. Ice Making Assembly System Cleaning Minerals that are removed from water during the freezing cycle will eventually form a hard scaly deposit in the water system. -
Page 20: Cleaning Suggestion
the unit slightly to drain out all of the cleaning solution completely. Then install back the drain pipe to the slot of the water tank. 7. Repeat steps 4--6 to clean the ice making assembly system again. The ice machine cleaner contains acids. DO NOT use or mix with any other solvent-based cleaner products. -
Page 21: Normal Trouble Shooting
NORMAL TROUBLE SHOOTING Problem Possible Cause Solution Check the main water supply pressure or check whether the water supply hose is No water supply blocked or not, adding the water pressure or cleaning the hose necessary. The floating ball of the water level detecting switch... -
Page 22: Correct Disposal Of This Product
ERROR INDICATOR a) Ambient temp sensor breakdown----- Display E1 in the digital panel. b) The machine does not make ice or the gas leak ----Display E2 in the digital panel. c) Magnetic control switch cut off---- “Full” light will be on when plugging on or just turning on the unit. - Page 23 213-4467172 661-4358826 (8:30am - 5:30pm P.S.T.) SE REQUIERE PRUEBA DE COMPRA CON FECHA PARA SERVICIO BAJO GARANTÍA. Address: ROWAN ELECTRIC APPLIANCE LLC 28407 Ascent Way, Santa Clarita, CA 91350 Phone: 213-4467172 or 661-4358826...
Need help?
Do you have a question about the HZB-45A and is the answer not in the manual?
Questions and answers