Advertisement
Quick Links
P P r r o o C C u u i i t t y y ™ ™ B B e e d d S S e e r r i i e e s s
O O p p e e r r a a t t i i o o n n s s M M a a n n u u a a l l
300900000000
3009PX-L-100
3009PX-L-200
3009PX-LE-400
3009PX-LE-450
3009PX-LE-500
3009PX-LEX-400
3009PX-LEX-450
3009PX-LEX-500
3009PX-Z-400
3009PX-Z-450
3009PX-Z-500
3009PX-ZX-400
3009PX-ZX-450
3009PX-ZX-500
3009PX-ZM-400
3009PX-ZM-450
3009PX-ZM-500
3009PX-ZM-600
3009PX-ZMX-400
3009PX-ZMX-450
3009PX-ZMX-500
3009PX-ZMX-600
3009-009-001 Rev AE.1
2023-06
EN
Advertisement

Related Manuals for Stryker ProCuity Bed Series


Summary of Contents for Stryker ProCuity Bed Series
- Page 1 P P r r o o C C u u i i t t y y ™ ™ B B e e d d S S e e r r i i e e s s O O p p e e r r a a t t i i o o n n s s M M a a n n u u a a l l 300900000000 3009PX-L-100 3009PX-L-200...
- Page 3 S S y y m m b b o o l l s s Refer to instruction manual/booklet Consult instructions for use General warning Caution Warning; electricity Fuse rating Non-ionizing radiation Warning; crushing of hands China RoHS with declarable substances Catalogue number Serial number European medical device...
- Page 4 Authorized representative in the European Community Authorized representative in Switzerland For US Patents see www.stryker.com/patents Manufacturer Date of manufacture Safe working load Mass of equipment NAWI Class IIII Maximum patient weight Adult patient Alternating current Direct current Duty cycle of product ≤2m...
- Page 5 T T a a b b l l e e o o f f C C o o n n t t e e n n t t s s Warning/Caution/Note Definition ..........................3 Summary of safety precautions ..........................3 Introduction ................................6 Product description ..............................6 Indications for use..............................6 Clinical benefits ..............................7...
- Page 6 Pendant, advanced option .............................42 Footboard control panel - Home ..........................44 Footboard control panel - Position ..........................44 Footboard control panel, advanced - Home option ....................45 Footboard control panel - Motion lock ........................47 Footboard control panel, advanced - Motion lock option ...................48 Footboard control panel - Scale..........................49 Zeroing/taring the scale ............................49 Weighing a patient............................50...
- Page 7 This product is equipped with a hospital-grade plug for protection against electric shock hazard. • Always use a Stryker supplied interface cable. Use of any other cable may cause the product to not function as intended, which may result in patient or user injury.
- Page 8 • Do not apply the brakes to slow or stop the product while the product is in motion. • Always unplug the power cord before you transport the product. • Always release the brakes before you transport the product. Do not transport the product with the brakes applied. •...
- Page 9 • Do not pinch the power cord in the bed frame. • Do not use the siderails as a push or pull device. Always move the product using the integrated handles in the headboard and footboard. • Always remove the patient helper before you transport the product. •...
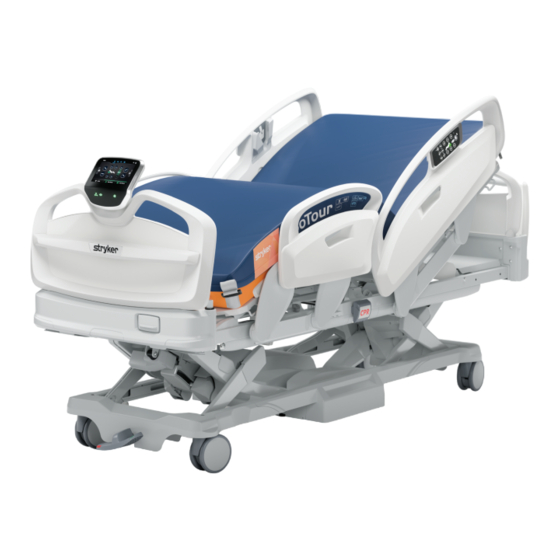
- Page 10 P P r r o o d d u u c c t t d d e e s s c c r r i i p p t t i i o o n n The Stryker P P r r o o C C u u i i t t y y ™ bed series is a powered, adjustable hospital bed used in combination with a patient support surface.
- Page 11 S S p p e e c c i i f f i i c c a a t t i i o o n n s s W W A A R R N N I I N N G G - - Always use Stryker approved support surfaces that have been tested for compatibility with the product frame to avoid the risk of patient entrapment.
- Page 12 12 VDC, 1.2 Ah (x2) (Stryker part number: 700000341245) N N o o t t e e - - Always replace with Stryker approved batteries. Z Z o o o o m m battery voltage 12 VDC, 20 Ah (x2) (Stryker part number: 700000341246) N N o o t t e e - - Always replace with Stryker approved batteries.
- Page 13 8 - 10.5 in. 20.3 - 26.7 cm Stryker reserves the right to change specifications without notice. Specifications listed are approximate and may vary slightly from product to product or by power supply fluctuations. O O p p e e r r a a t t i i o o n n...
- Page 14 S S u u b b s s t t a a n n c c e e o o f f v v e e r r y y h h i i g g h h c c o o n n c c e e r r n n D D e e s s c c r r i i p p t t i i o o n n N N u u m m b b e e r r ( ( S S V V H H C C ) ) c c h h e e m m i i c c a a l l n n a a m m e e...
- Page 15 2.4 GHz: All channels supported Channel plan 5 GHz: All channels supported (Recommend against the use of DFS and ISM channels) Leverage hospital SSID Support for 802.11r Other Support for Cisco CCX (Fast roaming) S S p p e e c c i i f f i i c c a a t t i i o o n n - - C C h h i i p p s s e e t t Q Q C C A A 9 9 3 3 7 7 7 7 - - 3 3 ( ( Q Q u u a a l l c c o o m m m m A A t t h h e e r r o o s s ) ) I I t t e e m m U U n n i i t t B B a a n n d d...
- Page 16 The client uses an additional 5-25 KB per device for each subscription that is created by Stryker (S S E E M M /i i B B e e d d V V i i s s i i o...
- Page 17 Add session timeout of at least 24 Recommended hours Microwave ovens Avoid using microwave ovens near Recommended Stryker wireless products as this will cause degradation of service or no service due to electromagnetic or radio-frequency (RF) interference ( Wireless coexistence notifications (page 75)).
- Page 18 C C o o n n t t a a c c t t i i n n f f o o r r m m a a t t i i o o n n Contact Stryker Customer Service or Technical Support at: 1-800-327-0770.
- Page 19 To view your operations or maintenance manual online, see https://techweb.stryker.com/. Have the serial number (A) of your Stryker product available when calling Stryker Customer Service or Technical Support. Include the serial number in all written communication. S S e e r r i i a a l l n n u u m m b b e e r r l l o o c c a a t t i i o o n n You can find the serial number (A) below the headboard at the head of the bed (Figure 3).
- Page 20 W W A A R R N N I I N N G G • Always use a Stryker supplied interface cable. Use of any other cable may cause the product to not function as intended, which may result in patient or user injury.
- Page 21 B B e e d d Locator or S S e e c c u u r r e e C C o o n n n n e e c c t t , see the i i B B e e d d Locator Installation Manual or S S e e c c u u r r e e C C o o n n n n e e c c t t Installation/Configuration Manual. For any set up questions, contact Stryker Technical Support at: •...
- Page 22 • If the product is equipped with the patient helper option, the product must be in a flat position and either be 17.5 in. (44.5 cm) from the wall at a 14 in. (35.6 cm) product height (or more) or within 3 ft (0.9 m) from the wall at a 22 in. (55.9 cm) product height (or more) to establish a first connection.
- Page 23 O O p p e e r r a a t t i i o o n n P P l l u u g g g g i i n n g g o o r r u u n n p p l l u u g g g g i i n n g g t t h h e e p p r r o o d d u u c c t t W W A A R R N N I I N N G G •...
- Page 24 Always check battery backup function. Replace the battery if it does not perform as intended during preventive maintenance. To charge the battery: 1. Plug the power cord into the wall outlet. 2. Turn on the battery switch (A) at the head end of the product (Figure 6). F F i i g g u u r r e e 6 6 –...
- Page 25 T T r r a a n n s s p p o o r r t t i i n n g g t t h h e e p p r r o o d d u u c c t t W W A A R R N N I I N N G G •...
- Page 26 F F i i g g u u r r e e 8 8 – – A A p p p p l l y y i i n n g g t t h h e e b b r r a a k k e e s s F F i i g g u u r r e e 9 9 –...
- Page 27 F F i i g g u u r r e e 1 1 0 0 – – A A p p p p l l y y i i n n g g S S t t e e e e r r - - L L o o c c k k F F i i g g u u r r e e 1 1 1 1 –...
- Page 28 N N o o t t e e • The throttle indicator will flash green when it senses your hand on the handle. The throttle indicator is solid green when Z Z o o o o m m is ready. •...
- Page 29 F F i i g g u u r r e e 1 1 3 3 – – Z Z o o o o m m D D r r i i v v e e R R e e l l e e a a s s e e S S t t o o p p p p i i n n g g t t h h e e p p r r o o d d u u c c t t w w i i t t h h Z Z o o o o m m d d r r i i v v e e o o p p t t i i o o n n You can rotate the Z Z o o o o m m throttle to stop the product in three ways.
- Page 30 To lower the Z Z o o o o m m handles, press the handle release (F) on the base of the handle and lower the handle (Figure 15). Z Z o o o o m m d d r r i i v v e e m m o o d d e e s s N N o o t t e e - - Push the product in neutral.
- Page 31 F F i i g g u u r r e e 1 1 5 5 – – Z Z o o o o m m t t h h r r o o t t t t l l e e Throttle Rotates to move the bed Green (flashing)
- Page 32 A A c c t t i i v v a a t t i i n n g g t t h h e e C C P P R R r r e e l l e e a a s s e e h h a a n n d d l l e e C C A A U U T T I I O O N N - - Always confirm that all persons and equipment are away from the area below and around the Fowler before you activate the CPR release handle.
- Page 33 2. Lower the footboard until the footboard seats into the sockets. R R a a i i s s i i n n g g t t h h e e s s i i d d e e r r a a i i l l s s W W A A R R N N I I N N G G •...
- Page 34 F F i i g g u u r r e e 1 1 8 8 – – S S i i d d e e r r a a i i l l i i n n t t e e r r m m e e d d i i a a t t e e p p o o s s i i t t i i o o n n L L o o w w e e r r i i n n g g t t h h e e s s i i d d e e r r a a i i l l s s W W A A R R N N I I N N G G •...
- Page 35 F F i i g g u u r r e e 1 1 9 9 – – S S i i d d e e r r a a i i l l l l o o w w e e s s t t p p o o s s i i t t i i o o n n E E x x t t e e n n d d i i n n g g o o r r r r e e t t r r a a c c t t i i n n g g t t h h e e b b e e d d e e x x t t e e n n d d e e r r The bed extender allows you to extend the length of the product by 12 in.
- Page 36 F F i i g g u u r r e e 2 2 0 0 – – R R e e s s t t r r a a i i n n t t s s t t r r a a p p t t i i e e - - i i n n l l o o c c a a t t i i o o n n s s S S e e c c u u r r i i n n g g a a F F o o l l e e y y b b a a g g t t o o t t h h e e F F o o l l e e y y b b a a g g h h o o o o k k There are two Foley bag hooks under the foot section (A) (Figure 21), one on either side of the product.
- Page 37 C C o o n n n n e e c c t t i i n n g g p p e e r r i i p p h h e e r r a a l l e e q q u u i i p p m m e e n n t t t t o o t t h h e e a a u u x x i i l l i i a a r r y y o o u u t t l l e e t t W W A A R R N N I I N N G G •...
- Page 38 P P r r e e p p a a r r i i n n g g b b e e d d p p o o s s i i t t i i o o n n s s f f o o r r I I s s o o l l i i b b r r i i u u m m P P E E f f u u n n c c t t i i o o n n s s o o p p t t i i o o n n W W A A R R N N I I N N G G - - Always route the cables, wires, and tubing from other equipment so that parts of the product do not pinch them during operation.
- Page 39 Default redistribution firmness setting Medium Select to decrease the redistribution firmness setting Soft Hold time Select 10 minutes or 30 minutes for the max inflate hold time Start Starts selected max inflate hold time Locks or unlocks selected mattress operation settings Lock Displays current mattress status Status bar...
- Page 40 Returns to the H H o o m m e e screen ( Footboard control panel, advanced - Home Home option (page 45)) Displays menu functions ( Footboard control panel, advanced - Menu Menu option (page 60)) Turn assist, patient right Selects turn assist for the patient right side Turn assist, patient left Selects turn assist for the patient left side...
- Page 41 N N o o t t e e - - The Fowler angle must be less than or equal to 60° for turn assist to operate. To activate turn assist: 1. Position the patient on the center of the product. 2.
- Page 42 Flat No rotation Select 0, 5, or 10 minutes for the hold time Hold time Starts selected lateral rotation operation Start Locks or unlocks selected mattress operation settings Lock Displays current mattress status Status bar A A c c t t i i v v a a t t i i n n g g l l a a t t e e r r a a l l r r o o t t a a t t i i o o n n o o p p t t i i o o n n Lateral rotation allows the healthcare professional to rotate the patient from left to right by increasing or decreasing the rotation levels and hold times.
- Page 43 • Always route the cables, wires, and tubing from other equipment so that parts of the product do not pinch them. C C A A U U T T I I O O N N - - Always clear the product of obstacles before you use motion functions. N N o o t t e e - - The motion button flashes when the product reaches the motion limit.
- Page 44 Bed Exit Press and hold to cancel Bed Exit alarm Nurse call Activates nurse call Places the product into a position for patient ingress Patient stand assist or egress Cardiac chair position Places the product into the cardiac chair position Vascular position Places the product into the vascular position Places the product into the Trendelenburg position...
- Page 45 • Always route the cables, wires, and tubing from other equipment so that parts of the product do not pinch them. C C A A U U T T I I O O N N - - Always clear the product of obstacles before you use motion functions. Healthcare professionals must instruct patients how to operate the patient control panel.
- Page 46 Nurse call Activates nurse call Fowler up Raises the Fowler Fowler down Lowers the Fowler Gatch up Raises the Gatch Gatch down Lowers the Gatch P P e e n n d d a a n n t t , , a a d d v v a a n n c c e e d d o o p p t t i i o o n n W W A A R R N N I I N N G G •...
- Page 47 Nurse call Activates nurse call Fowler up Raises the Fowler Fowler down Lowers the Fowler Gatch up Raises the Gatch Gatch down Lowers the Gatch Volume up Increases the volume Volume down Decreases the volume Channel up Changes the channel up Changes the channel down Channel down Mute...
- Page 48 F F o o o o t t b b o o a a r r d d c c o o n n t t r r o o l l p p a a n n e e l l - - H H o o m m e e The home functions are located on the touch panel of the footboard.
- Page 49 The P P o o s s i i t t i i o o n n screen displays the position functions of the product. Returns to the H H o o m m e e screen (see Footboard control Home panel - Home (page 44)) Low height range...
- Page 50 Displays pressure functions option ( Footboard control panel, advanced - Pressure Pressure option (page 34)) Displays turn functions option ( Footboard control panel, advanced - Turn Turn option (page 35)) Displays pulmonary functions option ( Footboard control panel, advanced Pulmonary - Pulmonary option (page 37)) Basic - Displays brake lock status Advanced option - Apply or release the brakes ( Applying or releasing the...
- Page 51 Places the product into a 0° horizontal position Bed flat Fowler up Raises the Fowler Fowler down Lowers the Fowler Gatch up Raises the Gatch Gatch down Lowers the Gatch Bed height up Raises the litter Bed height down Lowers the litter Places the product into the Trendelenburg position (head down with foot Trendelenburg Places the product into the Reverse Trendelenburg position (head up...
- Page 52 Lock all Locks or unlocks all motion function Back Returns to the M M o o t t i i o o n n L L o o c c k k screen N N o o t t e e •...
- Page 53 N N o o t t e e • The CPR release handle overrides all lockouts. • If the product is in a specific position when you enable a lock, the product is locked in that position. • Lock parameters are saved when you unplug the product. •...
- Page 54 2. On the S S c c a a l l e e screen, press the Z Z e e r r o o / / T T a a r r e e button (D) ( Footboard control panel - Scale (page 49)). 3.
- Page 55 Returns to the S S c c a a l l e e screen ( Footboard control panel Return - Scale (page 49)) Select to reset the added equipment to zero Reset Select to save the current displayed weight as Save equipment To add or remove equipment:...
- Page 56 Select to zero/tare the scale or set the scale for a new Zero (Non-NAWI) patient ( Zeroing/taring the scale, advanced option (page Tare (NAWI) 52)) Exit Returns to the S S c c a a l l e e screen Z Z e e r r o o i i n n g g / / t t a a r r i i n n g g t t h h e e s s c c a a l l e e , , a a d d v v a a n n c c e e d d o o p p t t i i o o n n Before you place a patient on the product, zero/tare the scale.
- Page 57 Returns to the H H o o m m e e screen ( Footboard control panel, Home advanced - Home option (page 45)) Returns to the S S c c a a l l e e screen ( Footboard control panel, Return advanced - Scale option (page 51)) Select to reset the added equipment to zero...
- Page 58 Returns to the H H o o m m e e screen ( Footboard control Home panel - Home (page 44)) Allows the patient to move freely on the bed. Alarms when the patient moves 50 percent body weight out of the designated zone.
- Page 59 To disarm Bed Exit, press T T u u r r n n O O f f f f (E) ( Footboard control panel - Bed Exit (page 53)). F F o o o o t t b b o o a a r r d d c c o o n n t t r r o o l l p p a a n n e e l l , , a a d d v v a a n n c c e e d d - - B B e e d d E E x x i i t t o o p p t t i i o o n n The B B e e d d E E x x i i t t screen displays the Bed Exit functions of the product.
- Page 60 A A r r m m i i n n g g o o r r d d i i s s a a r r m m i i n n g g B B e e d d E E x x i i t t , , a a d d v v a a n n c c e e d d o o p p t t i i o o n n W W A A R R N N I I N N G G - - Do not use Bed Exit to replace patient monitoring protocol.
- Page 61 Monitors head left siderail in the highest position Head left siderail Foot right siderail Monitors foot right siderail in the highest position Monitors foot left siderail in the highest position Foot left siderail Head Angle Monitors head angle of the bed Monitors bed flat position Bed Flat Turn Off...
- Page 62 Returns to the H H o o m m e e screen ( Footboard control Home panel, advanced - Home option (page 45)) Low Height Monitors low height of the bed Foot right siderail Monitors foot right siderail in the highest position Head right siderail Monitors head right siderail in the highest position Monitors head left siderail in the highest position...
- Page 63 • LEDs on the footboard and siderails flash red • Sound alarm is triggered To disable i i B B e e d d Watch, press T T u u r r n n O O f f f f (I) ( Footboard control panel, advanced - i i B B e e d d Watch option (page 57)). F F o o o o t t b b o o a a r r d d c c o o n n t t r r o o l l p p a a n n e e l l - - M M e e n n u u The M M e e n n u u screen displays the functions available to view or change for the product.
- Page 64 S S e e t t t t i i n n g g s s Scale info Displays the current software version, local gravity, and calibrated gravity Wi-Fi info Displays the MAC address, connection type, IP address, SSID, signal strength, and BSSID i i B B e e d d Locator Displays the locator ID and locator battery status...
- Page 65 Displays lockout functions ( Footboard control panel, advanced - Motion Motion lock lock option (page 48)) Select to reset the bed configuration Soft Reset History Displays the S S c c a a l l e e H H i i s s t t o o r r y y screen Activates and displays Bed Exit functions ( Footboard control panel, Bed Exit advanced - Bed Exit option (page 55))
- Page 66 F F i i g g u u r r e e 2 2 2 2 – – L L o o w w h h e e i i g g h h t t r r a a n n g g e e A A d d v v a a n n c c e e d d S S e e t t t t i i n n g g s s i i B B e e d d Watch preset Select to choose the i i B B e e d d Watch presets...
- Page 67 N N o o t t e e - - The screen will disappear in 30 seconds if you do not press O O K K . 3. You can return to normal product motion. 3009-009-001 Rev AE.1...
- Page 68 A A c c c c e e s s s s o o r r i i e e s s a a n n d d p p a a r r t t s s These accessories and parts may be available for use with your product. Confirm availability for your configuration or region.
- Page 69 F F i i g g u u r r e e 2 2 4 4 – – H H A A V V A A S S U U t t w w o o - - s s t t a a g g e e I I V V p p o o l l e e A A t t t t a a c c h h i i n n g g o o r r r r e e m m o o v v i i n n g g t t h h e e p p a a t t i i e e n n t t h h e e l l p p e e r r o o p p t t i i o o n n W W A A R R N N I I N N G G - - Always use two people to attach or remove the patient helper.
- Page 70 F F i i g g u u r r e e 2 2 5 5 – – A A t t t t a a c c h h i i n n g g o o r r r r e e m m o o v v i i n n g g t t h h e e p p a a t t i i e e n n t t h h e e l l p p e e r r Reverse steps to remove the patient helper.
- Page 71 F F i i g g u u r r e e 2 2 6 6 – – A A d d j j u u s s t t i i n n g g t t h h e e p p a a t t i i e e n n t t h h e e l l p p e e r r A A t t t t a a c c h h i i n n g g t t h h e e o o x x y y g g e e n n b b o o t t t t l l e e h h o o l l d d e e r r C C A A U U T T I I O O N N •...
- Page 72 F F i i g g u u r r e e 2 2 7 7 – – A A t t t t a a c c h h i i n n g g t t h h e e d d e e f f i i b b r r i i l l l l a a t t o o r r t t r r a a y y O O p p e e r r a a t t i i n n g g t t h h e e d d e e f f i i b b r r i i l l l l a a t t o o r r t t r r a a y y o o p p t t i i o o n n To operate the defibrillator tray: 1.
- Page 73 C C l l e e a a n n i i n n g g a a n n d d d d i i s s i i n n f f e e c c t t i i n n g g w w i i t t h h S S i i d d e e K K i i c c k k ® ® For United States only. Confirm availability for your configuration or region. Call Stryker Customer Service: 1-800-327- 0770. Stryker’s preferred wipes (2060-000-001 6'' x 10'' or 2060-000-002 9'' x 12'') and spray (2070-000-001) include the following active ingredients: •...
- Page 74 C C l l e e a a n n i i n n g g C C A A U U T T I I O O N N • Do not clean, disinfect, service, or perform maintenance while the product is in use. •...
- Page 75 D D i i s s i i n n f f e e c c t t i i n n g g C C A A U U T T I I O O N N • Do not clean, disinfect, service, or perform maintenance while the product is in use. •...
- Page 76 Remove the product from service before you perform the preventive maintenance inspection. Check all items listed during annual preventive maintenance for all Stryker Medical products. You may need to perform preventive maintenance checks more often based on your level of product usage. Service only by qualified personnel.
- Page 77 Z Z o o o o m m drives forward and backward when throttle is rotated option Z Z o o o o m m throttle returns to neutral position when released and Z Z o o o o m m motion stops option Product serial number: Completed by: Date:...
- Page 78 W W i i r r e e l l e e s s s s n n o o t t i i f f i i c c a a t t i i o o n n s s For product equipped with optional wireless communication technology, these statements apply to the countries as indicated: C C o o u u n n t t r r y y...
- Page 79 C C o o u u n n t t r r y y N N o o t t i i f f i i c c a a t t i i o o n n Thailand เครื ่ อ งวิ ท ยุ ค มนาคมนี ้ ม ี อ ั ต ราการดู ด กลื น พลั ง งานจำเพาะ (Specific Absorption Rate - SAR) อั น เนื ่ อ งมาจาก เครื...
- Page 80 E E M M C C i i n n f f o o r r m m a a t t i i o o n n W W A A R R N N I I N N G G •...
- Page 81 G G u u i i d d a a n n c c e e a a n n d d m m a a n n u u f f a a c c t t u u r r e e r r ’ ’ s s d d e e c c l l a a r r a a t t i i o o n n - - e e l l e e c c t t r r o o m m a a g g n n e e t t i i c c i i m m m m u u n n i i t t y y Main power quality should Electrostatic fast transient/ ±2 kV for power supply lines...
- Page 82 Portable and mobile RF communications equipment should follow the guidance in the table titled “Recommended separation distances between portable and mobile RF communication equipment and the P P r r o o C C u u i i t t y y bed series.”...
- Page 83 R R e e c c o o m m m m e e n n d d e e d d s s e e p p a a r r a a t t i i o o n n d d i i s s t t a a n n c c e e s s b b e e t t w w e e e e n n p p o o r r t t a a b b l l e e a a n n d d m m o o b b i i l l e e R R F F c c o o m m m m u u n n i i c c a a t t i i o o n n e e q q u u i i p p m m e e n n t t a a n n d d t t h h e e P P r r o o C C u u i i t t y y b b e e d d s s e e r r i i e e s s The P P r r o o C C u u i i t t y y bed series is intended for use in an electromagnetic environment in which radiated RF disturbances are controlled.
- Page 84 Stryker Medical 3800 E. Centre Avenue Portage, MI 49002 3009-009-001 Rev AE.1 2023-06 WCR: AG.6...
Need help?
Do you have a question about the ProCuity Bed Series and is the answer not in the manual?
Questions and answers