
Related Manuals for SIGNIFY EA2327


Summary of Contents for SIGNIFY EA2327
- Page 1 DAB + RADIO WITH DUAL ALARM CLOCK Read this instruction manual carefully before using the DAB + Radio and keep it in a safe place for future reference. Model Number: EA2327 INSTRUCTION MANUAL...
-
Page 2: Welcome
Congratulations on choosing to buy a Signify product. All products brought to you by Signify are manufactured to the highest standards of performance and safety, and, as part of our philosophy of customer service and satisfaction, are backed by our comprehensive 1 Year Warranty. -
Page 3: Table Of Contents
SD (Micro SD Card) Mode Using the Headphone Output Frequently Asked Questions Other Useful Information Cleaning and Maintenance Storage Trademarks Responsible Disposal Specification Table Repair and Refurbished Goods or Parts Notice service@unclebills.com.au AFTER SALES SUPPORT 1300 777 137 MODEL: EA2327 PRODUCT CODE: 712283 04/2023... -
Page 4: Warranty Details
You are also entitled to have the goods repaired or replaced if the goods fail to be of acceptable quality and the failure does not amount to a major failure. service@unclebills.com.au AFTER SALES SUPPORT Y EAR WARRANTY 1300 777 137 MODEL: EA2327 PRODUCT CODE: 712283 04/2023... -
Page 5: General Information And Safety Instructions
9. Do not place objects filled with liquids, such as vases or jugs on or near the unit. 10. Only charge the Radio with the USB-A to USB-C charging cable that has been supplied with the product. service@unclebills.com.au AFTER SALES SUPPORT 1300 777 137 MODEL: EA2327 PRODUCT CODE: 712283 04/2023... - Page 6 CAUTION! A battery subjected to extremely low air pressure may result in an explosion or the leakage of flammable liquid or gas. WARNING: A battery can only be subjected to 0˚C to 45˚C during usage, storage or transportation. service@unclebills.com.au AFTER SALES SUPPORT 1300 777 137 MODEL: EA2327 PRODUCT CODE: 712283 04/2023...
-
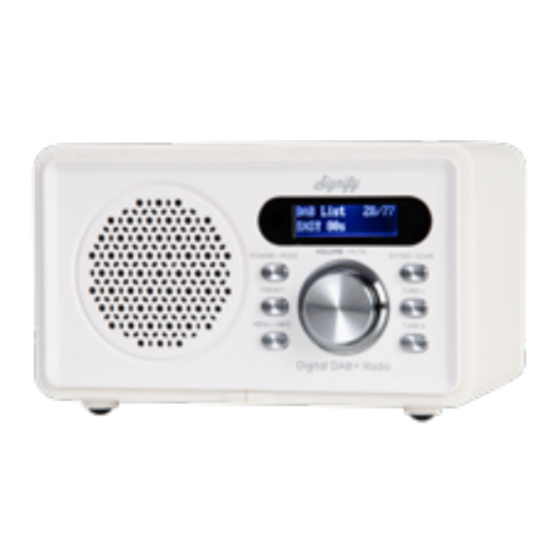
Page 7: Product Overview
4. Tune – (Previous) Button 9. Volume Control Dial/Mute Button 5. Tune + (Next) Button Included (not pictured): USB-A to USB-C Charging Cable, Instruction Manual, Warranty Certificate. service@unclebills.com.au AFTER SALES SUPPORT 1300 777 137 MODEL: EA2327 PRODUCT CODE: 712283 04/2023... -
Page 8: Rear Of Dab+ Radio Diagram
14. Charging Indicator Light 11. USB Media Port 15. DC 5V USB-C Charging Port 12. Micro SD Card Slot 16. ON/OFF (Power) Switch 13. Headphone Output 17. Antenna Clip service@unclebills.com.au AFTER SALES SUPPORT 1300 777 137 MODEL: EA2327 PRODUCT CODE: 712283 04/2023... -
Page 9: Getting Started
Radio. This is not a product fault. It is recommended to either change the audio mode of the Radio or wait to complete the charge cycle prior to using the Radio. service@unclebills.com.au AFTER SALES SUPPORT 1300 777 137 MODEL: EA2327 PRODUCT CODE: 712283 04/2023... -
Page 10: Instructions
(see above). NOTE: Please ensure you are in standby mode BEFORE you follow the instructions below. If not, the instructions below will not be valid. service@unclebills.com.au AFTER SALES SUPPORT 1300 777 137 MODEL: EA2327 PRODUCT CODE: 712283 04/2023... -
Page 11: Alarm Clock Set Up
2. Once in standby mode, long press the MENU button till ‘Menu <System>’ displays on LCD display screen. 3. Short press the ENTER button to access the ‘System’ menu. service@unclebills.com.au AFTER SALES SUPPORT 1300 777 137 MODEL: EA2327 PRODUCT CODE: 712283 04/2023... - Page 12 Short press any other button (except the MODE button or the MUTE button) to activate the snooze function which can be set in intervals of 5, 10, 15 or 30 minutes (see page 13 for detailed instructions). service@unclebills.com.au AFTER SALES SUPPORT 1300 777 137 MODEL: EA2327 PRODUCT CODE: 712283 04/2023...
-
Page 13: Snooze Function
4. Short press the TUNE + or TUNE - button to cycle through the 'System' menu options. 5. Once 'Sleep' displays on the LCD display screen, short press the ENTER button to confirm your selection. service@unclebills.com.au AFTER SALES SUPPORT 1300 777 137 MODEL: EA2327 PRODUCT CODE: 712283 04/2023... -
Page 14: Eq (Equalizer) Preset Set Up
5. Once ‘Language’ displays on the LCD display screen, short press the ENTER button to confirm your selection. 6. Short press the TUNE + or TUNE - button to cycle between the language options: English, German (Deutsch), service@unclebills.com.au AFTER SALES SUPPORT 1300 777 137 MODEL: EA2327 PRODUCT CODE: 712283 04/2023... -
Page 15: Adjusting The Volume
6. Short press the TUNE + or TUNE - button to cycle between the ‘Backlight’ menu options. Once ‘Level’ displays on the LCD display screen, short press the ENTER button to confirm your selection. Short service@unclebills.com.au AFTER SALES SUPPORT 1300 777 137 MODEL: EA2327 PRODUCT CODE: 712283 04/2023... -
Page 16: Adjusting The Lcd Display Screen Contrast
The factory reset function allows you to restore the Radio back to its default settings. 1. Enter the standby mode by following the instructions in section ‘Power On-Off / Standby Mode’ of the instruction manual (page 10). service@unclebills.com.au AFTER SALES SUPPORT 1300 777 137 MODEL: EA2327 PRODUCT CODE: 712283 04/2023... -
Page 17: System Version
5. Once ‘<System Version>’ displays on the LCD display screen, short press the ENTER button. 6. The system version number will now be displayed on the LCD display screen. service@unclebills.com.au AFTER SALES SUPPORT 1300 777 137 MODEL: EA2327 PRODUCT CODE: 712283 04/2023... -
Page 18: Dab+ Mode
Unlike AM/FM transmission, DAB+ transmits several stations on a single channel/frequency. While performing an automatic scan, if a station has been missed or you encounter poor reception, try manual tuning. service@unclebills.com.au AFTER SALES SUPPORT 1300 777 137 MODEL: EA2327 PRODUCT CODE: 712283 04/2023... - Page 19 2. Once you have located the station you wish to save as a preset, long press the PRESET button till you see ‘Preset Store’ displayed on the LCD display screen. service@unclebills.com.au AFTER SALES SUPPORT 1300 777 137 MODEL: EA2327 PRODUCT CODE: 712283 04/2023...
-
Page 20: Fm Mode
(-) available FM radio station. NOTE: Depending on the area the Radio is located, you may need to either adjust the antenna position or the Radio’s location to gain better reception. service@unclebills.com.au AFTER SALES SUPPORT 1300 777 137 MODEL: EA2327 PRODUCT CODE: 712283 04/2023... - Page 21 2. Short press the ENTER button to access the ‘Scan Setting’ menu options. 3. Short press the TUNE + or TUNE - button to cycle through the ‘Scan Setting’ menu options. service@unclebills.com.au AFTER SALES SUPPORT 1300 777 137 MODEL: EA2327 PRODUCT CODE: 712283 04/2023...
-
Page 22: Bluetooth ® Mode
2. On your Bluetooth® enabled device, activate (or turn ON) the Bluetooth® function, and search for nearby devices. When the device discovers ‘EA2327’, select and connect to ‘EA2327’. This process should take a few seconds to connect – no PIN or passcode will be required. - Page 23 1. The Bluetooth® enabled device was the last device that the Radio was connected to. 2. The Bluetooth® enabled device has maintained ‘EA2327’ as one of its paired devices, the device should display a list of paired devices in the Bluetooth® menu or settings.
-
Page 24: Usb Mode
NOTE: If the USB drive contains audio files which are not compatible with the Radio, the Radio will not be able to read them, so they will not be included in the count of tracks on the playlist, and they will not play. service@unclebills.com.au AFTER SALES SUPPORT 1300 777 137 MODEL: EA2327 PRODUCT CODE: 712283 04/2023... -
Page 25: Sd (Micro Sd Card) Mode
NOTE: The Radio will play music through most micro SD cards. However, we recommend that you use a micro SD card with less than 64GB of capacity. service@unclebills.com.au AFTER SALES SUPPORT 1300 777 137 MODEL: EA2327 PRODUCT CODE: 712283 04/2023... -
Page 26: Using The Headphone Output
IMPORTANT: It is NOT recommended to increase the volume higher than 5 bars when listening to audio via headphones connected to the Radio. Listening to audio via headphones at a higher volume than recommended may cause damage to your hearing. service@unclebills.com.au AFTER SALES SUPPORT 1300 777 137 MODEL: EA2327 PRODUCT CODE: 712283 04/2023... -
Page 27: Frequently Asked Questions
No. The unit can only broadcast FM and DAB+ stations. Some AM stations that usually appear on the AM band may also be broadcasting via the DAB+ radio band, depending upon your available area. service@unclebills.com.au AFTER SALES SUPPORT 1300 777 137 MODEL: EA2327 PRODUCT CODE: 712283 04/2023... - Page 28 Ensure the music files are in MP3, WMA, WAV, FLAC or APE format otherwise they will not play. Check your USB flash drive is in good working order. service@unclebills.com.au AFTER SALES SUPPORT 1300 777 137 MODEL: EA2327 PRODUCT CODE: 712283 04/2023...
-
Page 29: Other Useful Information
Other trademarks and trade names are those of their respective owners. These brands are not associated with this product and are not related to Uncle Bill’s Australia Pty Ltd. service@unclebills.com.au AFTER SALES SUPPORT 1300 777 137 MODEL: EA2327 PRODUCT CODE: 712283 04/2023... -
Page 30: Responsible Disposal
0.72 KG (INCLUDING ACCESSORIES) WARRANTY: 1 Year VERSION NO: 1.14 ISSUE DATE: 13th January, 2023 THIS DOCUMENT CONTAINS INFORMATION THAT IS SUBJECT TO CHANGE WITHOUT PRIOR NOTICE. service@unclebills.com.au AFTER SALES SUPPORT 1300 777 137 MODEL: EA2327 PRODUCT CODE: 712283 04/2023... -
Page 31: Repair And Refurbished Goods Or Parts Notice
UNCLE BILL’S AUSTRALIA PTY LTD 48B Egerton Street, Silverwater NSW 1811 Australia 1300 777 137 Opening Hours - 9:00am - 4:30pm (Mon-Fri), 9:00am - 3:00pm (Sat) service@unclebills.com.au www.signifyelectronics.com.au service@unclebills.com.au AFTER SALES SUPPORT Y EAR WARRANTY 1300 777 137 MODEL: EA2327 PRODUCT CODE: 712283 04/2023... - Page 32 Customer Service Hotline. Made in China ALDI STORES, 1 SARGENTS ROAD MINCHINBURY NSW 2770 www.aldi.com.au AFTER SALES SUPPORT 1300 777 137 service@unclebills.com.au MODEL: EA2327 PRODUCT CODE: 712283 04/2023 YEAR WARRANTY...
Need help?
Do you have a question about the EA2327 and is the answer not in the manual?
Questions and answers
I don’t know how to set the alarm on
To set the alarm on the SIGNIFY EA2327:
1. Access the System menu by short-pressing the TUNE + or TUNE - button to cycle through the options.
2. Select Alarms when it appears on the LCD display by short-pressing the ENTER button.
3. When Alarm 1 displays, short-press the ENTER button to confirm.
4. The alarm time will display in HH:MM format, with the hour (HH) flashing. Use the TUNE + or TUNE - button to select the desired hour (00-23). Confirm by short-pressing the ENTER button.
5. Next, the minutes (MM) will flash. Use the TUNE + or TUNE - button to select the desired minutes (00-59). Confirm by short-pressing the ENTER button.
6. After setting the time, the alarm sound options will display for further configuration.
This answer is automatically generated