Table of Contents
Advertisement
Quick Links
Advertisement
Table of Contents
Troubleshooting

Related Manuals for Canon Colorado 1650


Summary of Contents for Canon Colorado 1650
- Page 1 Colorado 1650 Extended operation guide © 2020 - 2022 Canon Production Printing...
- Page 2 Original instructions that are in American English. Trademarks Canon is a registered trademark of Canon Inc. Colorado is a trademark or registered trademark of Canon Production Printing Netherlands B.V. Windows are trademarks or registered trademarks of Microsoft Corp. incorporated in the United States and/or other countries.
- Page 3 Security is about safeguarding communication and data and keeping our online society and economy secure. It is critical for our customer’s business and we take it seriously at Canon Production Printing. Security is incorporated in the early stages of our product development process.
- Page 4 1. Name and version of the Canon Production Printing software you licensed. 2. Name and version of open source software modules contained in the above identified Canon Production Printing software of which you legitimately would like to obtain the source code.
-
Page 5: Table Of Contents
Contents Contents Chapter 1 Introduction.........................9 About this guide ............................10 About the users.............................. 11 About the Colorado 1650..........................12 Safe use................................13 Notes for the reader............................14 Available documentation..........................16 Chapter 2 Safety information......................17 Safety and Environment Information......................18 Safety System..............................27 Chapter 3 Explore the system...................... - Page 6 Contents Load media with the media input unit....................113 Calibrate the media..........................118 Add a leading or trailing strip....................... 119 Load a take-up roll core onto the roll winder..................120 Print with or without winding........................123 Winding options.............................123 Print and wind without a tension bar....................124 Print and wind with a tension bar......................127 Print and wind with a locked tension bar ....................132 Print without winding..........................
- Page 7 Contents Clean the ruler............................259 List of Colorado 1650 maintenance materials....................261 Chapter 7 Improve quality....................... 263 General workflow for improving quality....................264 Print a printhead quality check chart......................266 Print a demo print............................267 Analyze the printhead quality check chart....................268 Calibrate the printhead..........................
- Page 8 Contents Solve specific quality problems........................340 Zebra banding............................340 Gradient banding........................... 342 Lines at swath boundary ........................343 Lines within swaths..........................346 Wrinkles..............................348 Vertical banding............................. 349 Micro-uniformity/graininess........................350 Media touches............................352 Misalignment between gloss and matte in FLXfinish+ mode............353 Solve specific media transport problems....................354 Bulging media............................
-
Page 9: Chapter 1 Introduction
Chapter 1 Introduction... -
Page 10: About This Guide
About this guide About this guide Introduction The guide addresses the Colorado 1650 and is written for the printer operator. It describes the complete workflow of the printer: from setup to the operation, maintenance and troubleshooting of the machine. Process... -
Page 11: About The Users
About the users Introduction There are various types of users who can use the Colorado 1650 each with its own role in the complete workflow. The various roles can be filled in by the same person or by multiple people. This manual is mainly written for the Printer operator. -
Page 12: About The Colorado 1650
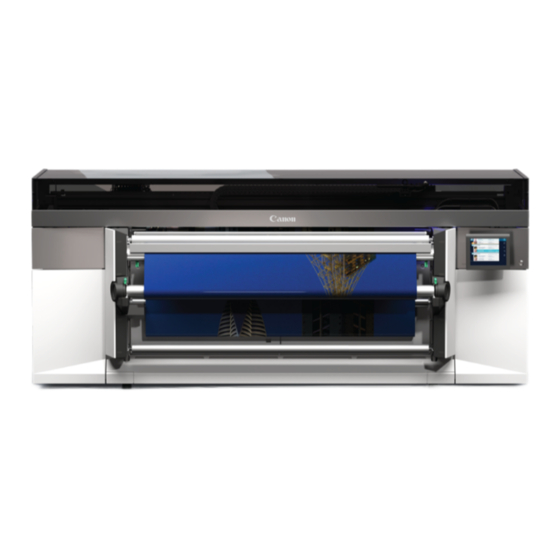
About the Colorado 1650 About the Colorado 1650 Introduction The Colorado 1650 is a 64 inch roll to roll production printer that uses a unique UV gel ink technology. Chapter 1 - Introduction... -
Page 13: Safe Use
Safe use Safe use Introduction When you operate the Colorado 1650 you have to take note of the safety precautions and follow the guidelines. Safety documents Before you operate the printer read the following documents and follow the instructions: • The safety chapter in this operation guide •... -
Page 14: Notes For The Reader
Names of options to be used in a fixed order Safety symbols Before you use this product, make sure you read and understand the safety information that https://downloads.cpp.canon belongs to the product. Find the safety information on . Also be sure to follow all warnings and instructions marked on the product. - Page 15 Notes for the reader Symbol Type of symbol Indicates CAUTION Laser beam Indicates a caution concerning operations that may lead to in- jury to persons if not performed correctly. To use the ma- chine safely, always pay attention to these cautions. IMPORTANT Indicates an operational requirement or restriction.
-
Page 16: Available Documentation
This manual is part of a complete documentation set. The following table shows a complete overview of the available documentation. Available documentation NOTE http://downloads.cpp.canon For up-to-date documentation: visit the downloads website , select your printer and language, and find all the support information. -
Page 17: Chapter 2 Safety Information
Chapter 2 Safety information... -
Page 18: Safety And Environment Information
The websites of the regional Canon sales offices are listed on the cover of the User Documentation. There you can find the addresses of the local Canon sales offices. - Page 19 If applicable, the relevant CE Declaration of Conformity is part of the User Documentation. You https://downloads.cpp.canon/ may also download it from the support site of your product at Canon Production Printing shall not be liable for damages from: • Failure to comply with the User Documentation; • Work performed incorrectly on the machine;...
- Page 20 Safety and Environment Information The following labels are used to identify and categorize the hazard level: Label Type Description Warning General warning sign. Warning Electricity: Hazardous electrical voltage inside. Do not remove cover. Caution Hot surface: Take care to avoid direct contact with hot surfa- ces.
- Page 21 Safety and Environment Information cause pain and to take precautions to avoid unintentional contact with or exposure to those energy sources. Power source WARNING • Put the power plug directly into a power outlet that has the same configuration as the plug. The use of an adapter can result in an inadequate power supply.
- Page 22 Safety and Environment Information Installation WARNING • The machine may be transported, assembled, installed, moved and repaired only by an authorized service representative. • The installation of accessories and options not permitted for the machines may constitute a violation of the Safety Regulations and Directives, and can also damage the machine. •...
- Page 23 Poisonous gases can be produced in any fire. They can also result from a fire in this machine. Keep into account: Canon Production Printing systems are designed in such a way that fire is encapsulated within the enclosure, thus preventing the further spread of fire to the customer’s premises.
- Page 24 Safety and Environment Information Consumables, supplies and maintenance materials WARNING • Do not throw ink or ink containing parts or contaminated parts into an open flame. • Do not leave ink or ink containing parts or contaminated parts within reach of children. •...
- Page 25 • Avoid skin contact with ink and uncured printed media. • Curing of media of the Canon Production Printing supported media-list is tested and considered sufficient under standard conditions. • After a printer error, wear gloves to handle the unfinished print.
- Page 26 Disposal of parts WARNING • All parts are produced according to the sustainability policy of Canon Production Printing. You can discard all used parts into a common dustbin, or follow your local or national sustainability and waste disposal procedures.
-
Page 27: Safety System
Safety System Safety System Safety System CAUTION • Winder Do not position the tension bar when there is no media present. Keep your fingers away because the tension bar can fall down. The winder has an emergency stopping device; It is located on the winder. Activating this emergency stopping device stops all winder motion. - Page 28 Safety System Chapter 2 - Safety information...
-
Page 29: Chapter 3 Explore The System
Chapter 3 Explore the system... -
Page 30: The Components Of The Printer - Media Output Side
The components of the printer - media output side The components of the printer - media output side Introduction From the media output side you can access the operator panel, access the roll winder, collect your print, or replace the knife. Number Component Knife compartment... -
Page 31: The Components Of The Roll Winder
The components of the roll winder The components of the roll winder Introduction The roll winder is located on the media output side and can be used to wind the printed media. Number Component Power switch winder Guide plate Take-up media shaft* Tension bar *For inside winding, you need the new take-up media shaft. -
Page 32: The Components Of The Printer Sides
The components of the printer sides The components of the printer sides Introduction On both printer sides you can perform maintenance actions. Filter configuration Exhaust configuration Number Component Filter fan (filter configuration) Chiller Exhaust (exhaust configuration) Ink bottle Chapter 3 - Explore the system... -
Page 33: The Components Of The Printer - Media Input Side
Maintenance drawer Maintenance tray Media input unit (optional) NOTE The Fotoba JRL170 is an example of an external media input solution for the Colorado 1650 Number Component Media input unit The Fotoba JRL170 is an example of an external media input solution for the Col-... -
Page 34: The Components Of The Media Drawer
The components of the media drawer The components of the media drawer Introduction You can open the media drawer on the media input side to load your media rolls. Number Component Roll loading station Media roll (position 1) Media roll (position 2) Number Component Locking mechanism... -
Page 35: The Components Of The Printer - Top Cover Open
The components of the printer - top cover open The components of the printer - top cover open Introduction When you open the top cover you can access the carriages, the platen area and perform several maintenance actions. Number Component Filter (filter configuration) Knife X-tran rollers... - Page 36 The components of the printer - top cover open Chapter 3 - Explore the system...
-
Page 37: Chapter 4 Handle The Media
Chapter 4 Handle the media... -
Page 38: Media Specifications
Media specifications Media specifications MEDIA Item Specification Roll width From 279 mm (11 inch) to 1625 mm (64 inch) Print margin 5.3 mm (0.21 inch) Roll weight Up to 50 kg (110 lb.) Roll diameter Up to 220 mm (8.7 inch) Media thickness Up to 0.8 mm (0.03 inch) Media input... -
Page 39: General Workflow For Using Media
General workflow for using media General workflow for using media Introduction Use the following workflow to handle the media correctly. Step Action Configure media in the RIP on page 40. Download and install a media profile, and manage the profiles in the RIP. Prepare media for printing on page 82. -
Page 40: Configure Media In The Rip
Configure media in the RIP Configure media in the RIP Manage media profiles in ONYX Introduction IMPORTANT Changing the media settings can cause damage to your printer which may void your machine warranty service. It is recommended to have a media profile for each media type. You can use ONYX as the RIP software to manage media profiles. -
Page 41: Install A Downloaded Media Profile In Onyx
Install a downloaded media profile in ONYX Before you begin First make sure you download a Colorado 1650 media profile, saved in a media library file (*.OML or *.prninst including the driver) for ONYX. You can download a media profile via ONYX Media Manager or via your local sales and support channel. - Page 42 Install a downloaded media profile in ONYX 4. Click on [Import], browse to find your media library files, and click on [Open]. 5. Click on [Ok]. A new window opens listing the media profiles in the selected file. 6. Select the media profiles you want to import and click on [Import]. The window closes.
-
Page 43: Create A New Media Profile In Onyx
Create a new media profile in ONYX Create a new media profile in ONYX Introduction When you are working with a new media that does not have a profile, you can create a new profile in ONYX. NOTE Profiling is an expert task which requires additional information and tools not covered by this manual. -
Page 44: Copy An Existing Media Profile And Edit It In Onyx
Copy an existing media profile and edit it in ONYX Copy an existing media profile and edit it in ONYX Introduction You can also use an existing media profile as a basis and edit the settings in ONYX. IMPORTANT Copy a media profile with the correct media category. Do not change the media category, this can cause damage to the printheads. - Page 45 Copy an existing media profile and edit it in ONYX 3. Click on the Colorado 1650 printer icon and click on [Media library] above. 4. Select the media profile from the list and click on [Make Copy]. A new window opens.
- Page 46 Copy an existing media profile and edit it in ONYX 5. Fill in the new media profile name and click on [Ok]. 6. Select the new media profile from the list and click on [Edit]. A new window opens. 7. Click on the 'Next' icon. For more information on the general steps use the ONYX documentation. 8.
- Page 47 Copy an existing media profile and edit it in ONYX 9. Click on [Media options]. A new window opens. 10. Check the media settings. For more information, see Change the media settings on page IMPORTANT Do not change the media category, this can cause damage to the printheads. Check the media thickness as your new media might have a different thickness than the media of the copied media profile.
- Page 48 Copy an existing media profile and edit it in ONYX 11. Give the media a new [Media Type Name] and click on [Ok]. The window closes. NOTE Check that the media type name is changed. Default it should be the same as the media profile name.
-
Page 49: Sync And Delete Media Types In Onyx
Procedure 1. Open the ONYX RIP queue. 2. Select the Colorado 1650 printer name. 3. In the top right pane click on [Device Info]. 4. To sync media types: 1. Click on [Sync Media Types]. - Page 50 Sync and delete media types in ONYX 3. Click on [Ok] to delete the selected media from the printer. The selected media are deleted from the list on the operator panel under, [Media]→[Media type]. Chapter 4 - Handle the media...
-
Page 51: Manage Media Profiles In Caldera
Manage media profiles in Caldera Manage media profiles in Caldera Introduction IMPORTANT Changing the media settings can cause damage to your printer which may void your machine warranty service. It is recommended to have a media profile for each media type. You can use Caldera as the RIP software to manage media profiles. -
Page 52: Install A Downloaded Media Profile In Caldera
Install a downloaded media profile in Caldera Before you begin First make sure you download a Colorado 1650 media profile via your local sales and support channel, saved in a calpatch file for Caldera (*.calpatch). Media profiles are also available on graphiPLAZA. - Page 53 Install a downloaded media profile in Caldera 5. Click on [Import...]. A window opens. 6. Click on [Install patch]. The file selection window opens. 7. Browse to your calpatch file (*.calpatch) and click on [Load]. A window with profiles opens. Chapter 4 - Handle the media...
- Page 54 Install a downloaded media profile in Caldera 8. Select the profiles you want to install and click on [Install selection]. 9. A message appears with the number of installed profiles, click on [Ok]. Chapter 4 - Handle the media...
-
Page 55: Create A New Media Profile In Caldera
Create a new media profile in Caldera Create a new media profile in Caldera Introduction When you are working with a new media that does not have a profile, you can create a new profile in Caldera. NOTE Profiling is an expert task which requires additional information and tools not covered by this manual. -
Page 56: Copy An Existing Media Profile In Caldera And Edit It
Copy an existing media profile in Caldera and edit it Copy an existing media profile in Caldera and edit it Introduction You can also use an existing media profile as a basis and edit the settings in Caldera. NOTE This manual provides you with basic information in order to create and change media profiles. Profiling is an expert task which requires additional information and tools not covered by this manual. - Page 57 Copy an existing media profile in Caldera and edit it 4. Select your printer and click on [Next]. 5. Select the media profile you want to copy and edit. NOTE Make sure you choose a media profile with the preferred media category, as you cannot change the media category of a media profile in Caldera.
- Page 58 Copy an existing media profile in Caldera and edit it • Under [Vacuum Power]: Change the media settings on page 10. Click on [Ok]. The window closes. 11. Click on [Next]. 12. Click on [New..] to create a new media project (print mode with media settings), or select a media project from the list and click on [Edit..] to edit.
- Page 59 Copy an existing media profile in Caldera and edit it 13. You can change the rest of the media settings: Select a print mode on page • Under [Resolution]: Change the media settings on page • Under [Parameters]: 14. Click on [Ok] and if needed follow the rest of the steps. Chapter 4 - Handle the media...
-
Page 60: Sync And Delete Media Types In Caldera
Sync and delete media types in Caldera Sync and delete media types in Caldera Introduction Caldera synchronizes all changes automatically, but you can also manually sync the media profiles with the printer so they become visible as media types on the operator panel instantly. Sometimes you also want to delete media types from this list. - Page 61 Sync and delete media types in Caldera 1. From the list of media, select one or more media types you want to delete. 2. Click on [Delete] and confirm per media type. The media types are immediately removed from the printer. They are removed from the list on the operator panel under, [Media]→[Media type].
- Page 62 Sync and delete media types in Caldera 1. Click on [Printer Medias]. A new window opens with all the media types known in the printer. 2. Click on [Delete all Printer Medias] to delete all the media types on the printer. NOTE All media types on the printer are deleted, this also includes media types added via other RIPs.
-
Page 63: Choose A Media Category
Only when you create a new media profile or edit an existing media profile you can change the media category. It is advised to use the Colorado 1650 media profiles and not change the media category. Only advanced users or application specialists should edit media profiles and have to choose the media category. - Page 64 Choose a media category Media category Characteristics Monomeric vinyl • Usually a smooth surface • Have a liner • Self-adhesive NOTE As an exception, wallcovering (embossed self-adhesive vinyl) and wallcovering (self-adhesive textile) are classi- fied under this media category. Polymeric & cast vinyl •...
-
Page 65: Change The Media Settings
Only when you create a new media profile or edit an existing media profile you can tune the media settings. It is advised to use the Colorado 1650 media profiles and not change the media settings. Only advanced users or application specialists should edit media profiles and have to tune the media settings. - Page 66 Change the media settings Media settings [Media setting ] Description [Automatic ad- Prints yellow or black markers on the media that the printer uses as guid- vance correction] ance to optimize the media step accuracy. Select [Normal] to print the yel- low markers or [Enhanced] to print the black markers.
- Page 67 Change the media settings [Media setting ] Description [Vacuum power] Controls the suction of the media on the platen. Per media category default values are used for each of the five zones available. Only change the vac- uum power when you encounter problems: •...
- Page 68 Change the media settings [Media setting ] Description [Auto media ad- Prevents pinch roller marks that can occur on sensitive media while it sits vance] idle in the loaded position or while it lies on the printer platen for more than two minutes.
- Page 69 Change the media settings [Media setting ] Description [Media thick- Fill in the thickness of the media before the media is loaded for the first time ness ] This value represents the total thickness of the media, e.g. for self-adhesive vinyl, PVC including the liner.
- Page 70 Change the media settings Media settings Description [Printer platen Controls the temperature of the platen. Generally there is no need to change temperature] this settings. Therefore recommended to keep this setting as defined in the media profile, and only adjust after consulting with an application specialist. [Precure power] Controls the curing intensity of the LED for the first part of the curing zone.
- Page 71 Change the media settings Media settings Description [Throughcure/ Controls the curing intensity of the LED for the subsequent part of the curing Postcure power] zone. Default value is 0. Increase to get rid of smudges (due to rubbing) or not fully cured ink. Decrease to minimize the appearance of a white haze on dark areas.
- Page 72 Change the media settings Media settings Description [Advance correc- Controls the average step size for the selected media and print mode. Only tion (Caldera) / change this setting when media calibration, [Automatic advance correction], Step correction and decreasing the vacuum settings do not help enough in improving the (ONYX)] print quality.
- Page 73 Change the media settings Print strategy selection Gloss Matte Mixed Print mode Default / Default / Strategy1 Strategy1 Strategy Robust 1 / Robust Quality / (ONYX / Strategy2 Strategy2 Caldera) Robust 2 / High density / a-hd a-hd a-hd a-hd Strategy3 Strategy3 Strategy type b is more robust than type a...
- Page 74 Change the media settings Mode Strategy (ONYX / Result / action Strategy (ONYX / Result / action Caldera) Caldera) Production Default / Strategy Paper step mark- ers Off (AAC) Less robust for media step varia- tions Speed = 57 m (187 ft Improved Media Paper step mark-...
-
Page 75: Select A Print Mode
Select a print mode Select a print mode Introduction You can select a print mode that best suits your application. Choose a gloss, matte or mixed matte/gloss finish and select your print mode in the RIP software. The location of the print modes differs, depending on the RIP you are using. For more Manage media profiles in ONYX on page Manage media profiles in Caldera information, see... - Page 76 Select a print mode FLXfinish For Colorado 1650 a print mode exists that allows you to combine matte and gloss finishes in one print. This option is called FLXfinish To use FLXfinish you do not need any additional varnish channels or extra printheads.
- Page 77 Select a print mode Media in combination with print modes Gloss Matte Mixed Media Application Speed (m²/h) 159 MC Paper Strat2 Coated Paper Strat2 (wallpaper) Uncoated Paper Wrappings (wallpaper) Vinyl Wallcovering (textured) PVC banner Indoor/outdoor Banner; Mesh SAV mono/poly Fleet graphics; Window graphics;...
-
Page 78: Flxfinish+ In The Rip
These media profiles can be downloaded from media profile with FLXfinish print mode can also be created from scratch, using the profiling GraphiPLAZA documentation from the Colorado 1650. This documentation can be found on on the downloads website http://downloads.cpp.canon under the product name. - Page 79 FLXfinish+ in the RIP 3. To check that the gloss part will be printed: hover the mouse over an area in the image that should be printed in gloss. Check at the bottom of the Job Editor whether there is a CMYK value and Spot2 value.
- Page 80 FLXfinish+ in the RIP 5. Check if Spot Color [Gloss] is present under [Spot Colors]. 6. Double-click on the file itself in the files window. This will allow the file to be opened and checked on the CMYK and Spot color percentages. 7.
- Page 81 FLXfinish+ in the RIP Chapter 4 - Handle the media...
-
Page 82: Prepare Media For Printing
Prepare media for printing Prepare media for printing Load a media roll (position 1) Introduction This topic describes how to load a media roll in position 1. NOTE You can use an optional grip lock to insert the feed media shaft into the core of the new media roll. - Page 83 Load a media roll (position 1) 2. Place the new media roll, with the media flap on the bottom and towards you, on the roll loading station. 3. Pull the lever and open the clamp. 4. Take the feed media shaft out of the drawer. 5.
- Page 84 Load a media roll (position 1) 3. Slide (3) the media shaft into the side of the core of the new media roll. 4. Remove the grip lock. Without the optional grip lock: 1. Pull (1) the handle of the locking mechanism towards you. 2.
- Page 85 Load a media roll (position 1) 6. Accurately align the roll on the media shaft. Place it on the corresponding media size with the help of the ruler. Check on the left and right side of the roll if both are aligned on the same size. 7.
- Page 86 Load a media roll (position 1) 9. Close the clamp firmly. IMPORTANT Make sure you close the clamp completely until you hear a click, otherwise the roll can come loose and can damage the machine. Chapter 4 - Handle the media...
- Page 87 Load a media roll (position 1) 10. Use both hands to turn the media roll backwards (1) until the media flap has passed the metal paper guide. 11. Use both hands to move the media forward and slide it under the metal paper guide (2) until the media is transported automatically.
- Page 88 Load a media roll (position 1) 1. Push the handles on the left and right side of the loading station to open the media feed. 2. Use both hands to move the media forward and slide the media under the metal paper guide until you see it coming out on top.
- Page 89 Load a media roll (position 1) 13. On the operator panel, select the correct media type and fill in the media width. 14. When the media you use has an upward curl select [ Upward curled media]. This setting persists as long as the media is assigned. When enabled, the system feeds the media to the output position.
-
Page 90: Load A Media Roll (Position 2)
Load a media roll (position 2) Load a media roll (position 2) Introduction You can load multiple media rolls on your printer for optimal productivity. NOTE You can use optional grip lock to insert the feed media shaft into the core of the new media roll. You can load a media roll without the optional grip lock. - Page 91 Load a media roll (position 2) 3. Pull the lever and open the clamp. 4. Take the feed media shaft out of the drawer. 5. Insert the feed media shaft into the core of the new media roll. You can use the optional grip lock for this step.
- Page 92 Load a media roll (position 2) 4. Remove the grip lock. Without the optional grip lock: 1. Pull (1) the handle of the locking mechanism towards you. 2. Slide (2) the media shaft into the side of the core of the new media roll. Chapter 4 - Handle the media...
- Page 93 Load a media roll (position 2) 6. Accurately align the roll on the media shaft. Place it on the corresponding media size with the help of the ruler. Check on the left and right side of the roll if both are aligned on the same size. 7.
- Page 94 Load a media roll (position 2) 10. Use both hands to turn the media roll backwards (1) until the media flap has passed the metal paper guide. 11. Use both hands to move the media forward and slide it under the metal paper guide (2) until the media is transported automatically.
- Page 95 Load a media roll (position 2) 12. Close the media drawer carefully. The operator panel displays the message that new media is detected. IMPORTANT Do not open the media drawer when the indicator light is off, you can damage the machine.
- Page 96 Load a media roll (position 2) 16. Tap on [Save]. NOTE For the highest output quality, it is advised to always perform a media calibration when Calibrate you load a new media type or a new media width. For more information, see the media on page 118.
-
Page 97: Load A Media Roll For Inside Printing
Load a media roll for inside printing Load a media roll for inside printing Introduction You can load a media roll to print on the inside. NOTE Print • We recommend to use inside printing only in combination with a locked tension bar, see and wind with a locked tension bar on page 132. - Page 98 Load a media roll for inside printing 3. Put the feed media shaft back into the drawer with the ruler and the pins of the locking mechanism facing up to prevent damage to the media. Firmly close the clamp. Make sure you close the clamp completely until you hear a click.
- Page 99 Load a media roll for inside printing 5. Pull the lever and open the clamp of position 2. 6. Take the feed media shaft out of the drawer. 7. Insert the feed media shaft into the core of the new media roll. You can use the optional grip lock for this step.
- Page 100 Load a media roll for inside printing 4. Remove the grip lock. Place it on the cover beside the media drawer. Without the optional grip lock: 1. Pull (1) the handle of the locking mechanism towards you. 2. Slide (2) the media shaft into the side of the core of the new media roll. Chapter 4 - Handle the media...
- Page 101 Load a media roll for inside printing 8. Accurately align the roll on the media shaft. Place it on the corresponding media size with the help of the ruler. Check on the left and right side of the roll if both are aligned on the same size. 9.
- Page 102 Load a media roll for inside printing 12. Use both hands to turn the media roll backwards and slide the media under the metal paper guide (1) until the media is transported automatically. You will hear a beeping sound when the media is correctly fed and loaded.
- Page 103 Load a media roll for inside printing 14. On the operator panel, select the correct media type and fill in the media width. 15. When the media you use has an upward curl select [ Upward curled media]. This setting persists as long as the media is assigned. When enabled, the system feeds the media to the output position.
-
Page 104: Load Weak Media For Outside Printing
Load weak media for outside printing Load weak media for outside printing Introduction When you load weak media in the printer, such as canvas and textiles, manual feeding and the use of the tension bar are recommended. You can configure the settings for manual feeding and the tension bar in the RIP. - Page 105 Load weak media for outside printing 3. Load a media roll of rigid media in position 2, with the media flap on top and towards you. 4. Take the leading edge of the rigid media and tape it to the roll of weak media. 1.
- Page 106 Load weak media for outside printing 5. Use both hands to turn the media roll in position 1 towards you. Add ± 80 cm (31.5 inch) of rigid media to the weak media roll. 6. Take a knife and cut the rigid media manually. 7.
- Page 107 Load weak media for outside printing 11. Use both hands to turn the weak media roll and slide the media under the metal paper guide until the media is transported automatically. You will hear a beeping sound when the media is correctly fed and loaded.
-
Page 108: Load Weak Media For Inside Printing
Load weak media for inside printing Load weak media for inside printing Introduction When you load weak media in the printer, such as canvas and textiles, manual feeding and the use of the tension bar are recommended. You can configure the settings for manual feeding and the tension bar in the RIP. - Page 109 Load weak media for inside printing 3. Load a media roll of rigid media in position 2, with the media flap on top and towards you. 4. Take the leading edge of the rigid media and tape it to the roll of weak media. 1.
- Page 110 Load weak media for inside printing 5. Use both hands to turn the media roll in position 1 towards you. Add ± 80 cm (31.5 inch) of rigid media to the weak media roll. 6. Take a knife and cut the rigid media manually. 7.
- Page 111 Load weak media for inside printing 13. Rotate the weak media roll and place the roll with the media flap on top pointing towards you in roll position 2. 14. Put the feed media shaft back into the drawer with the ruler and the pins of the locking mechanism facing up to prevent damage to the media.
- Page 112 Load weak media for inside printing Transport 2. Transport the media on the platen to the desired position. For more information see media by distance on page Transport media by manual control on page 141, 140. Chapter 4 - Handle the media...
-
Page 113: Load Media With The Media Input Unit
When the media is taped to the take-up roll. Procedure 1. Place a marker on the frame of the Colorado 1650 media input unit to identify the width of the media (for example a piece of tape). Chapter 4 - Handle the media... - Page 114 Load media with the media input unit NOTE The notch in the illustration above indicates the center of the guiding plate of the media input unit. Place the marker at a distance "media width divided by 2" from the center notch. 2.
- Page 115 Load media with the media input unit 3. Before you feed the media into the printer, align the media with the marker on the printer (the tape you applied in step 1). NOTE It is highly recommended to perform the next two steps with two persons. Chapter 4 - Handle the media...
- Page 116 Load media with the media input unit 4. Align the 2 markers (lines) on the left and right side of the media with the input unit, see illustration. Distance to red dotted line is 3 cm (1.18 inch). Chapter 4 - Handle the media...
- Page 117 Load media with the media input unit 5. Feed the media into the media input unit. The input unit pinch will start to rotate for 2 seconds and grab the media. Check the media position at the reference marker (lines) position. The allowed tolerance is ±...
-
Page 118: Calibrate The Media
Calibrate the media Calibrate the media Introduction In case of print quality issues you should always perform a media calibration. It is advised to calibrate media when you have loaded a new media type or media width. NOTE Media calibration is type and width dependent. When you have two different sizes of the same media type you must perform calibration for each size. -
Page 119: Add A Leading Or Trailing Strip
Add a leading or trailing strip Add a leading or trailing strip Introduction You can define the length of a leading or trailing strip. The strip is added by default to every print job from this moment on. When to do •... -
Page 120: Load A Take-Up Roll Core Onto The Roll Winder
Load a take-up roll core onto the roll winder Load a take-up roll core onto the roll winder Introduction When you want to wind media, you must load a take-up roll core onto the roll winder first. For inside winding, you need the new take-up media shaft. The gear inside the new take-up media shaft is marked with the number 2. - Page 121 Load a take-up roll core onto the roll winder 2. Push the green levers on both sides of the take-up media shaft. Remove the take-up media shaft from the winder. 3. Pull the handle of the locking mechanism inside the core towards you. Take the empty media roll core and slide it on the media shaft.
- Page 122 Load a take-up roll core onto the roll winder 4. Center the core on the media shaft. 5. Push to place the media shaft back on the winder. Make sure it clicks in place. After you finish Print and wind without a You can now wind media onto the core, for more information see tension bar on page Print and wind with a tension bar on page...
-
Page 123: Print With Or Without Winding
Print with or without winding Winding options Introduction For the Colorado 1650 there are several winding options depending on the type of media you are using. NOTE It is very important to select the correct winding option. If you choose the wrong option this can lead to print quality and winding issues. -
Page 124: Print And Wind Without A Tension Bar
Print and wind without a tension bar Print and wind without a tension bar Introduction Winding media without a tension bar, loose winding, is used for most media that can be transported well and is not too weak. Before you begin •... - Page 125 Print and wind without a tension bar NOTE Make sure you set the output configuration in time, as you cannot change the configuration once the media has passed the clamp. 4. Optional: set [ Wind the printed side] to [ Outside] or [Inside]. The default value is [ Outside].
- Page 126 Print and wind without a tension bar NOTE In order to prevent winding issues when winding the media in the opposite direction of the roll in the drawer, the media has to be taped with enough tapes over the full width of the roll to straighten the curling edge.
-
Page 127: Print And Wind With A Tension Bar
Print and wind with a tension bar Print and wind with a tension bar Introduction Winding media with a tension bar, tight winding, is only used for weaker media in order to prevent media transportation issues. Media that is weak and sensitive for buckling, but not too stiff, can be wound with a tension bar in unlocked position. - Page 128 Print and wind with a tension bar 4. Optional: set [ Wind the printed side] to [ Outside] or [Inside]. The default value is [ Outside]. When the setting is not available, the output will be winded with the printed side to the outside. 5.
- Page 129 Print and wind with a tension bar 8. Tape first the center and then the sides of the media to the core, as shown on the operator panel. For outside winding feed the media along the front of the core, for inside winding feed the media along the back of the core.
- Page 130 Print and wind with a tension bar 9. Place the tension bar lever in unlocked position. 10. Lift up the tension bar and place it correctly on top of the media. 11. On the operator panel tap on [Ready]. The printer starts printing while winding the job. Make sure the tension bar follows the media when the blouse is formed.
- Page 131 Print and wind with a tension bar After you finish Cut the When you want to stop winding you have to cut the media. For more information, see media on page Cut the media (manual) on page 150, 152. Chapter 4 - Handle the media...
-
Page 132: Print And Wind With A Locked Tension Bar
Print and wind with a locked tension bar Print and wind with a locked tension bar Introduction Winding media with a locked tension bar is only used for stiff media, in order to prevent media transportation issues. Before you begin •... - Page 133 Print and wind with a locked tension bar 4. Optional: set [ Wind the printed side] to [ Outside] or [Inside]. The default value is [ Outside]. When the setting is not available, the output will be winded with the printed side to the outside. 5.
- Page 134 Print and wind with a locked tension bar for inside winding: NOTE In order to prevent winding issues when winding the media in the opposite direction of the roll in the drawer, the media has to be taped with enough tapes over the full width of the roll to straighten the curling edge.
- Page 135 Print and wind with a locked tension bar 10. Lift up the tension bar and place it correctly on top of the media. 11. On the operator panel tap on [Ready]. 12. Move the media guides towards the middle to align with the media. Tap on [Ready]. The printer starts printing while winding the job.
-
Page 136: Print Without Winding
Print without winding Print without winding Introduction You can also print without winding. Media that is printed without winding can be transported well and is not too weak. Before you begin • Check the media category of your media. Media categories that need a tension bar cannot be printed without winding. - Page 137 Print without winding 4. Start a print job. The printer continues printing without winding. After you finish When you want to stop printing without winding you have to cut the media. For more Cut the media on page Cut the media (manual) on page information, see 150, 152.
-
Page 138: Move Media Manually
Move media manually Move media manually Introduction You can move media manually. This gives you the option to move the media before and between jobs. You can: Feed and retract media manually on page 138 • Feed and retract media, see Transport media by manual control on page 140 •... - Page 139 Feed and retract media manually 4. Tap on [Feed]. The printer feeds the media in the correct position to tape the media or to start printing, depending on the type of media. 5. Tap on [Retract] to retract the media to the drawer. NOTE You can retract the media only when the media is not yet at the taping position.
-
Page 140: Transport Media By Manual Control
Transport media by manual control Transport media by manual control Introduction You can move the media before and between jobs. Procedure 1. On the operator panel tap on the [Output] icon. 2. Select [Manual control] as [Transport mode]. 3. Select the transport direction. •... -
Page 141: Transport Media By Distance
Transport media by distance Transport media by distance Introduction You can move the media before and between jobs. Procedure 1. On the operator panel tap on the [Output] icon. 2. Select [Distance] as [Transport mode]. 3. Select the winding direction. •... -
Page 142: Print On The Inside Of A Media Roll
Print on the inside of a media roll Print on the inside of a media roll Introduction To print on the inside of a media roll, load the media roll for inside printing. Procedure 1. Load the media roll for inside printing on position 2 in the media drawer, see Load a media roll for inside printing on page 2. -
Page 143: Print Double-Sided With Automatic Cut
Print double-sided with automatic cut Introduction Colorado 1650 offers the possibility to print on the inside as well as on the outside of the media, which indirectly provides the user a way to print double-sided. To print double-sided you print on the inside of the media. - Page 144 Print double-sided with automatic cut Print the side 1 Print side 2 Strip Function Length of the strip Leading strip 1600 mm (63 inch) Lead-in image 250 mm (9.84 inch) Lead-out image 250 mm (9.84 inch) Trailing strip 1600 mm (63 inch) Leading strip 1600 mm (63 inch) Lead-in image...
- Page 145 Print double-sided with automatic cut 8. On the operator panel tap on the [Default settings][System] icon and change the leading and trailing edge length to 1600mm (63 inch). 9. Prepare a nest of prints for the outside of the media in one of the supported RIP software applications.
-
Page 146: Print Double-Sided With Manual Cut
Print double-sided with manual cut Introduction Colorado 1650 offers the possibility to print on the inside as well as on the outside of the media, which indirectly provides the user a way to print double-sided. To print double-sided you print on the inside of the media. - Page 147 Print double-sided with manual cut Print side 1 Print side 2 Strip Function Length of the strip Leading strip 1600 mm (63 inch) Lead-in image 250 mm (9.84 inch) Lead-out image 250 mm (9.84 inch) Trailing strip with a cutting line 1600 mm (63 inch) Leading strip 1600 mm (63 inch)
- Page 148 Print double-sided with manual cut 7. On the operator panel tap on the [Media] icon. Select the required media and media width. 8. On the operator panel tap on the [Default settings][System] icon and change the leading and trailing edge length to 1600mm (63 inch). 9.
- Page 149 Print double-sided with manual cut 25. Repeat the actions of step 11 to 15 you did for printing side 1. 26. Remove the take-up media roll from the winder. Chapter 4 - Handle the media...
-
Page 150: Cut And Unload Media
Cut and unload media Cut and unload media Cut the media Introduction When you cut media, the printer uses the embedded knife. You can also cut the media manually with your own knife. How the media is cut depends on the Change the media settings on media type configuration in the RIP. - Page 151 Cut the media After you finish Unload a You can now remove the take-up roll from the roll winder. For more information, see take-up media roll from the roll winder on page 156. Chapter 4 - Handle the media...
-
Page 152: Cut The Media (Manual)
Cut the media (manual) Cut the media (manual) Introduction When you manually cut media, the printer does not use the embedded knife but you have to use your own knife or pair of scissors. How the media is cut depends on the media type configuration in the RIP. For more information, Change the media settings on page Before you begin Use a knife or pair of scissors that is sharp enough to cut the media. - Page 153 Cut the media (manual) 5. Tape the trailing edge to the take-up media roll in case of winding. 6. After you finish, tap on [Completed] on the operator panel. After you finish You can now remove the take-up media roll from the roll winder. For more information, see Unload a take-up media roll from the roll winder on page 156.
-
Page 154: Autocut
AutoCut AutoCut Introduction When you want to print a job in sheets, you can choose to cut the media automatically after each copy. For AutoCut, the printer uses the embedded knife. NOTE Media categories that need a tension bar or request a manual cut cannot be cut automatically after each copy. - Page 155 AutoCut 5. Make sure [Wind the output] is set to [AutoCut]. 6. Start a print job. The embedded knife automatically cuts the media after each image has been printed. 7. Collect your output at the printer. After you finish When you want to stop cutting after each copy you can change the output configuration again, after the jobs are completed and the queue is empty .
-
Page 156: Unload A Take-Up Media Roll From The Roll Winder
Unload a take-up media roll from the roll winder Unload a take-up media roll from the roll winder Introduction When you want to collect the printed output you have to unload the take-up media roll from the roll winder. Before you begin Cut the media on page 150 Make sure you have cut the media. - Page 157 Unload a take-up media roll from the roll winder 2. Push the green levers on both sides of the take-up media roll. Remove the take-up media roll from the winder. 3. Place the take-up media roll on a sturdy surface. 4.
- Page 158 Unload a take-up media roll from the roll winder 6. Push to place the media shaft back on the winder. Make sure it clicks in place. Chapter 4 - Handle the media...
-
Page 159: Unload A Media Roll From The Drawer
Unload a media roll from the drawer Unload a media roll from the drawer Introduction Unload a media roll from the drawer when you want to load a new media roll. CAUTION • Watch your fingers when you handle the media roll. •... - Page 160 Unload a media roll from the drawer 3. Pull the lever and open the clamp. 4. Lift up and take out the media shaft with the media roll, and put it on the roll loading station. 5. Pull (1) the handle of the locking mechanism towards you. Remove (2) the media shaft from the core of the media roll.
- Page 161 Unload a media roll from the drawer 6. Load a new media roll, for more information see Load a media roll (position 1) on page 82. Or put the feed media shaft back into the drawer and firmly close the clamp. Make sure you close the clamp completely until you hear a click.
- Page 162 Unload a media roll from the drawer Chapter 4 - Handle the media...
-
Page 163: Chapter 5 Print A Job
Chapter 5 Print a job... -
Page 164: General Workflow For Printing A Job
General workflow for printing a job General workflow for printing a job Introduction There is a general workflow for using the Colorado 1650 explained in this manual. Operator Panel Printing Mobile app 1. RIP Prepare and submit a job in one of the supported RIP software applications. You can install media profiles and also add or change media profiles and types here. -
Page 165: Print A Job
Print a job Print a job Introduction You can submit and print a job via the RIP. When to do Make sure you have one of the supported RIP applications installed and connected to the printer. Procedure 1. Open the RIP. 2. - Page 166 Print a job 4. Submit the job. NOTE • When you have problems submitting your job, check if the physical width in the RIP corresponds with the width of the media roll. Take into account the margin used for [Automatic advance correction] (_AAC_NONE, _AAC_NORMAL, _AAC_ENHANCED).
- Page 167 Print a job 5. Collect your output at the printer. Print and wind without a If requested, tape the media for winding. For more information, see tension bar on page Print and wind with a tension bar on page Print and wind with a 124, 127, or locked tension bar on page...
-
Page 168: Perform Actions On A Submitted Job
Perform actions on a submitted job Perform actions on a submitted job Introduction On the operator panel you can control your job. Procedure 1. Submit a job to the printer. 2. On the operator panel, you see the job appearing in the queue, at the top of the screen. The job on top is the active job. -
Page 169: Status On The Operator Panel
Status on the operator panel Status on the operator panel Introduction The operator panel indicates when an operator attention is required via colors and symbols. Colors on the operator panel When you see an orange or red color indication on the operator panel, tap the tile with the color to see what action is required. - Page 170 Status on the operator panel Color Example Description Status Attention Operator attention is required. The system continues the (indication) When this icon appears in the queue action if possible. you have to be aware that most likely the media will run out during this job.
-
Page 171: Use The Prismasync Remote Control App
Use the PRISMAsync Remote Control app Use the PRISMAsync Remote Control app Introduction With the PRISMAsync Remote Control app you can monitor your Colorado 1650 at a distance. Before you begin To use the PRISMAsync Remote Control app you need a mobile device with: •... - Page 172 Use the PRISMAsync Remote Control app Chapter 5 - Print a job...
-
Page 173: Maintain The System
Chapter 6 Maintain the system... -
Page 174: Maintain The Print Quality
Maintain the print quality Maintain the print quality Guidelines to maintain the print quality Introduction To keep the printer in optimal condition it is very important to perform printhead and system maintenance actions regularly. These maintenance actions can be performed at any time to solve print quality problems, for example after a media crash. - Page 175 Guidelines to maintain the print quality Action Procedure Clean the matrix plate on page 188 Clean the matrix plate Clean the matrix plate Clean the platen on page 197 Clean the platen Clean the platen Vacuum the chiller and check the fluid level (first design) Vacuum the chiller on page 237 Vacuum the chiller...
- Page 176 Guidelines to maintain the print quality Action Procedure Clean the matrix plate. Clean the matrix plate on page 188 Clean the matrix plate Video: Clean the M&C scanner on page 194 Clean the M&C scanner. Clean the M&C scanner Video: Clean the platen on page 197 Clean the platen.
- Page 177 Guidelines to maintain the print quality Action Procedure Vacuum the chiller. Vacuum the chiller and check the fluid level (first design) on page 237 Vacuum the chiller Clean the ink unit on page 257 Clean the ink unit. Clean the ink unit Clean the nozzles The printer performs a purge and Video:...
-
Page 178: Start Automatic Maintenance
Start automatic maintenance Start automatic maintenance Introduction Start automatic maintenance in case of quality issues. The printer performs a purge and wipe and optionally you can print a nozzle classification chart to optimize the print quality. Procedure 1. On the operator panel tap on the [Tools] icon on the right. 2. - Page 179 Start automatic maintenance NOTE The nozzle classification chart can only be printed on media of one of the following categories: • Heavy paper > 200 gsm (54 lb bond) • Paper 120-200 gsm (32-54 lb bond) • Film • Polymeric & cast self-adhesive vinyl •...
-
Page 180: Start Manual Maintenance
Start manual maintenance Start manual maintenance Introduction Start manual maintenance in case of quality issues. Perform any or all of the listed actions on the operator panel. You can print a nozzle classification chart to optimize the nozzles. Procedure 1. On the operator panel tap on the [Tools] icon on the right. 2. - Page 181 Start manual maintenance NOTE The nozzle classification chart can only be printed on media of one of the following categories: • Heavy paper > 200 gsm (54 lb bond) • Paper 120-200 gsm (32-54 lb bond) • Film • Polymeric & cast self-adhesive vinyl •...
-
Page 182: Start Periodic Maintenance
Start periodic maintenance Start periodic maintenance Introduction Start periodic maintenance when the operator panel gives a warning. Periodic maintenance contains a variety of mandatory maintenance actions and the possibility to print a nozzle classification chart to optimize the nozzles. IMPORTANT You must perform all periodic maintenance actions when indicated, otherwise the printer functions are not guaranteed. - Page 183 Start periodic maintenance NOTE The nozzle classification chart can only be printed on media of one of the following categories: • Heavy paper > 200 gsm (54 lb bond) • Paper 120-200 gsm (32-54 lb bond) • Film • Polymeric & cast self-adhesive vinyl •...
-
Page 184: Clean The Maintenance Station, Wiper And Clean Wall
Start manual maintenance on page 180. 2. Put on the Colorado 1650 approved gloves. 3. Open the top cover from the media input side. 4. Locate the maintenance station with the wiper and the clean wall on the right hand side. - Page 185 Clean the maintenance station, wiper and clean wall CAUTION Be careful to touch, the wiper can be hot. Let the wiper cool down for five minutes. CAUTION Only use the cleaning liquid cleaner MB - Methyl benzoate in combination with swabs. Do not use a lint free cloth.
- Page 186 Clean the maintenance station, wiper and clean wall 8. Take a lint free cloth and clean the clean wall until all residue ink is gone. If necessary, dampen a swab with the cleaning liquid to remove any remaining ink. CAUTION Only use the cleaning liquid cleaner MB - Methyl benzoate in combination with swabs.
- Page 187 Clean the maintenance station, wiper and clean wall CAUTION Only use the cleaning liquid cleaner MB - Methyl benzoate in combination with swabs. Do not use a lint free cloth. IMPORTANT Do not clean the black top cover of the clean wall with cleaning liquid to prevent deterioration of paint.
-
Page 188: Clean The Matrix Plate
180 Start periodic maintenance on page 182. 2. Put on the Colorado 1650 approved gloves. 3. Take a new and clean piece of matrix plate cleaning foam and put it in the holder of the cleaning tool. - Page 189 Clean the matrix plate 4. Take the matrix plate cleaning tool, go to the media input side and locate the manual maintenance door on the left. 5. Open the media cover (1) and lift the lever of the manual maintenance door on the left (2). 6.
- Page 190 Clean the matrix plate 8. Place the matrix plate cleaning tool against the matrix plate. Position it correctly with the arrows facing you, as illustrated. 9. Press the cleaning tool against the matrix plate. IMPORTANT Press until you lift the printhead carriage up very lightly. When you press too hard you will damage the printheads and carriage.
- Page 191 In this example you see that you have applied more pressure at the top side of the foam. 11. Take a Colorado 1650 approved swab. Swabs come in 2 sizes: • Wide TX714A swab • Narrow TX761 swab 12.
- Page 192 Clean the matrix plate Narrow swab Wide swab If you use a narrow swab, hold the swab side- If you use a wide swab, hold the swab upright. ways. IMPORTANT • Make sure to end the cleaning procedure within 5 minutes, when you use the cleaning liquid.
- Page 193 Clean the matrix plate 19. Close the manual maintenance door and the media cover. IMPORTANT Make sure all covers are closed correctly to prevent cured ink in your system. 20. On the operator panel tap [Completed] to end the maintenance action. Chapter 6 - Maintain the system...
-
Page 194: Clean The M&C Scanner
180 Start periodic maintenance on page 182. 2. Put on the Colorado 1650 approved gloves. 3. Go to the media input side and locate the manual maintenance door on the left. Chapter 6 - Maintain the system... - Page 195 Clean the M&C scanner 4. Open the media cover (1) and lift the lever of the manual maintenance door on the left (2). 5. Open the manual maintenance door (3). A light is switched on. IMPORTANT Do not use any external light source to prevent curing of the ink and damage to the printheads.
- Page 196 Clean the M&C scanner 8. Make sure that all residue ink is removed. 9. Carefully wipe the glass plate dry. 10. Dispose the gloves and cloths as chemical waste according to local regulations. 11. Close the manual maintenance door and the media cover. IMPORTANT Make sure all covers are closed correctly to prevent cured ink in your system.
-
Page 197: Clean The Platen
180 Start periodic maintenance on page 182. 2. Put on the Colorado 1650 approved gloves. 3. Open the top cover from the media input side. 4. If present, remove the media from the paper path. For more information, see... - Page 198 Clean the platen 6. Use the compressed air duster to open the suction holes. NOTE If necessary, you can also use a 2,5 mm (0.1 inch) micro cleaning brush. 7. Dampen a rough lint free cloth with the cleaning liquid and clean the complete platen area. If necessary, you can clean the area surrounding the maintenance station as well.
- Page 199 Clean the platen 10. Close the top cover. 11. On the operator panel tap [Completed] to end the maintenance action. After you finish Load a media roll (position 1) on page Reload the media. For more information, see Chapter 6 - Maintain the system...
-
Page 200: Clean The Buffer Plate
Follow the Safety Data Sheets (SDS) guidelines carefully in order to ensure maximum safety. Procedure 1. Put on the Colorado 1650 approved gloves. 2. Go to the media input side and open the media cover. Chapter 6 - Maintain the system... - Page 201 Clean the buffer plate 3. Inspect if the buffer plate is polluted. 4. Take a lint free cloth and clean the buffer plate. 5. Dampen the cloth with the cleaning liquid to remove any remaining ink. IMPORTANT Use the prescribed cleaning liquid. Do not use any other cleaners. 6.
-
Page 202: Maintain The Printer
Maintain the printer Maintain the printer Refill ink Introduction You can refill ink easily without the risk of spilling ink. On the operator panel tap on the [Inks] icon on the right. You see an overview of the ink bottles and levels of remaining ink: •... - Page 203 IMPORTANT • Make sure you use official Colorado 1650 ink. UNDER CERTAIN CONDITIONS, INCLUDING WHEN A USED, REFILLED OR THIRD PARTY INK HAS BEEN DETECTED, THE PRINTER WILL OPERATE UNDER SAFE MODE. THIS MODE IS...
- Page 204 Refill ink 6. Take the empty bottle out of the slot. 7. Dispose the bottle as chemical waste according to local regulations. 8. Take a new ink bottle with the same color and shake it well for at least 10 seconds. 9.
- Page 205 Refill ink 10. Move the green handle back up as far as it will go. IMPORTANT Do not hold the bottle. In case the handle is resistant, repeat step 9. The ink will pour out of the bottle. The bottle is locked into place. You can leave the bottle in. NOTE When it is possible to fill a second bottle, you have to wait 15 minutes.
-
Page 206: Replace The Maintenance Tray (First Design)
There are 2 types of maintenance trays. The new design has a green lever, visible between the media cover and the maintenance drawer. This procedure describes the first design. Before you begin Use Colorado 1650 prescribed: • Microflex gloves for handling ink • Lint free cloths •... - Page 207 2. Go to [Maintenance tray]. 3. Tap on [Replace] and read the instructions. 4. Put on the Colorado 1650 approved gloves. 5. Go to the media input side and locate the maintenance drawer on the right. Chapter 6 - Maintain the system...
- Page 208 Replace the maintenance tray (first design) 6. Pull to open the maintenance drawer. 7. Take the lid out of the drawer. 8. Push the handle of the inner drawer and pull carefully to slide the maintenance tray to the front. Make sure to extend the drawer completely.
- Page 209 Replace the maintenance tray (first design) 9. Lift the metal holder up. 10. Put the lid on the tray. Chapter 6 - Maintain the system...
- Page 210 Replace the maintenance tray (first design) 11. For both hands, put your thumb on the lid and your other fingers under the side reel. Squeeze to click and seal the lid completely. 12. Lift the maintenance tray out with both hands on the sides of the tray. Dispose the sealed maintenance tray as chemical waste according to local regulations.
- Page 211 Replace the maintenance tray (first design) 16. Push to slide the inner drawer to the back and let it click to close. 17. Take a new lid and place it in the outer drawer. 18. Dispose the gloves as chemical waste according to local regulations. 19.
-
Page 212: Replace The Maintenance Tray (New Design)
There are 2 types of maintenance trays. The new design has a green lever, visible between the media cover and the maintenance drawer. This procedure describes the new design. Before you begin Use Colorado 1650 prescribed: • Microflex gloves for handling ink • Lint free cloths •... - Page 213 2. Go to [Maintenance tray]. 3. Tap on [Replace] and read the instructions. 4. Put on the Colorado 1650 approved gloves. 5. Go to the media input side and locate the maintenance drawer on the right. 6. Open the media cover (1) and lift the lever of the maintenance drawer on the right (2).
- Page 214 Replace the maintenance tray (new design) 7. Pull carefully to slide the maintenance drawer to the front (3). Make sure to extend the drawer completely. CAUTION Open the maintenance drawer very carefully to not let the ink splash and spill. 8.
- Page 215 Replace the maintenance tray (new design) 10. For both hands, put your thumb on the lid and your other fingers under the side reel. Squeeze to click and seal the lid completely. 11. Lift the maintenance tray out with both hands on the sides of the tray. Dispose the sealed maintenance tray as chemical waste according to local regulations.
- Page 216 Replace the maintenance tray (new design) 17. On the operator panel tap [Replaced] to confirm you replaced a full maintenance tray with an empty maintenance tray and end the action. Chapter 6 - Maintain the system...
-
Page 217: Replace The Wiper
For more information, see 263. Replace the wiper Video: Before you begin Use Colorado 1650 prescribed: • Microflex gloves for handling ink • Wiper • Lint free cloths and swabs • Matrix plate cleaning tool and foam • Cleaning liquid (IPA) for the platen •... - Page 218 Replace the wiper 4. Move to the media input side and wait till the carriage has moved into position. 5. Put on the Colorado 1650 approved gloves. 6. Open the top cover. Clean the platen on page 7. Clean the platen. For more information, see 197.
- Page 219 Replace the wiper 12. Place a new wiper back. Put the left side in first and click the right side into the holder. Make sure the wiper is fully clicked into the holder. 13. Clean the matrix plate. For more information, see Clean the matrix plate on page 188.
- Page 220 Replace the wiper IMPORTANT When you only have cleaned the wiper, click [Not replaced]. The life time counter for the wiper should not be reset in this case. Chapter 6 - Maintain the system...
-
Page 221: Replace The Knife
Procedure 1. Open the top cover from the media input side. 2. Put on the Colorado 1650 approved gloves. 3. Locate the knife and move it from the left to the right. Chapter 6 - Maintain the system... - Page 222 Replace the knife 4. Go to the media output side and locate the knife compartment cover on the left. 5. Unscrew the screw on top of the cover with the Torx-25. CAUTION Mind your head. Chapter 6 - Maintain the system...
- Page 223 Replace the knife 6. Lift the cover up and take it out. 7. Locate the knife in the top right part of the compartment. 8. Unscrew the two screws of the knife (1-2) with the Torx-6. NOTE Hold a piece of paper under the knife to collect any falling screws. This way you make sure you do not lose any of the screws inside the machine.
- Page 224 Replace the knife 10. Place a new knife with the wheel top-first in the rails and let it fall into position. Test to make sure the knife slides well on the rails. 11. Fasten the two screws, hand tight. 12. Place the knife compartment cover back into position. 13.
-
Page 225: Replace The Filters
1. On the operator panel tap on the [Tools] icon on the right. 2. Tap on [Replace the filters]. 3. Tap on [Replace] and read the instructions.. 4. Put on the Colorado 1650 approved gloves. 5. Open the top cover from the media input side. 6. Locate the filters on the left. - Page 226 Replace the filters 8. Take the front filter box out by the green handles. Place it on a sturdy surface. 9. Slide the second filter box to the front and take it out by the green handles. Place it on a sturdy surface.
- Page 227 Replace the filters 12. Pick up the filter box holder by the green handles. Place the box in the filter compartment with the higher handle on the left. Slide it to the back. 13. Pick up the second filter box holder by the green handles. Place the box in the filter compartment with the higher handle on the left.
-
Page 228: Replace The Lubricators
Video: Replace the lubricators Before you begin Use Colorado 1650 prescribed: • Microflex gloves for handling ink • Bracket with two lubricators and pins (2x) • Crosshead screwdriver • Lint free cloth (optional) - Page 229 Replace the lubricators 5. Put on the Colorado 1650 approved gloves. 6. Carefully push the printhead carriage to the left in manual maintenance position (1). IMPORTANT Touch the printhead carriage on the covered area only, otherwise you can damage the printheads.
- Page 230 Replace the lubricators 9. Locate the lubricators on the left side of the curing carriage. 10. Take a pin and place it in the hole of the upper lubricator (1). 11. Take a second pin and place it in the hole of the lower lubricator (2). Chapter 6 - Maintain the system...
- Page 231 Replace the lubricators 12. Unscrew the two screws (1-2) on the lubricators' bracket with a crosshead screwdriver. 13. Remove the bracket with the lubricators. 14. Take a new bracket with lubricators and place the two pins in the lubricators' holes. Chapter 6 - Maintain the system...
- Page 232 Replace the lubricators 15. Place the new bracket with the lubricators into position. The bracket should fit into the positioning hole. 16. Fasten the two screws, hand tight (1). 17. Take the pins out of the lubricators (2). Chapter 6 - Maintain the system...
- Page 233 Replace the lubricators 18. Locate the lubricators on the right side of the curing carriage. 19. Repeat steps 10 to 17. 20. When the lubricators on both sides have been replaced, remove the paper. 21. Dispose the gloves as chemical waste according to local regulations. 22.
-
Page 234: Replace The Rollers Of The Xtran Pinch
Video: Replace the rollers of the Xtran pinch The clamp and the roller with axis Before you begin Use Colorado 1650 prescribed: • Microflex gloves for handling ink • Xtran pinch rollers, axis and clamps • Small screwdriver • Piece of paper (A3) - Page 235 Replace the rollers of the Xtran pinch Procedure 1. Move to the media input side and open the top cover. 2. Put on the Colorado 1650 approved gloves. 3. Carefully push the printhead carriage to the left in manual maintenance position (1). IMPORTANT Touch the printhead carriage on the covered area only, otherwise you can damage the printheads.
- Page 236 Replace the rollers of the Xtran pinch 6. Remove the axis from the holder. 7. Remove the roller from the holder. 8. Take the new roller and place it into the holder. 9. Insert the new axis through the holder and the roller. 10.
-
Page 237: Vacuum The Chiller And Check The Fluid Level (First Design)
First design New design Before you begin Use Colorado 1650 prescribed: • Screwdriver (Torx-25) • Vacuum cleaner with a brush head Check the fluid level 1. To check the fluid level, on the operator panel tap on the [Tools] icon on the right. - Page 238 Vacuum the chiller and check the fluid level (first design) • The operator panel gives an orange warning when you can refill the chiller. • The operator panel gives a red warning when you must refill the chiller. Procedure 1. Go to the chiller side and locate the cover under the fan. 2.
- Page 239 Vacuum the chiller and check the fluid level (first design) 3. Lift the cover a little up and towards you (1), then lift it up fully and take it out (2). 4. Vacuum the condenser surface as indicated. Make sure you remove all the collected dust. Do not remove any parts of the chiller.
-
Page 240: Vacuum The Chiller And Check The Fluid Level (New Design)
First design New design Before you begin Use Colorado 1650 prescribed: • Screwdriver (Torx-25) • Vacuum cleaner with a brush head Check the fluid level To check the fluid level, locate the level gauge glass behind the right-hand side of the cover. - Page 241 Vacuum the chiller and check the fluid level (new design) Procedure 1. Go to the chiller side and locate the cover under the fan. 2. Unscrew the left and right screws on top of the cover with the Torx-25. Chapter 6 - Maintain the system...
- Page 242 Vacuum the chiller and check the fluid level (new design) 3. Lift the cover a little up and towards you (1), then lift it up fully and take it out (2). 4. Vacuum the condenser surface as indicated. Make sure you remove all the collected dust. Do not remove any parts of the chiller.
-
Page 243: Refill The Chiller (First Design)
• The operator panel gives an orange warning when you can refill the chiller. • The operator panel gives a red warning when you must refill the chiller. Before you begin Use Colorado 1650 prescribed: Chapter 6 - Maintain the system... - Page 244 Refill the chiller (first design) • Demineralized water • Pouring can • Screwdriver (Torx-25) NOTE List of Colorado 1650 For information on the prescribed maintenance materials, see maintenance materials on page 261. CAUTION Wear specified gloves when you refill the chiller to protect your skin.
- Page 245 Refill the chiller (first design) 6. Pull out the two power supply plugs from the sockets. 7. Go to the chiller side and locate the cover under the fan. 8. Unscrew the left and right screws on top of the cover with the Torx-25. Chapter 6 - Maintain the system...
- Page 246 Refill the chiller (first design) 9. Lift the cover a little up and towards you (1), then lift it up fully and take it out (2) 10. Locate the lid on top of the chiller. 11. Pull to remove the lid. 12.
- Page 247 Refill the chiller (first design) 13. Place the pouring can on the chiller and fill the tank with the liquid. 14. Close the lid, press it firmly. 15. Place the cover back into position. 16. Fasten the left and right screws on top of the cover. 17.
-
Page 248: Refill The Chiller (New Design)
Refill the chiller when the fluid level is near the bottom of the green zone on the level gauge Vacuum the chiller and check the fluid level (new design) on page glass. See 240. Before you begin Use Colorado 1650 prescribed: • Demineralized water • Pouring can • Screwdriver (Torx-25) NOTE... - Page 249 Refill the chiller (new design) 3. Tap on [Power off]. The system shuts down. 4. When the system has shut down, pull to open the cover under the roll winder. NOTE There are 2 types of the cover under the roll winder. In the new design you can access the power switch through an opening in the cover.
- Page 250 Refill the chiller (new design) 8. Unscrew the left and right screws on top of the cover with the Torx-25. 9. Lift the cover a little up and towards you (1), then lift it up fully and take it out (2) 10.
- Page 251 Refill the chiller (new design) 11. Twist to remove the lid. 12. Pour one liter of demineralized water from the bottle in the pouring can. IMPORTANT Use demineralized water, do not use any other liquid. 13. Place the pouring can on the chiller and fill the tank with the liquid. NOTE Check the level gauge glass to ensure that you do not refill beyond the top of the green zone.
- Page 252 Refill the chiller (new design) 14. Close the lid, twist it on tightly. 15. Place the cover back into position. 16. Fasten the left and right screws on top of the cover. 17. Plug the two power supply plugs back into the sockets. 18.
-
Page 253: Clean The Mirrors
Procedure 1. Make sure the printer is not printing. 2. Put on the Colorado 1650 approved gloves. 3. Open the top cover from the media input side. 4. Carefully push the printhead carriage to the left in manual maintenance position. - Page 254 Clean the mirrors 6. Unscrew the six green screws of both mirror boxes manually. Chapter 6 - Maintain the system...
- Page 255 Clean the mirrors 7. Dampen a lint free cloth with the demineralized water and clean all mirrors on the inside of the mirror boxes. Depending on the printer configuration there are 2 or 3 mirrors. IMPORTANT Use demineralized water, do not use any other liquid. 8.
- Page 256 Clean the mirrors 13. Locate the mirror funnel on the curing carriage. 14. Dampen a lint free cloth with the demineralized water and clean the glass plate in front of the mirror funnel. IMPORTANT Use demineralized water, do not use any other liquid. 15.
-
Page 257: Clean The Ink Unit
Procedure 1. Go to the side of the printer where the ink bottles are located. 2. Put on the Colorado 1650 approved gloves. 3. Move down the green handle which is located left of the bottle you want to replace. - Page 258 Clean the ink unit 4. Take the empty bottle out of the slot. 5. Dispose the bottle as chemical waste according to local regulations. If preferred and possible, you can repeat the steps to take out all bottles. 6. Take a lint free cloth and clean the indicated areas surrounding the slots until all residue ink is gone.
-
Page 259: Clean The Ruler
You can clean a ruler marked with a green dot. Do not clean a ruler that is not marked with a green dot. When to do If the operator panel shows error 5709, clean the ruler. Before you begin Use Colorado 1650 prescribed: • Microflex gloves for handling ink • Lint free cloths • Cleaning liquid IPA NOTE... - Page 260 Procedure 1. Open the top cover of the printer. 2. Put on the Colorado 1650 approved gloves. 3. Dampen a lint free cloth with the cleaner IPA and clean the left side of the ruler until you reach the printhead carriage. Make sure that the lint free cloth covers the front and back of the ruler.
-
Page 261: List Of Colorado 1650 Maintenance Materials
List of Colorado 1650 maintenance materials List of Colorado 1650 maintenance materials Items to order The items listed below can be requested from your local representative: Maintenance material Used for Prescribed Microflex Handling Colorado 1650 UVgel ink. gloves Lint free cloth Cleaning the printer when polluted with ink. - Page 262 List of Colorado 1650 maintenance materials Maintenance material Used for Cleaning liquid (IPA) Cleaning ink pollution on non-heated surfaces, such as the platen, maintenance tray, drawer, ink unit, M&C scanner, non-heated parts of the maintenance station, etc. IMPORTANT This cleaning liquid is not used for the matrix plate, wip- er and clean wall, heated parts of the maintenance sta- tion.
-
Page 263: Chapter 7 Improve Quality
Chapter 7 Improve quality... -
Page 264: General Workflow For Improving Quality
General workflow for improving quality General workflow for improving quality Introduction Follow the general workflow to solve quality problems and improve the output. The preconditions are that you: • Have performed maintenance regularly. Perform automatic and manual maintenance with incidents, and perform periodic maintenance Maintain the print once a month or when the printer requests it. - Page 265 General workflow for improving quality Calibrate the media on page 118 Calibrate the printhead carriage on page 271 Print a printhead quality check chart on page 266 Analyze the printhead quality check again, and chart on page 268 Result In case the problem remains, use the printhead quality check chart to identify the issue and try to Solve specific quality problems on solve that specific quality problem.
-
Page 266: Print A Printhead Quality Check Chart
Print a printhead quality check chart Print a printhead quality check chart Introduction Print a printhead quality check chart to check your quality and identify any quality issues. If a problem is visible on the chart, you can change the necessary settings to optimize the quality. Procedure 1. -
Page 267: Print A Demo Print
Print a demo print Print a demo print Introduction Print a demo print to see the quality of the output. Procedure 1. On the operator panel tap on the [Tools] icon on the right. 2. Tap on [Demo print]. 3. Select a roll to print the demo print on. 4. -
Page 268: Analyze The Printhead Quality Check Chart
Analyze the printhead quality check chart Analyze the printhead quality check chart Introduction When you have printed the printhead quality check chart, analyze the chart to help you solve your quality problem. Printhead quality check chart Each area can indicate a quality problem. Use the chart to identify your problem and solve it: Solve specific quality problems on page 340. -
Page 269: Calibrate The Printhead
Calibrate the printhead Calibrate the printhead Introduction When you are unsure about the density of colors on your printed output, you can optimize the printhead performance. Perform a printhead calibration when you want to optimize colors. When you enable [Automatic nozzle optimization] the printer will create a test print on which each individual nozzle will print a pattern. - Page 270 Calibrate the printhead NOTE The calibration can take quite some time, around 30 minutes. Wait until the printer is finished with the calibration. When the active job disappears and [Start] is no longer greyed out, the calibration is finished. After you finish The calibration can be successful or it can fail.
-
Page 271: Calibrate The Printhead Carriage
Calibrate the printhead carriage Calibrate the printhead carriage Introduction When your image is blurred or fuzzy the registration can be off. Calibrate the printhead carriage to align the registration. Before you begin First perform the following actions to try and solve your problem, before you calibrate the printhead carriage: 1. - Page 272 Calibrate the printhead carriage 4. Select the roll you want to use for calibration. 5. Tap on [Start]. The printer performs the calibration. NOTE The calibration can take quite some time, around 40 minutes. Wait until the printer is finished with the calibration. When the active job disappears and [Start] is no longer greyed out, the calibration is finished.
-
Page 273: Configure The Network And Security Settings
Chapter 8 Configure the network and security settings... -
Page 274: Configure The Network
Configure the network Configure the network Introduction At installation, the printer is connected to the network and connectivity settings are made. If necessary, you can change the network configuration settings on the user panel. Network overview Action Connection via The printer receives jobs from the RIP worksta- RAW TCP/IP (port 9100) tion The printer connects via the internet with the... - Page 275 Configure the network 4. Tap on [IPv4] to change the TCPIP v4 parameters. 5. Tap on [IPv6] to change the TCPIP v6 parameters. 6. Tap on Save to save the settings. It is recommended to restart the engine to make sure the settings are activated.
-
Page 276: Configure Remote Assistance
Configure remote assistance Configure remote assistance Introduction Enable and configure remote assistance to give the service organization access to your system. The service technician is then able to operate your system and provide assistance remotely. Remote assistance is by default disabled and is limited to 172 hours. Procedure 1. -
Page 277: Log In As A System Administrator
Log in as a System administrator Log in as a System administrator Introduction The System administrator settings are password protected. You have to log in as System administrator on the operator panel or in the settings editor to be able to change the system administrator settings. - Page 278 Log in as a System administrator 2. Click on a System administrator setting you want to change. 3. Select the System administrator as [user name] and fill in the [password]. 4. Click on [Log in]. Chapter 8 - Configure the network and security settings...
-
Page 279: Open The Settings Editor
Open the settings editor Open the settings editor Introduction Next to the settings on the operator panel, you can create settings for connectivity and security in the settings editor of the printer. NOTE You can make some connectivity and security settings on the operator panel, for more Configure the network on page information see 274. -
Page 280: Configure Time Synchronization
Configure time synchronization Configure time synchronization Introduction You can enable the time synchronization to connect the Colorado 1650 to a certified time server. Then, the printer is set automatically on the correct date and time. Before you begin Ask your IT administrator for the name of the NTP server the printer has to connect to for time synchronization. - Page 281 Configure time synchronization 4. Select [Enabled] and click on [OK]. 5. Click on the value next to [NTP server name]. A window opens. 6. Fill in a valid IP address or domain name and click on [OK]. If you do not know the server name, ask your IT administrator. 7.
-
Page 282: Change The System Administrator Password
Change the System administrator password Change the System administrator password Introduction For security reasons it is advised to change the System administrator password during installation or immediately after. Next to that, you should change the password periodically. Before you begin Log in as System administrator in the settings editor. -
Page 283: Configure A Mail Server For Password Recovery And Notifications
Configure a mail server for password recovery and notifications Configure a mail server for password recovery and notifications Introduction When you have forgotten your System administrator password you can recover it, but only when you have configured an email server first. The email address is also used to send a notification email when security updates and system updates are available. - Page 284 Configure a mail server for password recovery and notifications NOTE It is strongly advised to secure the communication between the controller and the mail server, in order to avoid anyone to intercept the password recovery email. 7. In case of a secure connection, fill in the username under [Username]. If you do not know the username, ask your IT administrator.
- Page 285 Configure a mail server for password recovery and notifications Result When you have received the test email, you have configured the email server correctly and you can recover your System administrator password when necessary. Chapter 8 - Configure the network and security settings...
-
Page 286: Troubleshoot The Mail Server Configuration
Troubleshoot the mail server configuration Troubleshoot the mail server configuration Introduction Follow the procedure below to troubleshoot any mail server configuration problems. When to do When in the settings editor, under [Configuration] →[Connectivity], you click on [Connection test] and the result is not [Ok]. Troubleshoot error messages Error Troubleshoot... -
Page 287: Recover The System Administrator Password
Recover the System administrator password Recover the System administrator password Introduction When you have forgotten your System administrator password you can recover it. You can only recover your System administrator password via the settings editor. Before you begin You have to configure an email server first, so an email with a special link for password recovery Configure a mail server for password recovery and can be sent to you. -
Page 288: Security In The System
Security in the system Security in the system Introduction The Colorado 1650 is equipped with a Windows 10 IoT Enterprise LTSC operating system with the following security features: • OS patches are released by Canon Production Printing via the ORS (On Remote Service) environment. -
Page 289: Certificates Overview
Certificates overview Certificates overview Introduction There are two kinds of certificates: • Trusted certificates • Identity certificates Trusted certificates Trusted certificates allow the controller to recognize Root and intermediate certificates that may be sent by : • The mail server, with secure communication via HTTPS, when configuring or using it for System administrator password recovery. -
Page 290: Import A Trusted Certificate
Import a trusted certificate Import a trusted certificate Introduction Your company can use trusted certificates to secure communication with a mail server or a proxy server. When this is the case, you must import the certificates in the settings editor to make sure the controller recognizes them. -
Page 291: Enable The Use Of Https
Enable the use of HTTPS Enable the use of HTTPS Introduction You can enable the use of HTTPS to establish a secure communication between a browser and the controller for the settings editor access. NOTE Make sure before you start the procedure you receive the required specific information about the settings and key exchange technologies from your IT department. - Page 292 You can find the protocol (HTTPS only/ HTTP or HTTPS) used for access to the settings editor under [Configuration] →[Security]. Note that WebDAV is not used for the Colorado 1650. Chapter 8 - Configure the network and security settings...
-
Page 293: Troubleshoot The Use Of Https
Troubleshoot the use of HTTPS Troubleshoot the use of HTTPS Introduction When enabling the use of HTTPS fails, it can be caused by a PKCS7 certificate which is not supported by the printer. When you want to solve this problem: 1. - Page 294 Troubleshoot the use of HTTPS 9. Click on [Details] →[Copy to file]→[OK]. A wizard opens. 10. Click on [Next]. 11. Select [Base-64 encoded X.509 (.CER)] and click on [Next]. 12. Click on [Finish] and check that the export is successful. Enable the use of HTTPS on page 13.
-
Page 295: Change The Https Security Settings
Change the HTTPS security settings Change the HTTPS security settings Introduction You can change the default HTTPS security settings to best fit your configuration. Illustration Procedure 1. Open the settings editor. 2. Click on [Configuration] →[Security]. 3. Click on [Edit] in the [HTTP/HTTPS] header. 4. -
Page 296: Configure Prismasync Remote Control
Configure PRISMAsync Remote Control Configure PRISMAsync Remote Control Introduction When you want to use the PRISMAsync Remote Control app to monitor the Colorado 1650 the System administrator has to configure the right settings first. Before you begin Make sure: • You have System administrator rights. - Page 297 Configure PRISMAsync Remote Control 9. Once the printer is added and the requested users are added, you can click on [Log out]. After you finish Test PRISMAsync Remote Control on Test if PRISMAsync Remote Control is working well: page 298. Chapter 8 - Configure the network and security settings...
-
Page 298: Test Prismasync Remote Control
Test PRISMAsync Remote Control Test PRISMAsync Remote Control Introduction When you have configured PRISMAsync Remote Control, you can test the connection between PRISMAsync Remote Control and the cloud services. Before you begin Make sure you have configured PRISMAsync Remote Control. For more information, see Configure PRISMAsync Remote Control on page 296. - Page 299 Test PRISMAsync Remote Control • Make sure the app PRISMAsync Remote Control is not open on the foreground (active in the background is no problem). • Make sure the account used for the PRISMAsync Remote Control app is a registered user. For Manage users for PRISMAsync Remote Control on page more information, see 300.
-
Page 300: Manage Users For Prismasync Remote Control
Manage users for PRISMAsync Remote Control Manage users for PRISMAsync Remote Control Introduction When you have configured PRISMAsync Remote Control you can manage the users via the cloud services administration website. Procedure 1. Open the settings editor. 2. Click on [Configuration] →[Connectivity]. 3. -
Page 301: Make A Backup
Make a backup Make a backup Introduction It is advised to make a backup with confidential data and export it to a file to save on another location than the controller. The confidential data consists of: the System administrator password, identity certificates (including private key), trusted certificates. Procedure 1. -
Page 302: Restore A Backup
Restore a backup Restore a backup Introduction When you have made a backup you can restore it. Before you begin You need to have a backup created before. It is highly recommended to have exported a backup. Make a backup on page For more information, see 301. -
Page 303: Enable System Installation From Usb
Enable system installation from USB Enable system installation from USB Introduction Installation from a USB key is used by the Service technician for system installation or reinstallation. For security reasons related to USB, it is possible to disable installation from USB. Procedure 1. - Page 304 Enable system installation from USB Chapter 8 - Configure the network and security settings...
-
Page 305: Troubleshooting And Support
Chapter 9 Troubleshooting and support... -
Page 306: Tips And Tricks
Tips and tricks Tips and tricks Introduction In order to use the Colorado 1650 in the best way possible it is advised to follow the below listed tips and tricks. Subject Follow step by step actions Always follow the instruction given on the operator panel step by explained step in the specified order. - Page 307 Tips and tricks Subject Tape leading edge straight In case of winding, the leading edge of the media must be aligned and taped straight on the take-up roll core for best winding and printing quality. Tape first the center and then the sides. Print with or without winding on For more information, see page...
-
Page 308: General Support
General support General support Change the regional settings Introduction You can change the language, system of measurement, date and time, or time zone under the regional settings on the operator panel. Procedure 1. On the operator panel, tap on the [System] icon on the right. 2. -
Page 309: Set The Energy Save Modes
Set the energy save modes Set the energy save modes Introduction You can enable the energy save modes, automatic wake-up mode and automatic shutdown mode, via the settings editor. Set timers for each day of the week to wake up or turn off (standby mode) the printer. -
Page 310: Download An Account Log File
Download an account log file Download an account log file Introduction For every job that is finished a record is added to the account log file. You can download the file via the settings editor to check the properties and counters of your job. On account log files •... - Page 311 Download an account log file Field Description jobid Unique job ID that is generated by the controller each time a new job is created. NOTE In case of controller reinstallation, software error, or power failure it cannot be guaranteed that the ID is unique. jobtype The value AP (Automatic Print Jobs) is used for all jobs from the RIP, so the value is always AP.
- Page 312 Download an account log file Field Description mediatype The name of the media type that is displayed on the operator panel. mediawidth <num> in 0.1 mm (0.004 inch). The width of the media on which the job is prin- ted. media <num>...
-
Page 313: Configure, Download, And Install Software Updates From On Remote Service
Configure, download, and install software updates from On Remote Service Configure, download, and install software updates from On Remote Service Introduction When you configured the download and installation of operating system updates from On Remote Service, the print server behaves as follows: •... - Page 314 Configure, download, and install software updates from On Remote Service 2. Go to [Available PRISMAsync and operating system updates from On Remote Service]. 3. Click [Configure]. 4. By default, the checkboxes to receive software updates are checked. You can uncheck a checkbox if you do not want to receive software updates from On Remote Service.
- Page 315 Configure, download, and install software updates from On Remote Service • You receive an email when an error occurs during downloading or installation of the software updates. Download the software update from ORS manually 1. Open the Settings Editor and go to: [Support]→[Software updates]. 2.
- Page 316 Configure, download, and install software updates from On Remote Service • [Operating system updates], if the software update is an operating system update. Chapter 9 - Troubleshooting and support...
-
Page 317: Configure, Upload And Install Operating System Updates From A File
This procedure applies only to operating system updates that are manually uploaded in the Settings Editor. Approach https://downloads.cpp.canon/ The operating system updates can be downloaded via: The operating system updates consist of multiple files. This is called an update package. All files must be installed. - Page 318 Configure, upload and install operating system updates from a file • [Immediately]: The printer installs the operating system updates once they are present on the system. The printer remains operational. To finalize the installation, you must restart the system. • [At specified time]: The printer installs the operating system updates at the time you specify.
- Page 319 Configure, upload and install operating system updates from a file 5. Click [Select a file] to navigate to the operating system updates that needs to be installed. 6. Click [OK] to upload the selected file to the printer. The duration of the upload and validation process depends on the size of the update. Do not restart your system during this process.
- Page 320 Configure, upload and install operating system updates from a file After you restart the system, the software update is removed from the list in [Available PRISMAsync and operating system updates from On Remote Service]. The installed software update can be seen in one of the following lists: •...
-
Page 321: Move The Printer
Move the printer Move the printer You should not move the printer. When you want to move the printer, contact your local service representative. Chapter 9 - Troubleshooting and support... -
Page 322: Turn The Printer On And Off
Turn the printer on and off Turn the printer on and off Introduction The printing system is powered on by the service technician at installation. You can turn the printer on or off via the button on the media output side. Procedure 1. -
Page 323: General Troubleshooting
General troubleshooting General troubleshooting Stop the printer Introduction In case of problems or a dangerous situation you can stop the printer immediately. IMPORTANT Opening the top cover during operations, can result in uncured ink. Only perform this action when absolutely necessary. Procedure 1. -
Page 324: Restart The Printer
Restart the printer Restart the printer Introduction You can restart the printer via the operator panel. You might be asked to restart the system to activate settings, or in case of a software issue it might help to restart the system. Procedure 1. -
Page 325: Remove All Jobs
Remove all jobs Remove all jobs Introduction You can delete all jobs from the queue via the settings editor. When to do When you cannot delete a job in the queue or you want to clear all jobs at once in the system, follow the procedure below. -
Page 326: Download Data Log Files
Download data log files Download data log files Introduction When your local Service representative requests it, you can download the data log files of your printer via the settings editor. Procedure 1. Open the settings editor. 2. Click on [Support]→[Troubleshooting]. 3. - Page 327 Download data log files 5. The new file is added at the top of the list of files. 6. Click on the file to download. 7. Send the set of files to your local Service representative. Chapter 9 - Troubleshooting and support...
-
Page 328: Download The Last Received Job File
Download the last received job file Download the last received job file Introduction When you have problems with a print job and your local Service representative requests it, you can download the print file of this job via the settings editor. Procedure 1. - Page 329 Download the last received job file 10. Send the file to your local Service representative. Chapter 9 - Troubleshooting and support...
-
Page 330: Enable Extended Printhead Logging
Enable extended printhead logging Enable extended printhead logging Introduction When your local Service representative requests it, you can enable extended printhead logging. When you enable this setting, the server stores additional information about the printheads. This setting will automatically be disabled after 30 days. Procedure 1. -
Page 331: Turn The Printer On After A Power Cut
Turn the printer on after a power cut Turn the printer on after a power cut Introduction When power has been cut to the machine, you have to power the machine on. The machine has to be on to keep the printer in optimal condition. NOTE There are 2 types of the cover under the roll winder. -
Page 332: Remove Media From The Paper Path
In case of a media jam or a carriage crash you can remove the media from the paper path. Before you begin • Wear the Colorado 1650 prescribed Microflex gloves for handling ink. • Use a knife that is sharp enough to cut the media. - Page 333 Remove media from the paper path 2. Go to the media input side and open the media cover. 3. Take the knife and cut the media in the cutting guide. 4. Close the media cover. 5. Pull firmly to open the media drawer. Chapter 9 - Troubleshooting and support...
- Page 334 If present, do this for both media rolls. 7. Close the media drawer. 8. Put on the Colorado 1650 approved gloves. 9. Open the top cover. 10. Carefully push the curing carriage to the left over the filters (1).
- Page 335 Remove media from the paper path 13. Fold the media towards you, from output side to input side, until the transport pinch. 14. Hold the folded media and pull the media from the transport pinch. 15. Dispose the media as chemical waste according to the local regulations. Clean the platen on 16.
-
Page 336: Replace A Drive Gear On A Media Shaft
Replace a drive gear on a media shaft Replace a drive gear on a media shaft Introduction You can replace a drive gear on a media shaft without service assistance. Replace a drive gear on a media shaft Video: For inside winding, you need the new take-up media shaft. The gear inside the new take-up media shaft is marked with the number 2. - Page 337 Replace a drive gear on a media shaft Before you begin Use Colorado 1650 prescribed: • Screwdriver (Torx-20) • Drive gear NOTE List of Colorado 1650 For information on the prescribed maintenance materials, see maintenance materials on page 261. CAUTION •...
- Page 338 Replace a drive gear on a media shaft 8. Take a new drive gear and insert the four hex nuts in the slots. 9. Place the new drive gear into position on the media shaft (1). Make sure you align the drive gear with the markers inside the shaft.
-
Page 339: Cancel The Replacement Of A Maintenance Tray
Cancel the replacement of a maintenance tray Cancel the replacement of a maintenance tray Introduction When you open the maintenance drawer the operator panel displays a message that you have to replace the maintenance tray. When you did this by accident, and you do not have to replace the maintenance tray you can cancel the replacement. -
Page 340: Solve Specific Quality Problems
Solve specific quality problems Solve specific quality problems Before you try to solve specific quality problems, make sure you have already checked and tried the general workflow for maintaining and improving quality. General workflow for improving quality on page For more information, see 264. - Page 341 Zebra banding 4. Select a slower print mode. Select a print mode on page After you finish When the problem is not solved, contact your application specialist or local Service representative. Chapter 9 - Troubleshooting and support...
-
Page 342: Gradient Banding
Gradient banding Gradient banding Introduction Problem description Cause Action Gradient/variation Try a print strategy of within the swath? type "b". Try a slower print mode. For the glossy high Robust 1 can also be quality mode better than default. Only for glossy & high See wrinkle in topic Wrinkles on page coverage areas? -
Page 343: Lines At Swath Boundary
Lines at swath boundary Lines at swath boundary Introduction Swath boundary. Two adjoining swaths/passes of the printhead must be positioned without overlap (dark lines), or gap (white lines ). Problem description Cause Action OD lines occur at the Usually worse during Perform a media cali- swath boundary. - Page 344 Lines at swath boundary Lines at swath boundary Procedure 1. Clean the platen and buffer plate, see Clean the platen on page 197 Clean the buffer plate on page 200. Chapter 9 - Troubleshooting and support...
- Page 345 Lines at swath boundary 2. Check if the media quality is ok. If not, try a different media. Check if the [Media thickness] setting in the RIP is correct. Calibrate the media on page 3. Perform a media calibration. 118. A media calibration will minimize the darker or lighter lines in 1st meter (40") of the print caused by the media step.
-
Page 346: Lines Within Swaths
Lines within swaths Lines within swaths Introduction Problem description Cause Action Sharp OD/gloss lines A single light line Detected too late for Cannot be solved (a for a single mono-col- (doesn’t repeat in next compensation in that slower print mode will or and its correspond- swath)? swath. - Page 347 Lines within swaths 3. Check if the [Media thickness] setting in the RIP is correct. Change the media settings on page 65 4. Select a higher quality print mode. Select a print mode on page After you finish When the problem is not solved, contact your application specialist or local Service representative.
-
Page 348: Wrinkles
Wrinkles Wrinkles Introduction Gradient banding within swath for glossy print modes. Only for high coverage mixed colors. Solve wrinkles on your print. Wrinkles show as rough repeating patterns especially in black. Follow the procedure below. You can stop at any time in the procedure when the problem is solved. -
Page 349: Vertical Banding
Vertical banding Vertical banding Introduction Problem description Cause Action Sharp lines or bands. Matching the roller Some media are very Try different medium positions. sensitive to mechani- cal deformation. More gradual varia- Selected print mode is Select a slower print Select a tion, some periodicity to fast. -
Page 350: Micro-Uniformity/Graininess
Micro-uniformity/graininess Micro-uniformity/graininess Introduction Solve micro-uniformity, for example graininess, mottle and small repeating structures on your print. Visibility non-uniform distributed ink drops on your print. The reason for this can be incorrect alignment or coalescence. Follow the procedure below. You can stop at any time in the procedure when the problem is solved. - Page 351 Micro-uniformity/graininess 5. When you see coalescence in the print, decrease the [Printer platen temperature]. Change the media settings on page With coalescence results in graininess Without coalescence no graininess visible 6. Select a different print strategy or a higher quality print mode. Change the media settings on Select a print mode on page page 65...
-
Page 352: Media Touches
Media touches Media touches Introduction Prevent media touches from happening. When the media touches the printhead or printhead carriage, the print gets pollutes or smudged. Follow the procedure below. You can stop at any time in the procedure when the problem is solved. Media touches Procedure 1. -
Page 353: Misalignment Between Gloss And Matte In Flxfinish+ Mode
Misalignment between gloss and matte in FLXfinish+ mode Misalignment between gloss and matte in FLXfinish mode Introduction The misalignment is visible as white lines between the gloss and matte parts of the print. Problem description Cause Action Misalignment be- More likely to be visi- Media step not accu- Perform a media cali- tween gloss and matte... -
Page 354: Solve Specific Media Transport Problems
Solve specific media transport problems Solve specific media transport problems Next to specific quality problems resulting in artefacts, you can also see media touches or a lower print quality caused by media transport problems. Problems in media transport can usually be observed through the top cover when you watch the media being transported over the platen. -
Page 355: Wrinkling Media
Wrinkling media Wrinkling media Introduction Solve media touches or print quality artefacts caused by the wrinkling of media in the transport direction. When you are using a weaker media such as textile or canvas which is not fed in the printer correctly or you are using a media type that is humid-sensitive, the media can start to wrinkle on the platen in the transport direction. -
Page 356: Waves In Media
Waves in media Waves in media Introduction Solve media touches or print quality artefacts caused by waves in the media. When media is weak and or of a relatively narrow media width (<1000mm) the vacuum suction can be too low and the media will start to move over the platen in a wave motion. -
Page 357: Curling Media
Curling media Curling media Introduction Solve media touches or print quality artefacts caused by the curling of media. When you are using a stiff media at the leading edge of the roll, the media can get a leading edge curl. When you are using a multi-layer based media with high ink coverage at the side edge or a media stored in high humidity, the media can get a side-edge curl. - Page 358 Curling media 3. Set the [Carriage elevation] setting in the RIP to [Highest]. Change the media settings on page 4. Use a different media type. Chapter 9 - Troubleshooting and support...
-
Page 359: Drifting Media
Drifting media Drifting media Introduction Solve printing over the side edges of the media caused by the drifting of media. When media is not rolled up evenly on the core or the media is not fed in the printer correctly, the media will drift on the platen. -
Page 360: Slipping Media During Calibration
Slipping media during calibration Slipping media during calibration Introduction When you are calibrating a smoother or weaker media, the media can start to slip on the platen resulting in an inaccurate calibration. Misalignment observed on the calibration prints can indicate the problem. Follow the procedure below to improve media transportation during the calibration process. -
Page 361: Clean Pollution On The Printer
Various parts in the printer can get polluted. Check all these parts when the system has been polluted by uncured ink. Cleaning materials When you have to clean uncured ink, use the Colorado 1650 prescribed maintenance materials. Order the materials via your local representative: • Microflex gloves for handling ink •... -
Page 362: Clean The Media Cover
Follow the Safety Data Sheets (SDS) guidelines carefully in order to ensure maximum safety. Procedure 1. Put on the Colorado 1650 approved gloves. 2. Go to the media input side and open the media cover. Chapter 9 - Troubleshooting and support... - Page 363 Clean the media cover 3. Inspect if the media cover is polluted on the inside. 4. Take a lint free cloth and clean the media cover. 5. Dampen the cloth with the cleaning liquid to remove any remaining ink. IMPORTANT Use the prescribed cleaning liquid.
-
Page 364: Clean The Guide Plate And Replace The Foams And Roller Assy
1. Make sure the printer is not printing and the guide plate is in open position. 2. Remove the media before you replace the foams and roller assy. For more information, see Remove media from the paper path on page 332 3. Put on the Colorado 1650 approved gloves. Chapter 9 - Troubleshooting and support... - Page 365 Clean the guide plate and replace the foams and roller assy 4. Go to the media output side and locate the guide plate with the roller assy and foams. 5. Locate the roller assy under the guide plate. 6. Pull to take out the roller. 7.
- Page 366 Clean the guide plate and replace the foams and roller assy IMPORTANT Use the prescribed cleaning liquid. Do not use any other cleaners. 14. Dispose the gloves and cloth as chemical waste according to local regulations. 15. Take the new foams and slide them in place. 16.
-
Page 367: Error Codes Overview
• Check the fan settings. • Use uncurled or undamaged media. • Use the correct winding mode. • Use recommended media and pro- files from Canon media guide web- site. • Make sure media is not damaged or curled. • Make sure the media can be transpor- ted well. - Page 368 Error codes overview Error code Message Action 6539 Temperature deviation • Check the air inlet and outlet for ob- error structions. Vacuum the • Vacuum the chiller, see 6540 Temperature at set chiller and check the fluid level (first point timeout design) on page 237 Vacuum the 6548...
-
Page 369: Chapter 10 Regulation Notices
Chapter 10 Regulation Notices... - Page 370 • CAN ICES-3 (A)/NMB-3(A) Conformity declaration for Radio Equipment Directive; RED (EEA including Switzerland) • Hereby Canon Production Printing declares that the printer is in compliance with the essential requirements and other relevant provisions of Directive 2014/53/EU (RED). The product is CE- marked to show conformance with applicable legal requirements.
- Page 371 Conformity declaration for Radio devices (USA and Canada) • This equipment contains a certified modular transmitter. The modular transmitter is located in the ink supply unit and can only be accessed by a service technician. • The transmitter’s FCC ID is 2AGNM, the IC ID is 22117. Conformity declaration for Federal Telecommunications Law (Mexico) This end device contains an RFID module which is already approved by IFETEL (RCPOCOC16-1941) for Federal Telecommunications Law.
- Page 372 VCCI (Japan) • Class A ITE (CISPR22) Class A ITE (CISPR22) Translation: This is a Class A product based on the standard of the VCCI Council. If this equipment is used in a domestic environment, radio interference may occur, in which case the user may be required to take corrective actions.
- Page 373 • This product contains a battery. Please do not remove the battery. If the battery needs replacement, this should be done only by skilled service technicians who are aware of the removal instructions provided by Canon Production Printing. • This product contains a battery or batteries. It (They) is (are) located in (a) printed circuit board(s) that is (are) essential for the continuous error-free functioning of the product.
- Page 374 • Caution: Canon Production Printing does not accept any liability for any damage or consequences, if the batteries are removed by persons other than Canon Production Printing service personnel. Battery labeling (Taiwan) Translation: Waste batteries, please recycle. Battery labeling (United Kingdom; England, Scotland and Wales) •...
- Page 375 WEEE scheme or your household waste disposal service. For http:// more information regarding return and recycling of WEEE products, please visit: www.canon-europe.com/sustainability . Reference: Directive 2012/19/EU. End of Life; WEEE (United Kingdom) This symbol indicates that this product is not to be disposed of with your household waste, according to the UK Waste Electrical and Electronic Equipment Regulations.
- Page 376 WEEE products, please visit or write to us at cipl.ewaste@canon.co.in. Also, this product complies with the "E-Waste (Management) Rules, 2016" and prohibits use of lead, mercury, hexavalent chromium, polybrominated biphenyls or polybrominated diphenyl ethers in concentrations exceeding 0.1 % by weight and 0.01 % by weight for Cadmium, except for the exemptions set in Schedule II of the Rule.
- Page 377 150 dB for the noise of a jet engine at close range. Recycled paper (All countries) The use of recycled paper also benefits the environment. The Colorado 1650 is designed to use recycled paper, including chlorine free paper, which complies with the requirements of EN12281:2002.
- Page 378 Glanzgrad bei Peripheriegeräten (Germany) Das Gerät ist nicht für die Benutzung im unmittelbaren Gesichtsfeld am Bildschirmarbeitsplatz vorgesehen. Um störende Reflexionen am Bildschirmarbeitsplatz zu vermeiden darf dieses Produkt nicht im unmittelbaren Gesichtsfeld platziert werden. Translation: The equipment is not intended for use within the direct visual field of a workplace equipped with a monitor screen.
-
Page 379: Index
Index Index Clean uncured ink..........361 Guide plate............. 364 2-sided..............147 M&C Scanner..........194 Media cover..........200, 362 Mirrors............253 Platen.............. 197 About this guide............. 10 Cleaning liquid (Cleaner MB - methyl Account log file.............310 benzoate)...............261 Actions on a job............168 Cleaning liquid (IPA)..........262 App PRISMAsync Remote Control......171 Clear the queue.............325 Auto media advance.......... - Page 380 Index Log in..............277 Logging..............310 Emergency stop............323 Loose winding............124 Enable extended printhead logging....330 Lubricators............ 228, 261 Errror codes............367 Extended printhead logging........ 330 Mail server............283 Maintain the print quality......174, 184 Feed media manually...........138 Maintenance............264 Filters............. 225, 261 Maintenance guidelines........174 FLXfinish+............
- Page 381 Index Lines at swath boundary....... 343 Lines within swaths........346 Off................322 Media touches..........352 On................322 Micro-uniformity..........350 ONYX.............40, 43, 44, 49 Misalignment gloss/ matte......353 Optimized color profiling........72 Vertical banding..........349 Optionals Waves in media..........356 Jumbo roll............33 Wrinkles............
- Page 382 Index Standby mode............322 Winding options........... 123 Status on the operator panel.......169 Winding tension............. 67 Step correction............72 Winding with locked tension bar......132 Stop job..............168 Winding with tension bar........127 Stop the printer.............323 Winding without tension bar.......124 Submit a job............165 Wiper.............
- Page 384 Canon Canada Inc. canon.ca Canon Europe Ltd canon-europe.com Canon Latin America Inc. cla.canon.com Canon Australia Pty. Ltd. canon.com.au Canon China Co., Ltd. canon.com.cn Canon Singapore Pte. Ltd. sg.canon Canon Hongkong Co., Ltd. hk.canon © 2020 - 2022 Canon Production Printing...
Need help?
Do you have a question about the Colorado 1650 and is the answer not in the manual?
Questions and answers