Table of Contents
Advertisement
Quick Links
Advertisement
Table of Contents

Related Manuals for Juniper PTX10004


Summary of Contents for Juniper PTX10004
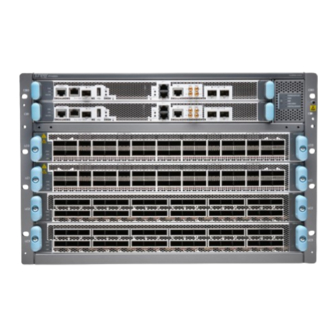
- Page 1 PTX10004 Published RELEASE 2023-09-12...
-
Page 2: Table Of Contents
What’s in the Crate? | 2 What Else Do I Need? | 2 Assemble the Rack Mount Kit | 2 Mount the PTX10004 on a the Rack and Ground the Chassis | 3 Power On | 5 Step 2: Up and Running... -
Page 3: Step 1: Begin
In this guide, we provide a simple, three-step path, to quickly get you up and running with your new AC- powered router. We've simplified and shortened the installation and configuration steps, and included how-to videos. You'll learn how to install the PTX10004 in a rack, power it up, and configure basic settings. -
Page 4: What's In The Crate
What Else Do I Need? • A mechanical lift rated for 250 lb (113.4 kg). You can mount a PTX10004 manually or by using a mechanical lift. Because of the router's size and weight, we strongly recommend that you use a mechanical lift to mount the PTX10004. -
Page 5: Mount The Ptx10004 On A The Rack And Ground The Chassis
4. Attach the tray to the mounting blades in the rack using the 12 flat-head screws. Mount the PTX10004 on a the Rack and Ground the Chassis Wrap and fasten one end of the electrostatic discharge (ESD) grounding strap around your bare wrist, and connect the other end to a site ESD point. - Page 6 Move the lift away from the rack. Check the alignment of the router. The rack mount screws on each side of the rack should line up, and the router should be level. Tighten the screws. Insert the safety restraint between the rear posts of the rack. It should rest on the top of the chassis and align with the holes in the rack.
-
Page 7: Power On
Power On Now that you’ve installed your PTX10004 in the rack and grounded the chassis, you’re ready to connect it to power. The PTX10004 supports AC, DC, high-voltage alternating current (HVAC), and high-voltage direct current (HVDC). In this guide, we show you how to connect AC power. See the... -
Page 8: Step 2: Up And Running
Configure Optional Routes, Services, and Commit the Configuration | 9 Now that the PTX10004 is powered on, let’s do some initial configuration to get the router up and running on the network. It’s simple to provision and manage the PTX10004 on your network. -
Page 9: Connect To The Router
The PTX10004 supports zero-touch provisioning (ZTP) which autoinstalls a software image and device- specific configuration file when you connect the PTX10004 and other devices on your network. To use ZTP, you’ll need to configure settings on a DHCP server. For more information, see... -
Page 10: Set A Root Password And An Optional Hostname
4. Log in as root. There is no password. If the software boots before you connect to the console port, you might need to press the Enter key for the prompt to appear. Amnesiac <ttyd0> login: root 5. Start the CLI. root@% cli Set a Root Password and an Optional Hostname 1. -
Page 11: Configure The Default Gateway And Ethernet Interface
0 family inet address CAUTION: Although the CLI lets you configure two management Ethernet interfaces within the same subnet, the PTX10004 supports only one interface. NOTE: The management ports—em0 or re0:mgmt-0 (MGMT for RJ-45 connections) and em1 (also labeled MGMT for fiber connections)—are on the front of the RCB. -
Page 12: Step 3: Keep Going
[edit] root@# commit Step 3: Keep Going IN THIS SECTION What’s Next? | 11 General Information | 11 Learn With Videos | 12 Congratulations! Your PTX10004 is configured and ready to go. Here are some things you can do next:... -
Page 13: What's Next
Activate Junos OS Licenses in the Juniper unlock additional features for your PTX Series router Licensing Guide See all documentation available for the PTX10004 Visit the PTX10004 Documentation for Junos OS Evolved page in the Juniper TechLibrary Find more in-depth information about how to install and... -
Page 14: Learn With Videos
Networks, Inc. in the United States and other countries. All other trademarks, service marks, registered marks, or registered service marks are the property of their respective owners. Juniper Networks assumes no responsibility for any inaccuracies in this document. Juniper Networks reserves the right to change, modify, transfer, or otherwise revise this publication without notice.
Need help?
Do you have a question about the PTX10004 and is the answer not in the manual?
Questions and answers