
Related Manuals for Toro 21611


Summary of Contents for Toro 21611
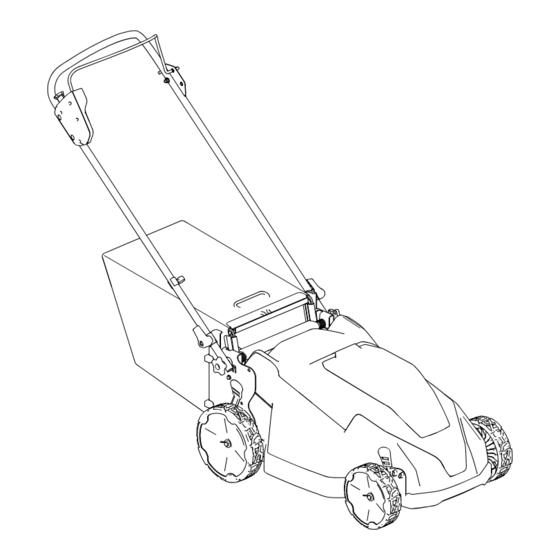
- Page 1 Form No. 3456-248 Rev A 21in 60V Lawn Mower Model No. 21611—Serial No. 400000000 and Up Model No. 21611T—Serial No. 400000000 and Up *3456-248* Register at www.Toro.com. Original Instructions (EN)
-
Page 2: Safety-Alert Symbol
It is designed to use Toro 60V lithium-ion battery packs. These battery g000502 Figure 2 packs are designed to be charged only by Toro 60V Safety-alert symbol lithium-ion battery chargers. Using these products for purposes other than their intended use could prove dangerous to you and bystanders. -
Page 3: Table Of Contents
Replace any damaged or unreadable labels. Use only the battery pack specified by Toro. Using other accessories and attachments may increase the risk of injury and fire. Plugging the battery charger into an outlet that is... - Page 4 Charge the battery pack with only the battery the influence of alcohol or drugs. charger specified by Toro. A charger suitable for Do not use a battery-operated lawn mower in 1 type of battery pack may create a risk of fire rain.
- Page 5 Replace the battery pack with a genuine Sharpen a dull blade on both edges to maintain Toro battery pack only; using another type of balance. Clean the blade and ensure that it is battery pack may cause a fire or risk of injury.
-
Page 6: Safety And Instructional Decals
Safety and Instructional Decals Safety decals and instructions are easily visible to the operator and are located near any area of potential danger. Replace any decal that is damaged or missing. Model 88610 decal140-2395 140-2395 1. Warning—read the 4. Thrown object decal144-3098 Operator’s Manual. - Page 7 decal137-9461 137-9461 1. Battery charge status decal144-3094 144-3094 1. The battery pack is 3. The battery pack is over charging. or under the appropriate temperature range. 2. The battery pack is fully 4. Battery pack charging fault charged. decal144-3096 144-3096 decal144-3175 144-3175 1.
-
Page 8: Setup
Setup Important: The battery pack is not fully charged when it is purchased. Before using the machine for the first time, refer to Charging the Battery Pack (page 16). Assembling the Grass Bag No Parts Required Procedure g409809 Figure 3 Unfolding the Handle No Parts Required Procedure... - Page 9 g415126 Figure 4 Using the holes at the ends of the handle, attach the handle to the machine (B of Figure Move the handle rearward to the operating position (C of Figure Ensure that the cables are routed in front of the handle (D of Figure Engage the handle locks until the pin clicks in place to lock the handle into the operating position (E of Figure...
-
Page 10: Product Overview
Contact your Authorized Service Dealer or authorized Toro distributor or go to www.Toro.com for a list of all approved attachments and accessories. g413066 Figure 6... -
Page 11: Before Operation
Operation Note: Determine the left and right sides of the machine from the normal operating position. Before Operation Installing the Battery Pack Important: Use the battery pack only in temperatures that are within the appropriate range; refer Specifications (page 10). Make sure that the vents on the battery are clear of any dust and debris. -
Page 12: Adjusting The Cutting Height
Adjusting the Cutting Height DANGER Adjusting the height-of-cut could bring your hands into contact with a moving blade and result in serious injury. • Shut off the motor, remove the battery, and wait for all moving parts to stop before adjusting the cutting height. -
Page 13: During Operation
During Operation Starting the Machine Ensure that the battery pack is charged and installed in the machine; refer to Installing the Battery Pack (page 11). Squeeze the blade-control bar and hold it to the handle (A of Figure Press the electric-start button and keep it pressed until the motor starts (B of Figure g409982 Figure 9... -
Page 14: Recycling The Clippings
Recycling the Clippings Your machine comes from the factory ready to recycle the grass and leaf clippings back into the lawn. If the grass bag is on the machine, remove it before recycling the clippings. Refer to Removing the Grass Bag (page 14). -
Page 15: Shutting Off The Machine
Release the blade-control bar (A of Figure 12). damage. • For best performance, install a new Toro blade before the cutting season begins or when necessary. Cutting Grass • Cut only about a third of the grass blade at a time. -
Page 16: After Operation
After Operation Green Battery pack is charged Battery pack and/or battery charger is over or under the appropriate temperature range Charging the Battery Pack Battery pack charging fault* blinking Important: The battery pack is not fully charged when you purchase it. Before using the tool for *Refer to Troubleshooting (page 20) for more... -
Page 17: Folding The Handle
Folding the Handle WARNING Folding or unfolding the handle improperly can damage the cables, causing an unsafe WARNING operating condition. Folding or unfolding the handle improperly can damage the cables, causing an unsafe • Do not damage the cables when folding or operating condition. -
Page 18: Maintenance
Maintenance Remove the electric-start button and battery pack from the machine before maintaining or cleaning the machine. Always shut off the machine, wait for all moving parts to stop, and allow the machine to cool before adjusting, servicing, cleaning, or storing it. Use only the manufacturer’s recommended replacement parts and accessories. -
Page 19: Preparing The Battery Pack For Recycling
If you are located outside of the US and Canada, please contact your authorized • Do not store the machine or charger with the Toro distributor. battery pack installed. • Clean all foreign material from the product. •... -
Page 20: Troubleshooting
Troubleshooting Perform only the steps described in these instructions. All further inspection, maintenance, and repair work must be performed by an authorized service center or a similarly qualified specialist if you cannot solve the problem yourself. Problem Possible Cause Corrective Action The machine does not start. - Page 21 Problem Possible Cause Corrective Action The LED indicator light on the battery 1. There is an error in the communication 1. Remove the battery pack from the charger is blinking red. between the battery pack and the battery charger, unplug the battery charger.
- Page 22 Notes:...
- Page 23 California Proposition 65 Warning Information What is this warning? You may see a product for sale that has a warning label like the following: WARNING: Cancer and Reproductive Harm—www.p65Warnings.ca.gov. What is Prop 65? Prop 65 applies to any company operating in California, selling products in California, or manufacturing products that may be sold in or brought into California.