
Related Manuals for designer's image 211-4525


Summary of Contents for designer's image 211-4525
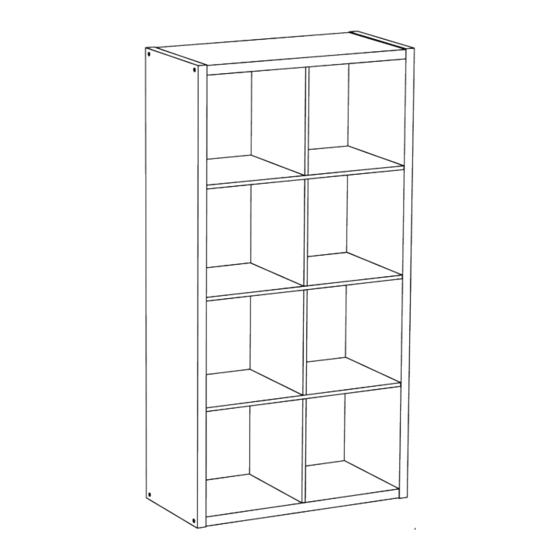
- Page 1 8-Cube Organizer Assembly Instructions Reference # Finish 211-4525 3657 White 211-4524 3658 Java 211-4523 3659 Cottage 211-4624 14589 Charcoal Tools Needed: Tools Provided: screwdriver drill cup of water hex key Optional Assembly 01-13953-00 11/20...
-
Page 2: Safety Precautions
SAFETY PRECAUTIONS WARNING • This unit contains small parts which could be a choking hazard for small children. Children should be STOP under adult supervision at all times or serious injury could occur. • Always unload unit prior to moving the unit. The weight of personal belongings can cause the unit to become unstable and either tip or collapse. -
Page 3: Description Quantity
HARDWARE DESCRIPTION QUANTITY (H1) x 22 (H2) x 8 side panel top/bottom panel pre-glued dowel hex screw divider fixed shelf adhesive screw-covers (H3) x 2 (H4) x 2 (H5) x 2 L-bracket screw wall screw L-bracket #10 x 1/2 in. #10 x 1-1/2 in. - Page 4 STEP 1 (H1) (H1) (H1) (H1) (H1) (H1) (H1) (H1) (H1) (H1) (H1) (H1) (H1) (H1) (H1) (H1) (H1) (H1) (H1) (H1) (H1) (H1) x 22 (H1) pre-glued dowel (H1) 1. Arrange fixed shelves (D) and dividers (C) as shown. 2.
- Page 5 STEP 2 1. Align dowels on dividers (C) with center holes on fixed shelves (D) as shown. 2. Push dividers into place. Dowels in divider (C) should interlock with divider (C) on other side of fixed shelf (D). 3. Align dowels on dividers (C) with center holes on both top/bottom panels (B). 4.
- Page 6 STEP 3 (H2) (H2) (H2) (H2) (H2) (H2) (H2) x 8 hex screw (H2) (H2) 1. Align center holes in each side panel (A) with dowels in fixed shelves (D). 2. Secure side panels (A) to both top/bottom panels (B) using four hex screws (H2) for each panel. Tighten screws using supplied hex wrench. 3.
- Page 7 STEP 4 WARNING (H4) x 2 (H3) x 2 (H5) x 2 wall screw All units MUST be fastened to the wall. L-bracket screw L-bracket #10 x 1/2 in. #10 x 1-1/2 in. Secure to wall using 1-1/2 in. screw (H4) inserted through small hole of L-bracket (H5) into wall stud.
Need help?
Do you have a question about the 211-4525 and is the answer not in the manual?
Questions and answers