
Related Manuals for Sharp 32JF-77H


Summary of Contents for Sharp 32JF-77H
-
Page 1: Operation Manual
32JF-77H COLOUR TELEVISION OPERATION MANUAL Please read this operation manual carefully before using the colour television. PRINTED ON ENVIRONMENTALLY FRIENDLY PAPER... -
Page 2: Terms Of Guarantee
Subject to the conditions listed below Sharp Electronics (U.K.) Ltd. (Hereinafter called «the Com- pany») guarantee to provide for the repair of, or at its option replace the Sharp Equipment, or any component thereof, (other than Batteries), which is faulty or below standard, as a result of inferior workmanship or materials. -
Page 3: Safety Precaution
The tube of your TV has a special coating. Do not knock or rub on the tube face with sharp or hard surfaces, otherwise you will damage the coating. To prevent damaging the surface of the television screen, remove finger prints only with a soft cloth dampened with glass cleaner. -
Page 4: Table Of Contents
Remote control Type-AA dry batteries Remote Control Battery Installation Before using the TV set for the first time, install the supplied dry batteries in the remote control. With your thumb nail, pull up the slit as indicated by the arrow to remove the battery cover. -
Page 5: Remote Control Buttons
Remote Control 1. Stand-by button (TV) Video 2. Power button (VCR) 3. 0 ~ 9 digit buttons 4. Flash back button Teletext 5. GREEN button 6. RED button 7. Volume DOWN button 8. MENU button Teletext 9. REVEAL button 10. LIST button 11. -
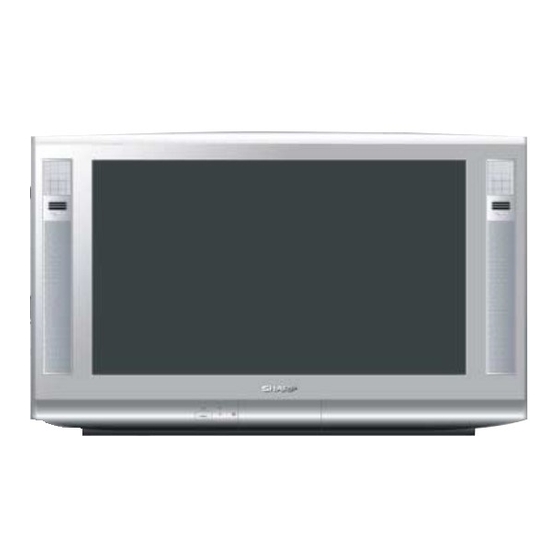
Page 6: Controls And Terminals
Controls and Terminals FRONT TV Main Power On/Off Switch Power Indicator Remote Control Sensor Door HOW TO OPEN THE DOOR Lift the projection at the lower right of the door with your finger in the direction of the arrow. Behind the door... -
Page 7: Aerial Connections (Typical Connections)
BACK OF TV AV/TERMINAL (AV-1) Scart Lead (Not supplied) BACK OF VCR Audio/Video Note: For further details, please refer to operation manual of your VCR. Aerial connection - TV set only - Aerial (Not supplied) DIGITAL AUDIO INPUT DIGITAL AUDIO INPUT... - Page 8 Typical Connections (Continued) Connections - TV, DVD Player, DECODER and VCR (Videorecorder) - BACK OF TV AV/TERMINAL (AV 2) Euro SCART AV/TERMINAL (RGB) (AV 1) Scart Lead (Not supplied) BACK OF VCR Audio/Video Note: For further details, please refer to operation manuals of your DVD Player, DECODER and VCR.
- Page 9 Typical Connections (Continued) Connections - TV, DVD Player, and Digital Set Top Box- BACK OF TV AV/TERMINAL (AV 2) Euro SCART (RGB) Aerial Lead (Not supplied) TV SCART RF OUT Note: For further details, please refer to operation manuals of your DVD Player and Digital Set Top Box.
- Page 10 Typical Connections (Continued) Connections - TV, DVD Player, VCR and Digital Set Top Box - BACK OF TV AV/TERMINAL (AV-2) Euro SCART AV/TERMINAL (RGB) (AV 1) Scart Lead (Not supplied) BACK OF VCR Audio/Video Aerial Lead (Not supplied) TV SCART...
- Page 11 WIEW CAM Audio Input Terminal (right) Note: For further details, please refer to operation manual of your Video Camera. Connection-TV power cable to a 220 ~ 240 V system - BACK OF TV Mains Socket Outlet AC 220~240 V, 50 Hz...
-
Page 12: Auto Installation
1. Put batteries into the remote control, as shown on page 3. 2. Connect the aerial jack into the aerial input terminal on the rear side of your TV, as shown on page 6. 3. Connect the TV power cable to a 220 ~ 240 V system, as shown on page 10. - Page 13 Stored programmes: When the TV has finished the automatic search, the «Stored programmes» menu will appear on screen with a list of the channels, which have been memorised with the available options: a) Select programme to be edited b) «EDIT NAME»...
-
Page 14: Switching On
When the TV is in Stand-by mode, to turn ON the TV press the Stand-by button (æ TV) on the remote control, or one of the four buttons on the TV ( ∑ a œ, ∑ CH œ). The TV will change from Stand-by mode to Program mode, the sound indicator will light a few moments and an image will appear on the screen. -
Page 15: Menu Structures
PROTECTION, CHANGE START, PASSWORD PROGRAMME: 01-99 CHANNEL TYPE: AERIAL / CABLE SYSTEM: B/G, D/K, I, L/L’ CHANNEL NUMBER: (REAL CHANNEL) MODE: TV / VCR / SKIP SEARCH (frequency tuning) INSTALL FINE TUNE AND TUNE INSTALLATION (BLUE button) To repeat the “AUTO INSTALLATION”... -
Page 16: Quick Menu
Record what you see by a VCR with AV LINK system, connected to the TV, through the AV-1 terminal: START / STOP recording. In this mode the TV set, freezes the picture: STILL ON / STILL OFF. several times Options... -
Page 17: Tv Operation (Channel Selection)
TV Operation Channel Selection Channel selector buttons E/ F Select the programme channel number you want to see, using the channel selector buttons E/ F. As you press these buttons, a list of channels appears. Press the E/ F again to select another channel. -
Page 18: Picture Adjustments
Picture LEVELS Menu 3. Press the Cursor UP/DOWN buttons E/ F to select a para- meter from the list: PICTURE MODE, CONTRAST, COLOUR, BRIGHTNESS or SHARP- NESS. The red point mark indicates the selected parameter. 4. Adjust the picture quality to your liking with the Cursor LEFT/RIGHT... - Page 19 100 Hz menu 1. Press the Cursor UP/DOWN buttons E/ F to select: COMB FILTER, NOISE REDUCTION, DIGITAL SCAN, D.GAMMA, SVM, LTI/CTI or BLACK STRETCHER. 2. Press the Cursor LEFT/RIGHT buttons AUTO / etc. Select COMB FILTER to reduce the colour interference in picture with fine details and the picture gets sharper (ON / OFF).
- Page 20 2. Press the BLUE button to freeze the picture. In this mode, the TV displays two windows, the main window in still mode and the small window in normal mode. Each time the BLUE button is pressed, the frozen picture is refreshed.
-
Page 21: Wide Mode
AUTO mode (VPS code) The VPS signal is sent by some broadcasting stations with information of the original size. When the TV is in AUTO mode and receives the VPS signal, it changes the size automatically as indicated below: When the TV is receiving VPS code 16:9 the TV selects CINEMA automatically. - Page 22 Wide Mode (Special detail information) Special detail information about PANORAMA, FULL, NORMAL, ZOOM 14:9 and CINEMA (16:9) . 16:9 PANORAMA The Panorama Mode adapts the broadcast picture to 16:9 format without changing the centre of view. This is especially useful for programmes like the News when the speaker in the centre of the picture needs to be seen clearly.
-
Page 23: Double Window
Double Window function With Double Window function, you can view two pictures (A and B) simultaneously by pressing the Double Window button . For example: the signal from the aerial terminal (picture A) and the signal from another device via one of the external input terminals (picture B). - Page 24 Other operations in DOUBLE WINDOW mode Changing TV channel Press the UP / DOWN buttons E/ F or the numeric buttons to change TV channel. The channel change will affect the window that is currently in TV mode. Note: if two external inputs are selected, the channel change will affect the main window.
-
Page 25: Audio Adjustments
DUAL CHANNEL A When the TV is receiving a MONO (NICAM) programme, the TV set selects MONO NICAM automatically, and you can change: When the TV is receiving a MONO (FM) programme, the TV set selects MONO automatically but the sound mode cannot be change. -
Page 26: Sound Setting Mode
SPATIALIZER MUSIC: This mode has been designed to be use when watching a musical event. Note: It is highly recommended to set the DOLBY VIRTUAL mode when the TV is receiving a "Dolby Digital 5.1" signal through the DIGITAL AUDIO INPUT terminal. - Page 27 On Screen Display Logo: A OSD logo arises exclusively in "Audio EFFECTS" and "Audio INPUT SELECT" menus when the selected AUDIO MODE (listening mode) is DOLBY VIRTUAL or SPATIALIZER. The OSD logo indicates the decoding mode accordingly with the signal input type: Selected AUDIO MODE (Listening mode) BYPASS DOLBY VIRTUAL...
- Page 28 EQUALIZER Menu Press the FLASHBACK button equalization: PERSONAL, CLASSIC, JAZZ, POP, CONCERT or SPORT. To change the PERSONAL option: a) Press the Cursor LEFT/RIGHT buttons 100Hz, 330Hz, 1KHz, 3.3KHz or 10KHz The red point mark indicates the selected item. b) Press the Cursor UP/DOWN buttons E/ F to Adjust. For more information, press the Help button Notes: The Equalizer adjustments are not operative for the headphones.
- Page 29 DIGITAL INPUT: Select this option when the TV is receiving a digital audio signal through the DIGITAL AUDIO INPUT terminal placed on rear TV (RCA connector). Use this digital audio input to connect a set with digital audio output, for example a DVD, a DAT or a CD.
-
Page 30: Features Setting Mode
OFF TIMER The OFF-TIMER is used to programme switching the TV set to Stand-by mode, after the set length of time has passed. If necessary, repeat steps (1. ~ 2.) to see the Timers Menu. Press the Cursor UP/DOWN buttons E/ F to select “OFF TIMER STATUS”. -
Page 31: Child Lock (Channel Block)
The protection can apply to the television itself «LOCK ALL» or to specific programmes «LOCK PROGRAMME». With the CHILD LOCK function, you can also programme a time period during which the TV or the programmes will be protected. (Your children cannot select the channel, which you locked). - Page 32 Note: In order for the timed protection to function correctly, the internal TV clock must be set at the right time. To check the time setting see section -Automatic or Manual time adjustment- (page 29). LOCK PROGRAMME Menu...
-
Page 33: Postcode Security
14. Press the MENU button to close the Menu. About Postcode Security: If you memorize a Postcode, in the events of lose or robbery of TV set and later recovery, you can identify your TV set by Postcode. Notes: As a precautionary measure, make a note of your Password and the Postcode, and keep it in a familiar place (see last page of this manual). -
Page 34: Help And Demo
Press the MENU button to close the Menu. DEMO mode (demonstration) The demonstration function allows you to see all the menus implemented in this TV set. Press the MENU button twice to see the MAIN Menu. Press the YELLOW button Press the GREEN button to see the DEMO Menu. -
Page 35: Av Link
This “Intelligent” communication system allows controlling some VCR functions from the TV and vice versa. For example it is possible to program the VCR timer recording from the TV or record the signal currently being displayed on the TV regardless of the signal source. - Page 36 When you select «Device TV», Mode (Unique) and Speed (SP) cannot be changed. When you select «Device TV», in the event of a power cut, disconnection from the plug or if you turn off the TV by the Main power button (® ) on the TV set, the TIMER PROGRAMMING data will be cancelled; In order to keep the programmed data, use Stand-by button (æ...
-
Page 37: Tv Channel Setting (Advanced)
The TV is ready to preset automatically all local channels for you. If the TV is being used with a VCR, turn on the VCR and play back a pre-recorded tape. The signal from the RF terminal of your VCR is assigned to a TV channel. -
Page 38: Manual Channel Preset
Manual Channel Preset (PRESET USING REAL CHANNEL NUMBERS) 1. Press the MENU button twice to see the MAIN Menu. 2. Press the BLUE button to see the TUNE Menu. TUNE Menu 3. Press the Cursor UP/DOWN buttons E/ F to select «PROGRAMME»... -
Page 39: After Preset Has Been Performed
7. Repeat the above procedure (3. ~ 6. steps) for other programme channels as required. 8. Press the MENU button to clear the on-screen display. Mode This feature allows you to select TV, VCR or SKIP. 1. Press the MENU button twice to see the MAIN Menu. 2. Press the BLUE button to see the TUNE Menu. - Page 40 Edit (Stored programmes) This features allows you to delete, sort or input name for each one of the programmes with A ~ Z , 0 ~ 9 and hyphen. 1. Press the MENU button twice to see the MAIN Menu. 2.
-
Page 41: Tv/Video Selector, Headphone Jack, Sub-Titles And Vcr Mode
Other features TV/Video selector button With this button you can select either source of input for the TV. 1. When the TV/VIDEO button menu appears and TV mode changes to VIDEO mode. The screen is displayed in the last VIDEO mode. -
Page 42: Vcr Mode
VCR mode SHARP VCR can be operated using the TV remote control. Channel selector buttons (VCR) These buttons are used for changing channels and setting the timer. Play button Press this button to start playback. Record button Press this button to start recording. If the videocassette is protected against recording, it will be ejected. -
Page 43: Teletext Mode
Teletext features Depending on the TV programme, every Teletext page is transmitted using a different system. Your SHARP TV is adjusted to receive 2 Teletext systems, namely FLOF and LIST, which are automatically identified by the receiver. The user can easily identify them by the manner in which they appear on the screen. - Page 44 If TV set is in NORMAL size, you can use this button together with the CANCEL button you can view the main TV picture until the subpage has been found. The on screen TV icon a in the top left side of the screen will change when the subpage has been found.
- Page 45 How to Operate Page Memory Your TV has 40 teletext page number memories for fast recall of teletext information. In programme positions 1 through 9, four teletext page numbers can be stored in each position; a total of 36 pages.
-
Page 46: 21-Pin Euro-Scart And 21-Pin Audio/Video
21-pin Euro-SCART and 21-pin Audio/Video REAR TV 21-pin In/Out 21-pin Audio/Video (AV-2) With PAL/SECAM/NTSC Video Input 21-pin Audio/Video (AV-1) With PAL/SECAM/NTSC/S-Video Input and AV LINK control signal 21-pin Euro SCART (RGB) With PAL/SECAM/NTSC Video Input RF Input Aerial terminal Digital Audio Input RCA Input Terminal Use this digital audio input to connect a set with digital audio output, for example a DVD, a DAT or a CD. -
Page 47: Troubleshooting
If the fault cannot be corrected by using this guide, remove the mains plug from the wall socket and contact the dealer or supplier from whom it was purchased. Where this is not possible, please visit our web-site at www.sharp.co.uk/support. Customers without Internet access may telephone 08705 274277 [or (01) 676 0648 if telephoning from Ireland] during office hours. -
Page 48: General Specifications For Television Receiver
Wide Mode Function Double window CCIR TV Standard system PAL, SECAM - B/G, L/L', I, DK VHF: F2 - F10 CH / E2 - E12 CH / IRA - IRJ / RI - RXII (CH71-CH82) UHF: F21 - F69 CH / E21 - E69 CH / I21 - I69 CH CATV: S01 –... -
Page 49: Index Page
Effects (Audio) ... 25 Equalizer ... 27 Features Setting Mode ... 29 Fine tuning ... 38 FLOF (Teletext) ... 42 FRONT TV ... 5 Graphic Equalizer ... 27 Headphone jack ... 40 Identification (Sound) ... 28 Interactive Help ... 33 LIST (Teletext) ... - Page 50 PASSWORD POSTCODE SECURITY TV SHARP 32JF-77H ® SHARP ELECTRÓNICA ESPAÑA, S.A. SHARP ELECTRONICS (U.K.) LTD. Sharp House, Thorp Road, Newton Heath, Manchester M40 5BE PRINTED IN SPAIN TINS-A702WJN0 01/03...