Advertisement
Quick Links
Philips Domestic Appliances and Personal Care
Service Manual
PRODUCT INFORMATION
Versions:
/A : Sensitive for error problems.
/B : With solution for ERROR in the display.
/C : With solution for ERROR in the display and/or
hum or bleep in the headphone.
/D : With electronic solution for ERROR and/or
hum or bleep in the headphone implemented.
- This full-body tanning appliance is equipped with an
electronic power supply. This means that when the
appliance is connected to the mains, the tanning or
relaxing functions are made visible by means of symbols
on the display. The set time is also shown on the display.
During the last minute of the set time, an accoustic
signal sounds.
- The UV lamps only burn in combination with the IR
(relax) lamps. When the UV lamps are on the IR lamps
burn at reduced intensity.
- The IR lamps can also be used separately at full intensity
for a relax session.
- This appliance is equipped with a sound module,
offering a selection of four nature sounds. The user can
also connect an external music appliance to play his/her
own music, either via the loudspeakers or the earphones.
- This tanning appliance has also been fitted with a scent
unit. The scent granules required for this unit can be
ordered as service part (see parts list).
= changed
Published by Philips Domestic Appliances and Personal Care
05/09
IMPORTANT
- Because of the brief high starting voltage, the appliance
should be connected to a circuit protected with a 16A fuse.
- HPA lamps only go on at a restart if they have cooled down
sufficiently.
- Never touch the HPA lamps with your fingers. If necessary,
clean the lamps with a cloth moistened with some alcohol.
- When a new HPA lamp is installed, this lamp may have
a different colour compared to the other lamp. This is
normal and will disappear after a short period of use.
- After repair, the glass filters should be free from fingerprints.
If necessary clean the filters with some alcohol.
- Never look directly into the light of an HPA lamp when it
is on without protective goggles.
- Insufficient cooling – for instance when the vents are
blocked or when the fan has broken down – will cause the
thermal safety cut-out to switch the appliance off. Once the
cause of overheating has been removed and the appliance
has cooled down sufficiently, it will switch automatically on
again.
- Let the appliance cool down for 15 minutes before folding
it back into transport position and storing it.
- Only move the appliance when it is in transport position,
i.e. when it is folded.
- If there are complaints about inadequate tanning, the
output of the lamps can be measured with a UV-X 36
meter. For the minimum values, see table under 'Technical
information'.
Printed in the Netherlands
© Copyright reserved
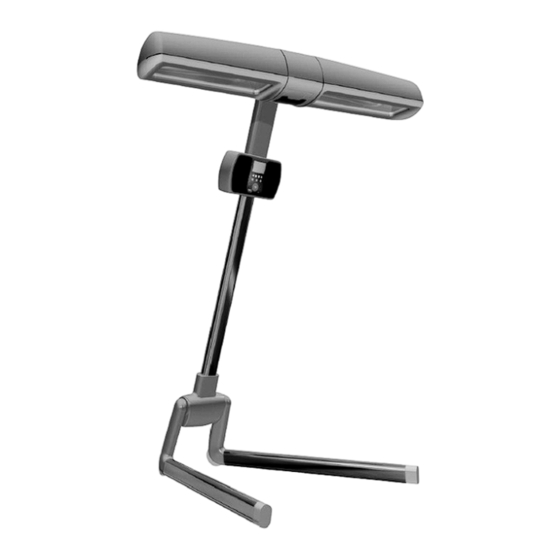
Sunstudio
HB935 /A
/B
/C
/D
Subject to modification
Advertisement

Related Manuals for Philips Sunstudio HB935/A


Summary of Contents for Philips Sunstudio HB935/A
- Page 1 For the minimum values, see table under ‘Technical unit. The scent granules required for this unit can be information’. ordered as service part (see parts list). = changed Published by Philips Domestic Appliances and Personal Care Printed in the Netherlands © Copyright reserved Subject to modification 05/09...
-
Page 2: Technical Information
- Fuse : 16 A - Protecting goggles : 2 x HB072 - UVA source : 2 x Philips Cleo HPA SYNERGIE - Safety : Class II Cenelec UV type 3 - IR source : 2 x Philips type 15040R - Weight : Approx. - Page 3 ELECTRICAL DIAGRAM Version /A and /D HB935/A /B /C /D TCO1 TCO2 NTC1 NTC3 NTC2 Relay Board PCB SMPS User Interface Panel (power) Sound Board PCB Headphones Line-in 3-12...
- Page 4 ELECTRICAL DIAGRAM Version /B and /C HB935/A /B /C /D TCO1 TCO2 NTC1 NTC3 NTC2 Relay Board PCB Loose connector SMPS (power) User Interface Panel SMPS Error Fix PCB Sound Board PCB Headphones Line-in 4-12...
-
Page 5: Parts List
PARTS LIST HB935/A /B /C /D Item Service code Description Item Service code Description 4222 062 95930 Grip main assy 4222 062 96390 Sleeve 4222 062 95940 Paw cap R 4222 062 96190 Sea saw (set) 4222 062 95950 Leg assy R 4222 062 96460 Lamp housing US 4222 062 95960... - Page 6 EXPLODED VIEW PART A HB935/A /B /C /D 6-12...
- Page 7 EXPLODED VIEW PART B HB935/A /B /C /D 49 Verson /B & /C 7-12...
- Page 8 EXPLODED VIEW PART C HB935/A /B /C /D 8-12...
- Page 9 WIRING DIAGRAM Version /A and /D HB935/A /B /C /D PCB5 NTC2 NTC1 TCO1 NTC3 TCO2 PCB4 User Interface Panel Sound Board Relay Board PCB3 Headphones PCB2 Line-in Brown Blue Purple SMPS Yellow Green PCB1 Black White Mains 9-12...
- Page 10 WIRING DIAGRAM Version /B and /C HB935/A /B /C /D PCB5 NTC2 NTC1 TCO1 NTC3 TCO2 ✂ Remove two "ground loops" (Cut out these wires) PCB4 Remove the wires as far as possible Yellow from this connection from this connection User Interface Panel Sound Board Relay Board...
- Page 11 ERROR in the display and/or hum or bleep on the headphone HB935/A /B /C /D As a result of an intermitting contact, the text ERROR may appear on the display when the appliance is plugged in and switched on (only occurs in HB935/A up to production code 0442). This can be solved by assembling an extra PCB (item 49) according to the diagram shown on page 4 of the service manual and by removing two “ground loops”...
- Page 12 ERROR in the display and/or hum or bleep on the headphone HB935/A /B /C /D - Pull the plug with the red/black wire out of the power supply PCB (1) (this socket remains vacant and the wire should be fixed in the bunch of wires).