Tesmed Max 830, Max 7.8, Max 5 - Medical Equipment Quick User Guide And Useful Tips
- Quick user manual and useful tips (2 pages) ,
- Instruction manual (136 pages) ,
- Instruction manual (164 pages)
Advertisement
 Before use, read carefully the user manual, paying attention to the warnings and contradictions listed in it.
QUICK USER GUIDE AND USEFUL TIPS
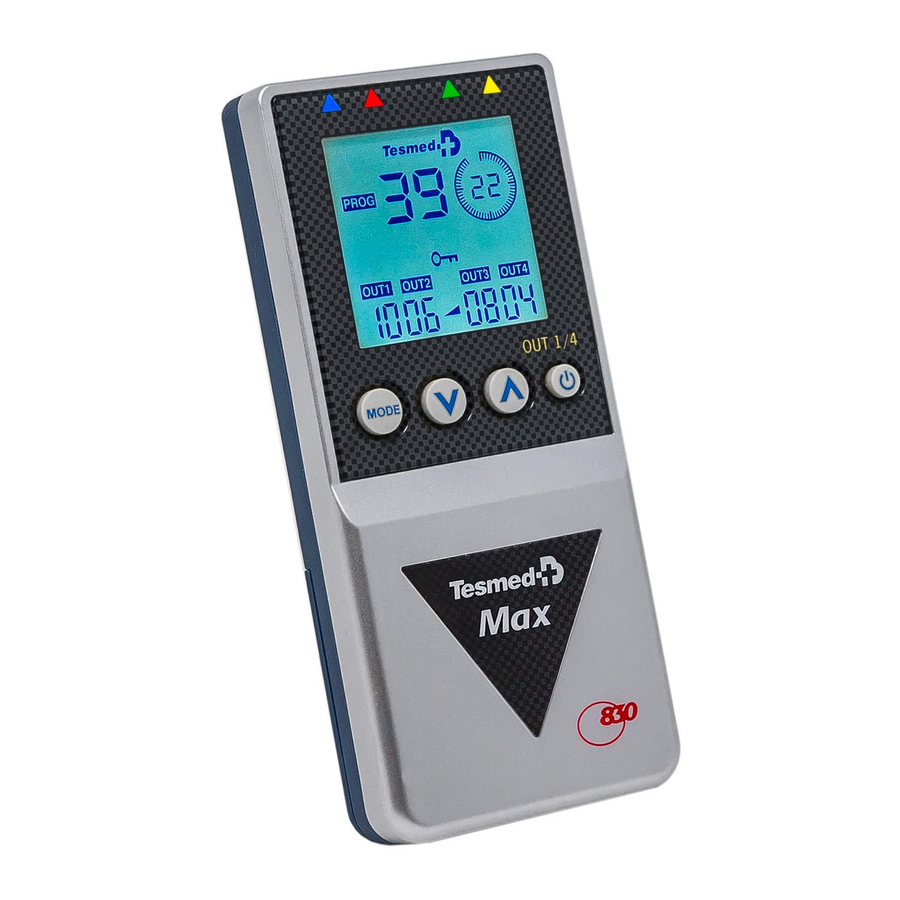
Battery already inserted, device ready to use. If the battery symbol flashes after switching on, charge.
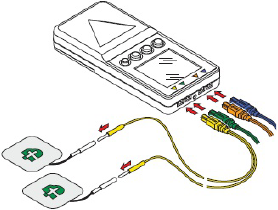
- Connect the 4 bipolar cables
![]()
- Insert the electrodes in the cables and place them on the treatment area
![]()
You may refer to the electrodes placement photos in the manual
EQUIPMENT DESCRIPTION
LCD display and keys

- Tesmed logo
- Program
- Program number symbol
- Low battery symbol
- Frequency symbol
- Selected output channels (n. 4)
- Relative intensity value for each 4 output
- Functions key (MODE)
- Decrease key (
![]() )
) - Increase key (
![]() )
) - ON/OFF and select channels double function key
- Intensity symbol
- Keyboard block and ON block symbol
- Timer symbol
- Treatment time and remaining time
- Clock symbol
- Output channels
- Battery recharger socket
- Battery door
- Removable belt hook
| The battery is already installed in the device. If the flashing battery symbol appears on the display or the Tesmed does not light up, charge the device. When the symbol stops flashing or disappears, the battery is charged. If the battery is charged and the Tesmed is connected to the battery charger, the Tesmed screen will not light up and no signal will appear because the battery charger detects that there is no need for charging and therefore does not activate.  |
Use mode
Switching on
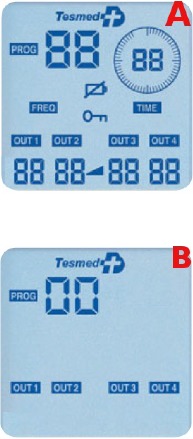
Press the key ![]() for approximately 2 seconds: the system runs a selftest procedure, during which the display shows all the available functions (fig. A); then appears on the display what shown in fig. B.
for approximately 2 seconds: the system runs a selftest procedure, during which the display shows all the available functions (fig. A); then appears on the display what shown in fig. B.
- "Display lighting" function
The display illumination turns off automatically after about 20 seconds in the absence of interactions.
The display is lit again when you press any key. - "Self switching- off" function
The Tesmed automatically switches off is not used for more than 5 minutes in order to save the battery.
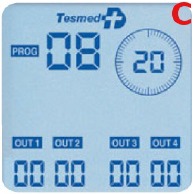
After switching on the device, press in succession key  to select the number of channels you want to use to suit the treatment and then key
  to select the program (fig. C).
Attention: The programs in the Tesmed are modulates to provide various stages (different frequencies of waves) of massage ranging from 1 to a maximum of 5 stages.
Some programs have one or more WAIMS -SYSTEM® stages.
During treatment (and especially with the WAIMS -SYSTEM®) we always recommend that you adapt the intensity of each channel, as your sensitivity will vary various from one group of muscles to another.
Programs
Only in programs from 01 to 20 you can change time and frequency
In programs from 01 to 20, once selected the program, it's possible to customize the treatment time and frequency.
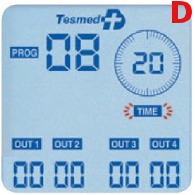
Treatment time adjustment
Press key  and the relevant symbol
 ![]() starts flashing on the display (fig. D). Use keys and
starts flashing on the display (fig. D). Use keys and  to adjust the treatment time: from min 1 minute to max 60 minutes.
Press key again to switch to the intensity adjustment ![]() , which is adjusted with the 2 keys and .
, which is adjusted with the 2 keys and .
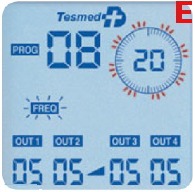
Frequency adjustment
You can adjust the frequency only after giving intensity and started treatment. Press key for 3 seconds to enter the frequency control mode. Press keys and repeatedly to increase or to decrease the frequency. The symbol  flashes (at a varying speed) to indicate frequency control mode (fig. E). Press key once to quit frequency control mode. The frequency is the number of pulses per second. When you change the frequency, you feel an increase or decrease in the speed of stimulation.
Attention: if you are in frequency control mode during a treatment and you want to clear the intensity, press key ![]() twice.
twice.
Programs 21 to 99: preset with different stimulation steps
After having selected a program from 21 to 99, press key ![]() to go straight to the intensity adjustment
to go straight to the intensity adjustment ![]() , which is adjusted with the 2 keys and .
, which is adjusted with the 2 keys and .
For the programs choice, refer to the tabs in the manual with the indication of treatments, program, electrodes photos, duration, phases and days.
Intensity control: 99 levels
Set initially a low level and then gradually increase. The intensity level must be such that the treatment is pleasant.
Symbol  appears on the display (fig. F) and you can now adjust the intensity using keys and (from 1 to 99). The intensity rises or falls on all the selected channels at the same time.

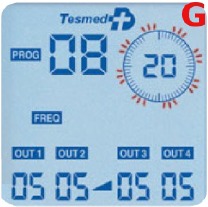
When you set the intensity, the clock begins to flash indicating that the equipment is providing energy (fig. G).
Attention: Programs 21 to 99 are preset with different stimulation steps.
Each phase alternates moments of activity with moments of rest. It is not possible to increase the intensity during the moment of rest. So do not increase the intensity in the rest phases during program execution, but only during active phases.
If you keep a low intensity, for example at level 1 or level 2, at the phase transition during execution, the program may be reset. In this case, restart with the program and keep the intensity a bit higher.
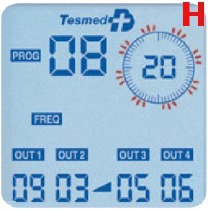
You can, however, access each channel during use to control the intensity independently: simply press key  to select the channel whose intensity you want to change and then use keys and to increase or decrease the value. Fig. H shows that the intensity values for the 4 channels can be different. At the end of the treatment, the Tesmed clears the intensity setting for all output channels; You can now switch the equipment off by pressing key for 2 seconds or set new parameters to begin a new treatment. Use keys and to increase or decrease the value of any parameter, each time these keys are pressed, the parameter is increased or decreased in steps of one unit, keep the keys pressed for faster increase/decrease of the parameter.
Error warning (electrodes disconnected)
In the case of a detached electrode, the device goes into error, displaying the word "Er", flashing for about 5 ", in the channel where the problem occurred (fig. I).
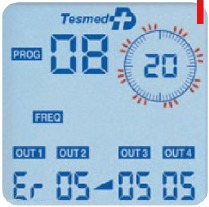
All pulses are stopped immediately and "00" appears as the intensity value on the display. The error message can mean that:
- There are no electrodes connected to the channel in error mode.
- The electrodes are not properly adhered to the skin: reposition the electrodes or replace them if they are too old.
- The cable used to connect the electrodes is faulty: check by inverting two cables.
The system automatically resets itself once the intensity value increases.
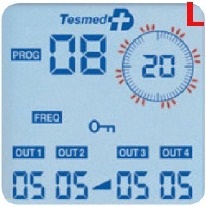
"Keyboard block" function
Keeping the key ![]() pressed, press key
pressed, press key ![]() and release it. Symbol
and release it. Symbol  will appear on the display (fig. L). Follow the same procedure to unlock the keyboard.
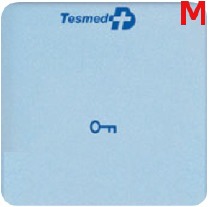
"ON block" function
Useful to avoid a random switch on.
With the device on, keeping the and keys pressed simultaneously for 3 seconds, the symbol and the Tesmed logo will appear on the display (Fig. M). Follow the same procedure to switch the equipment on.
ATTENTION
Before use, read carefully the user manual, paying attention to the warnings and contraindications listed in it.
- Use only Tesmed electrodes as they are constructed with materials able to guarantee maximum conductivity of the pulses of our electrostimulators.
- The larger electrodes are positioned in the same way as the smaller ones.
- If the cables are a bit hard to insert into the device, you can try to gradually force the insertion.
- In case of lack of stimulation or other malfunctions, check the condition of the electrodes and their adhesion to the skin, the correct connection of all the parts and possibly the battery charge.
- You can customize the use of your stimulator:
- using less channels;
- using Tesmed electrodes of different sizes;
- using your favorite program in the area you wish to treat, regardless of the indication in the manual. For example, the abdomen toning treatment can well be performed on another area, such as legs, pectorals, gluteus, etc...
- You can use your favorite program on multiple zones. You can not set two different programs at the same time.
REMEMBER
Programs 21 to 99 are preset with different stimulation steps.
Each phase alternates moments of activity with moments of rest. It is not possible to increase the intensity during the moment of rest. So, do not increase the intensity in the rest phases during program execution, but only during active phases.
If you keep a low intensity, for example at level 1 or level 2, at the phase transition during execution, the program may be reset. In this case, restart with the program and keep the intensity a bit higher.
- You may have the perception that on the one side the impulses are less intense. The stimulator emits the same impulses on all channels, so probably you have not well identified the motor points of the muscle, or on one side there is more fat tissue, or the electrodes are worn out. Try moving the electrodes, making sure they are well adherent to the skin.
The level of intensity to achieve the desired muscle contraction can vary depending on multiple factors, including the placement of the electrodes and the presence of adipose tissue. Therefore, the same current intensity can provide different sensations from person to person, from day to day, from the left side to the right side.
If you need technical assistance write to info@tesmed.com, or call 0039 030 5050163 from Monday to Friday from 09.00 to 16.30, excluding holidays.
We solve 100% of requests quickly because our priority is customer satisfaction.

Documents / ResourcesDownload manual
Here you can download full pdf version of manual, it may contain additional safety instructions, warranty information, FCC rules, etc.
Download Tesmed Max 830, Max 7.8, Max 5 - Medical Equipment Quick User Guide And Useful Tips
Advertisement


Need help?
Do you have a question about the Max 830 and is the answer not in the manual?
Questions and answers