Table of Contents
Advertisement
Quick Links
Advertisement
Table of Contents

Related Manuals for Vivitar DVR 506


Summary of Contents for Vivitar DVR 506
- Page 1 DVR 506 Digital Video Camcorder User‟s Manual © 2010 Sakar International, Inc. All rights reserved. Windows and the Windows logo are registered trademarks of Microsoft Corporation. All other trademarks are the property of their respective companies.
-
Page 2: Table Of Contents
Camcorder Setup Mode ..................46 Connecting the Camcorder to a TV ..............52 Install the Vivitar Experience Image Manager Software ........53 Connect your camcorder to the computer ............56 Get photos and videos from your camcorder to your computer ......57 Get started! ...................... - Page 3 Transfer media from my camcorder to my computer manually (Using Macintosh) ......................60 Sakar Warranty Card ................... 61 Technical Support ....................62 Technical Specifications ..................63 Frequently Asked Questions ................64 Trouble Shooting ....................65...
-
Page 4: Introduction
Introduction Thank you for purchasing the DVR 506 Digital Video Camcorder. Everything you need to shoot video clips, take quality digital photos and record audio files is included with your device. In addition, an SD compatible memory card of up to 16GB (not included) needs to be inserted in order to use the camcorder normally. -
Page 5: What"S Included
What’s Included Digital Video Camcorder Vivitar Experience Image Manager software Installation CD Quick Start Guide USB cable TV Out cable Carry Case Wrist Strap... -
Page 6: Computer System Requirements For Windows Os
Computer System Requirements for Windows OS To be able to download photos and videos to your PC, you will need the following minimum configuration: Pentium 4 processor or above with Windows XP service pack 2, Windows Vista or Windows 7 ... -
Page 7: A Quick Look At Your Digital Camera
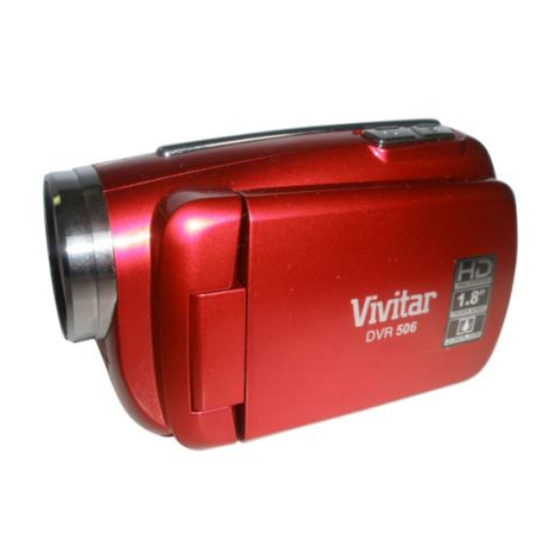
A Quick Look at your Digital Camera 1: Lens 2: Microphone 3: Compensating lamp 4: Self-Timer LED 5: Delete 6: Playback 7: Mode 8: TFT LCD Screen 9: Left /Self-Timer 10: Power 11: Down 12: Menu 13: AV Out jack 14: USB jack 15: Right /LED on or off... -
Page 8: Inserting Batteries
Inserting Batteries Your camcorder requires three (3) AAA batteries. Insert the batteries into the camcorder: Lift and open the cover of the battery compartment on the side of the camcorder. Insert the batteries according to the polarities (+ and -) indicated on the inside of the battery cover. -
Page 9: Inserting An Sd Memory Card
Inserting an SD Memory Card An SD/SDHC compatible memory card of up to 16GB (not included) needs to be inserted into your DV camcorder in order to save the videos, photos and audio that you capture with your camcorder before transferring them to a computer. Note: Media sitting on the memory card is not lost when your camcorder‟s power runs low or on replacing the batteries. -
Page 10: Maintenance And Care
Note: After you insert the SD memory card, the SD card icon will appear on the bottom left side of the LCD, indicating that your SD memory card has been installed successfully. The media you capture will now be stored on the card. ... -
Page 11: Starting Your Camera
Note: To easily download the photos and videos captured with this camera you need to install the Vivitar Experience Image Manager software. See the “Install the Vivitar Experience Image Manager Software” section of this manual to learn how to install the software on your computer. - Page 12 When there is insufficient battery power, a “Low Battery” message will appear on the LCD screen. The camcorder will automatically power off a few moments later Setting the Language When using the video camcorder for the first time after purchasing it, be sure to choose a language and set the date &...
-
Page 13: Capturing Videos
The video default capture mode appears on the LCD. Press the MODE button on the bottom left of the LCD screen to change the mode. Each time the MODE button is pressed the mode icon is changed. Display Title Description Video mode For recording movie clips. - Page 14 1. The amount of time left at that resolution and memory appears on the top right of the LCD. 2. Aim the camcorder at the subject or object you wish to capture. 3. Press the Shutter button on the top of the camcorder to start shooting. 4.
-
Page 15: Video Setting Options
Two LED white lamp lights will light up (like a torch) in the front of the camcorder to offer better lighting. To turn off the LED light, press the LED / Right button again. Digital Zoom function You can magnify your subject up to 4 times using the digital zoom. 1. - Page 16 To enter the Settings options for the Video mode: 1. Press the MENU button. 2. Press the Up/Down button to select the Setting you wish to change from the menu that appears.
- Page 17 Movie Size You can select different Video resolutions Press the Up/Down button to select the Movie Size menu. Press the OK button to open the Movie Size submenu. Press the Up/Down button to highlight and select the resolution option: [HD] 1280x720, [D1] 720x480, [VGA] 640x480, [QVGA] 320x240 Press the OK button to confirm, save your choice and exit to the Setting menu.
- Page 18 Frame Rate This setting allows you to control the frame rate for video capture. 1. Press the Up/Down button to select the Frame Rate menu. 2. Press the OK button to open the Frame Rate submenu. 3. Press the Up/Down button to highlight and select the rate option: 30fps High, 15fps Low 4.
- Page 19 4. Press the OK button to confirm, save your choice and exit to the Setting menu. 5. Press the MENU button to revert back to the Video capture mode to start capturing videos with the metering selected. White Balance This setting is used to adjust the color balance of your videos as per your light source. Press the Up/Down button to select the White Balance menu.
-
Page 20: Taking Photos
Shutter button to take a photo. Either download the photos to your computer using the Vivitar Experience Image Manager software as described below in the section “Transfer photos and videos to your computer” or insert another SD card to continue... - Page 21 7. The number of photos that can be captured not only depends on the internal memory or the SD card‟s capacity but also on the resolution selected. Better quality photos are taken at higher resolutions but these will also take up more memory on the card. LED Lamp When light conditions are poor, press the LED / Right button.
- Page 22 You can include yourself in a photo by using this feature to delay the time between your pressing of the shutter button and when the photo is actually taken. Place the camcorder on a tripod or on a flat and sturdy surface before pressing the Shutter button. There are 2 methods to activate the Self-Timer.
- Page 23 Press the Up/Down button to highlight and select the Capture Mode option: Self-timer 2S, Self-timer 10S, Continue (3 continuous snapshots) Press the OK button to save your choice. Press the MENU button to exit the Setting menu and revert to the Camera mode. The Self-Timer icon appears on the top of the LCD screen.
-
Page 24: Photo Capture Settings Options
The Continue icon will appear next to the Camera icon on the top left corner of the LCD. Press the Shutter button. The camera will now automatically take 3 continuous photos with intervals of 1 seconds. Photo Capture Settings options... - Page 25 The camera setting allows you to manage the way you wish to take photos. You can select and change the Resolution pixel size, Quality, Metering, White Balance, Exposure, Capture Mode and Effects. To enter the Settings options for the Capture mode: Press the MENU button.
- Page 26 will take. The image size and quality will also affect the maximum size you can print your photo effectively. To set the camera`s resolution: Press the Up/Down button to select the Resolution menu. Press the OK button to open the Resolution submenu. Press the Up/Down button to highlight and select one of the resolution options: 5M(2592X1944), 3M(2048X1536), 2M(1600X1200), 1M(1280x960), VGA(640X480) Press the OK button to confirm, save your choice and exit to the Setting menu.
- Page 27 Press the OK button to open the Quality submenu. Press the Up/Down button to highlight and select one of the quality options: Super fine Fine Normal Press the OK button to confirm, save your choice and exit to the Setting menu. Press the MENU button to revert back to the Camera capture mode to start taking photos with the quality selected.
- Page 28 Press the OK button to confirm, save your choice and exit to the Setting menu. Press the MENU button to revert back to the Camera capture mode to start taking photos with the metering selected. White Balance This setting is used to adjust the color of your photos as per your light source. Press the Up/Down button to select the White Balance menu.
- Page 29 Exposure This setting allows you to manually compensate for unusual lighting conditions such as indirect indoor lighting, dark backgrounds, and strong backlighting. The exposure value range is –2.0 (Dark) to 2.0 (Bright) in increments of 0.3. Press the Up/Down button to select the Exposure menu. Press the OK button to open the Exposure submenu.
- Page 30 Press the Up/Down button to select the Capture Mode menu option. Press the OK button to enter the Capture Mode submenu. Press the Up/Down button to highlight and select the Capture Mode options: Self-timer 2S, Self-timer 10S, Continue (3 continuous snapshot) Press the OK button to save your choice.
-
Page 31: Audio Mode
Press the OK button to open the Effect submenu. Press the Up/Down button to highlight and select the Effect option: Normal, B&W, Sepia, Negative, Red, Green, Blue The LCD screen automatically changes according to the Effect selected. Press the OK button to confirm, save your choice and exit to the Setting menu. Press the MENU button to revert back to the Camera capture mode to start taking photos with the new effect selected. - Page 32 The amount of time that you have to record audio files appears on the top right corner of the LCD. 1. Press the Shutter button to being recording. 2. The time left for recording the audio clip appears in the top right of the LCD and counts down as the clip is recording.
-
Page 33: Playback Mode
6. Press the Shutter button to stop and save the recorded audio file to memory in WAV format. Playback mode You can playback the videos, photos and audio files in your camcorder or attach the TV-out cable to watch them on your TV screen. After you power on your camcorder, press the playback mode button on the center left of the LCD panel. - Page 34 Videos - You can Lock or Delete the video clips recorded. Audio - You can Lock or Delete the audio files recorded. Note: If there are no images in your memory a “No File” message will appear on the LCD screen. Thumbnail display When the camcorder is in the Playback Mode 1.
- Page 35 4. Press the Up/Down/Left/Right buttons to scroll around the enlarged photo. Note: You can know from the thumbnail what the image is - JPEG files do not have any icons on the thumbnail screen. AVI`s will have a V appear on the thumbnail and audio files will have the audio icon.
- Page 36 Press the MENU button. Press the Up/Down button to select the Lock menu. Press the OK button to open the Lock submenu. Press the Up/Down button to highlight and select one of the lock options: Lock/Unlock One; Lock All; Unlock All If you selected Lock/Unlock One and press the OK button a “Protect File?”...
- Page 37 Note: After selecting your lock preference, the corresponding lock icon will appear on the left hand side of the LCD for the file(s) selected. Delete You can delete unwanted photos, videos and audio files at any time to free up memory. You can delete one at a time or delete all the unprotected files that are currently saved on the memory card.
- Page 38 If the selected file is locked a “File Locked!” message will appear. To unlock the file follow Steps 1 to 6 in the Lock section above. If you selected All and press the OK button a “Delete All?” confirmation message will appear with “Yes”...
- Page 39 Start; Interval; Repeat If you select Start the Slide Show will begin to play. Press the Up button to pause or again to continue. Press the OK button to exit the Slide Show If you select Interval, press the Left/Right button to increase or decrease the interval between images when playing the Slide Show by 1 to 10 seconds.
- Page 40 1. Press the Up/Down button to select the Effect menu. 2. Press the OK button to open the Effect submenu. 3. Press the Up/Down button to highlight and select the Effect option you wish to use: Normal ,B&W, Sepia, Negative, Red, Green, Blue 4.
- Page 41 7. Once you have rotated the image to your liking, press the Up/Down button to select the Save option. 8. A “Waiting…” message appears while the rotated image is saved. Resize You can resize a photo on the camcorder 1. Press the Up/Down button to select the Resize menu. 2.
- Page 42 Voice Memo You can add a voice memo message to a photo on the camcorder 1. Press the Up/Down button to select the Voice Memo menu. 2. Press the OK button to open the Voice Memo submenu. 3. Press the Up/Down button to highlight and select the Voice Memo options: Add, Delete 4.
- Page 43 10. If you wish to delete a voice memo from a photo, select the Delete option. 11. Press the OK button. The voice memo and corresponding icon is removed from the selected photo. Print You can print individual photos directly from your camcorder to a Pictbridge compatible printer. 1.
- Page 44 Operation for AVI video files You can playback AVI files (with audio) recorded on your camcorder or view them on your TV when the camcorder is connect to the TV with the TV-out cable provided. 1. Use the Left/Right button to select an AVI file you wish to play. 2.
- Page 45 Press the OK button to open the Lock submenu. Press the Up/Down button to highlight and select one of the lock options: Lock/Unlock One; Lock All; Unlock All If you selected Lock/Unlock One and press the OK button a “Protect File?” or “Unprotect FIle”...
- Page 46 Note: After selecting your lock preference, the corresponding lock icon will appear on the left hand side of the LCD for the image(s) selected. Delete You can delete unwanted video files at any time to free up memory. You can delete one at a time or delete all the unprotected files that are currently recorded on the memory card at once.
-
Page 47: Camcorder Setup Mode
If you selected All and press the OK button a “Delete All?” confirmation message will appear with “Yes” and “No” options. Note: The Delete „All‟ option will delete all the files saved on the SD card not only the video files. - Page 48 Sounds In this Setup mode you can adjust the sounds the camcorder emits 1. Press the Up/Down button to select the Sounds menu. 2. Press the OK button to open the Sounds submenu. 3. Press the Up/Down button to highlight and select the Sounds options: Shutter, Start-up, Beep, Volume To turn on or off the sound the Shutter makes when pressed, use the Right/Left button to select „On‟...
- Page 49 Press the OK button to save your choice. To turn on or off the Beep sound the camcorder makes when pressing a button, use the Right/Left button to select „On‟ or „Off‟. Press the OK button to save your choice. 10.
- Page 50 Press the OK button to save the Power Frequency option that you selected. Press the MENU button to close the menu and exit the Setup function. Power Save In this Setup mode you can save battery power by selecting the time before the camcorder will automatically power off if the camcorder is left on and not in use 1.
- Page 51 Press the Right button to enter the Language submenu. Press the Up/Down button to highlight and select the language you desire. English; French; German; Italian; Spanish; Portuguese, Dutch, Turkey or Russian Press the OK button to save your choice and for the language interface of the camcorder to change to the language you selected.
- Page 52 Your camcorder can be used as a MSDC (Mass Storage device) and is in USB mode by default. Format Using this function will delete all the files (including protected ones) on the inserted SD memory card. Caution: Please make sure to download the images first before using this feature as all the files and images sitting on the card will be erased.
-
Page 53: Connecting The Camcorder To A Tv
Press the Up/Down button to highlight and select the Reset All option you desire. Yes, No If you wish to reset the camcorder select „Yes‟ or „No‟ to cancel the reset. Press the OK button. Press the MENU button to close the menu and exit the Setup function. Connecting the Camcorder to a TV Connect the video camcorder to the TV via the supplied cable. -
Page 54: Install The Vivitar Experience Image Manager Software
Warning: Do not plug your camcorder into the computer until the software installation is complete You must be connected to the internet to install and run the Vivitar Experience Image Manager software. 1. Insert the installation CD into your CD-ROM drive. The installation screen should automatically... - Page 55 2. On PC: The Vivitar Experience Image Manager Installer window appears. If the window does not appear, open the application‟s CD/DVD drive and click on “Setup.exe” to launch the installer. 3. On Macintosh: Click the icon to install the Vivitar Experience Image Manager.
- Page 56 On PC and Macintosh: Click the “I accept the terms of this license agreement” and then click “Next” to continue. 10. On PC only: Let the “Vivitar Experience Image Manager” installer create the folder to where the program will be installed, and then click “Install”.
-
Page 57: Connect Your Camcorder To The Computer
Connect your camcorder to the computer Use the USB cable that came with your camcorder to connect your camcorder to your computer. Turn the camcorder on by pressing the Power On button. The first time you connect the device to the computer you will have to wait a few seconds until the computer recognizes the device. -
Page 58: Get Photos And Videos From Your Camcorder To Your Computer
Get photos and videos from your camcorder to your computer An SD card needs to be inserted. Do not disconnect the cable during transfer. Doing so will cancel the transfer of any files on their way to your computer. Select the “Get Images” button from the Main menu. -
Page 59: Get Started
10. The photo and video files are now downloaded to your computer to the selected folder and albums ready for your use. Get started! Using the Vivitar Experience Image Manager, you can: Upload and manage photos and videos to and from the most popular photo sharing and social networking sites - Facebook, Flickr, MySpace, Picasa, Photobucket and YouTube. -
Page 60: Transfer Media From My Camcorder To My Computer Manually (Using Windows)
Edit images using automatic and manual tools. Use automatic “Geotagging” with built in Google Maps and more... For more details on how to use the Vivitar Experience Image Manager open the Help file or click the “Take the Tour” button on the application`s Home page. -
Page 61: Transfer Media From My Camcorder To My Computer Manually (Using Macintosh)
Transfer media from my camcorder to my computer manually (Using Macintosh) 1. Use the USB cable that came with your camcorder to connect your camcorder to your computer. 2. “MSDC” will appear on the LCD, indicating that your camcorder is in Mass Storage Mode. 3. -
Page 62: Sakar Warranty Card
Sakar Warranty Card This warranty covers for the original consumer purchaser only and is not transferable. Products that fail to function properly UNDER NORMAL USAGE, due to defects in material or workmanship. Your product will be repaired at no charge for parts or labor for a period of one year. What Is Not Covered By Warranty: Damages or malfunctions not resulting from defects in material or workmanship and damages or malfunctions from other than normal use, including but limited to, repair by unauthorized parties,... -
Page 63: Technical Support
For phone support in the US please call 1-800-592-9541, in the UK call 0800 917 4831, in Australia call 1800-006-614. If you would like to call from anywhere else, please visit www.vivitar.com for your local toll free number. -
Page 64: Technical Specifications
Technical Specifications 5M(2592X1944), 3M(2048X1536), 2M Image Resolution (JPEG) (1600x1200),1M(1280X960), VGA(640X480) HD 1280x720, D1 720x480, VGA 640x480 Video Resolution (AVI) QVGA 320x240 Frame Rate 15, 30fps LCD Display 1.8” TFT LCD External Memory SD card up to 16 GB Lens F=3.0 f=6.5 Shutter speed Range 1/2 ~ 1/2000 sec Digital Zoom... -
Page 65: Frequently Asked Questions
If the photos are saved to the SD memory card then all the photos should appear. Q: I deleted images using the Vivitar Experience Image Manager. The photo was also deleted from my computer. How do I recover photos that I accidently deleted? All images deleted using the Vivitar Experience Image Manager are sent to your computer`s Recycle or Trash Bin and can be retrieved from there. -
Page 66: Trouble Shooting
Trouble Shooting Power does not turn on. ★Reload battery in the correct direction. 1. The Battery is inserted in the wrong direction. ★Replace or recharge the battery. 2. The Battery has insufficient power to power on. The camcorder does not take pictures. ★Insert a new memory card.
Need help?
Do you have a question about the DVR 506 and is the answer not in the manual?
Questions and answers