
Related Manuals for Kinderkraft MINK PRO i-Size


Summary of Contents for Kinderkraft MINK PRO i-Size
- Page 1 MINK PRO i-Size USER GUIDE MODEL: MINK PRO ECE R129.03 v.1.0 MODEL: I-LITE ECE.R129.03 ver. 1.0...
-
Page 2: Car Seat Components
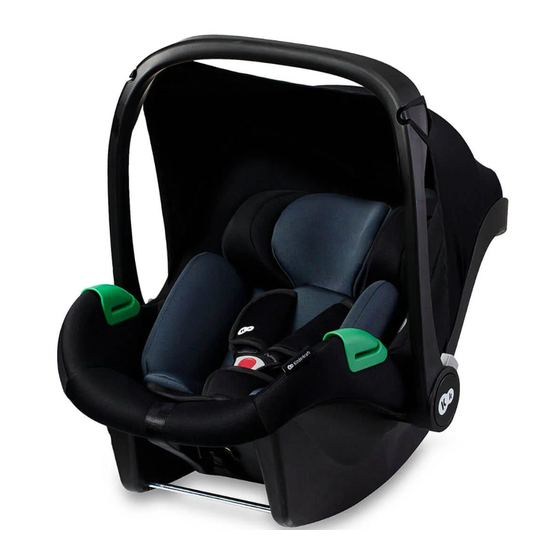
ATTENTION! Product graphics serve an illustrative function. Please read the operating manual carefully before using the child car seat for the first time. Ensuring the safety of the child is your responsibility, and not reading this instruction may have an impact on it. 1.0 Car seat components 1. - Page 3 14. Indicator of correct installation of the car seat on the base 15. Base mounting ISOFIX connector 16. ISOFIX connector release button 17. Lever for releasing the car seat lock 18. Adjustable support leg 19. Support leg extension release button 20.
- Page 4 The car seat must be installed rearward facing (RWF) in the vehicle on the ISOFIX MINK FX base or with the use of the three-point car seat belt. The car seat can be installed in the car in the places indicated by the manufacturer in the vehicle manual.
-
Page 5: Safety Instructions
3.0 Safety instructions WARNINGS Please take a few minutes to read this instruction manual in order to ensure the proper safety of your child. Many injuries that are easy to avoid are caused by reckless and improper usage of the car seat. •... - Page 6 • Remember that the internal safety harness holding the child should be • Do not use any other attachment points than those described in the adjusted to the child's body shape and not twisted. For this reason, the instruction manual and marked on the car seat. child should not wear thick clothes under the safety harness.
- Page 7 The car seat that is not secured can injure the passengers even during ● Never let your child sleep in this product. This product is not a substitute for emergency braking. a cot or bed. If your baby needs to sleep, it should be placed in a proper cot IMPORTANT! READ CAREFULLY AND KEEP FOR FUTURE or bed REFERENCE.
- Page 8 4.0 Use of insert The insert (3) serves to support and protect the head and back of a very small > 60 cm child. The insert prevents the child from collapsing inside or sliding down and ensures a proper physiological position of the child in the car seat. 4.1.
-
Page 9: Installation In The Vehicle
5.0 Installation in the vehicle In the event of sudden braking or an accident, people not wearing car seat belts may injure other passengers. Always check whether: • The seat backrests in the vehicle are locked (i.e. the folding backrest of the rear seat is latched). - Page 10 5.1 Rearward facing car seat installation for children between 40 and 75 cm using the ISOFIX MINK FX base 5.1.1 installation of the ISOFIX MINK FX base • Unfold the base support leg (18) (fig. C.1). • While holding down the ISOFIX connector release button (16) (fig. C.2), pull the connector out of the base (19) as far as possible (fig.
- Page 11 ATTENTION! With a properly installed base there is no gap between the backrest of the vehicle seat and the shell of the base (fig. C.5). • Press the base support leg extension release buttons (fig. C.6). Adjust its length until it touches the floor of the car (fig. C.6). The indicators at the bottom of the support leg (20) should turn green.
- Page 12 5.1.2 Installation of the car seat on the ISOFIX MINK FX base Place the car seat on the base as shown in figure C.7. Position the car seat perpendicularly to the base - you will hear a click. ATTENTION! The car seat can be installed on the base in the rearward facing position only (fig.
- Page 13 C.10 5.1.3 Removing the car seat from the ISOFIX base and removing the base In order to remove the car seat from the base, move the lever (17) to the left and hold it, then press the button (2) to release the seat. (fig. C.9, C.10) To remove the ISOFIX base, first fold the leg extension while pressing the C.11 release button (fig.
- Page 14 5.2 Forward facing car seat installation for children between 40 and 75 cm using the car seat belt ATTENTION! The car seat must be installed in the rearward facing position. ATTENTION! Never install the car seat on a seat with an active front air-bag. ATTENTION! Before starting the installation, make sure that the seat is equipped with a three-point car seat belt.
- Page 15 • For maximum tightness of the car seat belt, pull its waist part towards the car seat belt buckle and the shoulder part in the opposite direction. First tighten the waist section of the belt, and then the shoulder section. •...
-
Page 16: Using The Sun Shade
6.0 Using the sun shade The sun shade (13) is used to prevent direct sunlight on the child's face. 6.1 Installation of the sun shade • Set the car seat handle (1) to the carrying position (fig. A.2). • Place the fastener of the sun shade in the appropriate place on the handle of the car seat (fig. - Page 17 7.0 Using the car seat 7.1 Adjusting the position of the internal safety harness and the headrest The adjustment of the car seat safety harness is integrated with the adjustment of the headrest. The headrest should be adjusted according to the child's height.
- Page 18 In order to correctly position the child's head, make sure that the lower part of the headrest is in line with the child's chin (fig. E.4). Before changing the position of the headrest, loosen the inner belts (point 7.2) by pressing the adjustment button while pulling the shoulder straps towards you.
- Page 19 7.2 Adjusting the length of the internal safety harness and fastening the child in the car seat • Adjust the position of the internal safety harness to the correct height (see point 7.1) • Place the car seat on a level surface and set the handle (1) to the position for placing the child in the cat seat.
- Page 20 • Put the child in the car seat and fasten the internal safety harness (fig. E.7) - fold both buckle latches together to engage them, then insert them into the buckle hole (7). A “click” sound will be heard to indicate that the buckle is locked (fig.
- Page 21 ATTENTION! The safety harness buckle should be closer to the child's crotch than to the belly. 8.0 Maintenance instructions 8.1 Removing the cover (fig F.1) • Remove the sun shade (see point 6.1). • Press the safety harness release button (7) and make it loose. •...
- Page 22 8.2 Cleaning Only the original cover (4) should be used, as it is an essential element of the car seat safety. • The cover can be removed. Machine wash in warm water (up to 30°C) using a mild detergent. Leave to dry. Do not spin, do not tumble dry, do not use bleach.
- Page 23 9.0 Installation of the car seat on the stroller frame ATTENTION! Before installation the car seat on, and removing it from the stroller frame, always engage the parking brake to prevent the stroller from rolling away uncontrollably. • Guide the stroller frame adapters into the slots in the car seat and push them down until you hear a "click"...
Need help?
Do you have a question about the MINK PRO i-Size and is the answer not in the manual?
Questions and answers