
Related Manuals for Samsung MM-DB9


Summary of Contents for Samsung MM-DB9
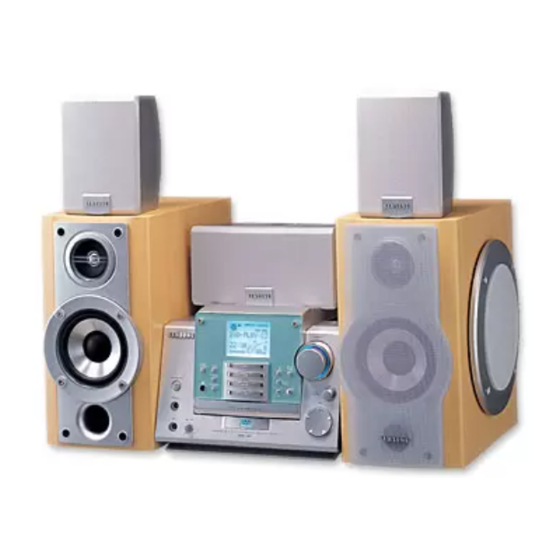
- Page 1 MICRO COMPONENT DVD AUDIO SYSTEM DVD/CD-R/RW/MP3-CD PLAYBACK MM-DB9 Instruction Manual...
-
Page 2: Safety Warnings
Safety Warnings CLASS 1 LASER PRODUCT KLASSE 1 LASER PRODUKT LUOKAN 1 LASER LAITE KLASS 1 LASER APPARAT PRODUCTO LASER CLASE 1 CAUTION RISK OF ELECTRIC SHOCK. DO NOT OPEN CAUTION: TO REDUCE THE RISK OF ELECTRIC SHOCK, DO NOT REMOVE REAR COVER. -
Page 3: Table Of Contents
System Setup ...21 Setting up the Language Features ...22 Press Thank you for buying this SAMSUNG micro component system. Please take time to read these instructions. They will allow you to operate your system with ease and take full advantage of its features. -
Page 4: Front Panel View
Front Panel View On/Standby Phones 1. Function (TUNER, DVD/CD,TAPE) 2. REC/Pause Demo 3. Color Display/ On/Standby 5. CD Synchro Headphone Jack Connector 7. AUX 8. CD Repeat 9. Stop 10. DIsc Tray Color Display TUNER /Band /Demo REC/Pause DVD/CD CD Synchro TAPE CD Repeat Tuning Mode... -
Page 5: Rear Panel View
Rear Panel View 1. FM Aerial Connector Terminal 2. AM Aerial Connector Terminal 3. AUX-Input 4. REAR Speaker / CENTER Speaker 5. SUBWOOFER Speaker 6. FRONT Speaker 7. VIDEO OUT 8. S-VIDEO OUT 9. CD Digital Out jack... -
Page 6: Remote Control
Remote Control POWER button TUNER(Band) button DVD button Sleep button Mono/ST(mono/stereo) button Rec/Pause button Power Surround button Tape Mode button Counter Reset button Play/Pause button Stop button Tuning Preset/CD Skip button Tuning Up/Down/CD Search button TAPE Function buttons To open the remote control cover, push the top of the cover, then slide downward. - Page 7 Number(0~9) buttons Remain button Angle button Repeat button Display(RDS) button Zoom button PTY(RDS) button Repeat A B button Program button Insert Remote Batteries Remove the battery cover on the back of the remote by pressing down and sliding the cover in the direction of the arrow.
-
Page 8: Where To Install Your Micro Component System
Where to Install Your Micro Component System To take full advantage of your new micro component system, fol- low these installation instructions before connecting the unit. Install the system on a flat, stable surface. Never place this unit on carpeting. Never place this unit in an outdoor area. -
Page 9: Speaker Connection
Speaker Connection The System has Main Speaker jacks and Subwoofer Speaker jacks. Front Speaker Connection: Connect the Front Speaker cords (red/black) to the Main Speaker jacks of the System. Subwoofer Speaker Connection: Connect the Subwoofer Speaker cords (blue/black) to the Subwoofer Speaker jacks of the System. Center Speaker Connection: Connect the center speaker cord to the CENTER SPEAKER terminal. -
Page 10: Connecting The Am (Mw)/Lw Aerial
Connecting the AM (MW)/LW Aerial The AM aerial (for long and medium waves) can be: Placed on a stable surface Fixed to the wall (you must first remove the base) The AM aerial connector terminals are located on the rear of the system and are marked AM . To avoid noise interference, check that the loudspeaker wires do not run close to the aerial wires. -
Page 11: Connection Of The Tv Monitor
Connection of the TV monitor The following show examples of connections commonly used to connect the DVD player with a External Source. (Example : TV, VCR, DAT CD-RW, etc) TV monitor S-Video Composite video (Supplied) • When S-VIDEO is connected, S-VIDEO has priority. -
Page 12: Connection For Better Sound
Connection for better sound Connecting to an amplifier with Dolby Pro Logic support. What is Dolby Pro Logic? Using five speakers, it recreates the original sound of the music or audio and provides the sense of presence, as if you were in a movie theater or concert hall. -
Page 13: 7-Color Display Function
7-Color Display Function The System allows you to choose your favorite color to produce your own personal atmosphere. Switch the system on by pressing On/Standby ( Press the Color Display/Demo button and select the color you want. Result: Whenever the button is pressed, the color is repeated in the sequence of Cyan Green Y. -
Page 14: Playing A Disc
Playing a Disc Playback Press the Open/Close( ) button. Place a disc gently into the tray with the disc's label facing up. Press the Play/Pause( ) button or Open/Close( close the disc tray. When playing back MP3-CD's, song titles are not displayed on the main unit, but on the TV screen. -
Page 15: Forward/Reverse Searching
Forward/Reverse Searching During playback, you can search quickly through a chapter or track for a specific scene or tune. High-Speed Playback Press the button. Each time the button is pressed Each time the PLAY playback (reverse playback) is possible on DVDs. Down Tuning Enter... -
Page 16: Slow Playback/Checking The Remaining Time
Slow Playback/Checking the Remaining Time Playing Slowly Press the Slow button. Each time the Slow button is pressed SLOW 1/2 SLOW 1/4 PLAY Checking the Remaining Time Press the Remain button. For checking check the total time and the remaining time of a title or chapter being played. -
Page 17: Using Disc Menu/Title
Using Disc Menu/Title To Select the Disc Menu You can use the menus for the audio language, subtitle lan- guage, profile, etc. DVD menu contents differ from disc to disc. Press the Menu button during playback. The Menu Screen appears. When playing a VCD version 2.0, you can operate it using PBC On/Off function. -
Page 18: Selecting The Audio Language/Subtitle Language
Program Playback (Cont’d) To Change the Program Press the Up/Down ( ) button to select the track number to be changed. Press the Enter button to select the title or chapter to be changed. The cursor moves to the next number when the Enter button is pressed again. -
Page 19: Various Dvd Functions
Various DVD Functions To enlarge an image Press the Zoom button. Images can be enlarged 2x and 4x. Zoom During DVD playback, press the button to zoom in 2X/4X/nor- mal, in that order. Press ( ) to move the enlarged portion you want to watch. Selecting the desired Screen Angle Press the Angle button. -
Page 20: Mp3 Playback
MP3 Playback This system is incorporated with an MP3 decoder. You can play back MP3 tracks (files)recorded on CD-Rs,CD-RWs,and CD-ROMs. Starting Playback It is recommended to turn on your TV when playing back an MP3 disc. Press the Open/Close( ) button to load a disc. Press the Play/Pause( ) button. -
Page 21: System Setup
System Setup You can use the DVD player's Setup function to select the TV screen ratio, rating limit, or digital output mode. To Set up the System From the stop mode, press the Setup button. LANGUAGES SYSTEM OSD LANGUAGE ENGLISH AUDIO CHINESE SUBTITLE... -
Page 22: Setting Up The Language Features
System Setup (Cont’d) DIGITAL OUTPUT LANGUAGES SYSTEM TV SCREEN 4:3 LB RATING LEVEL DIGITAL OUTPUT BITSTREAM : Move Setup : Exit BITSTREAM Select this if Dolby Digital 5.1 CH connections have been made. Sends a digital signal that carries the Dolby Digital 5.1 or DTS multichannel infor- mation to your external decorder. -
Page 23: Tuner
Searching for and Storing the Radio Stations You can store up to: 15 FM stations 8 MW stations 7 LW stations Switch the system on by pressing On/Standy ( Select the required frequency band by pressing TUNER/Band again. Result: The appropriate indication is displayed: Frequency Modulation AM(MW) Medium Wave... -
Page 24: About Rds Broadcasting
About RDS broadcasting This unit has the RDS (Radio Data System) function, which enables for the various information such as broadcasting station, radio text, time and 30 types of programs (News, Rock, Classic, etc.) to be received from the FM RDS station together with normal radio signal. Press the On/Standby ( ) button. -
Page 25: Pty(Program Type) Indication And Pty-Search Function
PTY(Program Type) indication and PTY-SEARCH function The PTY information is composed of an identification symbol, which helps the FM radio to recognize the program type of each FM station. The below 30 PTY information is shown on the display by pressing the Pty button. -
Page 26: Tape
Listening to a Cassette Always treat your cassettes with care; refer, if necessary, to the section entitled “Precautions When Using Audio Cassettes” on page 32. Switch the system on by pressing On/Standby ( Open the cassette deck by pushing on the corner of the cover marked Push Eject ( ) until you hear a click and then releasing it. -
Page 27: Recording A Compact Disc
Recording a Compact Disc You can record a compact disc on a cassette in two different ways: Synchronised recording Direct recording If the REC button is pressed while playing back a 5.1 channel encoded DVD, no sound will be output from the center and rear speakers. -
Page 28: Timer Function
Timer Function The timer enables you to switch the system on or off at specific times. Example: You wish to wake up to music every morning. If you no longer want the system to be switched on or off automatically, you must cancel the timer. Before setting the timer, check that the current time is correct. -
Page 29: Mute Function
Mute Function You can turn the sound off temporarily on your system. Example: You wish to answer a telephone call. Press Mute. To switch the sound back on (at the same volume as before), press Mute again or the Volume buttons. TUNER Mute Band... -
Page 30: Setting The System To Switch Off Automatically
Setting the System to Switch off Automatically While listening to a compact disc or a cassette, you can set the system to switch off automatically Example: You wish to go to sleep to music. Press Sleep. Result: The following indications are displayed: 90 MIN Press Sleep one or more times to indicate how long the system should continue playing before it switches off:... -
Page 31: Safety Precautions
Safety Precautions The following diagrams illustrate the precautions to be taken when using or moving your micro component system. Volume Power Sound Color Display REC/Pause TUNER /Band Surround Mode /Demo On/Standby On/Standby DVD/CD CD Synchro Sleep TAPE CD Repeat Mono/ST Open/Close S.Bass Level... -
Page 32: Precautions When Using Compact Discs
The model and serial numbers, normally printed on the rear of the system Your warranty details A clear description of the problem Then contact your local dealer or SAMSUNG after-sales service. Problem Checks/Explanation • The main lead is not correctly plugged into a wall socket or the wall socket is not switched on. -
Page 33: Technical Specifications
Technical Specifications SAMSUNG strives to improve its products at all times. Both the design specifications and these user instructions are thus subject to change without notice. RADIO Usable sensitivity AM (MW) Signal/noise ratio Usable sensitivity Total harmonic distortion Signal/noise ratio... -
Page 34: Reference
Reference Note on Terminology ANGLE CHAPTER NUMBER (PLAYBACK CONTROL) REGION NUMBER SUBTITLES TITLE NUMBER TRACK NUMBER VIDEO CD A 4 channel analog sound reproduced from a program source such as a video- PRO LOGIC tape or LD with the sound unavailable from regular stereo sources. Recorded onto some DVD discs are scenes which have been simultaneously shot from a number of different angles (the same scene is shot from the front, from the left , from the right , etc.). - Page 35 THIS APPLIANCE IS MANUFACTURED BY: AH68-01102B...