Table of Contents
Advertisement
Quick Links
Advertisement
Table of Contents

Related Manuals for Ultima Neo


Summary of Contents for Ultima Neo
- Page 1 User's Manual User Manual For Ultima Neo...
-
Page 2: Prescribing Information
PRESCRIBING INFORMATION FOREWORD Read this manual carefully before using your Ultima NEO unit. The manufacturer strongly recommends carefully reading the “Warnings and Cautions”, and subsequent chapters of this manual. WARNINGS AND CAUTIONS Prescription labeling: Federal law restricts this device to sale or use by or on the order of a practitioner appropriately licensed by the state or province. - Page 3 2. Do not apply stimulation across the patient’s chest, because the introduction of electrical current into the chest may cause rhythm disturbances to the patient’s heart, which could be lethal. 3. Do not apply stimulation over open wounds or rashes, or over swollen, red, infected, or inflamed areas skin eruptions...
- Page 4 PRECAUTIONS 1. TENS is not effective for pain of central origin, including headache. 2. TENS is not a substitute for pain medications and other pain management therapies. 3. TENS devices have no curative value. 4. TENS is a symptomatic treatment and, as such, suppresses the sensation of pain that would otherwise serve as a protective mechanism.
- Page 5 12. Use caution when the patient has a tendency to bleed internally, such as following an injury or fracture. 13. Use caution following recent surgical procedures when stimulation may disrupt the patient’s healing process. 14. Use caution if stimulation is applied over the menstruating or pregnant uterus.
- Page 6 GENERAL WARNINGS 1. Do not immerse any part of the unit in water. 2. Do not place the unit close to excessive heat. 3. Do not use any electrodes which are less than 50mm X 50mm. 4. Do not use the unit while asleep. 5.
-
Page 7: Table Of Contents
Prescribing Information………………………..…… 1 Contents …...……………………….…………..….. 6 Operating Instructions for Healthcare Provider…. 7 Instruction for Use……………….…………..…….. 9 How to Assemble Your Unit…………….….……… 10 After Use…..……………………….….…..….…… 13 Operation of the ULTIMA NEO Unit……..…… Specifications……………….…..………..…..…….. 19 Other Features…………………………...…..…… 21 Electrodes Placement…………………...………… 24 - 6 -... -
Page 8: Operating Instructions For Healthcare Provider
OPERATING INSTRUCTIONS FOR HEALTHCARE PROVIDER INTENDED USE The Ultima NEO combines the treatment capabilities of a TENS device, an EMS or NMES device, a MIC stimulator, and an IFT stimulator all in one unit. TENS stands for Transcutaneous Electrical Nerve Stimulation. - Page 9 experimentation. Some people feel immediate benefit from EMS/TENS, however some may only achieve benefit after repeated treatment sessions and over an extended period of time. For EMS treatment: Electrical Neuromuscular Stimulation (EMS) is believed to work by stimulating the muscles with electrical impulses.
-
Page 10: Instruction For Use
INSTRUCTIONS FOR USE Your Ultima NEO has been designed to be simple and easy to use. CONTENT IN THE PACK Your Ultima NEO pack should contain the following: 1 ... -
Page 11: How To Assemble Your Unit
HOW TO ASSEMBLE YOUR UNIT Assembly of the Ultima NEO Unit is very simple and requires only four steps. STEP 1 LEADS If only using one lead, insert into one jack. If using two leads, insert into both jacks. Step A... - Page 12 STEP 2 ELECTRODES Remove electrodes from the bag and connect to the leads. - 11 -...
- Page 13 Remove the electrodes from the clear plastic shield and position on your body as required. STEP 4 READING Read “Operation of the Ultima NEO Unit” on page 15, and decide how to use the unit for the treatment. - 12 -...
-
Page 14: After Use
NOTE: AFTER USE Always ensure that the unit is switched OFF before removing the electrodes. After use, return the electrodes to the clear plastic shields. There is no need to separate the lead wires from the electrodes. Life of the electrodes: When the electrodes initially lose their adhesive quality, it is possible to reactivate their adhesiveness by applying a fine spray of water. - Page 15 CHARGING THE BATTERY The Ultima NEO is powered by a built-in rechargeable polymer battery or directly from the power adaptor. Separate power adaptor is included in the kit. When the battery is running low, the battery symbol on the screen is empty and keep flashing. It is time to charge the battery.
-
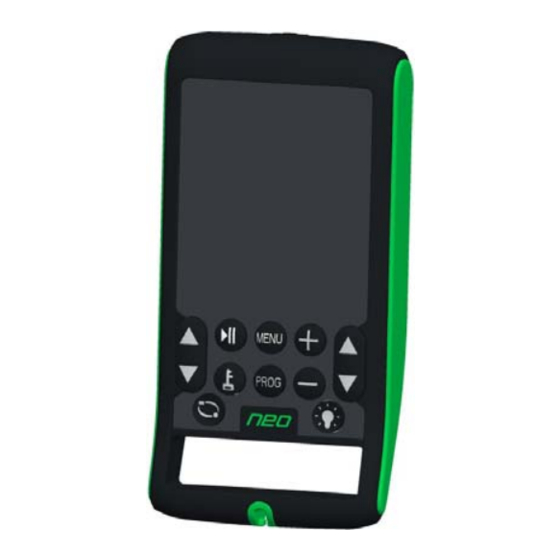
Page 16: Operation Of The Ultima Neo Unit
CHARGER COULD BE HAZARDOUS OPERATION OF THE ULTIMA NEO UNIT Ultima NEO Unit is easy to operate using the buttons shown in the following diagram. WHAT DOES EACH BUTTON DO This button switches the unit on or off. Press once... - Page 17 stimulation). Press and hold the “PROG” button at least 3 seconds, to switch between TENS – EMS –Micro– IFT. The symbol “TENS”, “EMS”, “Micro” and “IFT” will display on the LCD accordingly. Once the stimulation type is selected, press the “PROG” button to select the related programs as below.
- Page 18 Press this button to select the following parameters one by one: TENS /Micro Preset Mode (P1-P2): Treatment Timer (min) TENS Manual Mode (M): FREQUENCY (Hz) PULSE WIDTH (μs) Waveform Treatment Timer (min) EMS Manual Mode (M): FREQUENCY (Hz) PULSE WIDTH (μs) Waveform Treatment Timer (min) SYNCHRONOUS/ALTERNATING...
- Page 19 Press these buttons to increase or decrease the value of the parameter, which has been selected by MENU button. Press these buttons to adjust the intensity of channel 1 and channel 2. Left side is for channel 1; right side is for channel 2. Pause button: Press this button to make the unit pause;...
-
Page 20: Specifications
SPECIFICATIONS Model: Ultima NEO Channel Dual, isolated TENS: Intensity 0-100mA zero to peak at 500ohm load Frequency 1-150 Hz Pulse width 50-250μs in steps of 10μs Waveform Symmetrical bi-phase rectangular, Asymmetrical bi-phase rectangular, Mono-phase rectangular Treatment timer Continuous, 15, 30, 45, 60, 90min... - Page 21 will appear on your screen if this formula is not followed in EMS manual mode. Micro Current: Frequency: 94Hz fixed(P1), 80Hz fixed(P2), 0.5,8,80Hz(M) Pulse width: 250μs fixed(P1), 2ms fixed(P2,M) Wave form Mono-Phase rectangular, Symmetrical Bi-Phasic rectangular Treatment timer Continuous, 10, 20, 30, 45, 60, 90min Interferential(IFT): Carrier Frequency 4000Hz fixed (P1,M-CH1) ,...
-
Page 22: Other Features
OTHER FEATURES 1. When the unit is turned on, if any of the buttons are not pressed within 5 minutes, it will automatically shut off. 2. When the treatment timer has been set, it begins to count down one minute by one minute and is displayed on the LCD. - Page 23 Waveform Information There are 5 types of waveforms: (1). Symmetrical Bi-Phasic rectangular waveform Amplitude Time (2). Asymmetrical Bi-Phasic rectangular waveform Amplitude Time (3). Mono-Phasic waveform Amplitude Time - 22 -...
- Page 24 (4). Alternated Bi-Phasic rectangular waveform Amplitude Time (5). Symmetrical balanced Sine waveform Amplitude Time - 23 -...
-
Page 25: Electrodes Placement
ELECTRODES PLACEMENT Please study the body maps in this guide, which illustrate placement of the electrodes depending on your symptoms. Note: 1B =Channel 1 black / 1R =Channel 1 red 2B =Channel 2 black / 2R =Channel 2 red Examples of electrodes placement for TENS: 0 &... - Page 26 2 – NECK PAIN Using both leads, place the electrodes at the back of the neck and over the top of your shoulders. Note: Do not place electrodes on the side or front of the neck. - 25 -...
- Page 27 3 – TORTICOLLIS Using a single channel, place the electrodes, over the area of maximum pain. - 26 -...
- Page 28 4 – LOW BACK PAIN Using both leads, place electrodes on either side of the spine, crossing the channels, at the site of pain. - 27 -...
- Page 29 5 – SCIATICA Using both leads, take the first lead and place the electrode with the black adapter on your lower back on one side of your spine, and the second electrode with the red adapter at the top of the back of your leg. With the second lead, place the other two electrodes lower down as illustrated.
- Page 30 6 – EPICONDYLITIS Using both leads, place electrodes on either side of the elbow. - 29 -...
- Page 31 7 – WRIST PAIN Using a single channel, place the electrodes over the area of maximum pain on each side of the wrist. - 30 -...
- Page 32 8 – KNEE PAIN (CHRONIC) Using both leads, place electrodes over the top and base of the knee. Avoid placing directly on the kneecap. Below are two common application techniques. - 31 -...
- Page 33 9 – ANKLE SPRAIN Using both leads, place an electrode from one lead on either side of the leg, and the other electrode on your ankle. The electrodes from the other lead will be placed along the affected nerve. - 32 -...
- Page 34 10 – KNEE PAIN (ACUTE) Using both leads, place electrodes over the top and base of the knee. Avoid placing directly on the kneecap. Below are two common application techniques. - 33 -...
- Page 35 11 – HIP PAIN (COXALGIA) Using both lead wires, place one electrode from each lead wire on your lower back on the side of the spine related to the affected hip. The remaining electrodes must be placed on the area of pain, on your hip. - 34 -...
- Page 36 12 – MENSTRUAL PAIN Using both lead wires, place electrodes over the tummy area as shown. - 35 -...
- Page 37 13 – MIGRAINE Using only 2 electrodes, place each on the back of the neck. Note: Do not place electrodes on the side or front of the neck. 1B 1R MIGRAINE (ADDITIONAL POSITION) Using only 2 electrodes, place one on the left temple, and the other on the back of your right hand between your thumb and first finger.
- Page 38 Examples of electrodes placement for EMS: Please Note: In EMS mode, electrode placement is not determined by the program mode selected. Simply select your program mode, then place electrodes on the required treatment area according to the following diagrams. TRICEPS - 37 -...
- Page 39 LATISSIMUS DORSI - 38 -...
- Page 40 SPINALIS MUSCLE (BACK) - 39 -...
- Page 41 GLUTEUS - 40 -...
- Page 42 HAMSTRINGS - 41 -...
- Page 43 CALVES - 42 -...
- Page 44 BREAST - 43 -...
- Page 45 ABDOMEN - 44 -...
- Page 46 ABDOMEN + WAIST - 45 -...
- Page 47 QUADRICEPS - 46 -...
- Page 48 THIGHS - 47 -...
- Page 49 Interferential stimulation, please consult your doctor for directions on electrode placement. ELECTRODES The electrodes that are supplied with your ULTIMA NEO Unit are self-adhesive and can be used several times. Skin must be allowed to breathe, so the electrodes should be removed periodically. When not in use, the electrodes should be placed onto the clear plastic shield.
- Page 50 I-NEO-EN Rev8.0 0421 - 49 -...
Need help?
Do you have a question about the Neo and is the answer not in the manual?
Questions and answers