Table of Contents
Advertisement
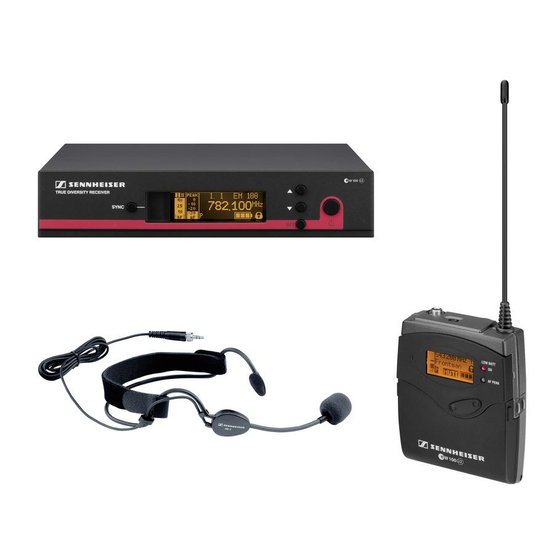
Quick Links
Advertisement
Table of Contents

Related Manuals for Sennheiser EW 145 G3


Summary of Contents for Sennheiser EW 145 G3
- Page 1 100 Series Instruction manual...
-
Page 3: Table Of Contents
Overview of the operating menus ..............................25 Cleaning the devices ..................................... 27 Specifications ......................................31 Manufacturer Declarations ................................. 35 For an animated instruction manual, visit the respective product pages at www.sennheiser.com. There you will also find detailed instruction manuals for the individual devices. -
Page 4: Important Safety Instructions
• Heed all warnings and follow all instructions in this instruction manual. • Only clean the devices when they are not connected to the mains. Use a cloth for cleaning. • Only use attachments/accessories specified by Sennheiser. • Refer all servicing to qualified service personnel. -
Page 5: Bodypack Transmitter And Radio Microphone
Important safety instructions • Danger due to high volumes This device is capable of producing sound pressure exceeding 85 dB(A). 85 dB(A) is the sound pressure corresponding to the maximum permissible volume which is by law (in some countries) allowed to affect your hearing for the duration of a working day. It is used as a basis according to the specifications of industrial medicine. -
Page 6: The Ew 100 G3 Evolution Wireless Series
The frequency bank system Please note: Frequency usage is different for each country. Your Sennheiser partner will have all the necessary details on the available legal frequencies for your area. The devices are available in 6 UHF frequency ranges with 1,680 frequencies per frequency... -
Page 7: Product Overview
Product overview Product overview Overview of the EM 100 receiver 2 Data Ports auf der Rückseite ergänzen, Anzeigen-Display verkleinern, Jog-Dial entfernen, Typen- schild zu 300 ändern, kein Kopfhörerausgang: Nr. anpassen ³ · » ¿ ´ ² PEAK 1. 1 ew100 G3 543.200 MUTE XXXXXXX... -
Page 8: Overview Of The Displays Of The Em 100 Receiver
Product overview Overview of the displays of the EM 100 receiver After switch-on, the receiver displays the standard display “Receiver Parameters”. For further illustrations and examples of the different standard displays, please refer to 24. This stan- dard display displays the operating states of the receiver. PEAK 1. -
Page 9: Overview Of The Sk 100 Bodypack Transmitter
Product overview Overview of the SK 100 bodypack transmitter » ³ · ¿ ² ´ ² ¹ ¶ º ¸ ¾ µ ¸ Operating elements ³ ¶ SET Microphone/instrument input (MIC/LINE), button 3.5 mm jack socket, lockable º rocker button (UP/DOWN) ·... -
Page 10: Overview Of The Displays Of The Sk 100 Bodypack Transmitter
Product overview Overview of the displays of the SK 100 bodypack transmitter After switch-on, the bodypack transmitter displays the standard display “Frequency/Name”. For further illustrations and examples of the different standard displays, refer to 24. The display backlighting is automatically reduced after approx. 20 seconds. 543.200 ew100 G3 MUTE... -
Page 11: Overview Of The Skm 100 Radio Microphone
Product overview Overview of the SKM 100 radio microphone ¶ ² ´ ¿ » · º ¸ µ ¾ º ¹ µ µ Operating elements ³ º Microphone head (interchangeable) Color-coded protection ring; available in different colors · Name and pick-up pattern of the micro- ¾... -
Page 12: Overview Of The Displays Of The Skm 100 Radio Microphone
Product overview Overview of the displays of the SKM 100 radio microphone After switch-on, the radio microphone displays the standard display “Frequency/Name”. For further illustrations and examples of the different standard displays, refer to 24. The display backlighting is automatically reduced after approx. 20 seconds. 543.200 ew100 G3 MUTE... -
Page 13: Putting The Devices Into Operation
You can set up the receiver on a flat surface or mount it into a 19“ rack. For informa- tion on rack mounting, refer to the instruction manual of the EM 100 receiver avail- able on the ew G3 product page at www.sennheiser.com. Setting up the receiver on a flat surface Place the receiver on a flat, horizontal surface. - Page 14 G3 product page at www.sennheiser.com). Align the antennas in a V-shape. When using more than one receiver, we recommend connecting remote antennas and, if necessary, using Sennheiser antenna accessories. Fore more information, visit the ew G3 product page at www.sennheiser.com. Connecting an amplifier/mixing console ¾...
-
Page 15: Sk 100 Bodypack Transmitter
SK 100 bodypack transmitter Inserting the batteries/accupack For powering the bodypack transmitter, you can either use two 1.5 V AA size batteries or the rechargeable Sennheiser BA 2015 accupack. ¸ Push the two catches in the direction of the arrows and open the battery compart- ment cover µ. - Page 16 The audio input is designed for the connection of both condenser microphones and instru- ments (e.g. guitars). DC powering of the condenser microphones is via the audio input. Use one of the recommended Sennheiser microphones or the optional CI 1 instrument cable.
-
Page 17: Skm 100 Radio Microphone
SKM 100 radio microphone Inserting the batteries/accupack For powering the radio microphone, you can either use two 1.5 V AA size batteries or the rechargeable Sennheiser BA 2015 accupack. » Unscrew the lower part of the radio microphone from the radio microphone’s body »... - Page 18 Putting the devices into operation Charging the accupack To charge the radio microphone with the inserted BA 2015 accupack (optional accessory): Use the LA 2 charging adapter to insert the radio microphone into the L 2015 charger (both the charger and the charging adapter are available as optional accessories). Changing the microphone head The microphone head is easy to change.
-
Page 19: Using The Devices
Using the devices º º Using the devices To establish a transmission link, proceed as follows: 1. Switch the receiver on. 2. Switch a transmitter on. The transmission link is established and the receiver’s RF level display “RF” reacts. If you cannot establish a transmission link between transmitter and receiver: Make sure that transmitter and receiver are set to the same frequency bank and to the same channel. - Page 20 Using the devices completely switch the receiver off: Disconnect the receiver from the mains by unplugging the mains unit from the wall socket. SK 100 bodypack transmitter ¿ ¸ ¸ µ To switch the bodypack transmitter (online operation): ¸ and open the battery compartment cover µ. Push the two catches Briefly press the ON/OFF...
- Page 21 Using the devices 543.200 ew100 G3 MUTE Use this function to save battery power or to prepare a bodypack transmitter for use during live operation without causing interference to existing transmission links. activate signal: Briefly press the ON/OFF button ON/OFF “RF Mute Off”...
-
Page 22: Synchronizing A Transmitter With The Receiver
Using the devices To switch the radio microphone and to deactivate the RF signal on switch-on (offline operation): ¹ Press the ON/OFF button until “RF Mute On?” appears on the display panel. ON/OFF Press the multi-function switch ¸. The transmission frequency is displayed but the radio microphone does not transmit an RF signal. -
Page 23: Deactivating The Lock Mode Temporarily
Using the devices “ ” appears on the display panel of the receiver. “ ” also appears if: – no transmitter was found or the transmitter is not compatible, – no transmitter was found and the synchronization process was canceled after 30 seconds, –... -
Page 24: Muting The Audio Signal Or Deactivating The Rf Signal
Using the devices Muting the audio signal or deactivating the RF signal EM 100 mute the audio signal: When one of the standard displays is shown on the display panel, press the STANDBY button. “RX Mute On?” appears on the display panel. Press the button. - Page 25 Using the devices The current state of the muting function or the RF signal is displayed on the display panel of the bodypack transmitter. Audio signal is muted Transmitter’s display panel: “MUTE” is displayed Audio signal is activated (muting is canceled) Transmitter’s display panel: “MUTE”...
-
Page 26: Selecting A Standard Display
Information on the soundcheck function and the guitar tuner function can be found in the instruction manual of the EM 100 receiver available on the ew G3 product page at www.sennheiser.com. SK 100 and SKM 100 To select a standard display:... -
Page 27: Overview Of The Operating Menus
Overview of the operating menus For more detailed information on the operating menus, refer to the individual instruction manuals of the devices. These instruction manuals can be down- loaded from the respective product pages at www.sennheiser.com. EM 100 Main menu “Menu“... - Page 28 Overview of the operating menus Display Function of the menu item Easy Setup Scans for unused frequency presets, releases and selects frequency presets Frequency Preset Changes the frequency bank and the channel Name Enters a freely selectable name AF Out Adjusts the audio output level Adjustment range: -24 dB to +24 dB, adjustable in 3-dB steps, 6 dB gain reserve Special function “gain reserve”: When you have adjusted a level of +18 dB, press the...
-
Page 29: Cleaning The Devices
Cleaning the devices Display Function of the menu item Main menu Sensitivity Adjusts the sensitivity “AF” Frequency Preset* Changes the frequency bank and the channel Name* Enters a freely selectable name Auto Lock Activates/deactivates the automatic lock mode Advanced Calls up the extended menu “Advanced Menu”... - Page 30 Cleaning the devices To clean the radio microphone’s sound inlet basket (MMD 835-1, MMD 845-1, MMD 935-1, MMD 945-1, MME 865-1): Unscrew the upper sound inlet basket from the microphone head by turning it counter- clockwise. CAUTION! Liquids can damage the microphone head! Liquids can damage the microphone head.
- Page 31 Cleaning the devices Problem Possible cause Possible solution RF signal available, Transmitter is muted (“MUTE”) Cancels the muting (see page 22). no audio signal, Switch the pilot tone transmission on the trans- “MUTE” appears on the transmitter doesn’t transmit a pilot tone mitter on (see page 27).
- Page 32 If a problem occurs that is not listed in the above table or if the problem cannot be solved with the proposed solutions, please contact your local Sennheiser partner for assistance. To find a Sennheiser partner in your country, search at...
-
Page 33: Specifications
Off, Low: 5 dBμV, Middle: 15 dBμV, High: 25 dBμV Pilot tone squelch can be switched off Antenna inputs 2 BNC sockets AF characteristics Compander system Sennheiser EQ presets (switchable, affect the line and monitor outputs): Preset 1: “Flat” Preset 2: “Low Cut”... - Page 34 USA: 47 CFR 15 subpart B Canada: ICES 003 Certified by cCSAus KL, 60065, CSA. For accessories and information on connector assignment, visit the ew G3 product page at www.sennheiser.com. SK 100 and SKM 100 RF characteristics Modulation wideband FM Frequency ranges 516–558, 566–608, 626–668, 734–776,...
- Page 35 Specifications AF characteristics Compander system Sennheiser AF frequency response microphone: 80–18,000 Hz line: 25–18,000 Hz 80–18,000 Hz ≥ 110 dBA S/N ratio (1 mV, peak deviation) ≤ 0.9 % Max. input voltage (SK) microphone/line Input impedance (SK) microphone/line 40 kΩ, unbalanced/1 MΩ...
- Page 36 Specifications Microphones (SK 100) ME 2 ME 3 ME 4 Microphone type condenser condenser condenser Sensitivity 20 mV/Pa 1.6 mV/Pa 40 mV/Pa Pick-up pattern omni-directional cardioid cardioid Max. SPL 130 dB SPL 150 dB SPL 120 dB SPL Microphone heads (SKM 100) MMD 835-1 MMD 845-1 MME 865-1...
-
Page 37: Manufacturer Declarations
90° Manufacturer Declarations Warranty Sennheiser electronic GmbH & Co. KG gives a warranty of 24 months on this product. For the current warranty conditions, please visit our web site at www.sennheiser.com or contact your Sennheiser partner. In compliance with the following requirements •... - Page 38 • Consult the dealer or an experienced radio/TV technician for help. These class B digital devices comply with the Canadian ICES-003. Changes or modifications made to this equipment not expressly approved by Sennheiser elec- tronic Corp. may void the FCC authorization to operate this equipment.
- Page 40 Sennheiser electronic GmbH & Co. KG Printed in Germany Am Labor 1, 30900 Wedemark, Germany Publ. 01/09 www.sennheiser.com 529659/A01...
Need help?
Do you have a question about the EW 145 G3 and is the answer not in the manual?
Questions and answers