Table of Contents
Advertisement
Advertisement
Table of Contents

Related Manuals for AMMOTION LUBA


Summary of Contents for AMMOTION LUBA
- Page 1 Original Instructions LUBA Robotic Lawn Mower User Manual V1.2...
-
Page 2: Table Of Contents
14. Disclaimers Thank you for choosing MAMMOTION as your garden care lawn mower. This Quick Start Guide will help you learn and operate MAMMOTION LUBA, a 4-wheels-drive (4WD) robotic perimeter free lawn mower to cut your lawn grass and maintain your lawn. - Page 3 1.Safety Instructions 1.1 General safety instructions ● Read the Operator’s manual carefully and make sure you understand the instructions before you use the product. ● Never allow children, persons with reduced physical, sensory or mental capabilities or lack of experience and knowledge or people unfamiliar with these instructions to use the machine, local regulations may restrict the age of the operator.
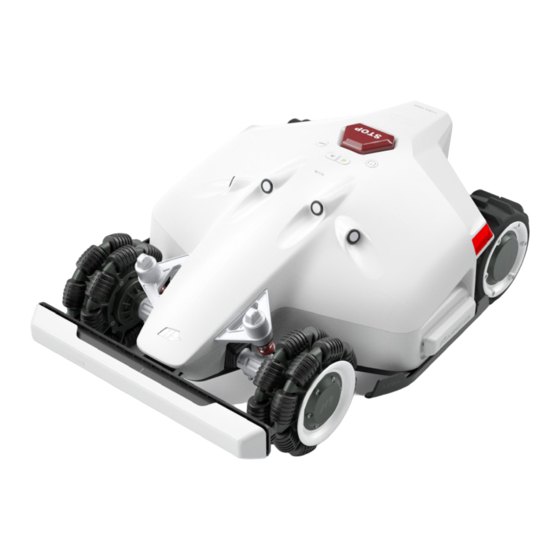
- Page 4 2.1 About MAMMOTION LUBA MAMMOTION LUBA is a 4-wheels-drive (4WD) robotic lawn mower. LUBA Series robot lawnmowers feature RTK GNSS navigation and virtual-mapping systems. Those allow users to customize their mowing tasks with different mowing areas and schedules in the Mammotion APP. They provide a picture-perfect lawn maintenance solution with a real hands-free experience.
- Page 5 ● If there is a risk of thunderstorm, Mammotion Tech recommends that the mains cable to the charging station and the power supply unit to the reference station are disconnected to decrease the risk of damage to electrical components. Connect the mains cable and the power supply again if there is no longer a risk of thunderstorm.
- Page 6 Do not use a high-pressure washer to clean the product. Do not use solvents to clean the product. Disconnect the plug to the charging station or remove the disabling device before you clean or do mainte- nance of the charging station. LUBA is water resistant, but it is not waterproof. Both LUBA and the RTK station have a water-resistance rating of IPX6 under the IEC/EN60529 standard and have been certified by TUV. LUBA is designed to meet the installation, setting, and use requirements for heavy rain or storms when ...
- Page 7 After washing, ensure that LUBA is placed on the ground in its normal orientation and not upside down. Do not reverse the LUBA to clean the chassis, and if you do reverse it for cleaning purposes, make sure to revert it back to its proper orientation afterward. This precaution is necessary to prevent water from seeping into the motor and potentially affecting the normal operation of LUBA. By following these guidelines, you can effectively clean your LUBA without compromising its water resis- tance and functionality. 1.5 Battery safety Lithium-ion batteries can explode or cause fire if disassembled, short-circuited, exposed to water, fire, or high temperatures. Handle carefully, do not dismantle, open the battery or use any type of electrical/me- chanical abuse.
- Page 8 This product is manufactured in China It is not permitted to dispose this product as normal household waste. Ensure that the product is recycled in accordance with local legal requirements. The recycling symbol shows that the item can be recycled Keep the pack of this product dry The pack of this product should not be covered Prohibit flipping This product is fragile articles...
- Page 9 Symbols on the battery It is not permitted to dispose this product as normal household waste. Ensure that the product is recycled in accordance with local legal requirements. This product complies with the applicable UK Directives. This product complies with the applicable EU Directives. This product is manufactured in China This product meets Canadian and U.S.
-
Page 10: Introduction
Do not ride on the machine. Keep a safe distance from your machine when operating. - Page 11 LUBA Robotic Mower Quick Reference Chart 1 LED indicator on the Status LED side light front bumper LUBA sleeping or "Pause" Green on on App clicked From local time 8:00-18:00 green on Working (manual control and from local time 18:00-8 00 off...
- Page 12 15.Charging port on LUBA 14.USB port 16.Infrared receiver Note: If in the returning home process, STOP is pressed and LUBA is locked, please First press then to continue Auto-returning. USB port is reserved for trouble shooting and debugging. The numbers in the figure represent: 1.
- Page 13 2.3 Charging Station Product Overview The numbers in the figure represent: 1.Mounting hole for RTK base pole 5.Power adaptor 2.Mounting holes*3 6.Extension wire(10meters) 3.Charging pin on charging station 7.LED light of charging station 4.Screws*3 Charging Station Quick Reference Chart Status LED on RTK reference station Reference station initializing green flash...
- Page 14 2.4 RTK Reference Station 1.Radio Antenna 3.Wire(2.5 meter or 8.2 feet) 2.RTK Reference Station 4.Mounting pole Charging Station Quick Reference Chart Status LED on RTK reference station Reference station initializing green flash (searching satellites) from local time 8:00-18:00 green constant on from Work properly local time 18:00-8:00 off Reference station defect &...
- Page 15 2.5 Other accessories LUBA garage: LUBA RTK reference station wall installation kit:...
- Page 16 LUBA are not obstructed,as “2” shown in the figure. 3.The data can be transmitted from RTK Reference Station to LUBA. As “3” shown in the figure. This does not mean there should always be a line-of-sight view from each point of your lawn to the RTK reference station.
- Page 17 We advise that you try to keep these parts out of the task area or place them in a no go zone. 2.If these corners or high walls exist in your lawn, please keep LUBA at least 15 cm (approx. 6 inches) away...
- Page 18 Multiple lawns But does this mean there are too many limitations for LUBA to be useful? This is not the case, and on our website you can find many examples of set-ups, videos and recommendations to assist you in determining if your lawn is suitable for LUBA, and how to set up LUBA to work efficiently.
- Page 19 Press the power button of LUBA to power LUBA on. Next press then press to direct LUBA back to the charging station. As the infrared sensor system is used, you can still do this even in indoor areas where there is no satellite signal and LUBA cannot do the navigation.
- Page 20 It will then back into the charging station and do the recharge automatically. If LUBA is not in the task area or on the connection path, you first need to first drive LUBA into the task area or onto the connection path. Then press then on App.
-
Page 21: Luba Quick Start Installation
The same as level 0 lower than 7cm the obstacle 3. LUBA quick start Installation Note: 1.Read and understand the safety chapter before you install the product. 2.Use original spare parts and installation material. - Page 22 Alternatively, set the RTK Reference station on a wall or roof that has an open-sky view. As shown below. ≥ 90。 2.Ensure that the RTK reference station is at least 5 m (approx. 16.5 feet) away from any large glass walls or large metal objects, such as a wall made of iron sheet.
- Page 23 Correct RTK reference station settings: 1. Open-sky area on the lawn, at least 3 m (approx. 10 feet) from the wall. 2. Set on the roof or high on a wall with open-sky area (typically for lawns with “O”-shape, “U” shape, or with separate lawns).
- Page 24 3. When set on the ground, the charging plate must not be bent or tilted, or with grass taller than 5 cm (approx. 2 inches) below the charging plate. Both the area of charging station and the “recharging area” should be on flat ground. After LUBA is positioned on the charging station, the plate should not be bent.
- Page 25 flat and solid. The grass should be short. F l a t G r o u Wrong charging station settings: 1.Setting charging station on a slope 2.Thick grass which causes the charging station to bend when a heavy object, such as LUBA, is on it.
- Page 26 3.3 The RTK base is installed on the charging station If the reference station is set on the charging station, the settings should be as follows: Correct settings: 1. Open sky area. 2. One side beside a wall. Only one direction is obscured by the wall, other directions are totally free Overview of the installation when it’s completed:...
- Page 27 Installation Kit: Charging station extension cable(10m) RTK reference station Installation Kits Power Supply connect cable(2m) RTK Reference Station Accessory Kit A Accessory Kit B Charging Station RTK reference station power supply Trident Ground Stake RTK reference station extension cable(10m) Bumper Accessory Kit C RTK Wall Mount Accessory Kit: Mounting pole...
- Page 28 2. Screw the 10 m (approx. 33 feet) power supply extension cord into the interface C of the charging station. 3. As shown in the figure, screw the two metal rods together, and then screw on the trident ground stake. 4.
- Page 29 6. Connect the 2 m (approx. 6.5 feet) RTK extension cord to the RTK antenna reference station cable. 7. Connect the 10 m (approx. 33 feet) power supply extension cord with power plug and insert the power plug into an electrical outlet. 8.
- Page 30 Wrong settings: Overview of the installation when it’s completed. RTK Wall Mount Kit: RTK Wall Mount RTK reference station RTK reference station Accessory power supply extension cable(10m) Installation Process: 1. Choose a suitable installation area at a high place of your house. 2.
- Page 31 3.Install the expansion screws in the drilled holes. 4.Fix the RTK Reference Station on the sticker and tighten the screws. 5.Connect the end of the RTK Reference Station extension cable (10m) to the RTK reference station and connect the other end of the RTK Reference Station extension cable (10m) to the RTK power supply and turn on the power.
- Page 32 6.The installation is complete. 3.5 RTK reference station is installed separately from the charging station & on the roof/wall Installation Kit: L-shaped mounting rod Expansion screw*4 Drilling position in dication sticker Cable buckle*3 It is also possible to site the RTK reference station in a separate location to the charging station.
- Page 33 Correct settings: ≥ 90。 ≥ 90。 Install on wall,in open area. Install on roof far from any obstruction that may affect signal. Wrong settings: Do NOT install antenna surrounded by Do NOT install on high wall. walls or in covered areas. Do NOT install under eaves or gutters.
- Page 34 Installation Process: 1.Choose a suitable installation area on the outer wall of your house. 2.Stick the sticker on the wall indicating the position of the drilling hole and drill holes in the appropriate positions. 3.Install the expansion screw in the drilled hole. 4.
- Page 35 5. Install the RTK reference station on the front end of the L-shaped installation pole (note that the antenna must be installed on the RTK reference station first). 6. Connect the 10m end of the RTK extension cord to the RTK reference station and fix the cord harness along the L-shaped installation rod with a cord tie.
- Page 36 3.6 LUBA garage installation Fasten the garage cover on the top of the charging station from front to back and tighten the two screws on the back of the garage cover to complete the installation of the garage. Note: 1.Do not place items on the top of the garage to avoid damage to the garage and affect the vehicle signal.
-
Page 37: Preparation & Activation
4. Preparation & Activation 4.1 MAMMOTION APP download & Installations MAMMOTION LUBA is a 4-wheels-differential (4WD) robotic lawn mower. The 4WDenables LUBA to break the limits of mowing jobs. LUBA Series robot lawnmowers feature RTK GNSS navigation and virtual-mapping systems. These allow users to customize their mowing tasks with different mowing areas and schedules on Mammotion APP. - Page 38 4.2 MAMMOTION account sign up and login How to sign up: 9:41 Welcome Welcome Welcome E-mail E-mail E-mail Allow Mammotion to access this Allow Mammotion to find, 9:41 device`slocation? connect to and delermine the relative Password Password Password positon of nearby devices? While using the app Allow Login...
- Page 39 1. Please read the guide on Mammotion App carefully 2. Please make sure the secure key is correctly inserted into LUBA 3. Please make sure that your LUBA is powered on (with the LED indicator on the front bumper constant green)...
- Page 40 LUBAs. Different phones can use the same Mammotion account. ONLY ONE phone can control ONE LUBA at same time. The task data and map data are stored in LUBA itself, so when you use different phones with the same LUBA, the map and task data will be synchronized.
- Page 41 Internet, which means you do not have to connect your phone to the same WIFI & hot spot as LUBA. You can also set your phone as a hot spot if your phone has good signal.
- Page 42 2.If LUBA is on charging station but not charging (charging failed), please check if the charging station if set in a proper place, and the charging port at back of LUBA is aligned with the charging port on the charging station 3.If positioning status is bad (“RTK Reference station”...
-
Page 43: Basic Operation & App Interface Introduction On Main Page
Enter map Network setting: can choose to connect WIFI & Hotspot or disconnect. Note: The WIFI & Hotspot connection of LUBA does not affect the normal task and working of LUBA once LUBA is registered and initialized for the first time. - Page 44 4.DO NOT switch off LUBA or disconnect the WIFI & Hotspot connection when upgrading, otherwise the upgrading may fail. Upgrading Process: 1. Connect LUBA to the WIFI & hot spot by clicking “Network settings”. The WIFI & Hotspot connection is complete when turns to...
- Page 45 Enter map 3. The message box will show you what is new in the firmware. Click “One click upgrade” 9:41 My Device LUBA_1000056 Firmware upgrade Luba-MATFBJZP 1.3.2.243 ·add new feature of led control 进入地图 ·fixed some issues One-click upgrade 4. Wait until the upgrading is done (make sure the WIFI & Hotspot is available during the upgrade):...
- Page 46 5.When the APP shows that LUBA is successful upgraded, the LUBA will automatically switch off, Please LONG Press (Press about 10s until the LED side lights is on) the power button of LUBA to switch on. 6. If the upgrade failed, please check the WIFI & Hotspot connection and try again.
- Page 47 5.2 How to check firmware version and App version: Check firmware version: Settings 9 41 Firmware version Unbound Feedback DeviceVersion 1.3.4.205 Main controller 1.3.2.944 Firmware Network Communication module 1.1.1.430 version setting Right motor driver 1.1.1.102 Upgrade Rtk rover station 7361 Check App version: 9:41 9 41...
-
Page 48: Basic Operation & App Interface Introduction On Map Page
1.During the feedback process, please make sure that both the Bluetooth and WIFI & Hotspot connection is good. And also ensure that the distance between your phone and LUBA is less than 3 m (approx. 10 feet) 6. Basic operation & App interface introduction on the Map page Below is the interface of the map &... - Page 49 7.Positioning status: The position status could be “Fine” or “Unavailable”. If “fine” LUBA can work normally, if “unavailable” LUBA could not do the automatic navigation and will not be able to function.
- Page 50 Bluetooth quality: shows the strength of the Bluetooth connection. Number of satellites: the Number of satellites observed by LUBA. If either of the 2 numbers is less than 20, there will be a risk that the positioning status may be “unavailable”. If you meet this issue, please drive/set LUBA and the task area to a more open-sky area to let LUBA receive more satellite signals from the sky.
- Page 51 Good, can use LUBA NOW! positioning 8.Setting: 1.) LUBA’s speed when under manual control (can only be set when manually controlling LUBA and not when creating a task) 2.) If rain sensor on or off 3. )Obstacle avoidance logic setting 9.View returns to the center of the map...
- Page 52 8.We highly recommend you set any areas with obvious holes, gullies, tree roots or other obstacles as no go zones. 9.LUBA can only be used when the front bumper is attached and the LED indicator on the front bumper is 6.1 Map page when creating Task:...
- Page 53 Note: if “Done” clicked, this means that a task area will be created immediately, one boundary will be from the start point to LUBA’s current location, e.g. if in the image above, the “Done” is clicked, a triangu- lar task area will be created.
- Page 54 37. Continue working (this “Continue” button only works when the “Pause” button on the App is clicked. If the STOP button on LUBA is pressed, it is necessary to use the buttons on LUBA to unlock and continue. 38. Cancel the recharging progress...
-
Page 55: Create A Task
1.Remove debris, piles of leaves, toys, wires, stones and other obstacles from the grass. Make sure no children and pets are on the lawn. 2.We highly recommend you leave 10-15cm distance if you drive LUBA along the edge of a wall / fence / obstacles / ditches 7.1 Initialization before creating a task:... - Page 56 5.After the initialization, LUBA’s status turns to “Ready” and you can now start creating a task as shown below. Located Located Congratulations! LUBA positioning success Automatic pile lowering test 1.5M Click the automatic pile lowering button at the bottom, and LUBA will lower the pile first...
- Page 57 7.2 Create a task map: 1. click “Create” to start creating task map Ready!(Luba-100020) Create 2. Read the guidelines of creating task & working with LUBA Grass < 10CM Phone power Make sure that before you start mowing Mobile phone charging to prevent accidental loss...
- Page 58 1) If “Create” clicked, this means that a task area will be created immediately, one boundary will be from the start point to LUBA’s current location, e.g. if in the image above, the “Done” is clicked, a triangular task area will be created.Another way to finish task creation is to manually drive LUBA back to the task area start point.
- Page 59 4.Finish the boundary drawing of the task area. Work planning(Luba-100020) Work planning(Luba-100020) Cancel Cancel Done Done Work planning(Luba-100020) Work planning(Luba-100020) Tips End of task area planning Continue planning Go to work Create Delete Create Delete 5.You can continue planning (add another task area in the same task, add a no-go zone, add a connec-...
- Page 60 Note: You need to first drive LUBA into an already existing task area to create a connection path (channel) or a no go zone, because they (or part of them) must be within the task area. You first need to drive LUBA out of the already existing task area to create a new task area.
- Page 61 40mm, please make sure that each time you carry out mowing, only about 1/3 height of the grass is cut (e.g. if your original grass height is 60mm, set the cutting height of LUBA 40 or 45mm; if your original...
-
Page 62: Parameter & Schedule Setting And Start Task
4.If any unexpected issue occurs, press the STOP button and lock LUBA. The STOP button has the high- est priority of any command. 5. If the lift sensor is triggered, LUBA will stop. Please press the grass cutting button and then the start button to unlock LUBA. - Page 63 2.When setting the task parameters, you need to select at least one task area of the task map (the area will change from green to blue when selected); if no area is selected then this results in all the areas being loaded together: Ready!(Luba-100020) Ready!(Luba-100020) Tips No area is selected.
- Page 64 20-30 (the unit on App is wrong) mowing path would be 10cm,if no positioning error(which is not possible) The speed of LUBA when mowing,lower speed gives better Task speed 0.3-0.5 result for dense and thick grass, but with lower efficiency.
- Page 65 1.select the area you want to set the schedule List of areas Ready!(Luba-100020) Areas_1 Areas_2 Confirm 2.set the date in each week and the start time of the selected date you want LUBA to work. Work settings Ready!(Luba-100020) Monday Fine Tuesday...
-
Page 66: Cutting Blades Replacement
The cutting blades can be replaced when they are damaged or worn out. We recommend you change the blades every six months. Tools needed:M2.5 Allen Key. The LUBA MUST BE TURNED OFF when replacing, inspecting, or cleaning the cutting blades. Make sure the blades are fixed securely and flexibly. Note: 1.All the cutting blades are recommended to be replaced at the same time when the mowing result... -
Page 67: Specifications
10. Specifications: Specifications LUBA AWD 5000 LUBA AWD 3000 LUBA AIR 1000 Lawn Size 53,820 ft 32,292 ft2 10,764 ft2 Engine All-Wheel Drive(AWD) All-Wheel Drive(AWD) All-Wheel Drive(AWD) Max Climbing Ability 75% Slope 65% Slope 45% Slope Vertical Obstacle Passing Ability... -
Page 68: Aftersales Policy
11. Aftersales Policy: 11.1 Cuetomer services flow Issue Report Note: 1. SN is on the sticker on machine body. For example, ***-2238****-S/N. Information Gathering 2. Service Center Contact Information: 1. Product’s SN *1 2. Purchasing invoice or receipt attached Contact support@mammotion.com for 3. - Page 69 11.2 Part I - limted Warranty These MAMMOTION After-Sales Policies (these “Policies”) only apply to MAMMOTION products you purchased from MAMMOTION authorized retailers or MAMMOTION directly for your own use and not for resale. By using your MAMMOTION product, you agree to be bound by these Policies. If you are not eligible or do not agree to any of the Terms, do not use your MAMMOTION product.
-
Page 70: How To Obtain Warranty Service
1.The warranty period for a product starts on the day such products are delivered. 2.If you cannot provide an invoice or other valid proof of purchase, then the warranty period will begin 90 days after the production date shown on the product, unless otherwise agreed upon between you and MAMMOTION. - Page 71 Table for parts warranty: Model LUBA Component Limited warranty period Main body 2 years Battery 2 years Accessories Charging station &RTK antenna 1 years Tire No warranty Wearing parts Decoration/Appearance parts No warranty Cutting blade No warranty *MAMMOTION reserves the rights of interpretation for this Limited Warranty and may not be able to notify each user when updates happen.
-
Page 72: Maintenance Guide
13.Maintenance Guide In order to have your LUBA in a good condition at all time, please clean your LUBA each time after mowing. The cleaning process in MAMMOTION user manual instructs you to get rid of the clippings, twigs, leaves or dust and keep the mower in good condition. - Page 73 7.Damage caused by operation in bad lawn conditions (i.e. large areas of puddle without setting no-go-zones, a lot of stones covering on it, etc.) 8.Damage caused by operating the product in an environment with electromagnetic interference (i.e., in mining areas or close to radio transmission towers, high-voltage wires, substations, etc.). 9.Damage caused by operating the product in an environment suffering from interference from other wireless devices (i.e.
Need help?
Do you have a question about the LUBA and is the answer not in the manual?
Questions and answers