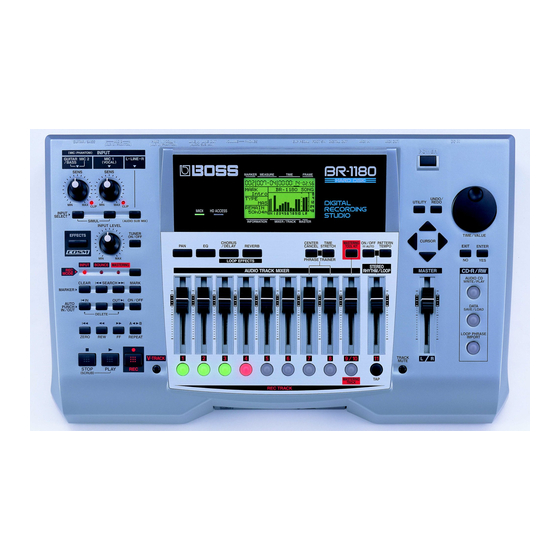
Boss BR-1180 Owner's Manual
Digital recording studio
Hide thumbs
Also See for BR-1180:
- User manual (42 pages) ,
- Effect patch list (4 pages) ,
- Function manual (20 pages)
Table of Contents
Advertisement
Quick Links
Owner's Manual
Thank you, and congratulations on your choice of the BOSS
BR-1180/1180CD Digital Recording Studio.
Before using this unit, carefully read the sections entitled:
• USING THE UNIT SAFELY (page 2–3)
• IMPORTANT NOTES (page 4–5)
These sections provide important information concerning
the proper operation of the unit.
Additionally, in order to feel assured that you have gained a
good grasp of every feature provided by your new unit,
Owner's manual should be read in its entirety. The manual
should be saved and kept on hand as a convenient reference.
Printing Conventions in This Manual
• Text or numerals enclosed in square brackets [ ] indicate buttons.
[PLAY]
PLAY button
[REC]
REC button
• Reference such as (p. **) indicate pages in this manual to which
you can refer.
Copyright © 2002 BOSS CORPORATION
All rights reserved. No part of this publication may be reproduced in any form
without the written permission of BOSS CORPORATION.
Advertisement
Table of Contents

Related Manuals for Boss BR-1180


Summary of Contents for Boss BR-1180
- Page 1 Owner’s Manual Thank you, and congratulations on your choice of the BOSS BR-1180/1180CD Digital Recording Studio. Before using this unit, carefully read the sections entitled: • USING THE UNIT SAFELY (page 2–3) • IMPORTANT NOTES (page 4–5) These sections provide important information concerning the proper operation of the unit.
-
Page 2: Using The Unit Safely
• Do not attempt to repair the unit, or replace parts within it (except when this manual provides specific instructions directing you to do so). Refer all servicing to your retailer, the nearest Roland Service Center, or an authorized Roland distributor, as listed on the “Information” sheet. - Page 3 012b • Immediately turn the power off, remove the AC adaptor from the outlet, and request servicing by your retailer, the nearest Roland Service Center, or an authorized Roland distributor, as listed on the "Information" page when: • The AC adaptor, the power-supply cord, or the plug has been damaged;...
-
Page 4: Important Notes
• Use only the specified expression pedal (EV-5; sold separately). By connecting any other expression pedals, you risk causing malfunction and/or damage to the unit. • Use a cable from Roland to make the connection. If using some other make of connection cable, please note the following precautions. -
Page 5: Disclaimer Of Liability
• Do not turn off the power while the hard disk is operating. • While using the BR-1180/1180CD, be careful not to subject the unit to vibration or shock, and avoid moving the unit while the power is turned on. -
Page 6: Table Of Contents
Quick Start ... 25 Listening to the Demo Songs ...26 (1) Connecting peripheral devices ... 26 (2) Turn on the BR-1180/1180CD... 27 (3) Listening to the demo songs ... 28 Selecting a song—Song Select ... 28 Playing Back a Song... 29 Changing the current position ... - Page 7 Adjusting the volume of each track... 38 Silencing the sound of specific tracks—Mute ... 38 (8) Recording an additional performance while listening to an existing performance—Overdubbing ... 39 (9) Completing the song—Mixdown ... 40 Setting the left-right positioning (pan) of the sound ... 40 Adjusting the tone—Equalizer...
- Page 8 Contents Registering a marker in your song—the Marker function...61 Registering a marker ... 61 Clearing a marker ... 61 Moving to the location of a marker... 61 Editing a marker ... 61 Changing the location of a marker ... 61 Naming a marker ...
- Page 9 Creating rhythm patterns using Realtime Recording... 86 Recording with uniform timing (Quantize) ... 87 Creating rhythm patterns using Step Recording... 88 Making corrections in rhythm patterns (Microscope) ... 89 Changing the amount of bounce in the rhythm patterns (Swing)... 90 Changing the rhythm pattern name...
- Page 10 MIDI Fundamentals ... 121 Using an external MIDI sound module to play the rhythm guide ... 121 Synchronizing the performance of an external MIDI sequencer to the BR-1180/1180CD (Master) ... 122 Switching the display of the TIME field ... 123 Operating MMC-compatible devices with the BR-1180/1180CD...
- Page 11 8. COSM COMP BASS AMP... 145 BANK: MIC ... 145 9. VOCAL MULTI ... 145 10. VOICE TRANSFORMER ... 145 11. COSM VOCAL COMP ... 146 12. MIC MODELING ... 146 BANK: LINE... 146 13. STEREO MULTI ... 146 14. LO-FI BOX... 146 BANK: SIMUL ...
- Page 12 Contents How the Mastering Tool Kit Parameters Work ...162 Equalizer ... 162 Bass Cut Filter ... 163 Enhancer ... 163 Input ... 163 Expander... 163 Compressor ... 164 Mixer ... 165 Limiter... 165 Output ... 165 Rhythm Arrangement/Pattern List ...166 Preset Rhythm Arrangement ...
-
Page 13: Introduction To The Br-1180/Br-1180Cd
Introduction to the BR-1180/BR-1180CD Main Features Simple operation The BR-1180/1180CD is designed to be operated as easily as a cassette tape recorder, even by beginners. Additionally, the large liquid crystal display allows you to view and confirm various information in graphic format. -
Page 14: Mastering Tool Kit
However, some CD players may be unable to play even CD-R discs. Still, you can play both CD-R and CD-R/RW discs on the BR-1180CD itself. * You can create music CDs with the BR-1180 by equipping it with the optional CDI-BR-1 CD-R/RW drive. Loop Phrase Function You can import commercially available phrase data via CD- R/RW, and save the data to the BR-1180CD’s hard disk. - Page 15 About Disk Space The BR-1180/1180CD is equipped with a 20 GB internal hard disk. With this disk you can record up to approximately 200 hours or more in LV2 mode (in terms of mono tracks). What are V-Tracks? Each track consists of eight virtual tracks, and you can choose any one of these tracks for recording or playback.
-
Page 16: Panel Descriptions
Front Panel fig.00-21 16 17 18 28 1. POWER Switch This is the power switch. It turns the power of the BR-1180/ 1180CD on/off. 2. SENS knob Use this knob to adjust the sensitivity at the input jacks (e.g., GUITAR/BASS, MIC 1, and MIC 2). -
Page 17: Auto Punch In/Out
What is AF method (Adaptive Focus method)? This is a proprietary method from Roland that vastly improves the signal-to-noise (S/N) ratio of the A/D and D/A converters. 5. EFFECTS button Press this button to call up the screens used for selecting patches for the insert effects (p. - Page 18 Panel Descriptions DELETE Button: This button erases the punch-in/out locations that were stored at the IN and OUT buttons. By holding down this button and pressing either IN or OUT, you can erase the location that was stored at the respective button. The indicator of the corresponding button will go dark.
-
Page 19: Undo/Redo Button
Flashing in green: The track contains recorded data but has been muted (silenced) Flashing in red: The track is selected as the recording destination, and is in recording standby. Red: The track is now being recorded Lighting alternately in orange and green: This track contains recorded data and is selected for recording. -
Page 20: Cd-R/Rw Drive
37. CD-R/RW AUDIO CD WRITE/PLAY Button Used for creating music CDs, and for simple playback. * Available only with the BR-1180CD. The BR-1180 does not feature this function. DATA SAVE/LOAD Button Used for saving recorded songs and loading saved data to the BR-1180. -
Page 21: Display
During play mode, the volume levels of instruments being input, and volume levels of each track are displayed. When the BR-1180/1180CD is shipped, this will indicate the volume level of the volume level of the signal that has passed through the TRACK faders (post-fader). -
Page 22: Rear Panel
These are output jacks for the analog audio signal. You can connect MD recorders, tape recorders, or other recording devices to record the output analog signal from the BR-1180/ 1180CD. * Depending on the settings, you can output a mix of the signal input to LINE IN with the LINE OUT signal (Audio Sub Mix: p. -
Page 23: Midi In Connector
13. AC ADAPTOR Jack Connect the included AC adaptor to this jack. To prevent accidents, do not use any adaptor other than the AC adaptor (PSB-3U) provided with the BR-1180/ 1180CD. 14. Cord Hook Wrap the cable around this hook so that the AC adaptor cable is not pulled out accidentally. -
Page 24: Before Using Cd-R/Rw Discs
Before Using CD-R/RW Discs Handling the CD-R/RW Disc Drive Install the unit on a solid, level surface in an area free from vibration. If the unit must be installed at an angle, be sure the installation does not exceed the permissible range. Avoid using the unit immediately after it has been moved to a location with a level of humidity that is greatly different than its former location. -
Page 25: Quick Start
Quick Start... -
Page 26: Listening To The Demo Songs
* Noise may be generated as guitar pickups are brought closer to the unit.If the noise is a problem, move the guitar away from the BR-1180/1180CD. Stereo Headphones MIDI Sequencer CD Recorder etc. -
Page 27: Turn On The Br-1180/1180Cd
* Use only the specified expression pedal (Roland EV-5; sold separately). By connecting any other expression pedal, you risk causing malfunction and/or damage to the unit. * The expression pedal connected to the EXP PEDAL jack is designed so that the range of adjustment is widest when the minimum volume is at “0.”... -
Page 28: Listening To The Demo Songs
If the AC adaptor becomes unplugged accidentally, the recorded data may become damaged. (3) Listening to the demo songs The BR-1180/1180CD comes with demo songs recorded on the hard disk. Follow the procedure given below to listen to a demo song. -
Page 29: Playing Back A Song
6. Press [ENTER]. fig.Q01-10 When reselecting the currently selected song A screen appears asking you to confirm whether or not you want to reload the same song. fig.Q01-80 Press [YES] if you want to reload the song; to cancel, press [NO]. The song you selected will be loaded. -
Page 30: Moving Through A Song In Measures Or Beats
(Shutdown) When recording/editing and when changing the settings When the POWER switch of the BR-1180/1180CD is pressed, it will save the necessary data on disk and in internal memory, and then will automatically turn off the power. If any recording/editing operations have been performed, or if... -
Page 31: Recording/Playing Back A Song
(p. 135) and “Viewing information about the hard disk” (p. 136). About data types When you record a new song, the BR-1180/1180CD allows you to set the data type. This enables you to select the combination of audio quality and recording time that is most suitable for the material you are recording. -
Page 32: Connecting Instruments
4. Turn the TIME/VALUE dial to select the desired data type. * The BR-1180/1180CD uses a sample rate of 44.1 kHz. It is not possible to change the sample rate. 5. Press CURSOR [ ] to select “GO,” and press [ENTER]. -
Page 33: Press The Input Select Button Of The Instrument That You Want To Record
MIC 1 * Use this jack/connector when recording vocals only. This jack/connector is used for connecting mics. The TRS jack accepts either balanced or unbalanced input. The XLR connector accepts balanced input (pin 2 hot). This connector also features optional phantom power (refer to “Using condenser mics”... -
Page 34: Using Insert Effects
What is an insert effect? An effect that is applied directly to a specific signal line (in the case of the BR-1180/1180CD, an input instrument or mic, or a playback track) is called an insert effect. The effect pedals that a guitarist connects between his guitar and amp are a type of insert effect. -
Page 35: About The Rhythm Guide
(5) About the Rhythm Guide When you record, it is convenient to use the built-in rhythm guide. The rhythm guide can also be used as a metronome when you are not recording. By using the rhythm guide during recording, you can use the track editor to edit in units of measures, synchronize outputs with an external device, and perform other useful operations. -
Page 36: Tapping To Change The Tempo
Recording/playing back a song Tapping to change the tempo You can determine the tempo by the timing with which you press [TAP]. While the [AUTO/ON/OFF] indicator for the RHYTHM/LOOP is lit, tap on [TAP] four or more times to change the tempo of the RHYTHM GUIDE. The tempo becomes that in which you tapped. -
Page 37: Recording Operations
1. Press [REC MODE] to make the INPUT indicator light. fig.Q02-17 On the BR-1180/1180CD, you can press [REC MODE] to select one of three recording modes. * Here we will explain how you can listen to the sound of the other tracks while recording only your own performance, so select INPUT as the recording mode. -
Page 38: Playing Back Recorded Music
Track 9/10. * You cannot use tracks 1–8, the Rhythm Guide, and the Loop Phrase Sequence function in this mode. 2. Press [REC]. [REC] flashes in red and the BR-1180/1180CD enters the recording standby state. fig.Q02-18 3. Press [PLAY]. -
Page 39: Recording An Additional Performance While Listening To An Existing Performance-Overdubbing
Selecting the track to which to record (p. 36) 2. Press [REC]. [REC] flashes in red and the BR-1180/1180CD enters the recording standby state. 3. Press [PLAY]. The [REC] and REC TRACK buttons stop flashing in red and instead light solidly, and recording starts. -
Page 40: Completing The Song-Mixdown
Adding width to the sound —Loop Effect Chorus and delay as well as doubling and reverb are provided as loop effects in the BR-1180/1180CD’s mixer section. Effective use of these allows you to add greater breadth to the sound. What is a loop effect? Effects connected to the send and return of mixer effects are called “loop effects.”... -
Page 41: Mixdown
Mixing down to an external recording device 1. Connect the recording device to the LINE OUT jack and place it into its recording standby state. 2. Press [PLAY] on the BR-1180/1180CD and start the playback of the recorded data. Recording/playing back a song... - Page 42 MEMO ...
-
Page 43: Advanced Use
Advanced... -
Page 44: Re-Recording Only A Mistake-Punch-In/Out
With your BR-1180/1180CD, you can choose from manual or automatic punching in/out. Manually punching in/out You can use the button on the BR-1180/1180CD or a foot switch to punch in or out. When you are playing an instrument and performing the recording by yourself, it may be difficult to punch in or out using the button on the BR-1180/1180CD. -
Page 45: Manually Punching In And Out Using A Foot Switch
Manually punching in and out using a foot switch Using the foot switch If you wish to use a separately sold foot switch (such as the DP-2 or BOSS FS-5U) to punch-in/out, connect the foot switch to the FOOT SW jack. Use the following procedure to set the function of the FOOT SW jack. -
Page 46: How To Record
IN/OUT [ON/OFF]. The indicator lights up, showing that the auto punch in and out have been set. 7. Press [REC] to place the BR-1180/1180CD in recording standby and then press [PLAY]. Recording automatically starts at the auto punch-in location, so start playing what you want to record. -
Page 47: How To Record
How to Record Here’s how you can use the Repeat function and Auto Punch-in/out to re-record part of the previously recorded track 1. 1. Press REC TRACK [1]. The REC TRACK [1] indicator will light alternately in orange and green. 2. -
Page 48: Utilizing The V-Tracks
V-tracks that are available for each track.Therefore, by making use of the many V-Tracks, you can use the BR-1180/1180CD just as if it were an 80-track multitrack recorder. This allows a wide range of uses, such as recording one take of a guitar solo or vocal, and then recording another take without having to erase the first one. -
Page 49: Naming A Track (Track Name)
Naming a track (Track Name) 1. Press [V-TRACK] to access the V-track screen. fig.R02-01 The V-track screen will appear. fig.R02-02 2. Use [CURSOR] and the TIME/VALUE dial to select the V-track that you are going to name. fig.R02-04 * In addition to using CURSOR [ selected, you can also select a track directly with the REC TRACK buttons. -
Page 50: Putting Multiple Tracks Together-Bouncing
Putting multiple tracks together—Bouncing Although the BR-1180/1180CD allows the simultaneous playback of ten tracks, when you run out of tracks, the BR- 1180/1180CD also lets you copy the recordings of multiple tracks together onto one track (V-Track).This is called “bouncing” (also known as bounce recording or ping-pong recording). -
Page 51: Using The Insert Effects
The effects used by insert effects and the parameters of each effect are changed by calling up “effect patches.” Your BR-1180/1180CD comes equipped with a number of preset effect patches for use with vocals and instruments. These are grouped according to different input sources and each group is called a “bank.”... -
Page 52: Editing Insert Effect Settings
Using the insert effects Editing insert effect settings To create a new effect sound, select the patch that most closely resembles the sound you have in mind from the effects patches already stored in the unit, then edit its settings.If you wish to save the effect settings that you edited, save them as a user patch or song patch. -
Page 53: Saving Insert Effects Settings
After the data has been written, you will return to the patch select screen. * If a bank other than the bank specified by INPUT SELECT is selected as the writing destination, the BR-1180/1180CD will switch to the newly specified writing destination bank after the data has been written. -
Page 54: Copying An Effect Patch
Using the insert effects Copying an effect patch When you wish to create several patches with similar effect settings, it is convenient to copy the patch. 1. Press [EFFECTS] to access the effect setting screen. fig.R04-02 2. Press CURSOR [ ] to select “Patch Number,”... -
Page 55: Changing The Insert Effect Connections
However, there may be times when you want to change the connection order. On the BR-1180/1180CD, you can change the location of the insert effect connection to meet a variety of needs. Follow the procedure below to change where insert effects are connected. -
Page 56: Using The Loop Effects
This is known as “doubling.” The BR-1180/1180CD provides an insert effect called “DOUBL’N (doubling)” (p. 141) that lets you produce a “DOUBL’N” effect without having to record twice. -
Page 57: Reverb
Reverb Here’s how to make reverb settings for the loop effect. 1. Press [REVERB]. A screen will appear in which you can adjust the volume that is sent from each track to the reverb (send level). fig.R05-03 2. Use [CURSOR] to select a track, and rotate the TIME/ VALUE dial to adjust the send level. -
Page 58: Reproducing The Characteristics Of Various Monitor Speakers (Speaker Modeling)
Reproducing the characteristics of various monitor speakers (Speaker Modeling) The BR-1180/1180CD includes a built-in “speaker modeling” feature, which allows you to reproduce the special characteristics of a variety of different monitor speakers. Speaker modeling can be used to compare the sound of... -
Page 59: Editing The Speaker Modeling Settings
Reproducing the characteristics of various monitor speakers (Speaker Modeling) 4. Rotate the TIME/VALUE dial to select the speaker model (patch) you want to use. The selected speaker model is applied to the output sound. For more on the different types of speaker modeling, refer to the “Speaker Modeling Patch List”... -
Page 60: Saving Speaker Modeling Settings
Reproducing the characteristics of various monitor speakers (Speaker Modeling) Saving speaker modeling settings This procedure names and saves edited speaker modeling settings. 1. With the speaker modeling block diagram in the display, press [CURSOR] to move the cursor to “NAME,” then press [ENTER]. The speaker modeling name can now be edited. -
Page 61: Registering A Marker In Your Song-The Marker Function
Registering a marker in your song—the Marker function The “Marker function” lets you register markers at desired locations within a song. By using this function, you can instantly change the current location simply by specifying the number of a previously registered marker. This is also very convenient during editing. -
Page 62: Naming A Marker
Registering a marker in your song—the Marker function fig.R07-07 At this time you can move the cursor to the measure display to specify the mark location by measure, or move the cursor to the time display to specify the mark location by time. -
Page 63: Registering/Recalling The Current Mixer Settings-Scenes
Registering/recalling the current mixer settings—Scenes In each song, the BR-1180/1180CD lets you store up to eight sets of mixer and effect settings. The mixer and effect settings that you register are called a “scene,” and can be recalled instantly and easily. -
Page 64: Search For The Music's Start And End (Scrub/Preview)
To enable you to find these points accurately, your BR-1180/1180CD is equipped with the Scrub Function. When you play back using the Scrub function, an extremely short portion (45 msec) either before or after the current location will be played back repeatedly. -
Page 65: Changing The Scrub Points
Changing the scrub points The BR-1180/1180CD lets you specify either before or after the current location as the scrub point. Follow the procedure given below to change the scrub point. 1. Press [UTILITY]. 2. Use [CURSOR] to select the “SCRUB/PREVIEW” icon, and press [ENTER]. -
Page 66: Editing The Performance-Track Editing
Editing the performance—Track Editing The BR-1180/1180CD allows you to edit your songs by performing editing functions such as copying and moving data recorded on the tracks. Copying recorded data (Track Copy) Track Copy allows you to copy a specific portion of recorded data and then place it in a different location. - Page 67 The Track Copy screen appears, allowing you to select the tracks/V-tracks of the copy source and copy destination. * If you select the “COPY + INS” icon, first a blank of the specified length will be inserted into the copy destination, and then the copy will be performed.
-
Page 68: Moving Recorded Data (Track Move)
Editing the performance—Track Editing Moving recorded data (Track Move) This operation moves a specified region of recorded data to another location. After the recorded data is moved, the location it was in will be left empty. This operation can be used to move multiple tracks of recorded data at once. - Page 69 Example 4: Track Move + Insert fig.R10-16 A' A' START * With the Track Copy + Insert, you cannot select the same track for the source and destination. fig.R10-17 move source (tracks/V-tracks) move destination name (move source) name (move destination) 4.
-
Page 70: Exchanging Recorded Data (Track Exchange)
Editing the performance—Track Editing Exchanging recorded data (Track Exchange) Perform the procedure given below to exchange the all recorded data between two tracks. Example: exchanging all the data on track 1 with all the data on track 2 fig.R10-20 Track1 Track2 Track1 Track2... -
Page 71: Inserting Blank Spaces In Recorded Data (Track Insert)
Inserting blank spaces in recorded data (Track Insert) This operation inserts blank space at the specified location. If you wish to add a phrase in the middle of the previously recorded data, you should add a blank of the same length as the phrase, and then record the new phrase in the blank area. -
Page 72: Deleting Data And Reconnecting The Remaining Data (Track Cut)
Editing the performance—Track Editing At this time, you can select “DISP” and press [ENTER] to switch between methods of specifying the location (measures, time). Set the following items. START (start point): Specify the location at which the blank will be inserted. LEN (Length): Specify the length of the blank. -
Page 73: Erasing Performance Data-Track Erase
fig.R10-32 Specify the additional tracks from which data will be cut. If you decide to cancel the Track Cut operation for any track, rotate the TIME/VALUE dial to the left and select “?.” * The Track Cut operation will not be performed for lines that contain even one “?.”... - Page 74 Editing the performance—Track Editing 3. Use CURSOR [ ] to select the “ERASE” icon, and press [ENTER]. fig.R10-35 The Track Erase screen appears, allowing you to select the track/V-track from which recorded data will be erased. 4. Use [CURSOR] and the TIME/VALUE dial to select the track/V-track containing the data to be erased.
-
Page 75: Canceling A Recording Or Editing Procedure-Undo/Redo
3. To go back even further, to other stages in your editing process, simply repeat Steps 1 and 2. Each time Steps 1 and 2 are repeated, the BR-1180/ 1180CD reverts to the state it was in immediately preceding the current state. Once you reach the point where no more Undos can be carried out, the UNDO icon disappears from the screen. -
Page 76: Organizing The Songs You've Recorded
Organizing the songs you’ve recorded Displaying song-related information (Song Information) The following information for the currently selected song can be displayed. • Song number • Song name • Song protect on/off • Data Type • Amount of disk used by the current song * The song sizes are displayed in units of 1M = 1,048,576 bytes. -
Page 77: Erasing Songs (Song Erase)
* If you execute Song Copy without saving, all recording and editing operations that you performed on the current song, the current state of the mixer section, and any changes to the song patch will not be saved. * When you execute the Song Copy operation, the copy destination song will be assigned the lowest unused song number. -
Page 78: Optimizing Hard Disk Space (Song Optimize)
Organizing the songs you’ve recorded Optimizing hard disk space (Song Optimize) When you overdub, punch in and out, and edit tracks, the recorded data saved to the hard disk before being rewritten is not deleted, but remains on the disk. In some cases, the amount of memory used by unneeded data cannot be ignored, and more hard disk space than necessary is used. -
Page 79: Canceling Song Protect
“SONG 001.” However, the use of such non- descriptive names can make it difficult to tell which song is which. With your BR-1180/1180CD, you can use Song Name to give each song a name, which helps you manage and organize your songs. -
Page 80: Saving A Song (Song Store)
Organizing the songs you’ve recorded Saving a song (Song Store) The BR-1180/1180CD can save the following contents as song data. • Recorded data • Mixer settings • Insert Effect song patches (S01–S50) * guitar bank: S01–S100 • Mastering Tool Kit song patches (S01–S19) •... -
Page 81: Using The Rhythm Guide
Using the Rhythm Guide The BR-1180/1180CD comes with a full-fledged internal Rhythm Guide feature, which uses PCM waveforms. The 294 “preset rhythm patterns” and nine “drum kits,” which are grouped together according to various musical styles, allow you to create rhythm arrangements full of variation. -
Page 82: About The Drum Kits
The BR-1180/1180CD holds 50 internal preset rhythm arrangements. You can also freely create ten rhythm arrangements that can be saved to the BR-1180/1180CD’s hard disk as “user rhythm arrangements,” and you can store up to ten rhythm arrangements in each song as “song rhythm arrangements.”... -
Page 83: Selecting Rhythm Arrangements
Selecting rhythm arrangements 1. Press RHYTHM/LOOP [EDIT], causing the indicator to light up. The Rhythm Arrangement screen appears. fig.R13-04 2. Use [CURSOR] to move the cursor to “ARRANGE,” and rotate the TIME/VALUE dial to select the rhythm arrangement. 3. Press [RHYTHM ON/OFF] several times until the indicator lights up or flashes, then press [PLAY]. -
Page 84: Setting Rhythm Tempos For Each Measure Individually (Tempo Map)
Using the Rhythm Guide Use [CURSOR] to move the cursor to “MEASURE,” then rotate the TIME/VALUE dial to select the measure where the rhythm pattern you want to erase is located. Move the cursor to “DEL” or “ERASE,” then press [ENTER]. -
Page 85: Copying Rhythm Arrangements
6. To add a new tempo map after finishing other tempo maps, move the cursor to the “<NEW>” position, then rotate the TIME/VALUE dial. A tempo map is created at that position. 7. When you have finished setting the tempo maps, press [EXIT] to return to the RHYTHM ARRANGE screen. -
Page 86: Creating Rhythm Patterns
Using the Rhythm Guide Creating rhythm patterns When creating a rhythm arrangement by stringing together rhythm patterns, there may be times when you do not find anything suitable among the preset rhythm patterns, or when you want to get a rhythm pattern that sounds exactly the way you want. -
Page 87: Recording With Uniform Timing (Quantize)
The TRACK buttons correspond to the drum sounds as shown below. TRACK button Drum Sound KIck 1 Snare 1 Closed Hi-Hat Open Hi-Hat Low Tom Mid Tom High Tom Crash Cymbal [9/10] Ride Cymbal [V-TRACK] + [1] Kick 2 [V-TRACK] + [2] Snare 2 [V-TRACK] + [3] Claves... -
Page 88: Creating Rhythm Patterns Using Step Recording
Using the Rhythm Guide Corrects the timing to the nearest sixteenth-note triplet Corrects the timing to the nearest thirty-second note. Corrects the timing to the nearest thirty-second- note triplet. OFF Quantization is not applied. The data is recorded as is with no correction of the timing. 3. -
Page 89: Making Corrections In Rhythm Patterns (Microscope)
* To display [INS] [MOVE] GATE, move the cursor to the far right side of the screen to move the screen further to the right. * With the BR-1180/1180CD’s Rhythm Guide, drum sounds are played with the same length, regardless of the Gate Time settings, so you can keep the Gate Time setting at “1”... -
Page 90: Changing The Amount Of Bounce In The Rhythm Patterns (Swing)
Using the Rhythm Guide Changing the amount of bounce in the rhythm patterns (Swing) You can produce a jazzy swing feel in the sound by delaying the points at which the performance data for the rhythm pattern’s upbeats are played. 1. -
Page 91: Loading Rhythm Patterns From Cd-R/Rws (Smf Import)
Copying SMFs created on a computer to CD-R/RW discs lets you easily increase the number of user rhythm patterns. * Use of the BR-1180 requires installation of the optional CDI- BR-1 CD-R/RW drive. 1. Using your computer, write the SMF you want to import to a CD-R/RW disc. -
Page 92: Using Loop Phrases
(a loop phrase), then arrange those to set up the song’s rhythmic framework. The BR-1180/1180CD is also capable of this method of creating music, meaning you can arrange and perform loop phrases in whatever order you like while arranging rhythms. -
Page 93: Creating A Loop Phrase By Copying Waveform Data On A Computer (Loop Phrase Import)
Copying waveform data created on computers or other devices as WAV files to CD-R/RW discs lets you more easily add loop phrases. * Use of the BR-1180 requires installation of the optional CDI- BR-1 CD-R/RW drive. 1. Using your computer, write the waveform data you want to import for the loop phrase as a WAV or AIFF file to a CD-R/RW disc. -
Page 94: Editing The Loop Phrase Settings
Using loop phrases 9. Move the cursor to “GO,” then press [ENTER]. Import of the wave file begins. * To quit copying while the import is still in progress, press [EXIT]. When the message “Cancel?” appears, press [YES]; the import is cancelled (it may take some time after you press [EXIT] for the message to appear). -
Page 95: Assigning Loop Phrases To The Track Buttons
Assigning loop phrases to the track buttons When the cursor is positioned at the loop phrase number, you can input loop phrases in rhythm arrangements easily by assigning the loop phrases to track buttons 1–9. Track loop phrase assignments can be stored on an individual song basis. -
Page 96: Creating Rhythm Arrangements By Arranging Loop Phases
Using loop phrases Creating rhythm arrangements by arranging loop phases Use the following procedure to create a rhythm arrangement by Arranging Loop Phases. 1. Press RHYTHM/LOOP [EDIT], causing the indicator to light up. The Rhythm Arrangement screen appears. fig.R13-04 2. Use [CURSOR] to move the cursor to “ARRANGE,” and rotate the TIME/VALUE dial to select the rhythm arrangement. -
Page 97: Copying Loop Phrases Arranged In Rhythm Arrangements To Audio Tracks
Move the cursor to “DEL” or “ERASE,” then press [ENTER]. The loop phrase is erased from the rhythm arrangement. When “DEL” is selected: Loop phrases following the erased loop phrase are shifted forward. When “ERASE” is selected: The location of the erased loop phrase is left blank. There is no change made to other loop phrases. -
Page 98: Copying Loop Phrases
Using loop phrases Set the following items. START (start point): Specify the starting location of the copy source data. END (end point): Specify the ending location of the copy source data. * If, after specifying the above parameters in terms of location you switch to the measure or marker indication, a “+”... -
Page 99: Creating Audio Cds (Br-1180Cd)
CD-R/RW discs, thus creating your own original audio CDs. * You cannot create audio CDs using the BR-1180 alone (without the CD-R/RW drive installed). Production of audio CDs requires the optional CDI-BR-1 drive. -
Page 100: Using Auto Fade In/Out
Creating audio CDs (BR-1180CD) 8. Use [CURSOR] and the TIME/VALUE dial to select the mastering source and destination V-tracks. 9. Press [REC] to go into recording standby, then press [PLAY] to begin recording. The mastering starts. 10. When the end of the song is reached, press [STOP] to end the recording. -
Page 101: Auto Fade Out
Start: Sets the time (location) at which the fade-in starts. When the current location is prior to Start, the volume is set to zero, and as a result, no sound will be output even when the recorder is playing back. Once the current location passes the Start point, the sound gradually begins to come up. -
Page 102: Specifying An Interval Of Several Seconds Between Songs (Pre-Gap)
Creating audio CDs (BR-1180CD) Specifying an interval of several seconds between songs (Pre-gap) When writing a number of songs to an audio CD, you can preset a gap of several seconds between each of the songs. When an audio CD is played back on an ordinary CD player, the seconds before the start of a song may be indicated by a minus sign, as in “-3, -2, -1.”... -
Page 103: What Is Finalizing
fig.R15-40 4. Use [CURSOR] to select the “TR. AT ONCE” icon, then press [ENTER]. The AUDIO CD write settings screen appears. fig.R15-03 5. Use [CURSOR] and the TIME/VALUE dial to select the tracks/V-tracks you want to write. 6. Use CURSOR [ ] to move the cursor to “GO,”... -
Page 104: Writing Multiple Songs All At One Time (Disc At Once)
Creating audio CDs (BR-1180CD) If you do not finalize: The audio disc being created cannot be played on ordinary CD players. However, you can write additional songs to the disc later on. If you want to play back the CD on a regular CD player, then finalize for this purpose. -
Page 105: Playing Back Audio Cds
9. Repeat Steps 5–8. When you have finished registering all the tracks you intend to write, move the cursor to “GO,” then press [ENTER]. The message “Write Speed?” appears. fig.R15-71 * If you are in the process of recording a song at this point, the message “Save Current?”... -
Page 106: Enabling Playback On Ordinary Cd Players (Finalize)
Creating audio CDs (BR-1180CD) Returns to the beginning of the track. If this is pressed close to the beginning of the track, it goes back to the beginning of the preceding track. The track will rewind while you hold down the button. -
Page 107: Editing The Mastering Tool Kit Settings
4. Rotate the TIME/VALUE dial to the number of the track you want to import. At this point, you can listen to the selected song by moving the cursor to “PRVW” and pressing [ENTER]. Press [ENTER] again to stop playback. 5. -
Page 108: Saving Patch Settings
Creating audio CDs (BR-1180CD) Saving patch settings This assigns a name (patch name) to the edited patch settings and saves the settings. 1. Entering the patch name. In the effect block diagram screen, use [CURSOR] to select “NAME,” and press [ENTER]. fig.R15-93 Now you can modify the patch name. - Page 109 fig.R15-96 5. Rotate the TIME/VALUE dial to select the patch copy destination. fig.R15-97 * You cannot specify a Preset patch as the copy destination. * You can press CURSOR [ ] to change the copy source. 6. After you have selected the copy destination, press [ENTER].
-
Page 110: Using The Cd-R/Rw To Exchange Data (Br-1180Cd)
• Save recorded songs and data to CD-R/RW discs • Exchange waveform data between the BR-1180CD and your computer * If using the BR-1180 (without the CD-R/RW drive installed), you will need to equip the unit with the optional CDI-BR-1 drive. -
Page 111: Loading Saved Songs To The Br-1180Cd (Song Recover)
8. Press [ENTER]. The message “Write Sure?” appears. * To cancel, press [NO]. 9. Press [ENTER]. Writing to the CD-R/RW disc begins. * If you are in the process of recording a song at this point, the message “Save Current?” may appear. If you want to save the current song to the hard disk, press [YES];... -
Page 112: Saving Data On The Hard Disk To Cd-R/Rw Discs
Using the CD-R/RW to exchange data (BR-1180CD) * If you are in the process of recording a song at this point, the message “Save Current?” may appear. If you want to save the current song to the hard disk, press [YES]; press [NO] if you do not need to save the song. -
Page 113: Loading Saved Songs To The Br-1180Cd (User Recover)
5. Use [CURSOR] to select the type of data you want to save, then press [ENTER]. You can register multiple songs. “*” appears at each registered song. To undo registration of the song, press [ENTER] once again; “*” is no longer displayed. Types of data that can be backed up: EFFECTS Insert effect patch user banks are saved. - Page 114 Using the CD-R/RW to exchange data (BR-1180CD) Types of data that can be recovered: EFFECTS Insert effect patch user banks are loaded. MASTERING T.KIT Mastering Tool Kit user banks are loaded. SP. MODELING Speaker modeling user banks are loaded. RHYTHM/LP.PHRASE User rhythm arrangements, patterns, and loop phrases are loaded.
-
Page 115: Saving The Entire Content Of The Hard Disk To Cd-R/Rws
Saving the entire content of the hard disk to CD-R/RWs You can save not only songs but all of the data on the hard disk to CD-R/RW discs, as well as load saved data to the hard disk. * The only data that can be saved onto a CD-R/RW disc is the data stored on the drive (partation) currently selected. -
Page 116: Loading The Saved Content Of The Hard Disk To The Br-1180Cd (Hdd Recover)
Using the CD-R/RW to exchange data (BR-1180CD) Loading the saved content of the hard disk to the BR-1180CD (HDD Recover) 1. Place the CD-R/RW disc containing the saved hard disk data in the CD-R/RW drive. 2. After the CD-R/RW drive’s indicator has stopped flashing, press [DATA SAVE/LOAD]. - Page 117 fig.R16-07 4. Using [CURSOR] again to select the “IMPORT” icon, then press [ENTER]. The Waveform Data Import screen appears. fig.R16-56 * If the WAV files are collected in a folder, then the folder name and icon ( ) is displayed. To show the WAV files within the folder, move the cursor to the folder name and press [ENTER].
-
Page 118: Copying Audio Track Waveform Data To Computers (Wav/Aiff Export)
Using the CD-R/RW to exchange data (BR-1180CD) Copying audio track waveform data to computers (WAV/AIFF Export) You can write data for specified tracks to a CD-R/RW disc as waveform data, then import the waveform data to the computer, using your computer to read the CD-R/RW disc. 1. - Page 119 Set the following parameters. START (Start Point): Specifies the export-source track’s start point. END (End Point): Specifies the export-source track’s end point. * If, after specifying the above parameters in terms of location you switch to the measure or marker indication, a “+” may appear if a discrepancy between the indicated position and the actual position arises.
-
Page 120: Erasing Cd-Rw Data
Using the CD-R/RW to exchange data (BR-1180CD) Erasing CD-RW data When using the CD-RW discs, you can erase data and then write over again. Be sure to note that carrying out the erase procedure erases all of the data on the disc. * You can only erase data with CD-RW discs. -
Page 121: Synchronizing With Midi Devices
Perform the procedure given below to use a MIDI sound module and choose the sounds you desire for the rhythm guide. 1. Use a MIDI cable to connect the BR-1180/1180CD and your MIDI sound module as shown in the diagram. fig.R17-01 MIDI Sound Module 2. -
Page 122: Synchronizing The Performance Of An External Midi Sequencer To The Br-1180/1180Cd (Master)
For details on MMC, refer to p. 124. Follow the procedure given below to synchronize the MIDI sequencer using the BR-1180/1180CD. 1. Use a MIDI cable to connect the BR-1180/1180CD and your MIDI sequencer as shown in the diagram. fig.R17-03 MIDI... -
Page 123: Switching The Display Of The Time Field
Transmits MIDI clock based on the Rhythm Guide (p. 81) tempo. MTC Type: On the BR-1180/1180CD, the following types of MTC can be selected. Check the specifications of your MIDI sequencer, and set the BR-1180/1180CD to the appropriate type of MTC. -
Page 124: Operating Mmc-Compatible Devices With The Br-1180/1180Cd
MMC and MTC. Make connections as shown in the diagram below. fig.R17-16 Offset Setting The BR-1180/1180CD will be the master for MMC and MTC. 00h30m00s00 23h30m00s00 Follow the procedure given below to operate the play, stop, fast-forward and other functions of a sequencer program with the BR-1180/1180CD. -
Page 125: Receiving Midi Clock And Creating The Rhythm Guide Sync Track
Receiving MIDI clock and creating the Rhythm Guide Sync Track With the BR-1180/1180CD, you can receive MIDI clock from an external MIDI sequencer and automatically create the Rhythm Guide’s tempo (Sync Track). Using the sync track to synchronize the external sequencer... - Page 126 Synchronizing with MIDI devices * You can record up to approximately 4000 eighth notes (about 500 measures in 4/4). Recording stops automatically once this limit is surpassed. Recording of the MIDI clock stops automatically when playback on the external sequencer finishes, and the top screen returns to the display.
-
Page 127: Using Midi To Control Track Volume-Midi Faders
Using MIDI to control track volume—MIDI Faders With the BR-1180/1180CD, you can use MIDI to transmit and receive TRACK fader movements. Using an external MIDI sequencer or similar device, you can record and play back TRACK fader information to get automated control for your mixes. -
Page 128: Setting The Expression Pedal Midi Channel
Using MIDI to control track volume—MIDI Faders Setting the expression pedal MIDI channel Just as with the TRACK faders, you can transmit and receive expression pedal operations through MIDI. Use the following procedure to transmit and receive messages. 1. Press [UTILITY]. 2. -
Page 129: Other Convenient Functions
Other Convenient Functions Changing the position of the input sound You can adjust the pan of the instrument you are playing. 1. Press [PAN]. 2. Press CURSOR [ ] a several times until the parameter for changing the INPUT pan is displayed. fig.R19-01 3. -
Page 130: Tuning An Instrument (Tuner)
Explanation of the indications that appear while tuning When the built-in tuner of the BR-1180/1180CD is used, the reference pitch is shown in the upper left of the display, and the note name in the left. The right and left part will display a tuning guide to indicate the difference between the input sound and the displayed note. -
Page 131: Setting The Reference Pitch Of The Tuner
1. Record the song that you wish to copy. In order to use the phrase trainer, you must first record the song on tracks 7/8. For how to record with the BR-1180/1180CD, refer to “Recording” (p. 36). * You cannot perform recording while you are using the Phrase Trainer (Time Stretch or Center Cancel). -
Page 132: Canceling The Center Sound (Center Cancel Function)
CD player. If you are using this type of DAT recorder, it will not be possible to record the digital output of the BR-1180/1180CD on a DAT recorder if “D.Cpy Protect” is turned “ON.” In this case, you will need to turn... -
Page 133: Switching The Signal Indicated In The Level Meter (Pre-/Post-Fader)
Switching the signal indicated in the level meter (Pre-/Post-Fader) The BR-1180/1180CD initially brings up the screen in which the level meters are displayed (the top screen). In this case, each track’s level meter indicates the level after the signal passes through the fader (post-fader). - Page 134 Other Convenient Functions 3. Use [CURSOR] to select the icon for the parameter you want to initialize, then press [ENTER]. GLOBAL icon When this icon is selected, the tuner’s reference pitch and parameters for each of the utility icons are initialized to their factory settings.
-
Page 135: Setting The Time Before The Cd-R/Rw Drive Is Stopped (Hold Time)
We recommend creating a backup of your data on a CD-R/ RW disc or other media as your situation requires. * If you are using the BR-1180, the optional CDI-BR-1 is required for backing up to CD-R/RW. 1. Press [UTILITY]. -
Page 136: Viewing Information About The Hard Disk (Hard Disk Information)
The currently selected drive is indicated by an asterisk (“*”). fig.R19-41 * The BR-1180/BR-1180CD is set with one drive at the factory, so only one drive will appear in the display. 4. If you want to switch the drive being used, use [CURSOR] to move the cursor to the drive you want to use, then press [ENTER]. -
Page 137: Using Condenser Mics (Phantom Power)
Turn the phantom power off when using such mics. * Turn the phantom power off when using dynamic mics. * Phantom power need not be furnished by the BR-1180/ 1180CD when you use an external mic preamp or special external phantom power supply. -
Page 138: Mixing The Output From An External Midi Device With The Output From Your Br-1180/1180Cd (Audio Sub Mix)
BR-1180/1180CD so you won’t need an external mixer. Also, since you can output the signal from the MIDI device without having to first record it to a track on the BR-1180/ 1180CD, you can use the BR-1180/1180CD tracks more effectively. -
Page 139: Adjusting The Display Contrast
Adjusting the Display Contrast Depending on the location where the BR-1180/1180CD is placed, the display could be difficult to read. If so, use the following procedure to adjust the display’s contrast (0-16). 1. Press [UTILITY]. 2. Use [CURSOR] to select the “LCD CONTRAST” icon, and press [ENTER]. - Page 140 Other Convenient Functions fig.R19-52 5. Using [CURSOR] again to move the cursor to “PLAYER,” then press [ENTER]. A list of SMFs on the CD-R/RW disc appears. fig.R19-53 6. Move the cursor to the SMF you want to play back, then press [ENTER]. The message “Now Loading...”...
-
Page 141: Mixer Effect Parameter Functions
Mixer effect parameter functions EQ (Equalizer) This is a two-band equalizer that is independent for each track. * If you adjust the equalizer while listening to the sound, you may notice a clicking noise. This is not a malfunction. If the noise is objectionable, make adjustments while the sound is not playing. -
Page 142: Reverb
Mixer effect parameter functions <When “DELAY” is selected> Delay Time This parameter adjusts the delay time (i.e., the interval for which sound is delayed). Feedback This parameter adjusts the amount of feedback. Changing the amount of feedback causes the number of time the delayed sound is repeated to change as well. -
Page 143: Insert Effect Algorithm List
Insert effect algorithm list The algorithms (the available effects and their connection order) that can be used as an insert effect are shown below. The algorithms that can be selected will differ for each bank. To select the algorithm that you wish to use, first select the effect bank that includes that algorithm, and then refer to the separate “Effect Patch List”... -
Page 144: Cosm Comp Guitar Amp
Insert effect algorithm list 4. COSM COMP GUITAR AMP This is a multi-effect designed for electric guitar. In addition to a COSM compressor/limiter, it uses a preamp and speaker simulator for a characteristic amp sound. fig.S02-04 COSM Comp/Limiter PreAmp Speaker Simulator 4Band Equalizer/Wah - 4Band Equalizer - Wah... -
Page 145: Cosm Comp Bass Amp
8. COSM COMP BASS AMP This is a multi-effect designed for bass guitar. In addition to a COSM compressor/limiter, it uses a preamp and speaker simulator for a characteristic amp sound. fig.S02-08 COSM Comp/Limiter PreAmp Speaker Simulator 4Band Equalizer/Wah - 4Band Equalizer - Wah Noise Suppressor Foot Volume... -
Page 146: 11. Cosm Vocal Comp
Insert effect algorithm list 11. COSM VOCAL COMP This is a multi-effect designed for vocals. The COSM compressor/limiter is perfect for creating a basic sound. fig.S02-11 COSM Comp/Limiter De-esser Enhancer 4Band Equalizer Noise Suppressor Foot Volume Delay 12. MIC MODELING This modifies sound that was recorded by a conventional dynamic mic, lapel mic or direct line, causing it to sound as though it had been recorded by an expensive condenser mic... -
Page 147: Bank: Simul
BANK: SIMUL 15. VO+GT.AMP This algorithm is for use when simultaneously recording a vocal and electric guitar. For the guitar, you can produce an amp sound using a preamp and speaker simulator. fig.S02-15 (MIC) Compressor 4Band Equalizer Noise Suppressor Delay (GUITAR) Compressor PreAmp... -
Page 148: Insert Effect Parameter Functions
BOSS and have not licensed or authorized BOSS’s BR- 1180/1180CD. Their marks are used solely to identify the equipment whose sound is simulated by BOSS’s BR-1180/1180CD. Acoustic Guitar Simulator This simulates the sound of an acoustic guitar. It allows you to use an electric guitar to produce sounds similar to those of an acoustic guitar. -
Page 149: Bass Cut Filter
You can get the same effect achieved with the compressor by 0.5–50.0 ms setting the threshold at a low value. The BR-1180/1180CD uses COSM technology to model four types of compressor/limiter in which the compressor and limiter functions are combined. -
Page 150: De-Esser
Insert effect parameter functions Attack (When set to BOSSCmp, D-Comp) Adjusts the strength of the picking attack when the strings are played. Larger values will result in a sharper attack, creating a more clearly defined sound. Sustain (When set to BOSSCmp, D-Comp) Boosts low-level signals, adjusting the time over which sounds are sustained. -
Page 151: Delay
Delay This creates a thicker sound by applying a delayed sound to the direct sound. Effect On/Off This parameter turns the delay effect on/off. Type This Parameter selects the type of delay. SINGLE: This is a simple delay. TAP: The delayed sound is panned across the left and right channels. -
Page 152: Equalizer
Insert effect parameter functions Level Adjusts the volume of the enhanced sound. Equalizer A 4-band equalizer. * If the “COSM GUITAR AMP,” “BASS MULTI,” “COSM BASS AMP,” or “STEREO MULTI” algorithms are selected, this effect can be used if “EQ” is selected for the “Effect Type” of the 4Band Equalizer/Wah. -
Page 153: Limiter
Limiter The limiter is an effect that prevents distortion by suppressing input signals that exceed a set value (threshold). Effect On/Off This parameter turns the limiter effect on/off. Threshold Adjusts this as appropriate for the inputs signal. When the input signal level exceeds this threshold level, limiting will be applied. -
Page 154: Mic Converter
(Line -> Microphone conversion). Effect On/Off This setting turns the Mic converter on/off. Input Select the type of mic that was actually used to record. Roland DR-20 DR-20: Small Dynamic Microphone Sml.Dy: Head-worn Dynamic Microphone Hed.Dy: Miniature Condenser Microphone Min.Cn:... -
Page 155: Noise Suppressor
Noise Suppressor This effect reduces the noise and hum. Since it suppresses the noise in synchronization with the envelope of the sound (the way in which the sound decays over time), it has very little effect on the sound, and does not harm the natural character of the sound. -
Page 156: Preamp
With “COSM GUITAR AMP,” “COSM COMP GUITAR AMP,” or “VO+GT.AMP” algorithms JC-120: The sound of the Roland “JC-120,” a favorite of pro musicians around the world. CLEAN: The sound of a conventional built-in tube amp. CRUNCH: Allows you to obtain a crunch effect that creates a natural distortion. -
Page 157: Ring Modulator
Adjust the volume of the slow attack sound. Speaker Simulator This simulates the characteristics of various types of speakers. When the output of the BR-1180/1180CD is connected directly to a mixer, etc., this can be used to create the sound of your favorite speakers system. -
Page 158: Tremolo/Pan
Insert effect parameter functions With “COSM BASS AMP” or “COSM COMP BASS AMP” algorithms fig.S03-02 SP Simulator Speaker Microphone Cabinet Type Unit Setting Large sealed enclosure 15 inch (two units) On Mic Large sealed enclosure 15 inch (two units) Off Mic Large sealed enclosure 10 inch (eight units) On Mic... - Page 159 When “TOUCH” is selected Polarity Selection for the direction in which the filter will change in response to the input. The frequency of the filter will rise. DOWN: The frequency of the filter will fall. Sensitivity This adjusts the sensitivity at which the filter will change in the direction determined by the polarity setting.
-
Page 160: Speaker Modeling Parameter Functions
Limiter SP Modeling (speaker modeling) Speaker Modeling is adjusted so that the optimal results will be obtained when you use the Roland DS-90/DS-90A powered monitors (separately available) as the output speakers for the BR-1180/1180CD. Effect On/Off Turn speaker modeling on/off. -
Page 161: Low Freq Trimmer (Low Frequency Trimmer)
Low Freq Trimmer (low frequency trimmer) Adjusts the low frequency. Effect On/Off Switches the low frequency trimmer on/off. Gain Adjusts the gain (amount of boost or cut) for the low frequency trimmer. Frequency Specifies the center frequency of the low frequency trimmer. High Freq Trimmer (high frequency trimmer) Adjusts the high frequency. -
Page 162: How The Mastering Tool Kit Parameters Work
How the Mastering Tool Kit Parameters Work This is a compressor effect that controls the volume level for each frequency range (lower range, midrange, and upper range) separately in order to even out the differences between them. This allows you to achieve the optimal level when mixing down to MD or DAT, and when using CD-R disks to create your own original audio CDs. -
Page 163: Bass Cut Filter
High Q Sets the frequency response curve steepness for the upper range’s center frequency. (*1) Output Level Sets the overall volume level after equalization. (*1) The Low Q/Hi Q setting is disabled when “SHELVNG” (shelving type equalization) is selected for the Low Type or High Type. -
Page 164: Compressor
How the Mastering Tool Kit Parameters Work ExpM: Attack This sets the time it takes for the midrange expander to go into effect once the input level falls below the Middle threshold level. ExpM: Release This sets the time it takes for the midrange expander effect to stop once the input level exceeds the Middle threshold level. -
Page 165: Mixer
CompH: Attack This sets the time it takes for the upper-range compressor to go into effect once the input level exceeds the Hi threshold level. CompH: Release This sets the time it takes for the upper-range compressor effect to stop once the input level falls below the Hi threshold level. -
Page 166: Rhythm Arrangement/Pattern List
Rhythm Arrangement/Pattern List Preset Rhythm Arrangement Each of the preset rhythm arrangement (except ARG.METRO) is set so that a three-measure BREAK, followed by V1 (verse) comes after the END (ending). Style Name Initial Tempo ARG.ROCK1 ARG.ROCK2 ARG.ROCK3 ARG.ROCK4 ARG.ROCK5 ARG.ROCK6 ARG.HdRck1 ARG.HdRck2 ARG.HdRck3... -
Page 167: Preset Rhythm Pattern
Preset Rhythm Pattern Style Initial Beat Name Tempo ROCK1 ROCK2 ROCK3 ROCK4 ROCK5 ROCK6 HdRck1 HdRck2 HdRck3 HdRck4 HdRck5 HEAVY1 HEAVY2 HEAVY3 HEAVY4 HEAVY5 POP1 POP2 POP3 POP4 POP5 POP6 POP7 POP8 BALLAD1 BALLAD2 BLUES1 BLUES2 BLUES3 BLUES4 R&B1 R&B2 R&B3 R&B4 R&B5... -
Page 168: Troubleshooting
Troubleshooting If the BR-1180/1180CD does not function as you expect, please check the following points before assuming that a malfunction has occurred. If this does not resolve the problem, contact a nearby Roland service center or your dealer. Problems with the sound... - Page 169 In such cases, connect the mic via a mic preamp to the BR-1180/ 1180CD, so that they can be boosted to line level before recording.
-
Page 170: Other Problems
Synchronization problems Cannot synchronize When using MTC to synchronize the BR-1180/1180CD with a MIDI sequencer, the BR-1180/1180CD must be the master device. Is the MIDI cable connected correctly? Is the MIDI cable broken? Has the sync generator been set to the desired synchronization method (MTC or MIDI Clock)? (p. -
Page 171: Error Message List
Error message list Blank Disc! Cause: Data is not written to the CD-R/RW drive. Action: Load a CD-R/RW disc that has data written on it. Cannot Select Same Track! Cause: You attempted to select the same track more than once during Track Edit (p. 66–74), WAV/AIFF Export (p. -
Page 172: Medium Error
Action: Perform the Song Optimize operation. (p. 78) What is an event? The smallest unit of memory used by the BR-1180/ 1180CD to store recorded results on disk is the event. A newly created song provides approximately 20,000 events per song. - Page 173 No CD-RW Drive! Cause: There is no CD-R/RW drive installed. Action: Purchase and install the optional “CDI-BR-1” CD- R/RW drive. No Data! Cause 1: You attempted to modify marker or scene data when none existed. Cause 2: You attempted to create an audio CD with no data in the tracks or songs, or you attempted to export a WAV or AIFF file.
-
Page 174: Parameter List
Parameter List * The BR-1180/1180CD can memorize in each individual Song on the hard disk the values you have set for all the parameters except the LCD Contrast and Disk. The values, however, cannot be written in the internal memory. - Page 175 Recorder Parameter Parameter name Recording Track Status V-Track V-Track Name Rhythm Guide Parameter Parameter name Rhythm Guide Auto/On/Off Tempo Rhythm Arrange Drum Kit Rhythm Arrangement Parameter Parameter name Rhythm Pattern Level Rhythm Pattern Number *1 The settable range for Pattern will change depending on the Tempo Map Beat. Rhythm Pattern length Loop Phrase Number Loop Phrase Length...
-
Page 176: Song Parameter
Parameter List Loop Phrase Parameter Parameter Name Measure Length Beat Name Start Point End Point Tuner Parameter Parameter name Pitch Song Parameter Parameter name Data Type LCD Contrast Parameter Parameter name LCD Contrast System Parameter Parameter name Foot Switch Assign Phantom Switch Audio Sub Mixer Switch Level Display Format... -
Page 177: Midi Parameter
Sync Parameter Parameter name Sync Generator MTC Type Sync Source Offset * The settable range for Offset will change slightly depending on the MTC Type (sync parameter). MIDI Parameter Parameter name MMC Mode Rhythm Guide Note Channel MIDI Fader Switch Track 1 MIDI Channel Track 2 MIDI Channel Track 3 MIDI Channel... - Page 178 Parameter List Scene Parameter Parameter name Scene Number Track Level Mode Scrub/Preview Parameter Parameter name Scrub From/To Mode Preview Switch Effects Parameter Parameter name Insert Effect Number Insert Mode Speaker Modeling Number Mastering Tool Kit Number Mastering Tool Kit Switch Effect Switch Display Initial value...
-
Page 179: Midi Implementation
Sub ID#1 (General Information) Sub ID#2 (Identity Request) EOX (End Of Exclusive) * Only a device ID of 7FH or message matching the BR-1180/1180CD’s device ID is received. * When this message is received, Identity Reply message (p. 182) will be transmitted. - Page 180 MIDI Implementation Control Change * Transmitted according to the content of the SMF during playback of SMFs. Bank Select (Controller number 0, 32) Status 2nd byte 3rd byte n = MIDI channel number: 0H - FH (ch.1 - 16) mm, ll = Bank number: 00 00H - 7F 7FH (bank.1 - bank.16384) Modulation (Controller number 1) Status...
- Page 181 * If the Sync parameter “Gen.” is set to “MTC,” quarter frame messages of the time code type specified by “MTC Type” will be transmitted when the BR-1180/1180CD is running (recording or playing). The transmitted time counts are summed to “SMPTE (MTC) Offset Time”...
- Page 182 * If the transport switch [PLAY] was pressed, the BR-1180/1180CD transmits this message. RECORD STROBE Status Byte * If the transport switch [REC] was pressed out of the recording condition, the BR-1180/ 1180CD transmits this message. Status RECORD EXIT Status...
- Page 183 “TARGET” sub-Command Standard Time Specification with subframes (typeff) mnH, scH, frH,ffH EOX (End of Exclusive) * If the efficient Maker of the locate switch is pressed or when moved, the BR-1180/ 1180CD transmits this message. MIDI Time Code Full Message Basic operation of quarter frame messages will be handled.
-
Page 184: Midi Implementation Chart
MIDI Implementation Chart DIGITAL RECORDING STUDIO Model BR-1180/BR-1180CD Function... Basic Default Channel Changed Default Mode Messages Altered Note Number : True Voice Note On Velocity Note Off After Key's Touch Channel's Pitch Bend 0–119 Control Change Program : True Number... -
Page 185: Specifications
MIC 1, 2 jack (TRS balanced, 1/4 inch phone type) MIC 1, 2 connector (XLR balanced) GUITAR/BASS jack (1/4 inch phone type) Power Supply DC 12 V; Supply AC Adaptor (Roland PSB-3U) Power Consumption Dimensions 460 (W) x 273 (D) x 87 (H) mm... -
Page 186: Index
Index ABS ... 124 AC ADAPTOR ... 23 ACOUSTIC GUITAR ... 144 Acoustic Guitar Simulator ... 148 Acoustic Processor ... 148 ACOUSTIC SIM ... 143 AF method ... 17 AIFF ... 93 Algorithm ... 34 ALL ... 134 ARRANGE ... 35, 83, 96 AUDIO CD WRITE/PLAY ... - Page 187 Expression Pedal ... 128 FADER ... 63, 128 FF ... 18 Final Mastering Track ... 49 FINALIZE ... 106 Finalize ... 103, 106 Flanger ... 152 FOOT SW ... 22 Foot Switch ... 45 Foot Volume ... 27, 152 FORMAT TYPE ... 118 FRAME ...
- Page 188 Noise Suppressor ... 155 NORMAL ... 135 Octave ... 155 OFF ... 35, 123, 125 Offset ... 124 ON ... 35, 83 ON/OFF ... 17, 44, 46–47 OPTIMAIZE ... 78 OUT ... 17, 45 Output ... 165 Overdubbing ... 39 PAN ...
- Page 189 STORE ... 80 Sub Mixer ... 138 SURFACE SCAN ... 136 Swing ... 90 Swing Pos ... 90 SYNC ... 123 Sync Generator ... 123 SYNC SOURCE ... 85 SYNC TRACK ... 125–126 Sync Track ... 125 SYSTEM ... 45, 62, 132–133, 135, 137–138 T.MAP ...
-
Page 190: Track Sheet
Track Sheet... - Page 191 IMPORTANT: THE WIRES IN THIS MAINS LEAD ARE COLOURED IN ACCORDANCE WITH THE FOLLOWING CODE. BLUE: NEUTRAL BROWN: LIVE As the colours of the wires in the mains lead of this apparatus may not correspond with the coloured markings identifying the terminals in your plug, proceed as follows: The wire which is coloured BLUE must be connected to the terminal which is marked with the letter N or coloured BLACK.
- Page 192 02900178 ‘03-6-5N...
Need help?
Do you have a question about the BR-1180 and is the answer not in the manual?
Questions and answers