Table of Contents
Advertisement
Advertisement
Table of Contents

Related Manuals for KQQ K8

Summary of Contents for KQQ K8
- Page 1 KQQ Dash Cam Driving Recording User Manual Mode K8...
-
Page 3: Table Of Contents
INDEX INTRODUCTION ..................2 PRE CAUTIONS ..................2 WARNINGS ....................3 PACKAGE CONTENTS ................. 5 DASH CAM OVERVIEW ................ 5 SPECIFICATIONS ................... 6 BUTTON SHORTCUTS ................6 GETTING STARTED ................8 1 Prepare Memory Card ..............8 2 FAQ .................. -
Page 4: Introduction
Thank you for purchasing KQQ K8 - 4K Dash Cam. This exclusive product is designed in a small size and elegant appearance, packed with powerful features, records ultra clear and high-quality footage and provides crucial evidence for what goes on the front and rear of your vehicles while driving. -
Page 5: Warnings
before installation. So as to prevent inconvenience and installation cost loss caused by the machine problem after installation. Please insert and format a TF card before using this device. The TF card is used to store image and video files of the driving recorder. ... - Page 6 off the main road first and only do so when it is safe. This camera is used inside vehicles. Don’t install it where it will block driver’s view including the top of dashboard/deployment of airbags. 2 For Maintenance: Do not leave the camera in the direct sunlight for a long period of time or where the temperature could go above 158°F (70°C).
-
Page 7: Package Contents
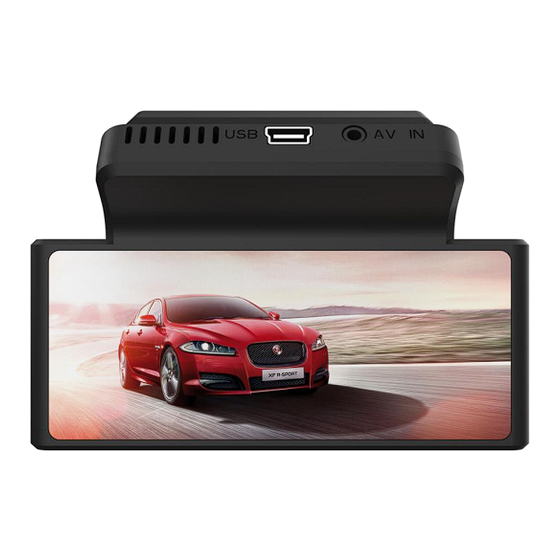
Rear Cam(23ft cable) 1*USB Car Charger 3.16″Dash Camera 2* Screws and Sticky 1* GPS Module 1* 64GB Micro SD Card Pads for Rear Cam 5*Cable Clips 1* User Manual 1* Cable Pusher Tool DASH CAM OVERVIEW 1 Camera Structure 2 Camera Indicators The Two indicator lights on the upper right corner of screen’s edge. -
Page 8: Specifications
(1) Red indicator light: Always turn on when the device is on. (2) Blue indicator light: Always turns on when the device is on but not recording. It flashes when the camera is recording. Note: The device will automatically turns on and start recording when power supplied, and the red indicator turns on and the blue one flashes. - Page 9 4. In Playback Mode, short press once to Start/Pause playing a video. 5. In Setup Menu, short press once to Enter submenu. 6. In a submenu, short press once to Confirm options. 1. In Video Mode, when the camera is not recording, short press once to Enter Setup Menu.
-
Page 10: Getting Started
GETTING STARTED 1 Prepare Memory Card The memory card MUST be formatted via camera when it is first time used in this device, so device can work smoothly and prevent problems. 1.1 Notice on Memory Card You need to insert and format a memory card on this camera before you can start recording. -
Page 11: Faq
1.4 Format Memory Card Format memory card via this camera before your first use. Also, it is recommended to format memory card once a month. Short press (Power/OK) Button to STOP recording first; ① Note: If the Video Mode page disappears, only short press any buttons first to return to Video Mode page can you press button to fulfill relative function. -
Page 12: Installation Steps
During Installation: Don't pull wires hard when arranging cables. ② Before powering the device on, please ensure that all cables are connected correctly and all connecting ports are plugged in completely.. After Installation: If the camera’s functions can work well before ③... -
Page 13: Connect Gps Module
water/alcohol and a lint-free cloth to make it dry and free of dust, oil, etc. Remove the protective film of the windshield electrostatic sticker, then ③ attach it to the mounting position. Note: 1. Use an electrostatic sticker, 3M tape may not leave mark after removing. 2. -
Page 14: Connect Car Charger/Hardwire Kit
2.3 Connect Car Charger/Hardwire Kit Two different ways to get power to keep the dash cam working. (1) Connect the Camera with Car Charger Use a standard car charger (included in package) to connect camera to car cigarette lighter, the camera will automatically turn on when you start the car and will also auto turn off after seconds the car engine is off. - Page 15 (2) Connect the Camera with Hardwire Kit Use a 3-lead hardwire kit to connect the camera to the car Fuse Box (not included in package), so the camera can continue to work while parking and the 24h Parking Monitoring function will be available. Warning: When mounting a hardwire kit, it is recommended to get HELP from a machinist or other professionals to avoid damage to vehicle by improper...
-
Page 16: Install Rear Camera
2.4 Install Rear Camera(Optional to Install) Please check whether rear camera can work normally before mounting it, (If not, CONTACT US). Two common mounting positions of rear camera: Position 1: Install the rear camera near license plate. (Note: Position 1 supports both rear viewing and reverse assist Plug the rear camera into the AV-IN rear camera port on the camera. -
Page 17: Remove Camera From Front Windshield
Arrange the rear camera cable along from the top of front windshield, ② door frame, all the way to the rear windshield, then organize/hide the cable(As shown in the figure below); Choose a mounting position, use the provided sticky pads to attach ③... -
Page 18: Operational Guideline
camera and its bracket from windshield without removing 3M tape: With the camera screen facing towards you, hold the camera and push/pull it to the right to make it unlock from 3M sticky base, then take camera off. OPERATIONAL GUIDELINE 1 How to Turn the Dash Cam On/Off 1.1 Auto Power On/Off This camera comes with a standard power cable (car charger) to get... -
Page 19: How To Reset Camera
2 How to Reset Camera? 2.1 Reset Camera’s Hardware If the camera doesn’t function, for example, can’t power on/off normally, the TF card is inserted but reminds “No SD card”, buttons no response, camera freezing/lagging, or any other operational or functional issues, please Press the “Reset Button”... -
Page 20: Camera Modes
(Menu) Button once to access Setup Menu; (UP)/ (Down) Button to navigate to “Time Zone”; Short press ② Short press (Power/OK) Button once to access the submenu; ③ Short press (UP)/ (Down) Button to go to a needed option; ④ (Power/OK) Button once to confirm the option. -
Page 21: Video Mode
Photo Mode Playback Mode (Menu) Button for at least With the device powered on, long press 3s to switch the 3 modes. Note: Modes CAN’T switch when camera is recording. Stop recording first. 1 Video Mode In Video Mode, you can record and lock videos, which will be saved in the inserted memory card. - Page 22 TF card. It won’t be deleted by Loop Recording and need to delete manually. 1.3 Record Sound In video mode, short press the (Down) Button once to turn on/off audio recording. Or turn on/off in Audio Record settings in Setup Menu. 1.4 Turn ON/OFF WiFi (UP) Button for 3s to turn ON/OFF WiFi.
-
Page 23: Photo Mode
It shows if License is edited and turned on in License-plate number setup menu. Microphone ON Turn ON/OFF the audio recording. Microphone OFF Red: The camera is recording an ordinary video. Record Status Yellow: The current video segment will be locked. White: The camera is not recording now. -
Page 24: View Footage On Pc/Mac
switch to Playback Mode. (2) How to View Footage in Playback Mode: In Playback Mode, short press (UP)/ (Down) Button to scroll ① files and short press (Power/OK) Button once to access a file. Note: Front footage is archived in “Front” files and rear footage in “Rear” files. Ordinary Video is for unlocked videos and Urgent Video for Locked videos. -
Page 25: View Footage On Your Smartphone
Front_photo: Photos for front camera. You can get the VLC Media Player free at www.videolan.org GXPlayer is the default GPS Player for K8, which can view video recordings and GPS logs on PC/MAC. How to install and use the GXPlayer? See page 27. - Page 26 Back: (Power/OK) Button once to confirm and exit Setup Short press Menu. Or short press (Menu) Button once to exit Setup Menu. Resolution: 4K(default), 2K, 1080P Front camera resolution. The higher resolution of video clearer it is, but the more storage space it will take up.
- Page 27 When it skips to Confirm, short press (Power/OK) Button once ⑤ to conform and exit Licence submenu to return to Setup Menu. Note: The license plate number needs to be edited or modified sequentially. Audio record: Off, On (default) Choose whether to record sound when recording videos.
- Page 28 USB Mode: USB Storage, Charge (default) Back Mirror: On, Off (default) Flip the rear camera view horizontally. Note: After connecting the rear camera, if you find that its camera view is right-left reversal, please set "Back Mirror" to flip the rear camera view. Speaker: Mute, Low (default), Middle, High ...
-
Page 29: Photo Menu
Default: Cancel, Confirm Restore all settings to factory default settings. Wi-Fi App See QR code to download the “Roadcam” app, camera’s WiFi SSID (WiFi name) and camera’s WiFi Password. Version: Software version. 2 Photo Menu 2.1 How to Access Photo Menu In Video Mode, if the camera is recording, stop it first, then Long ①... -
Page 30: Connect Wifi & App
Economy files are produced to take up the TF card. Strong, Soft, Sharpness Set the clarity of an image. Normal Auto (default), Adjust the warmth of a light according to White Daylight, different light conditions while taking Balance Cloudy, etc. photos. - Page 31 (UP) Button for at least 3s to Turn ON ① camera WiFi and you will see the WiFi hotspot name on the screen. Each K8 camera has its Wi-Fi Name, but all is started with SBC_. Wi-Fi Password (Default): 12345678 ...
-
Page 32: Introduction For Roadcam App
3 Introduction for Roadcam App Setup menu Setup Page Click to access Camera Controlling Interface Start/Stop Recording View video, image and GPS log after download Take Photos 4 How to Download Video/Image on App? onnect the camera WiFi, tap on the front page of App to access ①... -
Page 33: Faq On Wifi And "Roadcam" App
Note: Please keep your phone connect to the camera’s WiFi while download the video/image until it is finished to download. After download, return to the Front Page of App; ⑤ Disconnect the Camera WiFi to connect car’s WiFi/phone’s Internet, ⑥ then you can view the download video/image in “album”... - Page 34 Secondly, please make sure you are connected to the camera WiFi rather than other WiFi. If you did, please CONTACT US. Q4: Have inserted the TF card in camera, but the App reminds that “Can’t detect the TF card” or “No TF card”? Situation 1: It may be out of camera’s WiFi signal range.
-
Page 35: Gps Player&Gps Logs
Warning: Please install GXPlayer to view videos and GPS logs! GXPlayer is the default GPS player of K8, other GPS players may have problems on reading GPS data in videos. 1 How to Install the GXPlayer on Your PC/Mac? Connect GPS module to the USB port on the camera first, then ①... -
Page 36: How To View Gps Log Via Gxplayer
Note: Only set Maps to be Google Map to ensure player can work properly. After the GXPlayer is set, click the folder icon to add videos in TF card ⑦ to view video or GPS logs(driving route and location) on this player. 2 How to View GPS Log via GXPlayer? 3 How to View GPS Logs via Phone APP? Download a video with GPS data to “Album”... -
Page 37: Common Issues& Trouble Shooting
the camera’s WiFi and reconnect to your car’s WiFi/Phone’s Internet; Tap “Album” to access it, find out the video you download before and ③ tap the video to playback it and view the GPS data. Playback Window Video & Photo gallery for downloaded videos/images in Album;... - Page 38 Situation 1: Please make sure you have already removed protective films on camera lenses, and make sure that its lenses and your car’s Situation 2: windshield are clean and no dirt/grease. If the camera is fuzzy because the lens is out of focus, we are extremely sorry in advance.
- Page 39 from an extremely hot, CONTACT US ASAP: LESA_1688@163.com. Note: The internal battery can’t keep camera on after power stops to supply. (7) The earliest video files are missing? The camera has Loop Recording function. If Loop Record in Setup Menu is set to 1/3/5mins, all recorded videos will be archived in segment of 1/3/5mins, and the earliest un-locked video segments will be deleted automatically to record new video segments when the TF card gets full.
- Page 40 Set the Loop Record to make camera record over and over by loop: ③ Setup Menu > Loop Record > 1min/3min/5min. Situation 2: If above solution not work, please press "Reset" Button to RESET camera. Still not work? CONTACT US: LESA_1688@163.com. (10) TF Card is crooked /not going in slot easy? Please make sure you align the TF card correctly.
- Page 41 Situation 1: Restore factory default settings and format TF card. Restore the camera to its default settings first: Setup Menu > Default > Confirm(see page ), then format the TF card Setup Menu > Format > Fast format > Confirm. Check whether it still reminds “format SD card”. Note: If the issue has been solved by Solution 1, please do some settings for the camera.
-
Page 42: About User Manual
from your car cigar lighter each time before you leave your car. If you find that your car cigar lighter is connected with 12V ACC but the camera can’t turn off after the car is off, Contact us. Any other problems, CONTACT US: LESA_1688@163.com About User Manual The camera’s functions may be upgraded to differ from previous version... -
Page 43: Thanks For Your Love
Thanks For Your Love Thank you for purchasing the KQQ Dash Cam. We hope you find your new dash cam useful and fun to use. -
Page 44: Customer Service
Camera upgrades, firmware, and box contents can be changed without notice. Always see up-to-date information by visiting our website. Customer Service Have more questions or want to know more about KQQ K8? Scan the QR Code to CONTACT US Check us out here! We have professional customer service!
Need help?
Do you have a question about the K8 and is the answer not in the manual?
Questions and answers