
Summary of Contents for Olsteff Stefano
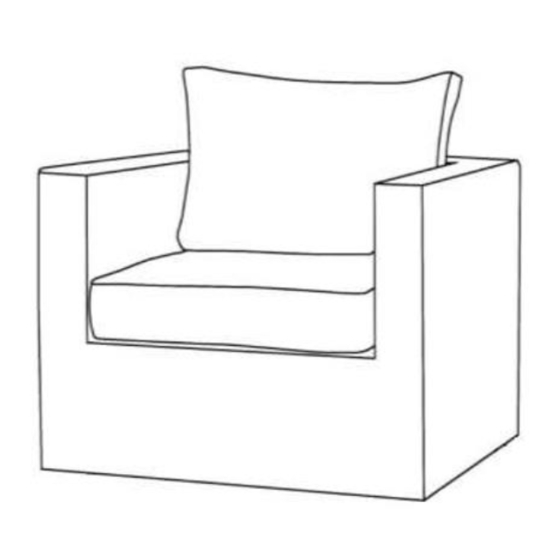
- Page 1 OLSTEFF .COM Stefano Chair Gartensessel | Armchair | Fotel Montageanleitung | Assembly instructions | Instrukcja montażu...
- Page 2 (DE) WICHTIGE INFORMATIONEN Lesen Sie vor dem Zusammenbau des Produkts die Sicherheitshinweise sorgfältig durch. Bitte lesen Sie die Montageanleitung und bewahren Sie diese zum späteren Gebrauch auf. Überprüfen sie bitte, ob das Produkt vollständig ist oder alle Elemente verpackt wurden. Es können sich lose Teile in der Verpackung und auf Möbelteilen befinden –...
- Page 3 TEILLISTE DES EINZELSTUHLS Rückenlehne Nuss M6*55 Sitzflache Inbusschlüssel Schraubenschlüs Linke Armlehne Rechte Sitzkissen Armlehne Unterlegscheib Rückenkissen e (M6) Schrauben M6*55 Schrauben M6*45...
- Page 4 PARTS LIST OF SINGLE CHAIR Back Rack M6*55 Seat Rack Allen Key Left Arm Hex Wrench Right Arm Seat Cushion Washer (M6) Back Cushion Bolts M6*55 Bolts M6*45...
- Page 5 LISTA CZĘŚCI FOTELA Oparcie Nakrętka M6*55 Siedzisko Klucz Imbusowy Lewy Klucz płaski podłokietnik Prawy Poduszka podłokietnik siedziskowa Poduszka Podkładka (M6) oparciowa Śruba M6*55 Śruba M6*45...
- Page 6 Gebrauchsanleitung | User Manual| Instrukcja montażu Schritt 1: Montieren See die Rucken (A) und das Sitz (B) zusammen mit Innensechskantschrauben (F), Unterlegscheiben (E) und Muttern (G) wieim Bild unten gezeigt. Step 1: Assemble the back (A) and seat (B) toogether with hexagon socket screws (F), flat washers (E) and nut (G) as shown below.
- Page 7 Schritt 3: Befestigen Sie die rechtelinke Armlehne (D) an dem Rucken (A) und dem Sitz (B) mit Innensechskantschrauben (F), Unterlegscheiben (E) und Muttern (G) wie im Bild unten gezeigt. Step 3: Attach the right armrest (D) to the back (A) and the seat (B) with hexagon socket screw (F), nuts (G) and flat washers (E) as shownin picture below.
- Page 8 OLSTEFF .COM Stefano 2-Sitzer-Sofa und Couchtisch | 2 Seater sofa and Coffee table | Sofa dwuosobowa i stolik kawowy Montageanleitung | Assembly instructions | Instrukcja montażu...
- Page 9 (DE) WICHTIGE INFORMATIONEN Lesen Sie vor dem Zusammenbau des Produkts die Sicherheitshinweise sorgfältig durch. Bitte lesen Sie die Montageanleitung und bewahren Sie diese zum späteren Gebrauch auf. Überprüfen sie bitte, ob das Produkt vollständig ist oder alle Elemente verpackt wurden. Es können sich lose Teile in der Verpackung und auf Möbelteilen befinden –...
- Page 10 TEILLISTE 2-SITZER-SOFA Rickenlehne Nuss Sitzflach Inbusschliissel Schraubenschlüs Linke Armlehne Rechte Sitzkissen Armlehne Unterlegscheibe Rickenkissen Schrauben Schrauben...
- Page 11 PARTS LIST OF 2 SEATER SOFA Back Rack M6*50 Seat Rack Allen Hey Left Arm Wrench Righ Arm Seat Cushion Washer (M6) Back Cushion Bolts M6*55 Bolts M6*45...
- Page 12 LISTA CZĘŚCI SOFA DWUOSOBOWA Oparcie Nakrętka M6*50 Siedzisko Klucz imbusowy Lewy Klucz płaski podłokietnik Prawy Poduszka podłokietnik Siedziskowa Poduszka Podkładka (M6) Oparciowa Śruba M6*55 Śruba M6*45...
- Page 13 Gebrauchsanleitung | User Manual| Instrukcja montażu Schritt 1: Montieren See die Rucken (A) und das Sitz (B) zusammen mit Innensechskantschrauben (F), Unterlegscheiben (E) und Muttern (G) wie im Bild unten gezeigt. Step 1: Assemble the back (A) and seat (B) together with hexagon socket screws (F), flat washers (E) and nut (G) as shown below.
- Page 14 Schritt 3: Befestige Sie die rechte Armlehne (D) an den Rucken (A) und dem Sitz (B) mit Innensechskantschrauben (F), Muttern (G) und Unterlegscheiben (E) wie im Bild unten gezeigt. Step 3: Attach the right armrest (D) to the back (A) and the seat (B) with hexagon socket screw (F), nuts (G) and flat washers (E) as shown in picture below.
- Page 15 TEILELISTE COUCHTISH Tischplatte Unterlegscheibe M6*35 Bein Schrauben M6*35 Seiten Inbusschlissel Glasplatte PARTS LIST OF COFFEE TABLE Stool Top Washer (M6) M6*35 Bolts M6*35 Fixed Rack Allen Key Glass top...
- Page 16 LISTA CZĘŚCI STOLIK KAWOWY Góra pufy Podkładka (M6) M6*35 Noga Śruba M6*35 Klucz imbusowy Szklany Blat...
- Page 17 Gebrauchsanleitung | User Manual| Instrukcja montażu Schritt 1: Montieren Sie die Tischplatte (A) und das Bein (B) zusammen mit Innensechskantschrauben (F) und Unterlegschieben (E) wie im Bild unten gezeigt. Step 1: Assemble the table top (A) and the leg (B) with hexagon socket screws (F) and flat washers (E) as shown in picture below.
- Page 18 Schritt 3: Verriegeln Sie alle Schrauben fest, setzen Sle dann die Glasplatte( D) auf den Tisch und beenden Sle die Montage, wie im Bild unten gezeigt. Step3: Lock all the bolts tightly, put the glass on top (D) on the table and finish the assembly as shown in picture below.
- Page 19 OLSTEFF .COM Stefano 3-Sitzer-Sofa und Hocker | 3 Seater sofa and Stool | Sofa trzyosobowa i pufa Montageanleitung | Assembly instructions | Instrukcja montażu...
- Page 20 (DE) WICHTIGE INFORMATIONEN Lesen Sie vor dem Zusammenbau des Produkts die Sicherheitshinweise sorgfältig durch. Bitte lesen Sie die Montageanleitung und bewahren Sie diese zum späteren Gebrauch auf. Überprüfen sie bitte, ob das Produkt vollständig ist oder alle Elemente verpackt wurden. Es können sich lose Teile in der Verpackung und auf Möbelteilen befinden –...
- Page 21 TEILLISTE 3-SITZER-SOFA Rickenlehne Nuss Sitzflach Inbusschliissel Schraubenschlüs Linke Armlehne Rechte Sitzkissen Armlehne Unterlegscheibe Rickenkissen Schrauben Schrauben...
- Page 22 PARTS LIST OF 3 SEATER SOFA Back Rack M6*50 Seat Rack Allen Hey Left Arm Wrench Righ Arm Seat Cushion Washer (M6) Back Cushion Bolts M6*55 Bolts M6*45...
- Page 23 LISTA CZĘŚCI SOFA TRZYOSOBOWA Oparcie Nakrętka M6*50 Siedzisko Klucz imbusowy Lewy Klucz płaski podłokietnik Prawy Poduszka podłokietnik Siedziskowa Poduszka Podkładka (M6) Oparciowa Śruba M6*55 Śruba M6*45...
- Page 24 Gebrauchsanleitung | User Manual| Instrukcja montażu Schritt 1: Montieren See die Rucken (A) und das Sitz (B) zusammen mit Innensechskantschrauben (F), Unterlegscheiben (E) und Muttern (G) wie im Bild unten gezeigt. Step 1: Assemble the back (A) and seat (B) together with hexagon socket screws (F), flat washers (E) and nut (G) as shown below.
- Page 25 Schritt 3: Befestige Sie die rechte Armlehne (D) an den Rucken (A) und dem Sitz (B) mit Innensechskantschrauben (F), Muttern (G) und Unterlegscheiben (E) wie im Bild unten gezeigt. Step 3: Attach the right armrest (D) to the back (A) and the seat (B) with hexagon socket screw (F), nuts (G) and flat washers (E) as shown in picture below.
- Page 26 TEILELISTE COUCHTISCH Tischplatte Schrauben M6*35 Bein Inbusschlissel Seiten Sitzkissen Unterlegscheibe (M6) PARTS LIST OF STOOL Stool Top Bolts M6*35 Allen Key Fixed Rack Seat Cuschion Washer (M6)
- Page 27 LISTA CZĘŚCI PUFY Góra pufy Śruba M6*35 Noga Klucz imbusowy Poduszka siedziskowa D Podkładka (M6)
- Page 28 Gebrauchsanleitung | User Manual| Instrukcja montażu Schritt 1: Montieren Sie die Hockerplatte (A) und das Bein (B) zusammen mit Innensechskantschrauben (E) und Unterlegscheiben (D) wie im Bild unten gezeigt. Step 1: Assemble the top (A) and the leg(B) with hexagon socket screws (E) and flat washers (D) as shown below.
- Page 29 Schritt 3: Verriegeln Sie alle Schrauben fest und beendenSle die Montage, wie im Bild unten gezeigt. Step 3: Lock all the bolts tightly and finish the assembly, as shown in picture below. Krok 3: Mocno dokręć wszystkie śruby i dokończ montaż, jak pokazano poniżej.
Need help?
Do you have a question about the Stefano and is the answer not in the manual?
Questions and answers