
Related Manuals for GRANULDISK Lean Wash Center D1 Master


Summary of Contents for GRANULDISK Lean Wash Center D1 Master
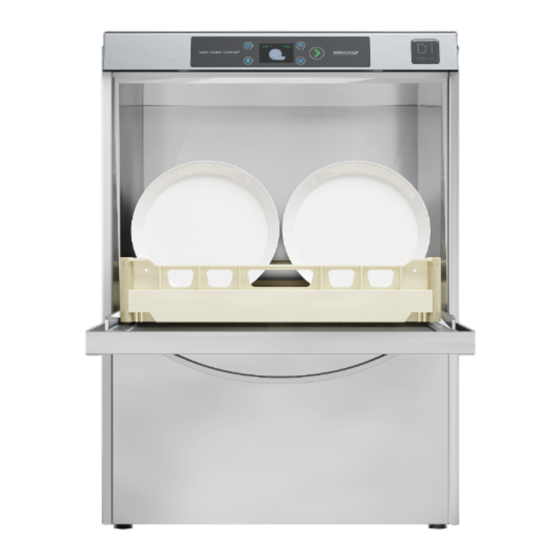
- Page 1 Wash Center® D1 Master User Manual serial # D1M–01 00001 Art. no EN31054 Granuldisk AB retains the right to make technical changes to the products. No responsibility is taken for any printing errors. www.granuldisk.com Tel. +46 40 671 50 60...
- Page 3 Contents EC DECLARATION OF CONFORMITY FOR MACHINERY 1 General description and safety 1.1 Notes and warnings 1.2 Technical data D1 Master 1.3 SIMpel — easy access to information 2 Operating 2.1 Control panel 2.2 Start and operation 2.3 Loading washware 3 User settings 4 Daily cleaning 5 Error icons and troubleshooting...
- Page 5 EC DECLARATION OF CONFORMITY FOR MACHINERY Original Directive 2006/42/EC, Annex II 1A Manufacturer (and where appropriate his authorised representative): Representative: Granuldisk Address: Jägershillsgatan 13, 213 75 Malmö Hereby declares that Type of machinery: Ware washing machine for com- mercial kitchens No.
- Page 7 This manual is your guide for the correct use of Lean Wash Center® D1 Master. Granuldisk recommends that you study the manual thor- oughly to be sure that Lean Wash Center® D1 Master is in- stalled and used correctly and safely.
- Page 8 1 General description and safety 1.1 Notes and warnings WARNING The following fundamental rules must be observed when using this appliance: • Never use the appliance with bare feet. • Do not put your bare hands into water containing detergent. Wash the hands thoroughly under running water straightaway if by accident this happens.
- Page 9 1.2 Technical data D1 Master 1 General description and safety Technical data D1 Master General Design Undercounter dishwashing machine Polypropylene dishware washing basket - Polypropylene glassware washing basket. External dimensions External dimensions H x W x D (Door open) 844 mm (+11 mm) x 600 mm x 633 mm (1072 mm) Weight (empty / filled) 54 / 74 kg (Standard machine)
- Page 10 1 General description and safety 1.2 Technical data D1 Master Fuse 10 A (400 V / 3N~) 16 A (230 V / 3N~) 25 A (230 V / 1N~) Frequency 50 Hz Maximum output 5,1 kW Dishwashing pump 0,55 kW Rinse pump 0,18 kW Heater wash tank*...
- Page 11 1.2 Technical data D1 Master 1 General description and safety NOTE Lean Wash Center® D1 Master must be installed according to national regulations. Lean Wash Center® D1 Master is supplied with a 1,5 metres long electric cable to be con- nected to an approved supply disconnecting device on the wall.
- Page 12 1.3 SIMpel — easy access to 1 General description and safety information SIMpel — easy access to information To make it easier for the operator to find information and how to use the unit there is a QR-code on Lean Wash Center® D1 Master. The sticker is placed in the upper right corner of the unit.
- Page 13 1.3 SIMpel — easy access to 1 General description and safety information 2 2 When you scan the QR code, you enter the following menu. (Note that the interface may vary depending on the de- vice used). See Fig. 2 Menu Fig.
- Page 14 1.3 SIMpel — easy access to 1 General description and safety information 5. ABOUT GRANULDISK Link to Granuldisk.com 6. CONTACT INFORMATION Contact information to service partner Rev. 2023-05...
- Page 15 Operating Control panel 1. ON/OFF 2. MENU — to enter the User settings. 3. Arrow UP — to toggle up in the display. 4. Arrow DOWN — to toggle down in the display. 5. CONFIRM Rev. 2023-05...
- Page 16 2 Operating 2.2 Start and operation 2.2 Start and operation Switch on the main electrical switch. The display lights up and goes in OFF-mode. 2 2 Press and hold the ON/OFF button in the upper left corner. The display lights up and Lean Wash Center®...
- Page 17 2.2 Start and operation 2 Operating 4 4 Choose wash program with the buttons UP and DOWN. • Glassware 1 min, 30 sec • Dishware 2 min • Flatware 3 min • Utensils 8 min Fig. 5 4 programs 5 5 Choose the appropriate program and start Lean Wash Center® D1 Mas- ter by pressing the CONFIRM button in green.
- Page 18 2 Operating 2.2 Start and operation NOTE If correct temperature is not achieved before the wash cycle or during the rinse cycle, thermostop will be activated. The countdown will stop and the temperature for wash or rinse will start blinking. The icon thermostop will be shown in the display.
- Page 19 2.3 Loading washware 2 Operating 2.3 Loading washware Dishware basket for dinner or soup plates (28148) Capacity: 18 dinner or 12 soup plates ø 240 mm. See Fig. 10 Dishware basket Fig. 10 Dishware basket Glassware basket for glasses and mugs (28149) Capacity: 25 glasses/mugs ø...
- Page 21 User settings There are in total (six) settings that can be changed as an operator of the machine. • Clock • Backlight • Buzzer • Language • Hood type (Auto Start) • Auto Opening Fig. 12 User settings 1st page Fig.
- Page 22 3 User settings Switch off backlight Choose Backlight in the User settings menu with the CONFIRM button. Change the value (in yellow) to NO with the arrows. Confirm with the CONFIRM button. To exit the menu: press the ON/OFF button. Switch off buzzer Choose Buzzer in the User settings menu with the CONFIRM button.
- Page 23 Daily cleaning Take out the tank grid (A) and remove the filter (B). See Fig. 14 Remove tank grid and filter Fig. 14 Remove tank grid and filter 2 2 Empty Lean Wash Center® D1 Master by pressing the ON/ OFF button in the upper left corner.
- Page 24 4 Daily cleaning 4 4 Take out the filter at the bot- tom of the tank. See Fig. 17 Remove the filter Fig. 17 Remove the filter 5 5 Flush and clean the filters and the tank grid. 6 6 Put all parts back in place. The two round filters are identical. 7 7 Undo the nut and remove the upper and lower wash and rinse arms.
- Page 25 4 Daily cleaning 1 1 0 0 Refill salt in the dispenser at the bottom of the wash tank. Use the funnel supplied. Make sure to clean any spilled salt from inside the tank. See Fig. 20 Refill salt Fig. 20 Refill salt NOTE Remove any spilled salt from the tank immediately, other- wise it could damage the surface of the tank with rust or...
- Page 27 Error icons and troubleshooting Error icons in the display ERROR ICONS MEANING SOLUTION Low water level in the Check the mains wash tank. water inlet. Press CONFIRM to re- set the count. If the problem persists after switching off and on again, call for technical assistance.
- Page 28 5 Error icons and troubleshooting 5.2 Troubleshooting 5.2 Troubleshooting PROBLEM POSSIBLE CAUSE POSSIBLE SOLUTION The mains light fails to Mains are not Check the electric switch on. connected. mains connection. The wash cycle fails to The machine has not Wait until the CONFIRM start.
- Page 29 5.2 Troubleshooting 5 Error icons and troubleshooting The glasses and cut- The rinse aid is unsuit- Check the rinse aid lery are stained. able or is not dis- container and if it is pensed correctly. suitable for the type of mains water.
- Page 31 Notes Rev. 2023-05...
Need help?
Do you have a question about the Lean Wash Center D1 Master and is the answer not in the manual?
Questions and answers