Advertisement
Quick Links
Full Installation Guide [Part Number 800-25459] available online at: www.resideo.com
To reset the Touchscreen, press and hold the side Power Button for 3 seconds and then press the reset button
be reset by pressing and holding the reset button for approximately 15 seconds until the touchscreen resets automatically.
TOUCHSCREEN INITIALIZATION
When initially powered, the boot sequence and the "Set ECP Address" is displayed. If
using one Touchscreen, leave the address set to 1 and select Apply. If using more than
one, power-up each Touchscreen one at a time, and set each Touchscreen address to
one of the addresses enabled in the control panel.
Operation Mode Selection: Select Normal Mode, Safe Mode or Demo Mode to turn the
option on or off.
SYSTEM INFORMATION / UPGRADES
To view the current software version installed, Interface name and MAC Address, select
Setup
→ System Information.
NOTE: If the 6290WC is connected to Wi-Fi, the software updates automatically.
ECP ADDRESS
If the screen is displaying "ECP Error", the ECP address in the Touchscreen is not valid
for the panel that it is connected to. In this case, to change the ECP Address, enter the
default code of "4140" to advance to the next screen.
Note: Default code "4140" is the Touchscreen default installer code before connecting to a
control panel. Once connected to a control panel, use that panel's installer code.
1. Select Setup
→System Setup
2. Enter an Authorized Code, if required.
3. Select ECP Address&Options
Addresses are:
1-2, 5-6 ......... for residential controls
1-30 .............. for commercial controls; supports 6 AUIs.
4. Select Home Screen: Legacy or Security Screen (See Images above for the differences).
5. Select the Back arrow to return to the previous screen. Select
DISPLAY & AUDIO SETUP
1. From the Home screen select Setup
down to change settings.
2. Select Setup → Disp & Audio Setup
- To adjust the screen timeouts, select a time interval from the drop-down list for each
option (Backlight Off After, To Homepage After, and Auto Slideshow After.)
- Select Chime, Voice or Voice Chime operating mode.
- To clean the Touchscreen screen, select the Clean Screen icon; select Continue, or
select Cancel to exit.
- Select the Back arrow to return to the previous screen. Select
USER SETUP
1. Select Setup → System Setup → USER
2. Select
and enter a User name and enter an Authorized Code for this user. Select
each field and enter the appropriate information.
3. Select Back
arrow to return to the previous screen.
For available user numbers, see control panel instructions.
TIME & DATE
1. Select Setup
→ System Setup→ Time/Date Setup
2. Enter an "Authorized Code".
a) If Get Time is selected, the Touchscreen downloads the time/date from the control
panel and exits the "Set Time" screen. (The Get Time icon appears with residential
panels and may not appear with all commercial panels.)
b) Or, set the time/date from the Set Time/Date screen.
3. Select
to save: A pop-up message displays "Time Setting Confirmation", select
Yes or No.
SYSTEM Wi-Fi (
Supports 2.4GHz and 5GHz frequencies.)
1. Select Setup
and System WIFI
networks.
2. Select the Wi-Fi networks SSID and if required enter the password for the network.
3. Select
to add a new network address. Use the displayed keyboard to:
- enter a new Network name (enter the SSID).
– select the security type
- scroll down to select Advanced options. Proxy: None, Manual, Proxy Auto-Config.
When done, select CONNECT to activate or select CANCEL.
Panel Faults – If
Panel Fault icons are displayed on the Security screen, see the full Installation Guide.
Expander Failure
AC Loss
Bell Failure
Security Mode
→ CS Setup
.
; enter an ECP Address. The available ECP
to save changes.
, slide the Brightness / Volume bar up or
; enter an Authorized Code.
to save changes.
.
.
icons to view the list of available Wi-Fi
Low Battery
LRR Supervision Failure
Quick Installation Guide
on the screen to start the reset function. The Touchscreen can also
MULTIMEDIA
NOTE: Micro SD card max size is 32GB and must be FAT32, SD/SDHC format.
Recommended is Kingston or Samsung.
NOTE: ACC (Advanced Audio Coding) is not supported
Picture Setup: Insert a media card (Micro SD/SDHC) with up to 1000 stored (jpg, .bmp,
.png or .jpeg) photos.
1. Select the Multimedia
2. Select a photo and select Play
3. To set a picture as wallpaper, select the Default/Wallpaper folder to activate the
wallpaper setting (only available in Legacy Mode).
4. Select the Multimedia information
5. Select Back
to return to the previous screen.
Video Setup: Insert a media card (Micro SD/SDHC) with stored (avi, .ts, .mp4, .mov,
.mkv, or .flv) video files. NOTE: for complete list of supported video and audio codecs
refer to the full installation guide.
1. Select the Multimedia
2. Select Play
to start the selected video file.
3. Select the Multimedia information
4. Select Back
to return to the previous screen.
SCREEN SECURITY
See the full Installation Guide for user Authority Levels.
1. Select Setup → System Setup → CS Setup
2. Enter an Authorized Code; select Screen Security
- To make changes, select the line to change and the level of user to have access,
and then select
CODE AUTHORITY
1. Select Setup → System Setup → CS Setup.
2. Select Code Authority
3. Enter the 4-digit Code for the user you want to obtain authority level information
about.
PANEL CONFIGURATION
1. Select Setup → System Setup → CS Setup.
2. Enter an Authorized Code and select Panel Config
Select
to clear the Touchscreen and reload the panel configuration into the
Touchscreen.
NIGHT SETUP
The NIGHT function can be set to arm the system in one of five arming modes. To change
the arming mode;
1. Select Setup →System Setup → Advanced Setup.
2. Enter an Authorized Code.
3. Select Night Setup; select desired mode:
4. Select
Away - Stay - Instant (default) - Night (Residential Panel Only) – Maximum.
to save changes.
EMERGENCY MESSAGES
1. Select the PANIC Icon.
2. Press and hold (for at least 2 seconds) the associated alarm icon (FIRE, POLICE or
MEDICAL).
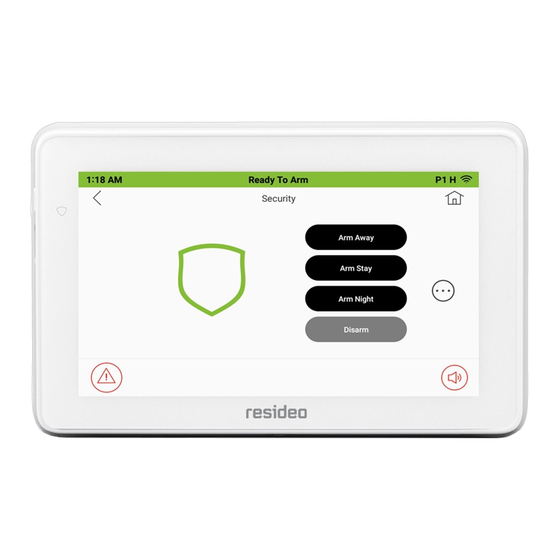
DISARMING THE SYSTEM AND SILENCING ALARMS
To silence Alarms or Trouble conditions: enter your 4-digit user code, press the Clear
button, then enter your 4-digit user code again.
To test the Alarm, select the Security
- Select Console Mode
Use a UL Listed, battery-backed supply for UL installations. The battery supplies
power to these keypads in case of AC power loss. The battery-backed power
supply should have enough power to supply the keypads with the UL required
U L
minimum standby power time.
IMPORTANT: Touchscreens powered from supplies that do not have a backup
battery do not function if AC power is lost. Make sure to power at least one
keypad in each partition from the control's auxiliary power output or UL Listed
battery backed up power supply.
Max Attempts
Pager Failure
Exceeded
Touchscreen Home Security System
Legacy Mode
icon and then select the Picture folder to view.
to view pictures in a slide show format.
icon to view picture/video information.
icon and then select the Video folder to view.
icon to view picture/video information.
.
.
to save changes.
.
.
and More Choices
and refer to the Control Panel User Guide for procedure.
Wireless Failure
Telco-2 Cut
Telco-1 Cut
6290WC
icons.
Panic
Advertisement

Related Manuals for resideo 6290WC


Summary of Contents for resideo 6290WC
- Page 1 Setup → System Information. 4. Select the Multimedia information icon to view picture/video information. NOTE: If the 6290WC is connected to Wi-Fi, the software updates automatically. 5. Select Back to return to the previous screen. ECP ADDRESS Video Setup: Insert a media card (Micro SD/SDHC) with stored (avi, .ts, .mp4, .mov, If the screen is displaying “ECP Error”, the ECP address in the Touchscreen is not valid...
- Page 2 Responsible Party / Issuer of Supplier’s Declaration of Conformity: Ademco Inc., a subsidiary of Resideo Technologies, Inc., 2 Corporate Center Drive., Melville, NY 11747, Ph: 516-577-2000 Partie responsable / Émetteur de la déclaration de conformité du fournisseur : Ademco Inc., une filiale de Resideo Technologies, Inc., 2 Corporate Center Drive., Melville, NY 11747, Tél. 516 577-2000 Warning: 5G Band 5150-5250 MHz is only for indoor use.
Need help?
Do you have a question about the 6290WC and is the answer not in the manual?
Questions and answers