
Related Manuals for Dell Alienware 17 R5


Summary of Contents for Dell Alienware 17 R5
- Page 1 Alienware 17 R5 Setup and Specifications Regulatory Model: P31E Regulatory Type: P31E002 May 2023 Rev. A01...
- Page 2 WARNING: A WARNING indicates a potential for property damage, personal injury, or death. © 2018-2023 Dell Inc. or its subsidiaries. All rights reserved. Dell, EMC, and other trademarks are trademarks of Dell Inc. or its subsidiaries. Other trademarks may be trademarks of their respective owners.
-
Page 3: Table Of Contents
Contents Chapter 1: Set up your computer......................4 Set up the Virtual Reality (VR) headset—optional......................4 HTC Vive..................................4 Oculus Rift..................................4 Oculus Rift with touch..............................6 Alienware Graphics Amplifier.............................. 7 Chapter 2: Views............................8 Base....................................... 8 Display....................................8 Front......................................9 Back.......................................9 Left...................................... 10 Right.................................... -
Page 4: Chapter 1: Set Up Your Computer
Set up your computer About this task Connect the power adapter and press the power button. Set up the Virtual Reality (VR) headset—optional NOTE: The VR headset is sold separately. NOTE: If you are using Alienware Graphics Amplifier with your computer, see Alienware Graphics Amplifier. - Page 5 2. Connect the Oculus Rift headset to the USB Type-A port at the right side of your computer. 3. Connect the Oculus Rift tracker to the USB Type-A port at the left side of your computer. 4. Connect a USB Type-C to Type-A dongle to the Thunderbolt 3 (USB Type-C) port at the back of your computer. 5.
-
Page 6: Oculus Rift With Touch
6. Follow the on-screen instructions to complete the setup. Oculus Rift with touch About this task NOTE: The USB dongles are only shipped with computers that are Oculus certified. Steps 1. Connect the HDMI cable of the Oculus Rift headset to the back of your computer. 2. -
Page 7: Alienware Graphics Amplifier
NOTE: The USB dongle is not required, if you are connecting the USB 3.1 Gen 1 cables on your VR headset to the USB 3.1 Gen 1 Type-A port on your Alienware Graphics Amplifier. For more information about Alienware Graphics Amplifier, see Alienware Graphics Amplifier User’s Guide at www.dell.com/support. -
Page 8: Chapter 2: Views
Views Base 1. Power button (Alienhead) Press to turn on the computer if it is turned off, in sleep state, or in hibernate state. Press to put the computer in sleep state if it is turned on. Press and hold for 4 seconds to force shut-down the computer. NOTE: You can customize the power-button behavior in Power Options. -
Page 9: Front
Application that enables you to interact with your computer using your eyes. 6. Service Tag label The Service Tag is a unique alphanumeric identifier that enables Dell service technicians to identify the hardware components in your computer and access warranty information. -
Page 10: Left
Connect an Alienware Graphics Amplifier to enhance the graphics performance. 6. Power-adapter port Connect a power adapter to provide power to your computer and charge the battery. Left 1. Security-cable slot (for Noble locks) Connect a security cable to prevent unauthorized movement of your computer. 2. -
Page 11: Chapter 3: Specifications
Specifications Computer model Alienware 17 R5 System information Table 1. System information Processor generation Intel Core i7/i9 Chipset Intel CM246 Operating system Table 2. Operating system Operating systems supported ● Windows 10 Home (64-bit) ● Windows 10 Professional (64-bit) Dimensions and weight Table 3. -
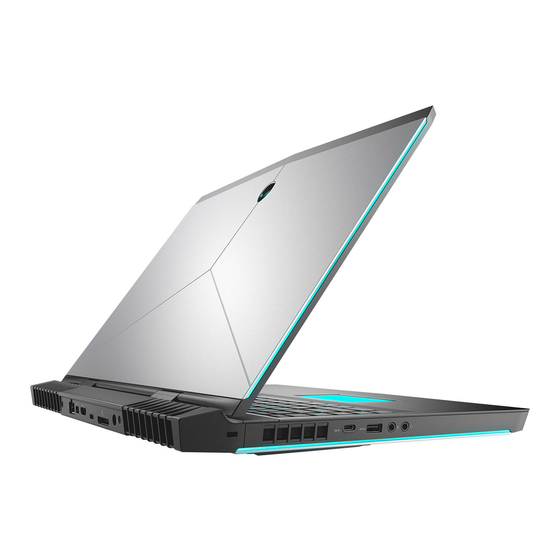
Page 12: Ports And Connectors
Ports and connectors Table 5. Ports and connectors External: Network One RJ-45 port ● One USB 3.1 Gen 2 (Type-C) port ● One USB 3.1 Gen 1 port with PowerShare ● One USB 3.1 Gen 1 port ● Thunderbolt 3 (USB Type-C) port Audio/Video ●... -
Page 13: Storage
Table 8. Audio specifications (continued) Subwoofer output ● Average: 2 W ● Peak: 2.5 W Microphone Digital-array microphones Storage Your computer supports one hard drive and three solid-state drives. Table 9. Storage specifications Storage type Interface type Capacity One 2.5-inch hard drive SATA AHCI 6 Gbps Up to 1 TB One M.2 2242 solid-state drive... -
Page 14: Touchpad
Table 12. Camera specifications (continued) Diagonal viewing angle 74 degrees Touchpad Table 13. Touchpad specifications Resolution ● Horizontal: 1727 ● Vertical: 1092 Dimensions ● Height: 56 mm (2.20 in) ● Width: 100 mm (3.94 in) Touchpad gestures For more information about touchpad gestures for Windows 10, see the Microsoft knowledge base article 4027871 support.microsoft.com. -
Page 15: Power Adapter
Table 15. Video specifications (continued) Integrated Discrete NOTE: The NVIDIA graphics cards support G-Sync panels. Memory Shared system memory ● 6 GB GDDR5 ● 8 GB GDDR5 ● 8 GB GDDR5X Power adapter Table 16. Power adapter specifications 180 W 240 W 330 W Input current (maximum) -
Page 16: Computer Environment
Table 17. Display specifications (continued) 17.3-inch FHD Anti-Glare 17.3-inch QHD Anti-Glare 17.3-inch UHD Anti-Glare panel panel panel Panel technology In-plane switching In-plane switching In-plane switching Controls Brightness can be controlled using shortcut keys Computer environment Airborne contaminant level: G2 or lower as defined by ISA-S71.04-1985 Table 18. -
Page 17: Chapter 4: Keyboard Shortcuts
Keyboard shortcuts NOTE: Keyboard characters may differ depending on the keyboard language configuration. Keys used for shortcuts remain the same across all language configurations. Table 19. List of keyboard shortcuts Keys Description Disconnect Alienware Graphics Amplifier Disable/enable wireless Mute audio Decrease volume Increase volume Switch to external display... -
Page 18: Chapter 5: Getting Help And Contacting Alienware
Express Service Code. To view relevant support resources for documents. your Dell computer, enter the Service Tag or Express Service Code at www.dell.com/support. For more information on how to find the Service Tag for your...
Need help?
Do you have a question about the Alienware 17 R5 and is the answer not in the manual?
Questions and answers