Table of Contents

Related Manuals for TSI Instruments AIRFLOW Instruments ProHood PH720

Summary of Contents for TSI Instruments AIRFLOW Instruments ProHood PH720
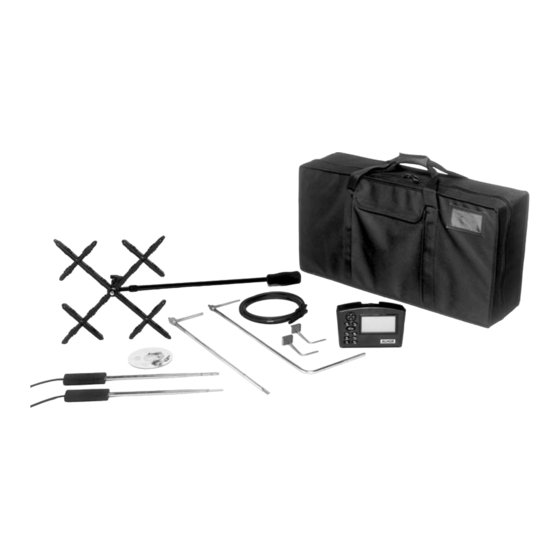
- Page 1 OWNER’S MANUAL ® Alnor Electronic Balancing Tool Models EBT720/EBT721 Instruments ProHood ™ ™ IRFLOW Capture Hood Models PH720/PH721 EBT720/PH720 Shown with all accessory options EBT721/PH721 Shown with all accessory options...
- Page 2 LIMITATION OF WARRANTY AND LIABILITY Copyright© TSI Incorporated / 2005–2011 / All rights reserved. LIMITATION OF WARRANTY AND LIABILITY (effective July 2000) Seller warrants the goods sold hereunder, under normal use and service as described in the operator's manual, shall be free from defects in workmanship and material for twenty-four (24) months, or the length of time specified in the operator's manual, from the date of shipment to the customer.
-
Page 3: Table Of Contents
CONTENTS About This Manual ........................iii Formatting and Typography ....................iii Technical Assistance—Help! ....................iii Chapter 1. Introduction ......................1 Instrument Description ......................1 Micromanometer ....................... 2 Micromanometer ........................3 Standard Tools ........................3 Pitot Tube .......................... 3 Static Pressure Probe ....................... 3 Optional Tools ......................... - Page 4 View/Set Standard Pressure and Temperature ..............21 Set Units of Measure for Temperature, Pressure, Velocity/Flow and Humidity ....23 Select the RS232 Output Device (Computer or Printer) ............23 Set the Baud Rate ......................... 24 Set the Format for Date and Decimal ..................24 Set Display Mode for Running Average or Single ..............
-
Page 5: About This Manual
About This Manual This manual explains how to set up, operate and maintain the Alnor EBT720/EBT721 and A ™ IRFLOW Instruments PH720/PH721. Read it thoroughly before using the instrument. Caution C A U T I O N ® HILE USING THE ALOMETER AIR BALANCING INSTRUMENT TO TEST AIR FLOW IN DUCTS... - Page 6 (This page intentionally left blank)
-
Page 7: Chapter 1. Introduction
Chapter 1. Introduction The Electronic Balancing Tools EBT720/EBT721 and ProHood PH720/PH721 capture hoods are ™ lightweight and easy-to-use instruments packaged with a variety of accessories for measuring pressure, temperature, humidity, air velocity, and air volume. Features of the micromanometer include: ... -
Page 8: Micromanometer
The basic EBT721/PH721 contains all of the EBT720/PH720 components plus 2 ft × 2 ft (610 mm × 610 mm) air capture hood, frame, and base. A variety of optional tools (see below) are also available to meet your measurement needs. The following paragraphs provide brief descriptions of the micromanometer and the various standard and optional tools for use with the EBT/PH. -
Page 9: Micromanometer
Micromanometer The micromanometer is a multifunction instrument useful in obtaining air velocity, air flow, absolute and differential pressure, temperature, and humidity measurements when used with the tools listed below. The lightweight micromanometer incorporates auto-zeroing for high-accuracy, low-end pressure measurements. Standard Tools This section gives a brief description of standard tools for the micromanometer. - Page 10 (This page intentionally left blank) Electronic Balancing Tool EBT720/EBT721 and ProHood PH720/PH721...
-
Page 11: Chapter 2. Unpacking And Setting Up
Chapter 2. Unpacking and Setting Up This chapter describes unpacking and setting up (preparing) the Electronic Balancing Tool (EBT) or ProHood ™ capture hood for use. Figure 3 shows a picture of the Model EBT720/PH720 with a velocity matrix measuring the face velocity on a laboratory hood. Figure 3: Model EBT720/PH720 with Velocity Matrix Unpacking As you unpack the instrument and accessories, check the components against your packing list. -
Page 12: Preparing The Instrument For Use
Table 2: List of Optional Hood Components Item Part No. 1 ft × 4 ft (305 mm × 1220 mm) and 2 ft × 4 ft (610 mm × 1220 mm) fabric hood 801206 and frame kit 1 ft × 5 ft (305 mm × 1525 mm) and 3 ft × 3 ft (915 mm × 915 mm) fabric hood 801207 and frame kit 1 ft ×... - Page 13 Figure 4: Battery Cover Removal Press down on the compartment cover and slide it down. (The cover slides off.) Remove the battery holder by pulling up on the bottom (to loosen it) and then pulling the battery holder free. Refer to Figure 5 and set the battery selection switch to indicate the type of batteries you are using. Battery Selection Switch Figure 5: Location of Battery Type Selector Switch Reinstall the battery holder and replace the battery compartment cover.
-
Page 14: Connecting The Pitot Tube To The Micromanometer
Remove the old batteries and replace with fresh batteries (alkaline or rechargeable NiMH). Make certain batteries are correctly oriented. Verify the battery selection switch is correctly set (see Figure 5). Reinstall the battery holder and replace the compartment cover. Note: Make sure the battery holder is oriented so that its terminals make contact with the spring contacts in the battery compartment. -
Page 15: Attaching The Micromanometer To The Capture Hood Base
Magnet Static Pressure Port Figure 7: Static Pressure Probe Attaching the Micromanometer to the Capture Hood Base 1. Tilt the meter forward and align the tabs in the base of the meter with the two matching slots in the bottom of the recessed area at the front of the base (see Figure 8). 2. -
Page 16: Connecting The Air Flow Probe To The Micromanometer
The handle assembly is attached to the downstream or negative (-) side in the center of the velocity matrix (see Figure 9). Standoffs Positive Port (+) Negative Port (–) Handle Figure 9: Velocity Matrix Connecting the Air Flow Probe to the Micromanometer The static pressure port (-) on the Air Flow Probe will be connected to the negative pressure (-) port on the micromanometer, and the total pressure port (+) on the Air Flow Probe will be connected to the positive (+) port on the micromanometer (see Figure 10). - Page 17 Match key on plug to detent on receptacle Figure 11: Connector for the Temperature Probe or Temperature/Humidity Probe Chapter 2: Unpacking and Setting Up...
- Page 18 (This page intentionally left blank) Electronic Balancing Tool EBT720/EBT721 and ProHood PH720/PH721...
-
Page 19: Chapter 3. Getting Started
Chapter 3. Getting Started This section provides information to help you quickly become familiar with the Models EBT720/EBT721 and PH720/PH721 Micromanometer functions. It also includes step-by-step instructions for taking Sample readings. Keypad Operation The keypad lets you enter information, initiate functions, and change values stored in the micromanometer. -
Page 20: Common Terms
The ON/OFF key is used to turn the micromanometer on or off. The BACKLIGHT key turns the display’s backlighting on and off. Use backlighting only when working in areas where you cannot read the display with existing light. Backlighting has a significant impact on battery life. -
Page 21: Step-By-Step Example Operation
Step-By-Step Example Operation The quickest way to become acquainted with the operation of the Electronic Balancing Tool or ProHood ™ capture hood is to take a few Samples while in the pressure mode. C A U T I O N ®... - Page 22 (This page intentionally left blank) Electronic Balancing Tool EBT720/EBT721 and ProHood PH720/PH721...
-
Page 23: Chapter 4. How To
Chapter 4. How To This chapter explains how to perform a variety of operations: Select a Tool/Probe Set the Time and Date Change the Currently Selected Test ID Recall Sample Data Delete Sample Data Delete All Sample Data ... - Page 24 Table 3: Tool Selection Display Display Shows Tool Units Available Pressure units only Pressure in H O, mm H O, cm H O, Pa, hPa, kPa, mm Hg, cm Hg, in Hg, Capture Hood l/s, m /hr, m /min, CFM with flow units Pressure units with K- Diffuser Flow...
-
Page 25: Set The Time And Date
Set the Time and Date 1. Press to display CHANGE Test ID. 2. Press until SETUP appears. 3. Press 4. Press until TIME is displayed. 5. Press . The display shows the current time and date. The hours value is flashing. 6. -
Page 26: Delete Sample Data
Delete Sample Data You can delete data in three ways: 1) delete all Sample data in all Test IDs, 2) delete all Sample data for a single Test ID, and 3) delete only the last Sample currently stored in a Test ID. Delete all Sample Data 1. -
Page 27: Select/Set A K-Factor For A Tool
Select/Set a K-factor for a Tool It is possible to enter K-Factors to adjust the calculations of the velocity and flow measurements. For Hood Flow, Pitot Velocity, Pitot Flow, Air Flow Probe Flow, Air Flow Probe Velocity and Velocity Matrix, the K-Factor is simply multiplied by the calculated velocity or flow in order to get the displayed value. - Page 28 To display the Barometric Pressure: to display CHANGE Test ID. 1. Press 2. Press until STP.SET appears. 3. Press . ACT.STD is displayed. 4. Press until B.PRESS appears. The measured barometric pressure is displayed. Barometric pressure is not changeable by the user. 5.
-
Page 29: Set Units Of Measure For Temperature, Pressure, Velocity/Flow And Humidity
Set Units of Measure for Temperature, Pressure, Velocity/Flow and Humidity to display CHANGE Test ID. 1. Press 2. Press until SETUP appears. 3. Press 4. Press until UNITS appears. . The display shows TEMP. 5. Press 6. Press . -
Page 30: Set The Baud Rate
6. Press or to change device. . COM.DEV is displayed. 7. Press 8. Press ESC to return to SETUP. Set the Baud Rate Before transferring data to a computer or printer, you must set the baud rate to the speed at which your printer or computer will accept information. -
Page 31: Set Display Mode For Running Average Or Single
Set Display Mode for Running Average or Single If Single is selected, the instrument will show READY on its display, and will not start taking readings until READ is pressed. If Running Average is selected, the instrument will constantly measure and display a running average. The READ button can then be used to stop and start the running average. -
Page 32: Turn Back Pressure Compensation On And Off
Turn Back Pressure Compensation On and Off Back pressure caused by flow through the capture hood can lower the flow being measured, causing measurement error. If it is desired to minimize this error, turn the back pressure compensation on. 1. Press to display CHANGE Test ID. -
Page 33: Set Deadband On And Off
Set Deadband On and Off The deadband determines the velocity or volume measurement threshold for displaying 0. If the deadband is ON, readings below 18 fpm (0.0914 m/s) or 18 cfm (30.58 m /h, 8.49 l/s) will be displayed as 0. If the deadband is OFF, readings down to 0 will be displayed. -
Page 34: Select User Calibration Or Factory Calibration
ENTER to accept. To return to the factory calibration, adjust the factor to 1.000 and press ENTER to accept. Select User Calibration or Factory Calibration Performing a user calibration does not erase the factory calibration because the user calibration is saved in a different place than the factory calibration. -
Page 35: Connect And Download Data To A Computer
--------------------------- MODEL: EBT721 SERIAL: 0404004 --------------------------- TEST ID: Sample: 02/16/04 15:14:31 1.00 CFM Shape=Round Dia = in. ø Entered Temp= 74.4 °F Baro. Press= 29.16 in.Hg 15:14:31 28.5 %rh Figure 12: Sample Print Out The Models EBT720/EBT721 and Models PH720/PH721 allow printing of the entire memory, all Samples stored within a particular Test ID, or an individual Sample. -
Page 36: Data Acquisition (Polling)
Data Acquisition (Polling) The micromanometer is designed to allow the user to perform polling through the use of a computer. The computer must send an upper case ‘V’ to the micromanometer while the micromanometer is taking measurements. The ‘V’ must be sent alone, without a carriage return or linefeed. The micromanometer will then output the values of the last measurements read. -
Page 37: Chapter 5. Changing Flow Hoods
Chapter 5. Changing Flow Hoods This chapter identifies the flow hood parts and gives instructions for assembling the flow hood. Flow Hood Parts Identification Figure 13 identifies the major parts of the capture hood, which are described in the following paragraphs. Before using the hood, please familiarize yourself with the various parts. -
Page 38: Alternate Hood Installation
Figure 14: Installing a Support Pole 4. Insert the second support pole into the pole mount on the opposite side of the base. 5. Repeat step 3 for the second support pole. 6. Repeat steps 4 and 5 for the remaining two support poles. Four other hood sizes are available from TSI and can be purchased separately. - Page 39 Figure 15: 1 ft × 4 ft (305 mm × 1220 mm) hood and frame. The support poles always cross as pairs at the front and back of the fabric hood. For the 1 ft × 4 ft (305 mm × 1220 mm), the support poles are inserted into the outside ferrule locations.
- Page 40 Figure 16: 2 ft × 4 ft (610 mm × 1220 mm) hood and frame. The support poles always cross as pairs at the front and back of the fabric hood. For the 2 ft × 4 ft (610 mm × 1220 mm), the support poles are inserted into the inside ferrule locations.
- Page 41 Figure 17: 1 ft × 5 ft (305 mm × 1525 mm) hood and frame. The support poles always cross as pairs at the front and back of the fabric hood. For the 1 ft × 5 ft (305 mm × 1525 mm), the support poles are inserted into the inside ferrule locations.
- Page 42 Figure 18: 3 ft × 3 ft (915 mm × 915 mm) hood and frame. The support poles always cross as pairs at the front and back of the fabric hood. For the 3 ft × 3 ft (915 mm × 915 mm), the support poles are inserted into the outside ferrule locations.
-
Page 43: Direct Inflow Measurement Hood For Biological Safety Cabinets
Figure 20: Frame Side Coupler Assembly Each hood is constructed in a trapezoidal shape, sewn together so that one open end forms a round attachment to the base, and the other forms a square or rectangle large enough to fit its matching frame assembly. - Page 44 The direct inflow BSC hood includes (see Figure 22): ❑ Fixed frame assembly with four removable flaps ❑ Fabric hood ❑ Hood support poles ❑ Base mounting hardware (threaded insert, washer, and screw) ❑ Telescopic pole stand with case to freely hold the capture hood in a vertical position when mounted to a biological safety cabinet or lab hood Figure 22: Direct Inflow Measurement Hood Components To complete the assembly of the BSC hood, follow these seven steps:...
- Page 45 2. Attach the fabric hood and hood support poles to the frame and base assembly in the same manner as previously described for the other hood sizes. 3. Insert the flaps into the slots from the side of the frame where the fabric hood is attached to the U-channel of the frame (see Figure 24).
- Page 46 Figure 26: Adjust Height and Position of Telescopic Stand 6. Lower the sash of the cabinet until it rests on the foam lip of the hood frame (see Figure 27). Figure 27: Lower Sash of Cabinet Until it Rests on Foam Lip of Hood Frame 7.
- Page 47 Figure 28: Unit Ready to Make Measurements Chapter 5: Changing Flow Hoods...
- Page 48 (This page intentionally left blank) Electronic Balancing Tool EBT720/EBT721 and ProHood PH720/PH721...
-
Page 49: Chapter 6. Flow Measurements Using The Capture Hood
Chapter 6. Flow Measurements Using the Capture Hood There are two methods of making flow measurements using the capture hood: Non-Backpressure Compensated and Backpressure Compensated methods (see “Appendix A. Back Pressure,” for an explanation of the implications of capture hood-induced back pressure on the measured flow). Flows in both “Supply”... -
Page 50: Running Average Measurements
Running Average Measurements In the “Running Average” measurement mode, the meter will constantly measure and display a running average of flow. This mode is useful when making adjustments to the flow. If you wish to “hold” a particular value on the display, momentarily press either the “READ” key on the meter or the red trigger button on the base. -
Page 51: Error Display
Error Display If the limits of allowed flow parameters are exceeded during a backpressure compensated measurement, an error message will be displayed. This can happen if there are flow reversals during the measurement or other changes in the flow during the measurement (such as changing a damper position), or as a result of other operator errors. - Page 52 (This page intentionally left blank) Electronic Balancing Tool EBT720/EBT721 and ProHood PH720/PH721...
-
Page 53: Chapter 7. Maintenance And Troubleshooting
Chapter 7. Maintenance and Troubleshooting The Electronic Balancing Tool (EBT) EBT720/EBT721 and ProHood ™ PH720/PH721 capture hoods are designed for long-term field use. If used with reasonable care, it should be able to make precise measurements over a long time period. Some of the components can be cleaned periodically. When cleaning the components, please follow the instructions given below. -
Page 54: Calibration
Calibration TSI recommends an annual calibration for the instrument. For a nominal fee, we will calibrate the unit and return it to you with a certificate of calibration and NIST traceability. This “annual checkup” assures you of consistently accurate readings. To calibrate the instrument, please ship the complete package that includes the meter, the base, the manifold and any fabrics used. - Page 55 Error Code Possible Causes Corrective Action Accessory temperature/humidity probe Perform user calibration or return to checksum error for humidity. factory. Accessory temperature/humidity probe Perform user calibration or return to checksum error for temperature. factory. Accessory temperature probe calibration Perform user calibration or return to checksum error.
- Page 56 Error Code Possible Causes Corrective Action Could not send RS232 data because the Make sure printer or computer is ready receiving device was busy >10 seconds. to receive. Check RS232 interface cable. Pressure sensor zero voltage is too high. Return to factory if error re-occurs. Pressure sensor gain out of range.
- Page 57 Error Code Possible Causes Corrective Action User temperature calibration >5°F (3°C) Re-do user calibration. different from factory calibration. Replace temperature probe. >100 Internal program error. Please contact the factory. Chapter 7: Maintenance and Troubleshooting...
- Page 58 (This page intentionally left blank) Electronic Balancing Tool EBT720/EBT721 and ProHood PH720/PH721...
-
Page 59: Appendix A. Back Pressure
Appendix A. Back Pressure The quantity of air flowing through a supply diffuser or a return grille is reduced to some extent whenever a capture hood is placed over the flow opening. The amount of flow reduction will vary depending on the combined effects of the diffuser/grille resistance, the capture hood resistance, and the flow rate. - Page 60 (This page intentionally left blank) Electronic Balancing Tool EBT720/EBT721 and ProHood PH720/PH721...
-
Page 61: Appendix B. Actual Vs. Standard Air Velocity And Flow Measurements
Appendix B. Actual vs. Standard Air Velocity and Flow Measurements Actual Air Velocity is also known as the “local” air velocity. It can be thought of as the speed of a microscopic dust particle being carried along in the air stream. Actual Air Velocity is measured with a Pitot tube using the basic formula: ×... - Page 62 Thus, to convert from Actual Velocity to Standard Velocity, use the following equation: ρ × Eq. (5) ρ Substituting known values into Eq. (5), we get: × × × × Eq (6) where: P is the local atmospheric pressure, as measured by the EBT/PH, for example, in units of (in.
- Page 63 ® Alnor Models EBT720/EBT721 and A Instruments ™ IRFLOW Models PH720/PH721 Specifications Range Units Differential pressure ... ±15 in. H O (3735 pa); 150 in. Pressure ....in. H O, pa, hPa, kPa, mm Hg, O maximum safe operating in. Hg, cm Hg, mm H O, cm H pressure Velocity ......
- Page 64 TSI Incorporated TSI Instruments Ltd. 500 Cardigan Road Stirling Road Shoreview, MN 55126 USA Cressex Business Park Toll Free (800) 874-2811 High Wycombe Telephone (651) 490-2811 Bucks Fax (651) 490-3824 HP12 3ST United Kingdom Tel: +44 (0) 149 4 459200 E-mail: customerservice@alnor.com...
Need help?
Do you have a question about the AIRFLOW Instruments ProHood PH720 and is the answer not in the manual?
Questions and answers