Samsung Hi8 SCL870 Owner's Instruction Book
Video camcorder
Hide thumbs
Also See for Hi8 SCL870:
- Owner's instruction book (76 pages) ,
- Owner's instruction book (76 pages)
Table of Contents
Advertisement
Quick Links
ENGLISH
Video Camcorder
8mm
COLOR LCD
SCL810/L860/L870
Hi
SCL810/L860/L870
Owner's Instruction Book
Before operating the unit, please read
this instruction book thoroughly, and retain it for future
reference.
Videocámara
8mm
PANTALLA LCD DE COLOR
SCL810/L860/L870
Hi
ELECTRONICS
Manual de instrucciones del usuario
Antes de utilizar la videocámara, lea completamente el
presente manual de instrucciones, y consérvelo para futuras
consultas.
ESPAÑOL
SCL810/L860/L870
AD68-00607D
Advertisement
Table of Contents

Related Manuals for Samsung Hi8 SCL870


Summary of Contents for Samsung Hi8 SCL870
- Page 1 ENGLISH ESPAÑOL Video Camcorder Videocámara COLOR LCD PANTALLA LCD DE COLOR SCL810/L860/L870 SCL810/L860/L870 SCL810/L860/L870 SCL810/L860/L870 ELECTRONICS Owner’s Instruction Book Manual de instrucciones del usuario Before operating the unit, please read Antes de utilizar la videocámara, lea completamente el this instruction book thoroughly, and retain it for future presente manual de instrucciones, y consérvelo para futuras reference.
-
Page 2: Table Of Contents
ENGLISH ESPAÑOL Contents Tabla de Contenido Notices and Safety Instructions Avisos e instrucciones de seguridad Conozca su videocámara Getting to Know Your Camcorder Features ....................8 Características..................8 Descriptions Descripciones Front View/Side View/Rear View........9, 10, 11 Vista Frontal/Vista lateral/Vista trasera.......9, 10, 11 OSD (On Screen Display) ............12 OSD (Visualizador en pantalla) ...........12 Accessories Supplied with the Camcorder...........14... - Page 3 ENGLISH ESPAÑOL Tabla de Contenido Contents (continued) Program AE (Automatic Exposure) ............38 PROGRAMA AE (Exposición automática) ........38 DSE (Digital Special Effects) in CAMERA mode........40 DSE (Efecto Digital Especial) en modo CAMERA .......40 Setting and Recording DATE/TIME............42 Configurar y grabar una FECHA/HORA ........42 Selecting and Recording a Title ............44 Selección y grabación de un título..........44 Fade In and Out ...................46...
-
Page 4: Notices And Safety Instructions
ENGLISH ESPAÑOL Notices and Safety Instructions Avisos e instrucciones de seguridad Notices regarding rotation of LCD screen Avisos relativos al giro de la pantalla LCD Please rotate the LCD screen carefully as illustrated. Por favor, gire la pantalla LCD con cuidado como lo muestra en la Unintended rotation may cause damage to the inside of the ilustración. - Page 5 ENGLISH ESPAÑOL Notices and Safety Instructions Avisos e instrucciones de seguridad Notices regarding electronic viewfinder Precauciones con el VISOR 1) Do not place the camcorder 1) No coloque la videocámara so that the viewfinder is de modo que el visor quede pointing towards the sun.
- Page 6 ENGLISH ESPAÑOL Notices and Safety Instructions Avisos e instrucciones de seguridad Notices regarding the battery pack Avisos relativos a la batería Make sure that the battery pack is charged before Asegúrese de que la batería está cargada antes de filmar en recording outdoors.
- Page 7 Notices and Safety Instructions Avisos e instrucciones de seguridad Notices with Recording or Playback by using LCD 1) The LCD monitor is manufactured by 1) La pantalla LCD se fabrica utilizando using high precision technology. tecnología de alta precisión. Sin embargo, pueden aparecer constantemente However, there may be some tiny specks pequeños puntos oscuros (de color rojo,...
-
Page 8: Getting To Know Your Camcorder
Getting to Know Your Camcorder Conozca su videocámara Features Características Your camcorder has many features for recording and playing back. Su videocámara incluye una gran variedad de características para la grabación y la reproducción. Snap Shot (SCL860/L870 only) Filmación instantánea (sólo SCL860/L870) The Snap Shot function lets you record an object at a standstill for a limited time in Camera mode. -
Page 9: Front View/Side View/Rear View
Getting to Know Your Camcorder Familiarisez-vous avec le caméscope Vue avant Front View 2. REC SEARCH (REW) 4. REC SEARCH (FF) 5. DATE/TIME (STOP) 3. PLAY/STILL (LIGHT) 7. EVF 6. TAPE EJECT 13. VIDEO LIGHT 1. LENS 9. Remote Sensor 10. -
Page 10: Vista Frontal/Vista Lateral/Vista Trasera
Getting to Know Your Camcorder Conozca su videocámara Side View Vue latérale 24. BLC 14. MENU ON/OFF 23. FADE 15. ENTER (MF) 20. SPEAKER 16. UP/DOWN Dial (VOLUME) 22. LCD Open 17. S-VIDEO out 18. P.AE 19. DSE 21. Lithium Battery 14. - Page 11 Getting to Know Your Camcorder Conozca su videocámara Vue arrière Rear View 25. ZOOM 26. CASSETTE Compartment 36. BATTERY EJECT 27. Hooks for shoulder strap 37. SNAP SHOT/D.ZOOM 28. AUDIO/VIDEO Out 39. USB JACK (SCL870 only) 32. START/STOP 33. External MIC 35.
-
Page 12: Osd (On Screen Display)
Getting to Know Your Camcorder Conozca su videocámara OSD (On Screen Display) OSD (Visualizador en pantalla) You can turn the OSD on/off by setting the Display menu Usted puede activar/desactivar el OSD en el menu Display on/off. Las funciones TITLE, DATE/TIME, EASY y CUSTOM pueden ser on/off. - Page 13 ENGLISH ESPAÑOL Getting to Know Your Camcorder Conozca su videocámara OSD (Visualizador en pantalla) OSD (On Screen Display) j. Time (see page 42) Hora (Consulte la página 42) Indicates the time you are recording. Indica la hora de la filmación. k.
-
Page 14: Accessories Supplied With The Camcorder
ENGLISH ESPAÑOL Getting to Know Your Camcorder Conozca su videocámara Accesorios suministrados con la videocámara Accessories Supplied with Camcorder Make sure that the following basic accessories are supplied with Asegúrese de que recibe con su videocámara los siguientes your camcorder. accesorios. -
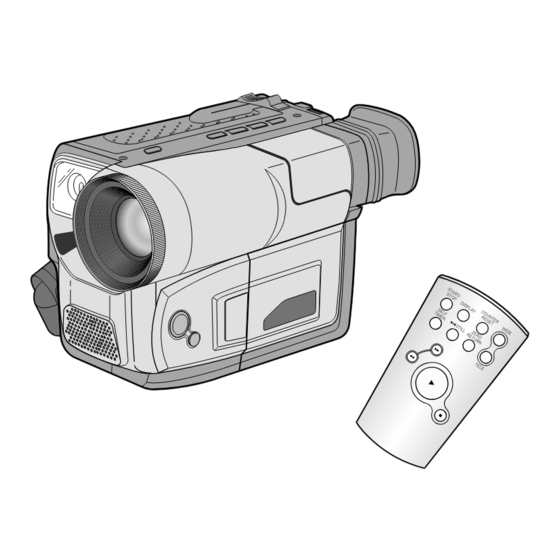
Page 15: Remote Control (Scl860/L870 Only)
ENGLISH ESPAÑOL Getting to Know Your Camcorder Conozca su videocámara Remote Control (SCL860/L870 only) Mando a distancia (sólo SCL860/L870) Description of Buttons Descripción de partas 1. Iniciar/Parar (Consulte la página 23) 1. Start/Stop (see page 23) 2. Temporizador Automático 2. Self Timer 3. -
Page 16: Preparing
ENGLISH ESPAÑOL Preparing Configuración de la videocámara 1. Set power switch to CAMERA mode. 1. Ponga el interruptor de encendido en modo CAMERA. 2. Pulse el botón del Temporizador 2. Press Self Timer button until the Automático hasta que el indicador CAMERA appropriate indicator is displayed on aparezca en la pantalla LCD:... -
Page 17: Lithium Battery Installation
ENGLISH ESPAÑOL Preparing Configuración de la videocámara Shoulder Strap Correa de hombro The Shoulder Strap allows you to carry your camcorder La correa de hombro le permite llevar la cámara con total with complete safety. seguridad. 1. Insert each end of the strap into the 1. -
Page 18: Connecting The Power Source
ENGLISH ESPAÑOL Preparing Configuración de la videocámara Conexión a la fuente de energía Connecting the Power Source There are two ways to connect power source. Existen dos formas diferentes de conectar la videocámara a la Using the AC Power Adapter : used for indoor recording. fuente de energía. -
Page 19: To Use The Battery Pack
ENGLISH ESPAÑOL Preparing Configuración de la videocámara To use the Battery Pack Para el uso de la batería ¿Qué duración tendrá la batería para filmar? How long will the battery last for recording? La frecuencia con que se usan las lentes de zoom. Depends on how often you are likely to use the zoom Prepare tantas baterías como sea posible. -
Page 20: Using The Battery Pack
ENGLISH ESPAÑOL Preparing Configuración de la videocámara Using the Battery Pack Uso de la batería Tabla de tiempo de grabación contínuo basada en el modelo Continuous recording time table based on model and y tipo de batería. battery type. Modelo Model SCL860/L870 SCL810... -
Page 21: Battery Level Display
ENGLISH ESPAÑOL Preparing Configuración de la videocámara Visualizador del nivel de batería Battery Level Display El visualizador del nivel de batería The battery level display indicates the muestra la cantidad de energía que aún amount of power remaining in the queda en la batería. -
Page 22: Inserting And Ejecting A Cassette
ENGLISH ESPAÑOL Preparing Configuración de la videocámara Inserting and Ejecting a Cassette Introducir y extraer un videocasete There are several cassette types, depending on: Existen diferentes tipos de videocasetes dependiendo de: Color system used Sistema de color utilizado Recording/playback time. Tiempo de filmación y reproducción. -
Page 23: Making Your First Recording
ENGLISH ESPAÑOL Basic Shooting Filmación básica Making Your First Recording Filmando por primera vez Please make these preparations before Asegúrese de que ha preparado recording. adecuadamente la videocámara. Did you connect a power source? Ha conectado la fuente de energía? (Battery Pack or AC Power Adapter) (Batería o adaptador de energia AC) BATTERY... - Page 24 ENGLISH ESPAÑOL Basic Shooting Filmación básica b. To stop recording, press the red b. Para detener la filmación, pulse START/STOP button again. de nuevo el botón START/STOP. STBY When Recording stops, STANDBY La filmación se detendrá y el Y:YY:YY should be displayed on the LCD. indicador STANDBY aparecerá...
-
Page 25: Hints For Stable Image Recording
ENGLISH ESPAÑOL Filmación básica Basic Shooting Hints for Stable Image Recording Consejos para la filmación con imágenes estables While recording, it is very important to hold Mientras filma, es muy importante sujetar la videocámara correctamente. the camcorder correctly. Para la filmación estable, asegure la tapa del For stable recording, fix the LENS cap firmly lente con firmeza enganchándola en la correa by clipping it on the hand strap. -
Page 26: Adjusting The Lcd
ENGLISH ESPAÑOL Basic Shooting Filmación básica Adjusting the LCD Ajustar la pantalla LCD Your camcorder is equipped with a 2.5 inch color Liquid Crystal Su videocámara está equipada con una Pantalla de Cristal Display (LCD) screen, which allows you to view recording or Líquido (LCD) a color de 2,5 pulg. -
Page 27: Adjusting Focus Of The Viewfinder
ENGLISH ESPAÑOL Basic Shooting Filmación básica 9. Turn the UP/DOWN dial to adjust the LCD color setting. 9. Gire el disco selector UP/DOWN para ajustar la LCD. 10. Press ENTER. 10. Pulse ENTER. For further adjustment, repeat steps 7, 8, 9. Para posteriores ajustes, repita los pasos 7, 8, 9. -
Page 28: Playing Back A Tape On The Lcd
ENGLISH ESPAÑOL Basic Shooting Filmación básica Playing back a tape on the LCD Reproducción de la cinta en LCD You can monitor the playback picture on the LCD monitor. Puede reproducir las imágenes filmadas en el monitor LCD. Make sure that the battery pack is in place. Asegúrese de que la batería está... -
Page 29: Adjusting The Lcd During Play
ENGLISH ESPAÑOL Basic Shooting Filmación básica Adjusting the LCD during PLAY Ajustar la pantalla LCD durante la reproducción The LCD adjustment method in PLAYER mode is identical to step Puede ajustar la pantalla LCD durante el modo PLAYER. El método number 4 of page 26, except the power switch must be set to de ajuste es el mismo que el método número 4 de la página 26, PLAYER. -
Page 30: Advanced Recording
ENGLISH ESPAÑOL Advanced Recording Filmación avanzada Zooming In and Out Lejos y Cerca El zoom sólo funciona en modo CAMERA. Zoom works in CAMERA mode only. El “Zooming” es una técnica de grabación que le permite Zooming is a recording technique that lets you change the size cambiar el tamaño del motivo de la escena. -
Page 31: Digital Zoom
ENGLISH ESPAÑOL Advanced Recording Filmación avanzada Digital Zoom Zoom Digital Digital Zoom works in CAMERA mode only. El zoom sólo funciona en modo CAMERA. Zooms more than 22x are performed digitally. El zoom de más de 22x funciona digitalmente. The picture quality deteriorates as you go towards the “T” side. La calidad de la imagen se deteriora a medida que se We recommend that you use the DIS (SCL860/L870) feature acerca hacia “T”. - Page 32 ENGLISH ESPAÑOL Advanced Recording Filmación avanzada Setting the DIGITAL ZOOM ON/OFF (SCL860/L870 only) Configuración del ZOOM ON/OFF DIGITAL (sólo SCL860/L870) The DIGITAL ZOOM feature is La funcion de ZOOM DIGITAL se explained on page 31. MENU explica en la pagina 31. LCD ADJUST DIS......OFF 1.
-
Page 33: Easy Mode (For Beginners)
ENGLISH ESPAÑOL Advanced Recording Filmación avanzada EASY Mode (for Beginners) Modo EASY (para principiantes) Even a beginner can easily make a recording using the EASY Incluso los principiantes pueden filmar facilmente usando el mode. modo EASY. The EASY mode only operates in CAMERA mode. El modo EASY solo funciona en modo CAMERA. -
Page 34: Custom-Creating Your Own Customized Recording Settings
ENGLISH ESPAÑOL Advanced Recording Filmación avanzada CUSTOM - Creating your own customized recording settings CUSTOM - Crear sus ajustes de grabación personalizados You can customize the settings and save them for future use. Usted puede crear sus ajustes de grabacion personalizados y The CUSTOM function only operates in CAMERA mode. -
Page 35: Dis (Digital Image Stabilizer, Scl860/L870 Only)
ENGLISH ESPAÑOL Advanced Recording Filmación avanzada DIS (Digital Image Stabilizer, SCL860/L870 only) DIS (Estabilizador digital de imagen, sólo en SCL860/L870) The DIS function works in CAMERA mode only. La función DIS sólo funciona en modo CAMERA. DIS (Digital Image Stabilizer) is a handshake compensation La función de compensación de temblor de la mano, function that compensates for any shaking or moving of the denominada DIS (Estabilizador digital de la imagen) compensa... -
Page 36: Mf/Af (Manual Focus/Auto Focus)
ENGLISH ESPAÑOL Advanced Recording Filmación avanzada MF/AF (Manual Focus/Auto Focus) Enfoque Manual/Automático La función Enfoque manual/automático funciona sólo en el The MF/AF function works in the CAMERA mode only. modo CAMERA. In most situations, it is better to use the Automatic Focus feature, as it enables you to concentrate on the creative En la mayoría de situaciones, es mejor utilizar el Enfoque side of your recording. -
Page 37: Blc
ENGLISH ESPAÑOL Advanced Recording Filmación avanzada 4. Turn the UP/DOWN dial up or down until 4. Girar el disco selector hacia arriba y abajo the object is focused. hasta que el objeto sea enfocado. 5. Puede obtener una imagen nítida 5. -
Page 38: Program Ae (Automatic Exposure)
ENGLISH ESPAÑOL Advanced Recording Filmación avanzada PROGRAM AE (Automatic Exposure) PROGRAMA AE (Exposición Automática) The PROGRAM AE function works in the CAMERA mode only. La función PROGRAMA AE sólo funciona en modo The PROGRAM AE modes allow you to adjust shutter speeds CAMERA. - Page 39 ENGLISH ESPAÑOL Advanced Recording Filmación avanzada Setting the PROGRAM AE(Automatic Exposure) mode Ajustando el modo PROGRAM AE(Exposicion automatica) 1. Set the power switch to CAMERA mode. (see page 18) 1. Ajuste el power switch en modo CAMERA. (ver pag. 18) 2.
-
Page 40: Dse (Digital Special Effects) In Camera Mode
ENGLISH ESPAÑOL Advanced Recording Filmación avanzada DSE (Digital Special Effects) in CAMERA mode DSE (Efecto Digital Especial) en modo CAMERA The digital effects enable you to give a creative look to your Los efectos digitales le permiten dar un aspecto creativo a recording by adding various special effects. - Page 41 ENGLISH ESPAÑOL Advanced Recording Filmación avanzada Selecting and recording DSE effects Seleccionar y grabar efectos DSE 1. Set the power switch to CAMERA mode. 1. Ajuste el power switch en modo STBY (see page 18) CAMERA. (ver pag. 18) X:XX:XX GHOST 2.
-
Page 42: Setting And Recording Date/Time
ENGLISH ESPAÑOL Advanced Recording Filmación avanzada Setting and Recording the DATE/TIME Configurar y grabar una FECHA/HORA Setting and recording the date/time feature works in the Configurar y grabar la función de fecha/hora sólo funciona CAMERA mode only. en el modo CAMERA. You can record the date/time on your tapes, so you will know Usted puede grabar la fecha/hora en las cintas que realiza, de when it was made. - Page 43 ENGLISH ESPAÑOL Advanced Recording Filmación avanzada 7. Press ENTER. 7. Pulse ENTER. CLOCK SETTING The month to be reset will blink. Parpadeará el mes para ser configurado. 12:00 AM 8. Gire el disco selector UP/DOWN para JAN. 1, 2005 8. Turn the UP/DOWN dial to set the introducir el mes deseado.
-
Page 44: Selecting And Recording A Title
ENGLISH ESPAÑOL Advanced Recording Filmación avanzada Selecting and Recording a Title Seleccion y grabacion de un título Selecting and recording a TITLE is possible in the CAMERA La selección y grabación de un TITLE funciona solo en el mode only. modo CA-MERA. - Page 45 ENGLISH ESPAÑOL Advanced Recording Filmación avanzada 6. Turn the UP/DOWN dial to select 6. Gire el UP/DOWN dial hasta la posición the appropriate language. del lenguaje apropiada. ENGLISH [HAVING FUN] You may select languages from FRENCH Puede seleccionar GERMAN ENGLISH/FRENCH/GERMAN/ ENGLISH/FRENCH/GERMAN/ ITALIAN SPANISH...
-
Page 46: Fade In And Out
ENGLISH ESPAÑOL Advanced Recording Filmación avanzada Fade In and Out Entrada y Salida gradual The FADE function works in CAMERA mode only. La función FADE sólo funciona en modo CAMERA . You can give your films a professional look by using special Para dar una apariencia profesional a sus películas, puede effects such as fading in and out at the beginning or end of a utilizar algunos efectos especiales, como la entrada gradual al... -
Page 47: Pip (Scl860/L870 Only)
ENGLISH ESPAÑOL Advanced Recording Filmación avanzada PIP (Picture-In-Picture, SCL860/L870 only) PIP (Imagen a Imagen, solo SCL860/L870) The PIP(Picture-In-Picture) feature works in combination with La función PIP (Imagen a Imagen) labora en combinación con the DIGITAL ZOOM function by using a small, superimposed la función ZOOM DIGITAL usando una pantalla pequeña, screen to show an image that is wider than the image being super impuesta para mostrar una imagen que es más amplia... -
Page 48: Snap Shot (Scl860/L870 Only)
ENGLISH ESPAÑOL Advanced Recording Filmación avanzada Snap Shot (SCL860/L870 only) Filmación Instantánea (sólo SCL860/L870) With the SNAP SHOT feature, your camcorder functions like a Con la función de SNAP SHOT, se puede filmar un objeto fijo con una duración como la de una cámara de filmación normal. regular film camera, allowing you to take single still pictures. -
Page 49: White Balance
ENGLISH ESPAÑOL Advanced Recording Filmación avanzada White Balance Balance de blancos WHITE BALANCE is a recording function that preserves the WHITE BALANCE es una función de filmación que conserva unique color of the object in any recording condition. el color único del objeto en cualquier estado de filmación. You may select the appropriate WHITE BALANCE mode to Puede seleccionar el modo de WHITE BALANCE para obtain good quality color of the image. -
Page 50: Demonstration
C.RESET ....0:00:00 DEMO ....OFF EXIT: MENU 4. Press ENTER to select ON. 4. Pulse ENTER para seleccionar ON. SAMSUNG Demonstration will start. Comenzara la demostración 5. Set the POWER switch to OFF to 5. Ponga el POWER switch en OFF para end the Demonstration. -
Page 51: Setting The Date/Title Color
ENGLISH ESPAÑOL Advanced Recording Filmación avanzada Setting the Date/Title Color Ajustando el color de Date/Title 1. Set the power switch to CAMERA mode. (see page 22) 1. Ponga el power switch en modo CAMERA. (ver pag. 22) 2. Press the MENU ON/OFF button. 2. -
Page 52: Lighting Techniques
ENGLISH ESPAÑOL Advanced Recording Filmación avanzada Lighting Techniques Técnicas de iluminación When you use your camcorder, there are only two possible Al utilizar la videocámara, pueden darse dos situaciones recording environments. posibles de filmación. You will be recording outdoors (Normal recording or Filmar en exteriores (Grabación normal o utilizando un filtro through an ND(Neutral Density) filter). -
Page 53: Playing Back A Tape
ENGLISH ESPAÑOL Playing back a Tape Reproducir una cinta To view a tape that you have recorded. Para ver una cinta que haya filmado. Playback function works in PLAYER mode only. La función Reproducir funciona sólo en el modo PLAYER. There are two ways to see a tape;... - Page 54 ENGLISH ESPAÑOL Playing back a Tape Reproducir una cinta Notes: Notas: SCL810/L860/L870 feature a monaural audio system. If SCL810/L860/L870 disponen de un sistema de audio your TV or VCR features a stereo audio system, connect monaural. Si su televisor o reproductor de vídeo disponen the audio cable to input “L”...
-
Page 55: Various Functions In Player Mode
ENGLISH ESPAÑOL Playing back a Tape Reproducir una cinta Various Functions in PLAYER mode Fonctions du mode Magnétoscope To view a STILL picture (Playback pause) Ver una imagen STILL (Pausa en la reproducción) Press (PLAY/STILL) button Pulse el botón (PLAY/STILL) durante PLAY/STILL during playback. -
Page 56: Adjusting The Lcd
ENGLISH ESPAÑOL Playing back a Tape Reproducir una cinta Adjusting the LCD Ajuste del LCD The LCD control in PLAYER mode is identical to step 3 of the El control LCD en el modo PLAYER idéntico al método page 26, except the power switch must be set to PLAYER número 3 de la pagina 26, excepto girar el interruptor de mode. -
Page 57: Multi Playback (Using A Pal60 System)
ENGLISH ESPAÑOL Playing back a Tape Reproducir una cinta This Camcorder can convert an NTSC tape recorded in the Esta videocámara puede convertir una cinta grabada en SP mode to the “PAL60” format, allowing you to view it on a NTSC modo SP, en formato de señal “PAL60”, permitiendo PAL TV which has Vertical sync adjustment circuitry for 60Hz. -
Page 58: Usb Interface (Scl870 Only)
ENGLISH ESPAÑOL USB interface (SCL870 only) Interfaz USB (sólo SCL870) Transferring a Digital Image through a USB Connection Transferencia de imágenes digitales mediante una conexión USB You can easily transfer a still image from a camera, tape, Se pueden transferir de manera sencilla imágenes fijas desde memory to a PC without additional add-on cards via a USB una cámara, una cinta, etc. -
Page 59: Installing Usb Media 2.0 Program
ENGLISH ESPAÑOL USB interface (SCL870 only) Interfaz USB (sólo SCL870) Installing USB Media 2.0 Program Instalación del programa USB Media 2.0 Do not connect the camcorder to PC before installing the No conecte la videocámara al ordenador antes de instalar program. - Page 60 Basically the program is El programa se instala por installed in the following folder. defecto en la siguiente carpeta: C:\Programfiles\Samsung\ C:\Archivos de programa\ USB Media 2.0 Samsung\USB Media 2.0 Click to change the Haga clic en para folder. cambiar de carpeta.
- Page 61 ENGLISH ESPAÑOL USB interface (SCL870 only) Interfaz USB (sólo SCL870) Connecting to a PC Conexión al ordenador 1. Connect a USB cable to the USB port on the PC. 1. Conecte un extremo del cable USB al puerto USB del ordenador.
-
Page 62: Maintenance
ENGLISH ESPAÑOL Mantenimiento Maintenance Cleaning and Taking care of the Camcorder Limpieza y cuidados de la Videocámara Limpieza del Visor Cleaning the Viewfinder Como desmontar el Ocular Releasing the Eyecap 1. Tire del VISOR hacia arriba y gire el tornillo en sentido antihorario. 1. -
Page 63: Using Your Camcorder Abroad
ENGLISH ESPAÑOL Using Your Camcorder Abroad Utilizar la videocámara en el extranjero Using Your Camcorder Abroad Utilizar la videocámara en el extranjero Each country or area has its own electric and TV color system. Cada país o zona tiene su propio sistema eléctrico o de color Before using your camcorder abroad, check the following: de televisión. -
Page 64: Troubleshooting
ENGLISH ESPAÑOL Resolución de problemas Troubleshooting Troubleshooting Resolución de problemas Before contacting a service center, perform the following simple Antes de ponerse en contacto con un centro de servicio, checks. They might save you the time and expense of an efectúe las sencillas verificaciones siguientes. -
Page 65: Checking
ENGLISH ESPAÑOL Troubleshooting Resolución de problemas Checking Resolución de problemas If you run into any problem using the camcorder, use the Si se encuentra con algún problema al utilizar la videocámara, utilice la siguiente tabla para resolver el problema. following table to troubleshoot the problem. Si las presentes instrucciones no le permiten resolver el If these instructions do not allow you to solve the problem, problema tome nota del:... - Page 66 ENGLISH ESPAÑOL Troubleshooting Resolución de problemas Síntoma Symptom Explanation/Solution Explicación/Solución Aparece una línea vertical A vertical stripe appears The contrast between the subject El contraste entre el motivo y el cuando filma un motivo claro fondo es demasiado grande para when you record a bright and the background is too great for contra un fondo oscuro...
-
Page 67: Moisture Condensation
ENGLISH ESPAÑOL Troubleshooting Resolución de problemas Moisture Condensation Condensación de la humedad If the camcorder is brought directly from a cold place to a warm Si se pasa la vídeocámara directamente de un lugar frío a otro place, moisture may condense inside the camcorder, con una temperatura más elevado, puede condensarse la on the surface of the tape, or on the lens. -
Page 68: Specifications
ENGLISH ESPAÑOL Specifications Especificaciones Estas especificaciones técnicas y diseños pueden ser The design and technical specifications may be changed cambiados sin notficación. without notice. System SCL810/L860/L870 SCL810/L860/L870 System Recording system Video: 2 rotary heads Helical scanning FM Sistema de grabación Vídeo: 2 cabezas rotatorias FM scanning Helical Audio: Sistema monoural FM Audio: FM monaural system... -
Page 69: Index
ENGLISH ESPAÑOL Index Índice - A - - E - - E - - A - ABROAD ......63 EASY ........33 ADAPTADOR DE CORRIENTE EASY .........33 AC POWER ADAPTER..18 EJECT ........22 AC ..........18 ENFOQUE AUTOMÁTICO ..36 ADJUSTING......26 ENTER ........26 AJUSTAR ........26 ENTER........26 AF ..........36 EXTERNAL MIC ....68... - Page 70 ENGLISH ESPAÑOL Index Índice - O - STANDBY......18 - S - - M - START/STOP .......23 MANDO A DISTANCIA..15 S-VÍDEO ......52 OPERATION MODE....13 STILL........55 MICRÓFONO EXT....63 SALIDA GRADUAL ....46 OSD ........12 STOP ........54 MIRROR.......40 SELF-30S......15 STROBE.......40 MODE PORTRAIT ....38 SELF-END ......15 - P - SYSTEM.......68...
- Page 71 ENGLISH ESPAÑOL THIS CAMCORDER IS MANUFACTURED BY: ESTA VIDEOCÁMARA HA SIDO FABRICADA POR: ELECTRONICS ELECTRONICS *Samsung Electronics’ Internet Home Page *Samsung Electronics’ Internet Home Page United States http://www.samsungusa.com United States http://www.samsungusa.com United Kingdom http://www.samsungelectronics.co.uk United Kingdom http://www.samsungelectronics.co.uk France http://www.samsung.fr France http://www.samsung.fr...