Table of Contents

Related Manuals for Heybike RANGER S


Summary of Contents for Heybike RANGER S
- Page 1 YOUR LIFE, HEYBIKE HEYBIKE RANGER S COPYRIGHT 2023 HEYBIKE.ALL RIGHTS RESERVED. ELECTRIC BIKE The manufacturer reserves the right to make changes to the product and manual at any time USER MANUAL Visit www.heybike.com to download the latest user manuals...
-
Page 2: Table Of Contents
NOTE TO ALL RIDERS UNDER 18 YEARS OF AGE: It's very important Product Overview that you get parental permission before riding your electric bike. Assembly Instruction Charge Your E-Bike If there is any assistance needed, please feel free to contact Heybike Support. Remove the Battery Display and Setting App Operation... -
Page 3: Product Safety Notice
Abuse - We do not cover physical damage due to negligent care and extreme riding. the bike or replace the battery. If necessary, Whenever you ride the heybike Electric Bike, you risk severe injury or even death from loss you should get more spare keys (We don't of control, collisions, and falls. -
Page 4: Package Contents
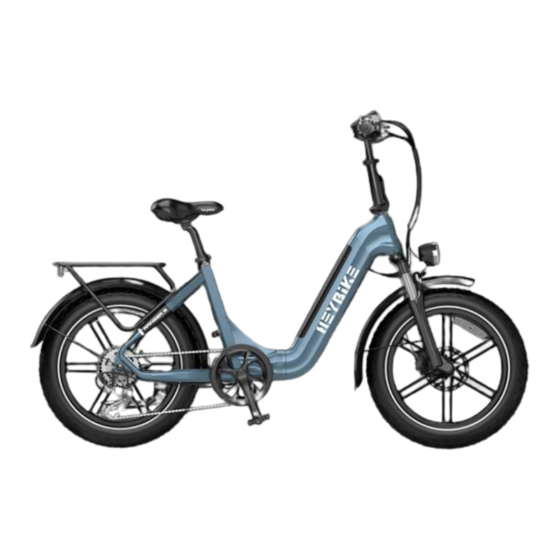
1×Front Wheel 1×Ranger S Ebike Carefully check package contents, if anything is missing or damaged, please contact Heybike Support. Unpack the bike. Open the bike box and remove the small box inside. With the help of another person Hub Motor... - Page 5 Congratulations on your purchase of a Heybike Ranger S electric bike! The instructions that follow are intended to serve as a guide in unboxing and getting familiar with your new bike. Please visit www.heybike.com for additional help with assembly, including a step-by-step video.
-
Page 6: Assembly Instruction
Assembly Instruction Assembly Instruction Step 2--Handlebar Step 3--Headlight & Front Fender Place handlebar onto head parts, adjusting Locate the head parts, loosen the fastening Use a gear wrench and an alllen wrench to handlebar angle to make sure the bike is Find out headlight stud bolts. - Page 7 Positioning the seat at the right height is key for better pedaling, safety, and overall comfort. Note: If the pedal/chain doesn't run smoothly or something seems misaligned, please contact Heybike Support. The rider’s leg length is used to determine the seat’s position. When pedaling, your hips should remain level and your legs should not over-extend.
- Page 8 Assembly Instruction Assembly Instruction Adjusting the Suspension Fork Adjusting the Suspension Fork The suspension fork can move up and down up NOTICE: Ensure the seatpost and seat are properly adjusted before riding. DO NOT raise the seatpost beyond the minimum insertion marking etched into the seatpost tube (as shown at to 80mm to cushion bumps in the riding surface, right).
-
Page 9: Charge Your E-Bike
Charge Your E-Bike Remove the Battery Charging Port Put the key into the lock, turn it to the Then turn it to the left. right first. Uncover the rubber cover of the charging port on the left side of the battery. Connect the battery and battery charger. -
Page 10: Display And Setting
Display and Setting Display and Setting LCD Display Controls Battery Indicator Riding Time Speed Unit Speed Pedal Assisted Level Operation Directions Walking Mode Turn on bike Long press the until power engages Ranges/Power Unit Long press the Turn off bike Increase pedal assist (PAS) level Press button... -
Page 11: App Operation
APP Operation APP Operation Heybike APP will update continually and the phone display interface is subject to the latest version. Note: APP is only available for models released after September, 2022. Please download the Genuine APP from Google Play Store or IOS App Store.(Search... -
Page 12: Start-Up Procedure
APP Operation Start-up Procedure Log in and Connect your Bike After the bike has been properly assembled according to the assembly video, all components are secured correctly, a certified, reputable mechanic has checked the assembly, and you have read this entire manual, turn on the bike and select a pedal assist level following the steps below: Familiarize yourself with the battery power positions. -
Page 13: Daily Care And Maintenance
Daily Care and Maintenance Recommended Service Intervals Regular inspection and maintenance are key to ensure bikes from heybike function as intended, and to Cleaning and Storage reduce wear and tear on their systems. Recommended service intervals are meant to be used as guide- If you see stains on the bike body, wipe them off with a damp cloth. - Page 14 Tire Inflation and Replacement Safety Check The Ranger S employs 20"x4.0" rubber tires with inner tube. The tires are designed for durability and safety for regular cycling activities and need to be checked before each use for proper inflation and Ensure front and rear brakes work properly.
-
Page 15: Troubleshooting
Troubleshooting Specifications Symptoms Possible Causes Most Common Solutions ITEM SPECIFICATIONS Ranger S Model 1. Insufficient battery power 1. Charge the battery 2. Faulty connections 2. Clean and repair connectors Product Dimensions 70x24.4x50(inch) 3. Battery not fully seated in tray The bike does 3. -
Page 16: Faqs
5. All accessories originally included with your purchase must be included with your return. 6. If you return a product to Hey bike, (a) without an RMA from Heybike(b) without all parts included in the original package, Heybike retains the right to refuse delivery of such return. -
Page 17: Contact Us
For the avoidance of doubt, Heybike will not be liable and/or responsible for any damage, failure or loss caused by any unauthorized service or use of unauthorized parts.
Need help?
Do you have a question about the RANGER S and is the answer not in the manual?
Questions and answers
We are having trouble folding the bike Ranger 2.0
To fold the Heybike Ranger S, follow these steps:
1. Central Hinge: The main folding mechanism is at the central hinge of the bike.
2. Collapsible Stem and Pedals: The bike has a collapsible plastic stem and folding plastic pedals.
3. Lock Mechanism: The external latch secures onto a short machine screw threaded into the frame.
4. Secure the Fold: Ensure the halves stay together. A strap can be useful to keep them in place.
Once folded, the bike measures approximately 29 inches tall, 26 inches wide, and 40 inches long.
This answer is automatically generated
Do the end plugs come out of handle bars? I want to mount a mirror