Table of Contents
Advertisement
FCC Information
This device generates and uses radio frequency (RF) energy, and if not installed and used
EN
properly, this equipment may cause interference to radio and television reception.
This equipment has been type tested and found to comply with the specifications in Subpart J of
Part 15 of FCC Rules. These rules are designed to provide reasonable protection against radio
and television interference in a residential installation. However, there is no guarantee that
interference will not occur in particular installations.
If this equipment does cause interference to radio or television reception (which you can
determine by turning the equipment off and on), try to correct the interference by one or more
of the following measures:
• Reorient the receiving antenna (that is, the antenna for the radio or television that is "receiv-
ing" the interference).
• Move the unit away from the equipment that is receiving interference.
• Plug the unit into a different wall outlet so that the unit and the equipment receiving
interference are on different branch circuits.
If these measures do not eliminate the interference, please consult your dealer or an experi-
enced radio/television technician for additional suggestions. Also, the Federal Communications
Commission has prepared a helpful booklet, "How To Identify and Resolve Radio TV Interfer-
ence Problems." This booklet is available from the U.S. Government Printing Office, Washing-
ton, DC 20402. Please specify stock number 004-000-00345-4 when ordering copies.
For Your Safety
The AC power plug is polarized (one blade is wider than the other) and only fits
into AC power outlets one way. If the plug will not go into the outlet com-
pletely, turn the plug over and try to insert it the other way. If it still will not fit,
contact a qualified electrician to change the outlet, or use a different one. Do
not attempt to bypass this safety feature.
Service Information
This product should be serviced only by those specially trained in appropriate servicing tech-
niques. For instructions on how to obtain service, refer to the warranty card included with this
product.
For Your Records
In the event that service should be required, you may need both the model number and the
serial number. In the space below, record the date and place of purchase, and the serial
number:
Model No.
Date of Purchase
Place of Purchase
Serial No.
WARNING : TO PREVENT
THE LIGHTNING FLASH
AND ARROW HEAD WITHIN
FIRE OR ELECTRICAL
T H E T R I A N G L E I S A
WARNING SIGN ALERTING
SHOCK HAZARD, DO NOT
YOU OF "DANGEROUS
VOLTAGE" INSIDE THE
EXPOSE THIS PRODUCT TO
PRODUCT.
RAIN OR MOISTURE.
CAUTION
RISK OF ELECTRIC SHOCK
DO NOT OPEN
CAUTION: TO REDUCE THE RISK OF
THE EXCLAMATION POINT
ELECTRIC SHOCK, DO NOT REMOVE
WITHIN THE TRIANGLE IS A
C O V E R
( O R
B A C K ) .
N O
U S E R
WARNING SIGN ALERTING
SERVICEABLE PARTS INSIDE. REFER
Y O U
O F
SERVICING TO QUALIFIED SERVICE
I N S T R U C T I O N S
PERSONNEL.
A C C O M P A N Y I N G
PRODUCT.
SEE MARKING ON BOTTOM/BACK OF PRODUCT
I M P O R T A N T
T H E
Advertisement
Table of Contents

Related Manuals for RCA CDRW121


Summary of Contents for RCA CDRW121
-
Page 1: Service Information
FCC Information This device generates and uses radio frequency (RF) energy, and if not installed and used properly, this equipment may cause interference to radio and television reception. This equipment has been type tested and found to comply with the specifications in Subpart J of Part 15 of FCC Rules. -
Page 2: Table Of Contents
Contents FCC/ Safety Information First Things First ... 2 Unpack the System ... 2 Check for Moisture ... 2 Choosing System Location ... 2 Inserting Batteries into Remote Control ... 2 Cable Connections ... 3 Power Connections ... 3 Panel Controls ... 4 The Display ... -
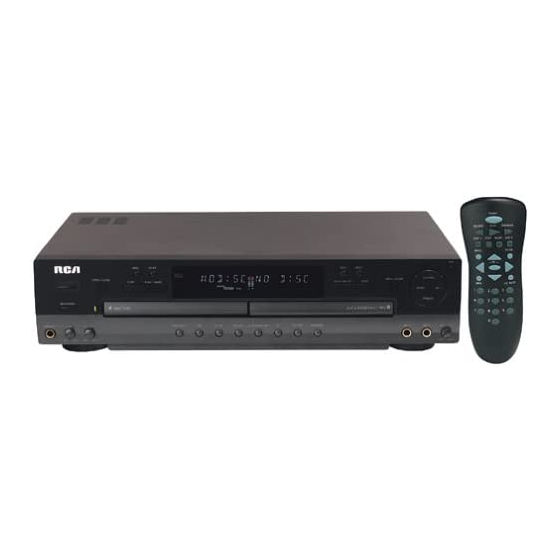
Page 3: First Things First
First Things First One Pair of AAA batteries Unpack the System Unpack your new CD Player and Recorder and locate all the accessories. You should have: • one main unit; • one Remote Control; • one audio cable (two wires) with red and white connectors. -
Page 4: Cable Connections
First Things First Connections Cable Connections 1. For recording from an external source with digital output (e.g MD) through optical or coaxial digital cable (not supplied). Connenction jacks on the back panel DEMO 2. Connection to external receiver (e.g. amplifier) with digital coaxial in for digital playback. -
Page 5: Panel Controls
Panel Controls POWER - Turns the unit on/off. Demo shows once plugged for power. Blue light indicates standby (off) mode. HELP/DEMO - Shows demo when unit is in standby mode. Enters help mode when unit is in operation mode (Press PREV/ NEXT/ STOP/ PLAY on main unit or POWER on remote control to enter operation mode from standby mode). -
Page 6: The Display
The Display When they light/ flash: Shows elapsed playback time, total remaining track time, total track time, track numbers,disc titles, selected live effect mode & messages during recording, dubbing etc. Shows sound Track Introduc- output levels tory mode and red bars activated. -
Page 7: The Remote Control
The Remote Control You can control or adjust most of the function keys as those are present on the main unit through the remote control. However, the following keys are present on the remote control only: CD, CDR - Selects which player you want to operate. -
Page 8: Playing
Playing Basic Operations Similar to common CD players, press PLAY, PREV, NEXT, STOP, PAUSE for basic opera- tions. (see page 4 “Panel Control” for more information) 1. Player in stop mode. Showing total number of tracks and total disc time. 2. -
Page 9: Live Effects
Playing DJ Mode This allows alternating playback of both players. 1. Activate DJ mode. Both trays open with DJ MODE ON scrolls on display. 2. Load disc on a tray (e.g. Tray A). Total number of tracks (e.g. TOT 16) shows on display. -
Page 10: Clearing Program
Playing Program You can program up to 32 tracks in dual off mode & 16 tracks in dual on mode in any desired sequence. Tracks can be programmed more than once but each time counts as a track. 1. Enter program mode. 2. -
Page 11: Recording
Recording Step 1 Loading Discs 1. Insert a blank audio CD-R or CD-RW on TRAY B (the recorder). The recorder will search automatically the end of the last track and stop to continue recording if recordings already exist. Note: REWRITABLE (for CD-RW) or RE- CORDABLE (for CD-R) icon must light on display. -
Page 12: Microphone Recording
Recording External Recording Mode 1. Select source (analog/ optical/ coaxial) to match with external input (e.g. MD) 2. Select auto/ manual track numbering (see tip). 3. Enter recording mode. 4. Start recording. 5. Start playing source material. 6. Stop recording. Synchronized Digital Recording Mode (from External Source) Synchronized Digital Recording enables fast and... -
Page 13: Recordings
Recording Step 3 Finalizing/ Unfinalizing/ Erasing Recordings Finalizing Recording You must finalize your CD-R or CD-RW after recording for playback on Tray A or other external CD players. 1. Enter finalization mode. 2. Confirm finalization. Rotating star shapes indicate finalization is in progress. -
Page 14: More Special Functions
More Special Functions Assigning Disc Titles You can assign your discs with disc titles so that they can be read everytime you load the discs on the player. 1. Enter CD title mode. 2. Select alphabets & symbols. 3. Confirm selection. 4. -
Page 15: Recalling Playback Programs And Disc Titles
More Special Functions Recalling Playback Programs and Disc Titles 1. Load disc with playback program & disc title stored. Display shows program information and disc title alternately. 2. Start program playback (or STOP to quit for normal playback). Erasing Disc Titles 1. -
Page 16: Troubleshooting
Troubleshooting Problem • System doesn’t turn on • No Sound • CD doesn’t play • CD Sound Skips • Remote Control won’t work • Cannot record • Analog recording is distorted • PLEASE RESET shows on display • RECOVER shows on display during recording Possible Cause Solution... -
Page 17: More Information
• The CD player of this unit uses a laser to read the music on the disc. The laser mechanism corresponds to the cartridge and stylus of a record player. -
Page 18: Index
Index Accessories 2 ANALOG 3, 4, 5 Assigning disc title 13 AUTO/ MANUAL track numbering 4, 8 Batteries, inserting 2 CD-R & CD-RW 16 CD Care 16 CD, CDR 6 CD Lens Care 16 CD SYNC button 4, 5 CD TITLE button 4 Clearing program 9 CLOSE 4 Coaxial 3, 4, 5... -
Page 19: Limited Warranty
What we will do: • Pay any Authorized RCA Audio Service Center the labor charges to repair your unit. • Pay any Authorized RCA Audio Service Center for the new or, at our option, refurbished replacement parts required to repair your unit.
Need help?
Do you have a question about the CDRW121 and is the answer not in the manual?
Questions and answers