
Related Manuals for Silvercrest 90995


Summary of Contents for Silvercrest 90995
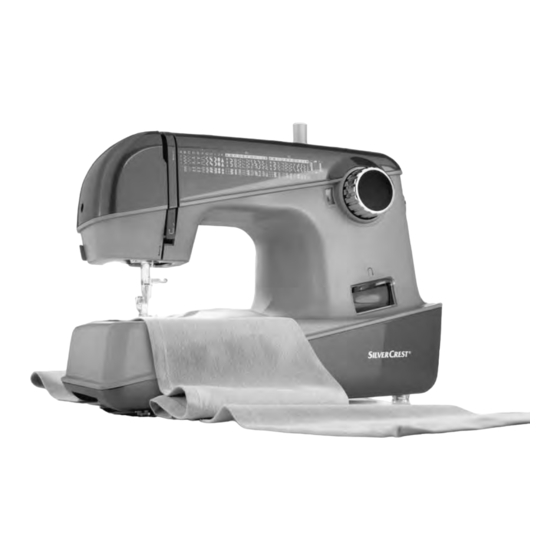
- Page 1 SEWING MACHINE SNMD 33 A1 SEWING MACHINE Operation and Safety Notes NÄHMASCHINE Bedienungs- und Sicherheitshinweise IAN 90995...
- Page 2 Before reading, unfold the page containing the illustrations and familiarise yourself with all functions of the device. Klappen Sie vor dem Lesen die Seite mit den Abbildungen aus und machen Sie sich anschließend mit allen Funktionen des Gerätes vertraut. GB / MT Operation and Safety Notes Page DE / AT / CH...
-
Page 5: Table Of Contents
Table of contents Introduction Introduction..........................Page Intended use..........................Page Details of the machine......................Page Accessories ...........................Page Technical data ........................Page Important safety instructions ................Page Getting ready Connecting machine to power source ...................Page Installing the snap-in sewing table ..................Page Inserting the needle.......................Page 10 Two-step presser foot lever ....................Page 10 Attaching the presser foot holder ..................Page 11 Setting up the thread spool pins....................Page 11 Winding the bobbin........................Page 12... -
Page 6: Introduction
Introduction Introduction Congratulations on the purchase of your sewing machine. You have bought a top quality product which has been manufactured with great care. These Operating Instructions contain all you need to know about using your sewing machine. We hope you enjoy your sewing machine and wish you success. Before you use the sewing machine for the first time, it is essential that you make yourself fully familiar... -
Page 7: Technical Data
Introduction Technical data Rated voltage 230 V/ 50 Hz Power rating - Machine 70 Watt - Sewing light 100 mW - Total 70 Watt Dimensions - When handle is folded down Approx. 397 x 277 x 194.5 mm (W x H x D) Cable length - Power cable Approx. -
Page 8: Important Safety Instructions
Important safety instructions Important safety instructions When using an electrical appliance, basic safety should always be followed, including the following: Read all instructions before using this sewing machine. DANGER - To reduce the risk of electric shock: 1. An appliance should never be left unattended when plugged in. 2. -
Page 9: Getting Ready
Getting ready Connecting machine to power source Attention: Unplug power cord when machine is not in use. Attention: Consult a qualified electrician if in doubt as to connect machine to power source. Unplug power cord when machine is not in use. The foot controller (r) must be used with the appliance by FC-2902B (220-240V area) -
Page 10: Inserting The Needle
Getting ready Inserting the needle Attention: Turn power switch to off ("O"). Needles must be in perfect condition. Change the needle regularly, especially if it is showing signs of wear and causing problems. Insert the needle following the illustrated instructions. A. -
Page 11: Attaching The Presser Foot Holder
Getting ready Attaching the presser foot holder Attention: Turn power switch to off ("O") when carrying out any of the above operations! 1. Raise the presser bar (A) with the presser foot lifter. Attach the presser foot holder (B) as illustrated. 2. -
Page 12: Winding The Bobbin
Getting ready Winding the bobbin Put the felt cushion (h) on the left thread spool pin . Place the spool of thread (m) on the same thread spool pin. Lead the thread from the spool into the thread guide, and up to the bobbin. Pull the thread from the inside through a hole of the empty spool (g). -
Page 13: Threading The Upper Thread
Getting ready Threading the upper thread Attention: Set the main switch to ("O")! Raise the sewing foot bar set by lifting the 2-step sewing foot lever and put the thread lever into its highest position by turning the hand wheel counterclockwise. Follow the arrow sand numbers on the machine when threading. -
Page 14: Thread Tension
Getting ready Thread tension Upper thread tension (A) Basic thread tension setting: "AUTO" To increase the tension, turn the dial to the next number up. To reduce the tension, turn the dial to the next number down. 1. Normal thread tension 2. -
Page 15: Sewing Basics
Sewing basics Sewing / Useful applications Sewing (1) Once the sewing machine is correctly adjusted and installed, lower the presser foot by lowering the lever. Press the controller pedal to start sewing. Stitching (2) At the end of seam, press down the reverse sewing lever (A). -
Page 16: How To Choose Your Pattern
Sewing basics How to choose your pattern straight stitch , select pattern "A" with Stitch width dial Stitch length dial S1-S2 pattern selector dial. Adjust the stitch length with the stitch length dial. You may choose Pattern any needle position, by turning the stitch selector dial width dial. -
Page 17: Zigzag Stitching
Sewing basics Zigzag stitching Stitch length dial Stitch width dial Turn the pattern selector dial to "B". Function of stitch width dial The maximum zigzag stitch width for zigzag stitching is "5"; however, the width can be reduced on any pattern. The width increases as you move zigzag dial from "0"... -
Page 18: Blind Stitch Foot
Sewing basics Blind stitch foot Stitch Stitch width Stitch length For hems, curtains, trousers, skirts, etc. Blind hem/ lingerie for firm fabrics. 1. Fold the fabric as illustrated with the wrong side uppermost. 2. Place the fabric under the foot. Turn the handwheel forwards by hand until the needle swings fully to the left. -
Page 19: Button Hole Foot
Sewing basics Button hole foot Stitch Stitch width Stitch length Stitch length 0.3~1 Preparation: Remove the zigzag foot and attach the buttonhole foot. Adjust the stitch length dial between "0.3" - "1". The density of the stitch depends on thickness of the fabric. -
Page 20: Overlock Stitches
Sewing basics Overlock stitches Stitch Stitch width Stitch length E, F S1, S2 Note: Use new needles or ball point needles or stretch needle! Seams, neatening, visible hems. Stretch overlock (A) For fine knits, jerseys, neck edges, ribbing. Standard overlock (B) For fine knits, jerseys, neck edges, ribbing. -
Page 21: Stretch-Stitch
Sewing basics Stretch-stitch Stitch Stitch width Stitch length S1, S2 Triple straight stitch: (A) For hardwearing seams. The machine sews two stitches forwards and one stitch backwards. This gives triple reinforcement. Stitch Stitch width Stitch length S1, S2 Triple zig-zag: (B) For hardwearing seams, hems and decorative seams. -
Page 22: Monogramming And Embroidering With Embroidery Hoop
Sewing basics Monogramming and embroidering with embroidery hoop* Stitch Stitch width Stitch length * Embroidery hoop not included with machine. Attach the embroidery and darning plate 1. Remove the presser foot and the presser foot holder. 2. Attach the embroidery and darning plate. 3. -
Page 23: Scallop Stitching
Sewing basics Scallop stitching Stitch Stitch width Stitch length This machine automatically produces a scallop stitch which may be used as decorative edging. 1. Sew the scallop stitch along the edge of the material. 2. If desired, trim around the scallop with scissors to create a scalloped edge. -
Page 24: Maintenance
Maintenance Maintenance Attention: Disconnect the machine from the electricity supply by removing the plug from the mains socket. When cleaning the machine, it must always be disconnected from the electricity supply. Remove the stitch plate (A): Turn the handwheel until the needle is fully raised. Open the hinged front cover and unscrew the needle plate screw with the L-screwdriver. -
Page 25: Trouble Shooting Guide
Maintenance Trouble shooting guide Problem Cause Correction Upper thread 1.The machine is not threaded correctly. 1.Rethread the machine. breaks 2.The thread tension is too tight. 2.Reduce the thread tension. (lower number) 3.The thread is too thick for the needle. 3.Select a larger needle. 4.The needle is not inserted correctly. -
Page 26: Disposal
Service-Address: sewingguide-service-mt@teknihall.com CROWN Service Center teknihall Elektronik GmbH Breitefeld 15 DE-64839 Münster IAN 90995 Manufacturer Please be aware that the following address is not a service address. Please first contact the service office stated above. Crown Technics GmbH Turmstraße 4... - Page 27 Inhaltsverzeichnis Einleitung Einleitung..........................Seite 28 Bestimmungsgemäße Verwendung ..................Seite 28 Nähmaschinenkomponenten....................Seite 28 Zubehör ..........................Seite 28 Technische Daten........................Seite 29 Wichtige Sicherheitshinweise ................Seite 30 Vorbereitung Anschluss der Nähmaschine an der Stromversorgung ............Seite 31 Der Anschiebetisch........................Seite 31 Einsetzen der Nadel ......................Seite 32 Zweistufen-Nähfußhebel .......................Seite 32 Montieren des Nähfußhalters ....................Seite 33 Einrichten der Garnrollenstifte...
-
Page 28: Einleitung
Einleitung Einleitung Herzlichen Glückwunsch zum Kauf lhrer Nähmaschine. Sie haben ein Qualitätsprodukt erworben, welches mit größter Sorgfalt hergestellt wurde. Diese Bedienungsanleitung vermittelt lhnen alles Wissenswerte über die Anwendungsmöglichkeiten lhrer Nähmaschine. Sollten dennoch Fragen offen bleiben, bitten wir Sie, sich an lhren Händler zu wenden. -
Page 29: Technische Daten
Einleitung Technische Daten Nennspannung 230 Volt/ 50 Hz Nennleistung Nähmaschine 70 Watt - Nählicht 100 mW - Total 70 Watt Abmessungen - Griff eingeklappt ca. 397 x 277 x 194.5 mm (B x H x T) Kabell nge ä - Netzkabel ca. -
Page 30: Wichtige Sicherheitshinweise
Wichtige Sicherheitshinweise Wichtige Sicherheitshinweise Wenn Sie ein elektrisches Gerät benutzen, sollten Sie immer die grundlegenden Sicherheitshinweise beachten. Lesen Sie alle Bedienungsanleitungen bevor Sie die Nähmaschine benutzen. Gefahr - wie das Risiko eines Stromschlages reduziert wird: 1. Die Nähmaschine sollte nie unbeaufsichtigt eingeschaltet sein. 2. -
Page 31: Anschluss Der Nähmaschine An Der Stromversorgung
Vorbereitung Anschluss der Nähmaschine an der Stromversorgung Achtung: Ziehen Sie den Netzstecker aus der Steckdose, wenn Sie das Gerät nicht benutzen. Achtung: Bitte treten Sie bei irgendwelchen Zweifeln hinsichtlich des Anschlusses der Nähmaschine an der Stromversorgung mit einem qualifizierten Elektrodienst in Verbindung. -
Page 32: Einsetzen Der Nadel
Vorbereitung Einsetzen der Nadel Achtung: Hauptschalter (20) auf "O" stellen! Ersetzen Sie die Nadel regelmäßig, vor allem bei ersten Anzeichen von Nähschwierigkeiten. Setzen Sie die Nadel wie abgebildet ein. A. Nadelbefestigungsschraube lösen und nach dem Einsetzen der Nadel wieder festschrauben. B. -
Page 33: Montieren Des Nähfußhalters
Vorbereitung Montieren des Nähfußhalters Achtung: Bei allen Anwendungen Hauptschalter (20) auf ("O") stellen! 1. Nähfußhalter montieren Nähfuß-Stange (A) durch Anheben des Zweistufen-Nähfußhebels (18) hochstellen. Nähfußhalter (B) wie abgebildet montieren. 2. Nähfuß einsetzen Nähfuß-Stange (A) wieder senken bis die Rille (C) direkt oberhalb des Stifts (D) ist. -
Page 34: Unterfaden Spulen
Vorbereitung Unterfaden spulen Filzkissen (h) auf den linken Garnrollenstift (15) setzen. Garnrolle (m) auf denselben Garnrollenstift (15) setzen. Faden von der Garnrolle durch die Fadenführung zum Spulen (2) ziehen. Faden von innen durch ein Loch der leeren Spule (g) nach aussen ziehen. Spule auf die Spuleinrichtung (14) stecken und dann nach rechts in die Spulposition drücken. -
Page 35: Oberfaden Einfädeln
Vorbereitung Oberfaden einfädeln Achtung: Hauptschalter (20) auf ("O") stellen! Nähfuß-Stange durch Anheben des Zweistufen-Nähfußhebels (18) hochstellen, Fadenhebel (1) durch Drehen des Handrads (21) im Gegenuhrzeigersinn in höchste Position bringen. Beim Einfädeln den Pfeilen und Zahlen auf der Nähmaschine folgen. Filzkissen (h) auf den linken Garnrollenstift (15) setzen. -
Page 36: Fadenspannung
Vorbereitung Fadenspannung Oberfadenspannung (A) Grundeinstellung der Oberfadenspannung: "AUTO". Für eine stärkere Oberfadenspannung Skala auf die nächstgrößere Zahl drehen. Für eine leichtere Fadenspannung muss die nächst kleinere Zahl eingestellt werden. 1. Oberfadenspannung normal 2. Oberfadenspannung zu schwach 3. Oberfadenspannung zu stark Unterfadenspannung Hinweis: Die Unterfadenspannung wurde während... -
Page 37: Grundlagen Des Nähens
Grundlagen des Nähens Nähen / Nützliche Anwendungen Nähen (A) Sobald die Nähmaschine korrekt eingefädelt und eingerichtet ist, senken Sie den Nähfuß vor Nähbeginn durch Senken des Zweistufen-Nähfußhebels (18). Dann betätigen Sie den Fußanlasser (r), um mit dem Nähen zu beginnen. Vernähen (B) Am Ende der Naht angelangt auf den Hebel zum Rückwärtsnähen (8) drücken. -
Page 38: Stichwahl
Grundlagen des Nähens Stichwahl Stichbreitenknopf (4) Stichlängenknopf S1-S2 (5) Für den Geradstich den Stichwahlknopf (7) drehen, bis der gewünschte Buchstabe "A" im Stichwahlfenster (6) erscheint. Stichwahlknopf (7) Nadelposition von Links bis Mitte wählbar indem Sie den Stichbreitenknopf (4) drehen. Die Stichlänge mit dem Stichlängenknopf (5) einstellen. -
Page 39: Zickzackstich
Grundlagen des Nähens Zickzackstich Stichlängenknopf (5) Stichbreitenknopf (4) Drehen Sie den Stichwahlknopf (7) auf "B". Funktion des Stichbreitenknopfs (4) Die maximale Stichbreite beim Zickzackstich ist "5". Die Stichbreite kann bei jeder Stichart reduziert werden. Die Stichbreite nimmt zu wenn Sie den Stichbreitenknopf von "0"... - Page 40 Grundlagen des Nähens Blindsaumfuß Stich Stichbreite Stichlänge Für Säume, Vorhänge, Hosen, Rock usw. Blindsaumstich für elastisches Gewebe. 1. Den Stoff wie abgebildet umlegen, mit der linken Seite nach oben. 2. Den umgelegten Stoff unter den Nähfuß legen. Das Handrad von Hand nach vorne drehen, bis sich die Nadel ganz links befindet.
- Page 41 Grundlagen des Nähens Knopflochfuß Stich Stichbreite Stichlänge Stichlänge 0.3~1 Vorbereitungen: Den Nähfuß entfernen und den Knopflochfuß (d) montieren. Die Stichlängen-Einstellung zwischen "0,3" und "1" einstellen. Die Stichdichte hängt von der Stoffdicke ab. Hinweis: Immer ein Test-Knopfloch anfertigen. Vorbereitung des Stoffs: Den Knopfdurchmesser messen und dem festgestellten Maß...
-
Page 42: Overlockstiche
Grundlagen des Nähens Overlockstiche Stich Stichbreite Stichlänge E, F S1, S2 Hinweis: Neue Nadel oder Kugelspitznadel verwenden! Nähte, Nähen und Versäubern von Kanten, Sichtsaum. Overlockstich: (A) Für feinere Maschenware, Tricot, Halsausschnitte, Kanten Standard-Overlockstich: (B) Für feinere Maschenware, Tricotgewebe, Halsausschnitte, Kanten Doppel-Overlockstich: (C) Für feinere Strickstoffe, handgestrickte Teile, Nähte. -
Page 43: Stretchstich
Grundlagen des Nähens Stretchstich Stich Stichbreite Stichlänge S1, S2 Dreifach Geradstich (A) Für Strapaziernähte. Die Nähmaschine näht zwei Stiche vorwärts und einen Stich zurück. Dies ergibt eine dreifache Verstärkung. Stich Stichbreite Stichlänge S1, S2 Dreifach Zickzackstich (B) Für Strapaziernähte, Säume und Ziernähte dreifache Zickzackstich eignet sich für... -
Page 44: Stickereien Mit Stickrahmen
Grundlagen des Nähens Stickereien mit Stickrahmen* * Der Stickrahmen wird nicht mit der Nähmaschine geliefert. Stich Stichbreite Stichlänge Einsetzen der Stick- und Stopfplatte (o) 1. Den Nähfuß und seine Halterung abbauen. Stick- und Stopfplatte einsetzen. 3. Vor Beginn des Nähens den Zweistufen- Nähfußhebel (18) senken. -
Page 45: Festonabschluss
Grundlagen des Nähens Festonabschluss Stich Stichbreite Stichlänge Einen dekorativen Rand erzielen Sie mit dem Festonabschluss. 1. Auf der Saumlinie nähen. 2. Stoff dicht der Nählinie entlang abschneiden. Darauf achten, dass der Nähfaden nicht mitgefasst wird. Zwillingsnadel Stich Stichbreite Stichlänge Hinweise: Vor Nähbeginn Stichbreite einstellen. -
Page 46: Wartung
Wartung Wartung der Nähmaschine Achtung: Trennen Sie die Nähmaschine von der Stromversorgung, wozu Sie den Netzstecker aus der Steckdose ziehen müssen. Bei allen Reinigungsarbeiten muss die Nähmaschine von der Stromversorgung getrennt sein. Ausbau der Stichplatte (A) : Durch Drehen des Handrads (21) die Nadel vollständig anheben. -
Page 47: Beheben Von Störungen
Wartung Beheben von Störungen Störung Ursache Fehlerbehebung Oberfaden reißt 1. Die Nähmaschine ist falsch eingefädelt. 1. Nähmaschine und Nadel neu einfädeln. 2. Die Fadenspannung ist zu stark. 2. Die Oberfadenspannung (3) reduzieren (kleinere Zahl). 3. Der Faden ist zu dick für die Nadel. 3. -
Page 48: Entsorgung
CROWN Service Center sewingguide-service-de@teknihall.com teknihall Elektronik GmbH Breitefeld 15 DE-64839 M nster ü IAN 90995 Hersteller Bitte beachten Sie, dass die folgende Anschrift keine Serviceanschrift ist. Kontaktieren Sie zunächst die oben benannte Servicestelle. Crown Technics GmbH Turmstraße 4 D-78467 Konstanz... - Page 50 Service number for complaints: 00800 555 00 666 ( free Servicenummer bei Reklamationen: 00800 555 00 666 ( kostenfrei Last Information Update Stand der Informationen: 06/2013 Ident.-No.:062013 021VGJ0102(GB/DE) www.sewingguide.de IAN 90995...
Need help?
Do you have a question about the 90995 and is the answer not in the manual?
Questions and answers
My machine IAN 90995, year 07/2013 Siver crest don't sew , Please i ask for repair. Thanks for responding.
If your SilverCrest IAN 90995 sewing machine is not sewing, follow these troubleshooting steps:
1. Check Needle Insertion: Ensure the needle is inserted correctly with the flat side facing the back. Replace the needle if it is damaged.
2. Verify Threading: Make sure the upper thread is threaded correctly and the bobbin is properly wound and inserted.
3. Adjust Thread Tension: If the thread tension is too tight, reduce it by selecting a lower number.
4. Use the Correct Needle and Thread: Ensure the needle matches the fabric and thread thickness.
5. Inspect the Bobbin Case: Remove and reinsert the bobbin case correctly, ensuring the thread pulls easily.
6. Guide Fabric Properly: Ensure the fabric is being guided smoothly and is not obstructing the movement.
If the issue persists, consider visiting a Repair Café for further assistance.
This answer is automatically generated