ADIC Scalar 100 User Manual
Quantum scalar 100: user guide
Hide thumbs
Also See for Scalar 100:
- User manual (346 pages) ,
- Quick start manual (2 pages) ,
- Release note (2 pages)
Table of Contents
Advertisement
Quick Links
Download this manual
See also:
User Manual
Advertisement
Table of Contents

Related Manuals for ADIC Scalar 100


Summary of Contents for ADIC Scalar 100
- Page 1 Scalar 100 User’s Guide ® ADVANCED DIGITAL INFORMATION CORPORATION www.adic.com...
- Page 2 Copyright © 2002-2006 ADIC The information contained in this document is subject to change without notice. This document contains proprietary information which is protected by copyright. All rights are reserved. No part of this document may be reproduced, modified, distributed, or translated to another language without prior written consent of ADIC.
-
Page 3: Table Of Contents
Storage Networking Controllers (SNCs) ........ - Page 4 Installing a Storage Column ........
- Page 5 Updating Drive Firmware ............76 Scalar 100 User’s Guide...
- Page 6 Creating or Erasing a FUP Tape ..........76 Exercising the Picker Fingers .
- Page 7 Allowed Tape Cartridges and Storage Capacity........
- Page 8 viii Contents...
-
Page 9: About This Guide And Your Product
Regulatory Information Guide before operating this product. This guide contains information and instructions necessary for the normal operation and management of the Scalar 100 library. This guide is intended for system administrators, operators, or anyone interested in learning about or using the Scalar 100. -
Page 10: Other Documents You Might Need
INDICATES A POTENTIALLY HAZARDOUS SITUATION WHICH, IF NOT WARNING AVOIDED, COULD RESULT IN DEATH OR BODILY INJURY. Indicates a situation that may cause possible damage to equipment, loss of CAUTION data, or interference with other equipment. Indicates important information that helps you make better use of your system. Note Other Documents you Might Need The following documents are also available for this product. -
Page 11: Description
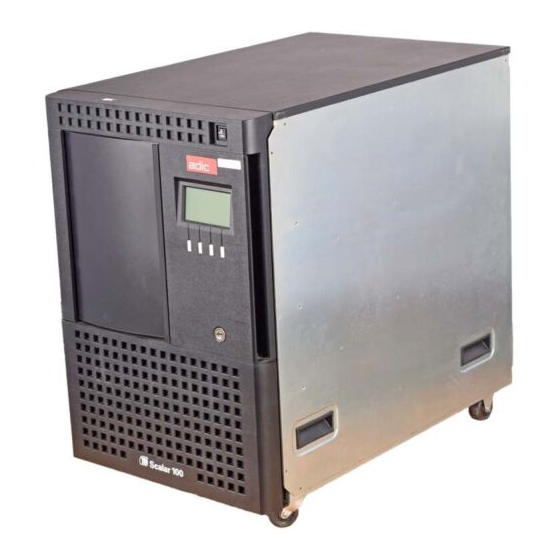
Description The Scalar 100 automates the retrieval, storage, and control of tape cartridges. It is designed for use in a standard office environment, with a fully finished appearance, or as a rackmounted unit. The library supports many different drive types and, depending on the type of drive, can contain up to eight drives. -
Page 12: Drive Support And Related Technologies
LTO drives can exist within the same partition. Refer to Partitioning Your Library The drive type affects the tape cartridge and overall storage capacity. For specific information about your library storage capacity and allowed tape cartridges, refer to With the correct drive and library firmware running, an AIT-3 library supports the Sony®... -
Page 13: Front Power Switch
ELECTRICAL SOURCE. Door Lock The Scalar 100 door lock protects your data from the risk of tampering and prevents unauthorized personnel from entering the mechanical area of the Scalar 100 where serious injury could occur. When locked, the library door can only be opened from the outside with a key. Authorized personnel are responsible for the security of the key. - Page 14 Figure 3 Back Panel Components of Library Control Path Libraries Description...
-
Page 15: Library Controller (Library Control Path Only)
However, except in emergencies, use the normal shutdown procedure before switching off the rear power switch. ADIC is not responsible for damage caused by improper use of the rear power switch. This risk lies entirely with the user. Scalar 100 User’s Guide... -
Page 16: Remote Management Unit
Storage Area Network (SAN) and provide Fibre to SCSI or Gigabit Ethernet to SCSI connectivity. The available feature set depends on which SNC you integrate into your library. The Scalar 100 supports the SNC 5101, SNC 6101, and the SNC 4500. To learn more about the available SNCs, visit or reference the applicable manual(s) on the Scalar 100 product CD. -
Page 17: Tape Magazines
0. For example, the coordinate for the fixed slot in column 2 would be “2 - 0”. For reference, the location for the picker is identified as [0 @ 0] on the operator Note panel. Scalar 100 User’s Guide... -
Page 18: Drive Module Numbering
Figure 5 Storage Slot Numbering Drive Module Numbering The drive modules are numbered 1 to N from bottom to top, where N is the number of drives allowed for that media type. Description... -
Page 19: Host Attachment
Host Attachment The Scalar 100 is a SCSI target device supporting communication with a host through fibre or SCSI connections. Native Fibre Connections A library supporting native fibre attachments communicates with a host through an intermediary LUN-1 (Logical Unit Number) interface in one or more installed drives. In this type of connection, a host is connected directly to a drive rather than a library. - Page 20 Description...
-
Page 21: Setting Up Your Scalar 100
Quick Start Guide For simple setup instructions, refer to the Quick Start Guide available on the Scalar 100 Documentation and Software CD or as a printed document in your product box. For more detailed instructions, refer to the Getting Started Road Map on page 13. -
Page 22: Finding A Location
Complete either the written registration card or register the product on the ADIC website at www.adic.com. The Scalar 100 serial number is located on the product label on the back of the library and on the inside of the front door. -
Page 23: Cabling Library Control Path Libraries
AIT libraries cannot have tape drives installed in the bottom-most or top- Note most drive module slots. Terminate the last device(s) on the SCSI bus(es) with an appropriate terminator (LVD or HVD). Refer Figure Figure 6 SCSI Bus Terminator Scalar 100 User’s Guide Host Attachment... -
Page 24: Cabling Drive Control Path Libraries
Install a Fibre cable between the bottom drive Fibre port and the host. Refer to Repeat for each additional drive installed. The Fibre cable can be connected from the drive to a switch rather than a Note host. Host Attachment on page 11. Figure Setting up your Scalar 100... -
Page 25: Connecting The Power And Scsi Cables In A Drive Control Path Library
Terminate the SCSI buses with an appropriate termintator (LVD or HVD). If you have more than one SCSI bus, connect a SCSI cable between the bottom drive and the host. Refer to Figure 9 on page 18. Scalar 100 User’s Guide... -
Page 26: Preparing The Host
• Prevent electrostatic discharge (ESD) by following proper procedures. Always use wrist-grounding straps and anti-static mats when handling internal components. • Make certain the host server system has an open expansion slot. Setting up your Scalar 100... -
Page 27: Host Coordinate System
SCSI capability, you will need to install a SCSI adapter. For installation instructions, refer to the manual that comes with the adapter. Installing Drivers When using Removable Storage Manager (RSM), ensure that the proper drivers for the library and drives are installed. Go to www.adic.com/locatedrivers... - Page 28 • LTO-2: IBM ULTRIUM-TD2 SCSI Sequential Device • LTO-3: IBM ULTRIUM-TD3 SCSI Sequential Device • SDLT-220: Quantum SDLT1 SCSI Sequential Device • SDLT-320: Quantum SDLT320 SCSI Sequential Device • SDLT-600: Quantum SDLT600 SCSI Sequential Device Right-click on the appropriate device and select Properties.
-
Page 29: Installing Drivers For Microsoft Windows Nt 4.0 Systems
LTO-1: IBM Ultrium Tape Drives (OEM) • LTO-2: Not Supported • SDLT-220: QUANTUM DLT/SuperDLT Driver for NT4 - Ver 2.0 • SDLT-320: QUANTUM DLT/SuperDLT Driver for NT4 - Ver 2.0 Select OK. 10 When the New SCSI Tape Device Found dialog box appears, click OK. -
Page 30: Verifying Communication With The Host
In Microsoft® Windows®, this is done as follows: • In Windows NT®: Settings > Control Panel > SCSI Devices • In Windows 2000: Settings > Control Panel > System > Hardware > Device Manager > Tape Drive or Medium Changers Setting up your Scalar 100... -
Page 31: Using The Optional Features
• AutoClean Rackmounting Your Library If you are rackmounting your library, use the rackmounting kit that is available from ADIC. The Scalar 100 requires 14U space in a standard 19 inch rack. Before rackmounting your library, read the following guidelines: •... - Page 32 • Before installing a unit into a rack, consider the overall loading of the branch circuit supplying power to the rack. Refer to Specifications • Because this unit is intended to be attached to an earth ground, ensure that a reliable path to earth ground is maintained within the rack.
- Page 33 Secure the front hardware to the rear hardware by installing four screws on each side. Complete the rackmount hardware installation by attaching the rear bracket to the rackmount hardware. Remove the four rubber feet or casters from the bottom of the library by removing the securing screws. Scalar 100 User’s Guide...
-
Page 34: Installing Side Panels
TWO PERSONS TO PROPERLY LIFT AND POSITION IT IN A RACK. Standing at the front of the rack, use the handles on both sides of the Scalar 100 to lift and position the library onto the rackmount hardware. 10 Slide the library into the rack until it stops. -
Page 35: Installing Casters
• Phillips screwdriver Place the Scalar 100 on its side for this procedure. Use the sling shipped with the library to tip the library onto its side. Using a Phillips screwdriver, remove the four rubber feet from the bottom of the library. -
Page 36: Removing A Drive
Removing a Drive Tools required: • None Take the tape drive offline (in the host software). If your library is an LTO-1 HVD, prepare the library using the operator panel: Main Menu > More > Service > Drives > Repair > Remove. Loosen the two captive thumbscrews from the drive and slide the drive out using its handle. -
Page 37: Replacing A Drive
Loop ID of the drive. Installing a Secondary Power Supply Use the following instructions to install a secondary power supply. Tools required: • none Scalar 100 User’s Guide Removing a Drive on page 28.) Installing a Drive on page 27.) -
Page 38: Installing Bulk Load Mailbox
On the rear of the library, find the secondary power supply slot. Loosen the two thumbscrews on the cover plate and remove the cover plate. LIVE AC VOLTAGE IS PRESENT ON THE DC POWER SUPPLY WARNING CONNECTOR AT THE REAR OF THE COMPARTMENT. EXERCISE EXTREME CARE WHEN WORKING IN OR NEAR THE DC POWER SUPPLY COMPARTMENT. -
Page 39: Removing The Standard Mailbox
Connector to Display Assembly Turn off the Scalar 100 library. (Both the front and the rear power switches.) Open the library front door. Remove the tape cartridge(s) from the standard mailbox. Remove the three mailbox cable clamps. Two of the cable clamps are attached to the door with #2 Phillips screws and one is attached with a 11/32 nut. -
Page 40: Installing The Bulk Load Mailbox
Remove the 11/32 nut from the bottom of the plastic cover and loosen T20 torx screw under the mailbox door. Remove the standard mailbox assembly. Remove the plastic cover by lifting it up and sliding it through the front door. Installing the Bulk Load Mailbox Figure 11 when installing the bulk load mailbox. -
Page 41: Installing A Storage Column
• T20 Torx driver • flashlight Turn off the library by turning off both the front (first) and then the rear power switches. Scalar 100 User’s Guide Top attachment for all storage columns Access Holes Bottom Screws Bottom attachment for... -
Page 42: Partitioning Your Library
2, 4, and 5. These slots are not counted as part of the slot capacity of the library, are not included in the report of storage elements, and are not addressable to SCSI hosts. -
Page 43: Working With Autoclean
Working with AutoClean AutoClean allows the library to clean a drive without instruction from a host. If the mailbox is configured as storage, the AutoClean function cannot be Note enabled. As AutoClean does not require host intervention, it should only be enabled if the host application does not or is not configured to control drive cleaning. - Page 44 Using the Optional Features...
-
Page 45: Using The Operator Panel
In the following graphic, shaded areas are for reference only. Your screen may Note differ depending on the configuration and type of media installed in your library. For example, the operator panel below displays an LTO library with a bulk load mailbox. Scalar 100 User’s Guide Using the Operator Panel... -
Page 46: Getting General Library Information
Figure 13 Operator Panel Areas Getting General Library Information The information area provides general library information: • Library name • Media type (Although the media type appears, the drive type is not. For example, DLT appears for SDLT-320 libraries.) • ONLINE/OFFLINE status •... - Page 47 Power On If the tape drive is turned on, the Power On indicator appears. Cleaning Required If the tape drive cleaning is required, the Cleaning Required indicator appears. Scalar 100 User’s Guide Tape Activity Error Codes Write Protect Compression On...
- Page 48 Table 2 Drive Status Area Indicators Indicator Description Error Code (LTO If a drive error condition exists, an error code appears. All errors are drives only) preceded by the character “!” followed by the drive error code. “!...” indicates drive failures detected by the library and the drive is not capable of reporting the error.
-
Page 49: Working With Buttons
Table 3 Mailbox Indicator Area Icons Media Type Indicator Scalar 100 User’s Guide A tape drive is unloading a cartridge. A tape drive has unloaded a cartridge. A tape drive is reading data from a cartridge. A tape drive is writing data to a cartridge. - Page 50 • The host issues a PREVENT/ALLOW MEDIUM REMOVAL SCSI command and locks the mailbox • The Scalar 100 is accessing a mailbox slot. • The mailbox has been configured as all storage. This indicator appears if the mailbox is unlocked.
-
Page 51: Menu Guidelines
A total of 10 slots are available. • Type 2: A single slot mailbox indicator. • Type 3: A continuous storage indicator. A total of 10 slots are available. These indicators are displayed on screen for all types of front door panel storage. -
Page 52: Using The Main Menu
Using the Main Menu The main menu is the first interactive menu displayed after you turn on the library. From this menu you can run all commands. Throughout this manual, all procedures begin from this menu. Figure 14 Main Menu (initial screen) Pressing More displays additional options. - Page 53 Figure 16 Operator Panel Menu Tree Scalar 100 User’s Guide...
-
Page 54: Using Commands That Require An Offline State
Using Commands that Require an Offline State The options available from the Command and Service menu require that the library be Offline. If you attempt these commands while the library is Online, you are prompted to take the library into an Offline state. -
Page 55: Getting Information
Full: 0 to 6 Empty: 0 to 6 Moves 0 to x IO accesses 0 to 65535 Scalar 100 User’s Guide Getting Information Table Description The number of full slots. The number of empty slots. The number of filled mailbox slots. -
Page 56: Getting Firmware And Serial Number Information
0 to 65535 Put retries 0 to 65535 a. The storage slot, mailbox slot, and drive maximum value may be different for your library, depending on your configuration and your drive type. Path: Main Menu > Status > Library > System •... -
Page 57: Getting Sensor Information
IE Lock IE Open IE Open IE Closed IE Closed DoorOpn DoorOpn Scalar 100 User’s Guide on page 73. Value Description The power supply fan is not running. The power supply fan is running. Additional power supply is not installed. -
Page 58: Getting Slot Information
Getting Slot Information Use Slot to get statistical characteristics of a slot. The information available through this command appears Table 5 on page 50. For more information on slot numbering, refer to Note Path: Main Menu > Status > Library > Slot Table 5 Available Slot Information Field... - Page 59 The Select TARGET line displays the target slot. For example, the display below has slot 5C5 selected as the target. When the correct slot is selected, select OK. Scalar 100 User’s Guide Description Indicates the horizontal position the picker uses to retrieve a tape cartridge from the selected slot.
-
Page 60: Getting Tape Cartridge Information
The slot information appears. Press Next to scroll through the available information. Getting Tape Cartridge Information Use Media to get information about the tape cartridges in the library. You can select the tape cartridge using the volser number and the current physical location of the tape cartridge. The information available through this command appears in Table For more information on slot numbering, refer to... -
Page 61: Getting Logs
• Stop bits: 1 • Flow control: None • Emulation: ANSI Scalar 100 User’s Guide Description The number of the drive currently selected. The type of drive currently selected. The serial number of the drive currently selected. The current level of firmware installed on the drive displayed. -
Page 62: Getting The Command Logs
Refer to the HyperTerminal documentation for information on how to Note configure and run HyperTerminal. Getting the Command Logs The command log is a history of all library operations. A maximum of 50 library operations are stored. You can print the log by sending it to the serial port. Path: Main Menu >... -
Page 63: Clear Log
Press the button beneath the OK softkey. Force Dump This option is used to dump a drive error log to a hyperterminal. Path: Main Menu > Status > Logs > Drive Log > Options > Force Dump Scalar 100 User’s Guide... -
Page 64: Copy Dump
After you confirm that the tape in the mailbox should be overwritten, the copy dump begins. • When the mailbox is configured as storage, press Cancel when the Scratch Tape Dialog appears. Open the main door, and place a scratch tape cartridge in slot [1 A 1], which is the top slot in the mailbox. - Page 65 The library sends a command to cause the drive to copy a drive dump to non-volatile memory on the drive. A service technician can extract the information for analysis. A message is posted to show that the drive dump is being saved. Scalar 100 User’s Guide...
- Page 66 Getting Information...
-
Page 67: Running Your Library
This removes all power from the library. If the library is in an ONLINE state, from the main menu, select Online/Offline. Press OK. Visually confirm that the library has changed to the OFFLINE state. Scalar 100 User’s Guide Running your Library Verifying Communication with... -
Page 68: Moving Tape Cartridges
Turn off the front power switch. Turn off the rear power switch. Moving Tape Cartridges Use Move Media to move tape cartridges between slots. This is useful for instances where you want to group a series of cartridges in the library. An error message appears if an unlabeled LTO Gen 2 tape is moved to CAUTION an LTO Gen 1 drive. -
Page 69: Moving The Picker
Scan Barcode allows you to take inventory of the entire library or a specific set of tape cartridges. Scalar 100 User’s Guide... -
Page 70: Adding/Removing Tape Cartridges
Path: Main Menu > Command > Move > Scan Barcode From the main menu, select Command and then select Move. Select Scan Barcode. With Select Column selected, press Change Column until the arrow points to the start column. Press Next. With Magazine selected, select Change Magazine until the arrow points to the start magazine. -
Page 71: Importing Tape Cartridges
Use Export to remove tape cartridges from your library through the mailbox. Export takes a specific tape cartridge and places it in the mailbox so that you can remove it from your library. To use this procedure, the mailbox cannot be configured as storage. Scalar 100 User’s Guide Locking/Unlocking the Configuring Additional Library Slot Numbering on page 46. -
Page 72: Manually Removing Tape Cartridges
Path: Main Menu > Command > Mailbox > Export From the main menu, select Command and then select Mailbox. Select Export. Select OK. The panel shows a list of tape cartridges in the library. Press Select to begin choosing the tape cartridge(s) you want to export. Use Next, Select, and Pages to choose the tape cartridge(s) you want to export. -
Page 73: Importing Cleaning Cartridges
You can unload a drive, reset a drive, or update the drive firmware. Unloading a drive is addressed here. Refer to Maintaining your Library on page 75 for information on resetting drives and updating drive firmware. For information on cleaning drives, refer to Scalar 100 User’s Guide Configuring AutoCleaning on page 34. -
Page 74: Unloading A Drive
Unloading a Drive Use this feature to unload a tape cartridge from a specific drive or all drives. The tape cartridge will be placed in its original slot. Path: Main Menu > Command > Drives > Unload From the main menu, select Command and then select Drives. Select Unload. Select Change Drive to specify the drive to be unloaded, or use ALL to unload all the drives. -
Page 75: Configuring Your Library
Using AIT WORM Technology Scalar 100 libraries with AIT-3 drives support the Sony® AIT™ WORM (write-once-read-many) technology. WORM technology provides extra data security by prohibiting accidental data erasure. Once written to, WORM recorded information cannot be erased or rewritten (but information can be appended to the end of existing data on a tape cartridge). - Page 76 Emulating a different library — You can configure your library to emulate other ADIC products. This is useful if your host software recognizes other ADIC products, but not the Scalar 100 (this may happen if, for example, you do not have the correct drivers installed). This feature allows the Scalar 100 to appear like a different library so that the host knows how to communicate with it.
-
Page 77: Configuring Additional Library Options
• Setting the mailbox for import/export commands or as additional storage. Path: Main Menu > More > Setup > Utils > Config From the main menu, select More. Select Setup and then select Utils. Select Config. -
Page 78: Reading Barcodes Of Media In Tape Drives
With this command selected, when inventory is taken during power up or when the door is opened, the picker moves any tape cartridges that are in a drive to the first available storage slot and then reads the barcode. If configured to do so, the picker then moves the tape cartridge back to the drive from which it was taken. -
Page 79: Setting Drive Scsi Ids
After the dialog box refreshes, the Drives with this ID shows how many other drives use the selected SCSI ID. If it displays NONE, select OK. Otherwise, change the drive SCSI ID so that it is unique. The library resets the SCSI IDs of the affected drives. When complete, select OK. Scalar 100 User’s Guide... -
Page 80: Setting Drive Loop Ids
Setting Drive Loop IDs Use Drive to set drive Loop IDs. Available Loop IDs are 0 to 15. Path: Main Menu > More > Setup > Drive > FC From the main menu, select More. Select Setup and then select Drive. Select FC. Use Change Drive to select the drive whose Loop ID you want to set. -
Page 81: Password Protecting The Operator Panel
From the main menu, select More. Select Service and then select Library. Select Diags and then Sensors. The sensor information appears. For information on this dialog box, refer to on page 49. Select Lock/Unlock to lock and unlock the mailbox. When you are done, select Cancel. Scalar 100 User’s Guide Getting Sensor Information... - Page 82 Configuring your Library...
-
Page 83: Maintaining Your Library
Updating Library Firmware Firmware Update is used by service personnel to update library firmware. Path: Main Menu > More > Service > Library > Firmware Update Scalar 100 User’s Guide Maintaining your Library... -
Page 84: Updating Drive Firmware
Alternatively, you can update firmware with the RMU. Updating Drive Firmware One way to update drive firmware is to use the Firmware Update command. This method requires a Firmware Upgrade Tape (FUP tape). To get a FUP tape, contact ATAC. Path: Main Menu >... -
Page 85: Exercising The Picker Fingers
Path: Main Menu > More > Service > Library > Diags > Fingers The following exercises are available through the Fingers menu: • Getting and putting tape cartridges into storage slots or drives. • Opening and closing and extending and retracting the fingers. -
Page 86: Opening/Closing And Extending/Retracting
• For AIT libraries, the possible values are 0 to 96. • For DLT/SDLT libraries, the possible values are 0 to 60. • For LTO libraries, the possible values are 0 to 72. • Starting slot — indicates the starting slot. This field is read-only and only changes when New start slot is selected. -
Page 87: Exercising The Barcode Scanner
Use horizontal — specifies whether or not to exercise the horizontal axis during this test. Possible values are Yes and No. With Use vertical or Use horizontal selected, press OK While the exercise is running, the status appears on the operator panel. Scalar 100 User’s Guide Moving the Picker on page 61. -
Page 88: Moving The Picker In Increments
Moving the Picker in Increments Use Step to manipulate the vertical and rotary axes of the picker in incremental steps. This is an advanced diagnostic tool that is not intended for use during normal Note operation. Path: Main Menu > More > Service > Library > Diags > Picker > Step From the main menu, select More and then select Service. -
Page 89: Running A Self Test
This feature instructs the library to determine what resources exist in the library, including how many drives, columns, and magazines. Path: Main Menu > More > Service > Library > Exercise > Teach From the main menu, select More. Select Service and then select Library. Select Exercise and then Teach. Scalar 100 User’s Guide... -
Page 90: Resetting A Drive
Select OK. The library is calibrated. When complete, select OK. Resetting a Drive Use the Reset command if you want to reset a drive and not interfere with other library functions. There are two reset options: soft resets and hard resets. A soft reset is used in instances where you want restart a drive, for example if you want to invoke a new Loop or SCSI ID. -
Page 91: Running Drive Diagnostic Tests
Path: Main Menu > More > Service > Drives > (select drive) > Diags From the main menu, select More. Select Service and then select Drives. Select Diags. Select the appropriate dialog you wish to run. Select OK. Scalar 100 User’s Guide... - Page 92 Maintaining your Library...
-
Page 93: Working With Tapes And Barcodes
Store tape cartridges at temperatures between 50°F to 104°F (10°C to 40°C). For longer cartridge life, always store the cartridge in its plastic container and in room environment conditions of 72°F (±7°F) (22°C [±4°C]). Scalar 100 User’s Guide Specifications on page 111. -
Page 94: Using Barcode Labels
• If the tape cartridge is exposed to heat or cold extremes, stabilize the cartridge at room temperature for the same amount of time it was exposed–up to 24 hours. • Do not place a cartridge near electromagnetic interference sources, such as terminals, motors, and video or X-ray equipment. - Page 95 Ergilaser 3000 High Density barcode measuring device, manufactured by the Laetus Company.) If you want to purchase barcode labels from a supplier other than ADIC, the Scalar 100 supports barcode labels purchased from Engineered Data Products.
- Page 96 Working with Tapes and Barcodes...
-
Page 97: Using The Remote Management Unit
Detects a power loss and generates an SNMP trap for notification. • Enables the retrieval of library logs and library, drive, and RMU diagnostic files. • Allows RMU configuration changes such as network, users, and date/time changes. Figure 17 The Remote Management Unit Scalar 100 User’s Guide... -
Page 98: Supported Browsers
Supported Browsers The RMU supports the following browsers: • Microsoft Internet Explorer version 5.0 and above • Netscape Navigator versions 4.01 for Unix and 4.7X for all other environments In certain versions of Netscape, the operator panel may not appear correctly. Note RMU Requirements The RMU requires a network address that consists of an Internet Protocol (IP) address, subnet mask, and... -
Page 99: Starting The Rmu
SNMP Alerts — indicates whether the SNMP Alert notification feature is on or off. • Library Firmware — indicates the current level of library firmware. • RMU Firmware — indicates the current level of RMU firmware. Scalar 100 User’s Guide... -
Page 100: Configuring Network Parameters
Configuring Network Parameters You can reconfigure the hostname, IP address, subnet mask, and gateway address through the RMU. This feature requires you to login to the RMU. Refer to Click the Configuration tab. In the Network Configuration area, enter the new hostname, IP address, subnet mask, and gateway address. -
Page 101: Adding/Removing Users
Click the Configuration tab. Enter the date and time in the Date and Time area. Click Submit and review your changes (indicated in red). Enter your password and click Confirm to complete the procedure. Scalar 100 User’s Guide... -
Page 102: Updating Firmware
Updating Firmware You can update firmware for the RMU, library, and drives (LTO only). Before you update firmware, you need to have the firmware file in a location that is accessible from the RMU interface. Firmware updates can be found on www.adic.com. Click the Firmware tab. -
Page 103: Using The Operator Panel (Via The Rmu)
Power off the library by setting the AC Input Power Module main switch to the Off position. Disconnect the network cable from the RMU. Loosen the thumbscrew on the RMU then slide the unit out of the Scalar 100 chassis. Install replacement RMU and reverse the process noted in steps 1 through 3. - Page 104 Using the Remote Management Unit...
-
Page 105: Troubleshooting And Help
Error also due to communication time-out with the drive. 01 xx Power off and on the Scalar 100 library to recover from the error. Use the rear switch to perform this action, wait at least one minute between power off and Scalar 100 User’s Guide... - Page 106 02 xx Power off and on the Scalar 100 library to recover from the error. Use the rear switch to perform this action, wait at least one minute between power off and Type 3 Software errors including microcode logic and operating system errors.
- Page 107 67. 21 xx Power off and on the Scalar 100 library a few times and see if the same error conditions re-appear. Use the rear switch to perform this action, wait at least one minute between power off and on.
- Page 108 An unknown library configuration is detected, the barcode scanner is unable to read the fiducial label located on the storage column or storage magazine during a Teach operation. Ensure that the microcode level in the Scalar 100 supports the hardware 43 xx installed. Refer to Check for a dirty, damaged, missing or wrong fiducial label located at the storage array in the Library.
- Page 109 A get command was issued but the sensor indicated that the source location is empty. This error can be caused by a cartridge that is not fully inserted in the storage 74 xx slot above the failing slot. If this condition exists, push the cartridge into its slot and close the library door.
- Page 110 Table 8 Service Action Code Descriptions Reported Error and Solution A put command was issued but the sensor indicated that the cartridge is not present in the picker assembly. 78 xx Contact ATAC. Failures detected in the picker assembly reach/retract operations. Check to make sure that the picker assembly Flex cable is properly connected and seated at the picker control PCBA.
- Page 111 Contact ATAC. The firmware installed on the tape drive is not supported by the library. The “xx” part of the SAC identifies the drive 98 xx Replace the tape drive module with a certified spare part. Scalar 100 User’s Guide...
- Page 112 Table 8 Service Action Code Descriptions Reported Error and Solution Communication is not established between the main controller PCBA and the auxiliary controller PCBA’s in the library. A0 xx Contact ATAC. Communication was established but has been lost between the main controller PCBA and the auxiliary controller PCBA’s in the library.
-
Page 113: Operator Intervention Messages
Initialization Error Code: 0x%Y -=>PERM ERROR!<=- CALL FOR SERVICE SAC :%X Code:0x%Y Scalar 100 User’s Guide on page 27. Drive module 1 must be Variables None %Y = 4 digit error modifier %X = 2 digit hex %Y = 4 digit error modifier... - Page 114 INTERVENTION NEEDED! Check SCSI bus port0 connector and/or termination. INTERVENTION NEEDED! Remove cartridge in picker and return to storage. BAD MEDIA Cannot get type. Please label media. Slot [%X %Y %Z] Variables %X = 2 digit hex %Y = 4 digit error modifier...
- Page 115 Slot [%X %Y %Z] DUPLICATE LABEL Please check volsers at element address %X and %Y Scalar 100 User’s Guide Variables %X = column number %Y = magazine number %Z = row number %X = column number %Y = magazine number...
- Page 116 Table 9 Operator Intervention Messages Message Lines SER NUMBER MISSING Please enter the system serial number via the monitor. One or more drives has downlevel firmware. You may wish to update these drives. See User’s Guide Your library firmware versions do not match.
-
Page 117: Operator Information Messages
Operator Information Messages are messages that display on the operator panel and give the library status. Table 10 explains the variables associated with the operator information messages. Table 10 Operator Information Messages Message Lines INITIALIZING OFFLINE Scalar 100 User’s Guide Variables %X = cartridge number None %X = Import or Export None None None... -
Page 118: Interpreting Drive Leds
Table 10 Operator Information Messages Message Lines ONLINE HOMING PICKER TEACHING COLUMN [%X] SCANNING COLUMN [%X] INITIALIZING DRIVES GOING READY DOOR IS OPEN PICKER HOME FAIL PICKER NOT HOME GOING ONLINE GOING OFFINE -=>ERROR!<=- REBOOTING CARTRIDGE RECOVERY CARTRIDGE IN PICKER SELF TEST FAILED Interpreting Drive LEDs For information on interpreting drive LEDs, go to the drive manufacturer’s website and download the latest... -
Page 119: Specifications
SNC 6101 (FC) SNC 4500 (iSCSI) a. Power consumption is obtained using RMS values for voltage and current. Drive sled power consumption is taken while writing to a tape. Scalar 100 User’s Guide Specifications Table 115 to 230 VAC BTU/hr... -
Page 120: Tape Cartridge Capacity
Tape Cartridge Capacity The tape cartridge capacity of the Scalar 100 is determined by the media type. The maximum cartridge configuration includes a bulk load mailbox feature. Table 12 Tape Cartridge Capacity Magazine Media Type Capacity DLT/SDLT a. These values do not include three additional cleaning slots. -
Page 121: Ait
Types 25 GB AIT-3 LVD a. The Scalar 100 AIT-2 LVD library configuration does not support AIT WORM technology. b. The Scalar 100 AIT-2 HVD library configuration does not support AIT WORM technology. Scalar 100 User’s Guide AIT Tape Cartridge Types... -
Page 122: Sdlt/Dlt
Refer to Table 15 on page 114 for each SDLT/DLT tape cartridge compatibility with each SDLT/DLT tape drive and native storage capacity. A DLT cleaning tape cannot be used in an SDLT drive. Note If a SDLT-220 drive overwrites a 320-formatted tape, all data on that CAUTION tape is lost. -
Page 123: Lto
Refer to Table 16 for each LTO tape cartridge compatibility with each LTO tape drive and native storage capacity. Table 16 Allowed LTO Cartridges and Native Capacity Ultrium Internal Tape Drive — Generation 1 (LVD and HVD) Ultrium 2 Tape Drive LTO Tape Drive —... - Page 124 Specifications...
- Page 125 ......112 Scalar 100 User’s Guide library ......112 casters installing .
- Page 126 Quick Start Guide ....13 Scalar 100 ......13 SCSI Adapter .
- Page 127 Mailbox as storage ......69 AutoClean ......35 import/export .
- Page 128 printing HyperTerminal ..... . . 53 logs ....... 53 Quick Start Guide .
- Page 129 ......9 storage capacity ....112 usage guidelines .
- Page 130 Index...
Need help?
Do you have a question about the Scalar 100 and is the answer not in the manual?
Questions and answers