Table of Contents
Advertisement
Quick Links
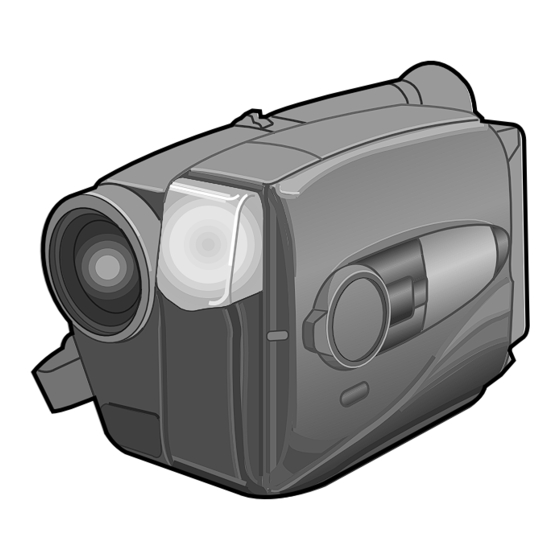
COMPACT VHS CAMCORDER
GR-AX910
GR-AX810
INSTRUCTIONS
For Customer Use:
Enter below the Serial Nos. of the
GR-AX910U/GR-AX810U camcorder
and the AA-V11U AC Power Adapter/
Charger.
The serial numbers are located on the
bottom of the GR-AX910U/GR-AX810U,
and the AA-V11U.
Model No. GR-AX910U/GR-AX810U
AA-V11U
Serial No.
YU30052-537
Advertisement
Table of Contents

Related Manuals for JVC GR-AX910


Summary of Contents for JVC GR-AX910
- Page 1 COMPACT VHS CAMCORDER GR-AX910 GR-AX810 For Customer Use: Enter below the Serial Nos. of the GR-AX910U/GR-AX810U camcorder and the AA-V11U AC Power Adapter/ Charger. The serial numbers are located on the bottom of the GR-AX910U/GR-AX810U, and the AA-V11U. INSTRUCTIONS Model No. GR-AX910U/GR-AX810U AA-V11U Serial No.
- Page 2 WARNING: Dear Customer, Thank you for purchasing the JVC Compact VHS TO PREVENT FIRE OR SHOCK camcorder. Before use, please read the safety information and precautions contained in the following HAZARD, DO NOT EXPOSE pages to ensure safe use of your new camcorder.
- Page 3 IMPORTANT PRODUCT 5. Ventilation Slots and openings in the cabinet are provided for SAFETY INSTRUCTIONS ventilation. To ensure reliable operation of the product and to protect it from overheating, these openings must not be blocked or covered. Electrical energy can perform many useful functions. But •...
- Page 4 SERVICING 1. Accessories 1. Servicing To avoid personal injury: If your product is not operating correctly or exhibits a • Do not place this product on an unstable cart, stand, marked change in performance and you are unable to tripod, bracket or table. It may fall, causing serious injury restore normal operation by following the detailed to a child or adult, and serious damage to the product.
- Page 5 QUICK OPERATION GUIDE SUPPLY POWER INSERTING A VIDEO CASSETTE Hook on. EJECT Push in. PUSH Insert. BATT. RELEASE Using the battery pack Hook-on the battery pack's top end to the Slide EJECT. camcorder. (Charging procedure, P. 8) Insert a video cassette. Push in the battery pack until it locks into Press PUSH.
- Page 6 MAJOR FEATURES REMEMBER Multi Function Control pg. 22 – 35) The Logical Choice Digital Hyper Zoom ( pg. 17) Zoom-in The only compact video cassettes that can be used with your VHS VCR* with VHS Playpak Zoom-out Program AE with Special Effects ( pg.
-
Page 7: Table Of Contents
CONTENTS GETTING STARTED Power ....................8 Clock (Lithium) Battery Removal/Insertion ........... 10 Viewfinder Adjustment ................10 Date/Time Setting ................11 Tape Length Setting ................12 Recording Mode Setting .................13 Loading/Unloading A Cassette ..............13 Grip Adjustment .................. 14 Shoulder Strap Attachment ..............14 Tripod Mounting .................. -
Page 8: Getting Started
Slide BATT. RELEASE and pull out the battery pack. ATTENTION: Before detaching the power source, APPROXIMATE RECORDING TIME make sure that the camcorder’s power BATT. PACK GR-AX910 GR-AX810 is turned off. Failure to do so can result BN-V11U 1 hr. (35 min.) 1 hr. 5min. (35 min.) in a camcorder malfunction. - Page 9 The CHG. indicator may not light properly with a brand new battery pack, or with one that’s been stored for an extended period. In this case, remove and reattach the battery pack and recharge it. The CHG. indicator should light during recharging. If not, contact your nearest JVC dealer. USING A CAR BATTERY...
-
Page 10: Clock (Lithium) Battery Removal/Insertion
GETTING STARTED (cont.) Clock (Lithium) Battery Insertion/Removal This battery is necessary for clock operation and to perform date/time settings. SWITCH OFF POWER Switch off the unit’s power and remove the power supply unit. OPEN COVER Open the clock battery compartment cover while pressing the release tab. -
Page 11: Date/Time Setting
Date/Time Setting Shooting mode selector SELECT MODE Set the Power switch to “CAMERA”, and the MENU Shooting Mode selector to “PRESET”. ACCESS MAIN MENU SCREEN Press MENU. SELECT FUNCTION NEAR Press – to move the highlight bar down to “Date/ Time”, then press NEAR. -
Page 12: Tape Length Setting
GETTING STARTED (cont.) Tape Length Setting SELECT MODE Set the Power switch to “CAMERA”, and the Shooting Mode selector to “PRESET”. ACCESS MAIN MENU SCREEN Press MENU. SELECT FUNCTION NEAR – Press + or – to move the highlight bar to “Tape Length”. -
Page 13: Recording Mode Setting
Recording Mode Setting SP/EP Pressing SP/EP alternates the setting between SP (standard play-provides higher picture and sound quality, better for dubbing) and EP (Extended Play- more economical, recording at 1/3 the speed of SP). NOTE: If the recording mode is switched during recording, the playback picture will be blurred at the switching point. -
Page 14: Grip Adjustment
GETTING STARTED (cont.) Grip Adjustment EXPAND LOOP Separate the Velcro strip. INSERT HAND Pass your right hand through the loop and grasp the grip. ADJUST STRAP LENGTH Adjust so your thumb and fingers can easily operate the Recording Start/Stop button and Power Zoom Recording Start/Stop button lever. -
Page 15: Using The Rm-V705U Remote Control Unit
Using The RM-V705U Remote Control Unit The Full-Function Remote Control Unit can operate this Infrared beam camcorder from a distance as well as the basic effective area operations (PLAY, STOP, PAUSE, FF, and REW) of your VCR. This remote control unit makes additional 10°... -
Page 16: Recording
RECORDING Basic Recording NOTE: LENS COVER You should already have performed the procedures listed SWITCH below. If not, do so before continuing. Power ( pg. 8) Tape Length ( pg. 12) Recording Mode Setting ( pg. 13) Grip Adjustment ( pg. -
Page 17: Basic Features
RECORDING Basic Features FEATURE: Zooming PURPOSE: To produce the zoom in/out effect, or Zoom-in an instantaneous change in image magnification. OPERATION: 28X Hyper zoom Digital circuitry doubles the maximum 14x magnification offered Zoom-out by optical zoom. 1) To zoom in, slide the Zoom Lever Zoom indicator bar toward “T”. - Page 18 RECORDING Basic Features (cont.) FEATURE: Index Code Marking PURPOSE: To give you automatic access to any selected point on a recording. Auto Marking and Manual Marking are available. Auto Marking OPERATION: An index code is marked to start the first recording after a cassette is inserted, as long as the Power switch is set to “CAMERA”.
-
Page 19: Video Light
•When operating, keep a distance of about 30 cm. (1 ft.) between the video light and people or objects. •Do not use near flammable or explosive materials. •It is recommended that you consult your nearest JVC dealer for replacing the video light. -
Page 20: Advanced Features
RECORDING Advanced Features Date/Time Insert This feature allows you to display the date and time in your viewfinder and on a connected TV. NOTE: You should already have performed the Date/Time Setting procedure ( pg. 11). If you haven’t, do so before continuing. -
Page 21: Quick Rec
Quick Rec QUICK REC Records a scene for 5 seconds, providing quick scene transitions like those seen in TV programmes. During Record–Standby, press and release QUICK REC. Recording starts, and after 5-second recording is finished, the camcorder reenters the Record–Standby mode automatically. •To continue shooting longer than 5 seconds, press and hold QUICK REC. -
Page 22: Digital Image Stabilizer (D.i.s.)
RECORDING Advanced Features (cont.) Digital Image Stabilizer This feature compensates for unstable images caused by camera-shake, particularly noticeable at high magnification. ACTIVATE D. I. STABILIZER Press D.I.STABILIZER. “ ” appears in the viewfinder. •To switch off the Digital Image Stabilizer, press D.I.STABILIZER. -
Page 23: White Balance Adjustment
White Balance Adjustment This camcorder’s Automatic Color Temperature system senses the color temperature of the ambient lighting for automatic white balance adjustment. However, precise color adjustment is not possible under the following conditions: •When an object is in various shades of the same color. •When a predominantly red or brown object is being shot outdoors. -
Page 24: Focusing
RECORDING Advanced Features (cont.) Focusing Auto Focus Focus The camcorder’s Full Range AF system offers continuous detection zone shooting ability from close-up to infinity. However, correct focus may not be obtainable in the situations listed below (in these cases use manual focusing): •When two subjects overlap in the same scene. - Page 25 Manual Focus Shooting mode selector NOTE: NEAR You should already have made the necessary viewfinder adjustments ( pg. 10). If you haven’t, do so before continuing. SELECT SHOOTING MODE Set the Shooting Mode selector to “PRESET”. ADJUST FOCUS Power zoom lever TO FARTHER SUBJECT Press and hold FAR.
-
Page 26: Program Ae With Special Effects
RECORDING Advanced Features (cont.) Program AE With Special Effects Shooting Mode Selector Useful in making the picture look creative and attractive. Effects can be selected during recording, as well as in EFFECT/PROG.AE Record–Standby. SELECT SHOOTING MODE Set the Shooting Mode selector to either “FULL AUTO”... - Page 27 INDICATION MODE EFFECT Adds black bars to the top and bottom of the screen to produce a CINEMA cinema-like “16:9 wide-screen” effect. The picture becomes sepia-tinted (reddish brown) monochrome, SEPIA creating the look of an old photograph. Makes dusk and twilight scenes, etc. look more natural and TWILIGHT dramatic.
-
Page 28: Fade/Wipe
RECORDING Advanced Features (cont.) Fade/Wipe Shooting mode selector These effects let you make pro-style scene transitions. SELECT SHOOTING MODE Set the Shooting Mode selector to either “FULL AUTO” or “PRESET”. If you set to “FULL AUTO”, . . . FADE/WIPE .. - Page 29 BLACK FADER Fades in/out to a black screen. BLUE FADER Fades in/out to a blue screen. MOSAIC FADER Gradually turns/returns the picture into/from a mosaic pattern. SHUTTER WIPE A black screen moves in from the top and bottom, closing over the image like a shutter, or a new image pushes open the black screen vertically from the center.
-
Page 30: Using Menu For Detailed Adjustment
RECORDING Advanced Features (cont.) Using Menu For Detailed Adjustment Shooting mode selector This camcorder is equipped with Multi-Function Control, an easy-to-use, on-screen menu system that simplifies MENU many of the more detailed camcorder settings. SELECT SHOOTING MODE Set the Shooting Mode selector to “PRESET”. ACCESS MAIN MENU SCREEN Press MENU. - Page 31 MAIN MENU Tele Macro Usually set to this position. Usually the distance to a subject where the lens is in focus depends on the zoom magnification. Unless there is a distance more than 1m to the subject, the lens is out of focus at the maximum telephoto setting.
-
Page 32: Instant Titles
RECORDING Advanced Features (cont.) Instant Titles NEAR You can superimpose one of 8 preset titles, or a title you made yourself, onto a scene. SELECT SHOOTING MODE Set the Shooting Mode selector to “PRESET”. ACCESS MAIN MENU SCREEN MENU – Press MENU. - Page 33 Character Generator You can enter an original title of up to 18 characters. NEAR Perform steps 1, 2 and 3 of the “Instant Title” procedure pg. 32) before continuing. ACCESS CHARACTER SET MENU Press + or – to move the highlight bar to “(Set Character)”, then press NEAR.
-
Page 34: Self-Timer
RECORDING Advanced Features (cont.) Self-Timer Interval Timer Indicator Recording You can set the delay between pressing RECORDING 1min Time Indicator START/STOP and the actual start of recording. If you secure the camcorder, you (or whomever is operating the camcorder) can enter the scene before recording starts. ENGAGE RECORD-STANDBY NEAR MODE... -
Page 35: Animation
Animation Time-Lapse Give stationary scenes or objects an illusion of You can record sequentially at preset time spans. movement. This function allows you to shoot a Leaving the camcorder aimed at a specific subject, series of pictures, each slightly different, of the same you can record subtle changes over an extended object for a brief period of time. -
Page 36: Playback
PLAYBACK Using The Cassette Adapter Cassette Adapter (VHS PlayPak) Use this to play back a VHS-C video cassette recorded with this camcorder. It is fully compatible with any VHS video cassette recorder. The C-P7U adapter is battery powered and automatically performs tape loading and unloading. -
Page 37: Basic Connections
PLAYBACK Basic Connections There are three basic types of connections. When making the connections, refer also to your VCR and TV instruction manuals. Connection To A VCR [A] (Editing, Dubbing and Playback) NOTE: Use the optional Audio and Video cables. CONNECT CAMCORDER TO VCR To AUDIO and VIDEO... -
Page 38: Basic Playback
PLAYBACK Basic Playback NOTE: PLAY/PAUSE Make sure you connect your camcorder as directed in STOP “Basic Connections” ( pg. 37). LOAD A CASSETTE Slide EJECT to open the cassette holder, then insert the cassette with the label facing out. Press PUSH to ensure the holder is closed and locked. -
Page 39: Features
PLAYBACK Features TRACKING PLAY/PAUSE FEATURE: Manual Tracking COUNTER R/M PURPOSE: To eliminate noise bars that appear on the screen. OPERATION: 1) Press either TRACKING button as many times as necessary for best picture. To reset TRACKING to the original NOTES: preset, press both TRACKING buttons simultaneously. -
Page 40: Editing
EDITING Tape Dubbing CONNECT EQUIPMENT Following the illustration at left, connect the camcorder and the VCR. PREPARE FOR DUBBING PLAY/PAUSE Set the camcorder’s Power switch to “PLAY”, turn on the VCR’s power, and insert the appropriate cassettes in the camcorder and the VCR. SELECT VCR MODE Engage the VCR’s AUX and Record-Pause modes. - Page 41 REC STBY (you don’t need to press VCR CTL for this one). HITACHI You’re now ready to try Random Assemble Editing. IMPORTANT Although the MBR is compatible with JVC VCRs and MAGNAVOX those of many other makers, it may not work with yours or may offer limited functions. SANYO...
- Page 42 EDITING (cont.) PREPARE CAMCORDER REW/FF CANCEL Insert a recorded tape and set the Power switch to IN/OUT “PLAY”. PREPARE VCR R.A. EDIT PLAY/PAUSE Turn the power on, insert a recordable tape and engage the AUX mode (refer to VCR’s instructions). STOP SELECT SCENES ACCESS R.A.
- Page 43 AUTOMATIC EDITING TO VCR ORIGINAL TAPE (camcorder) ENGAGE VCR’S RECORD–PAUSE IN OUT MODE Point the remote control toward the VCR’s infrared sensor and press VCR REC STBY, or manually engage the VCR’s Record-Pause mode. BEGIN AUTOMATIC EDITING EDITED TAPE (VCR) Press EDIT on the camcorder, and the previously selected scenes are copied to the VCR in the specified order.
-
Page 44: Insert Editing
EDITING (cont.) Insert Editing COUNTER R/M You can record a new scene into a previously recorded tape, replacing a section of the original recording with minimal picture distortion at the in- and out-points. The original audio remains unchanged. NOTE: Use the RM-V705U remote control unit to perform this procedure. -
Page 45: Audio Dubbing
Audio Dubbing Audio dubbing indicator You can record a new soundtrack on a prerecorded tape (normal audio only). Viewfinder M - 0 : 0 5 : 2 0 ** Perform steps 1, 2 and 3 of the Insert Editing procedure pg. -
Page 46: User Maintenance
USER MAINTENANCE After Use LENS COVER open/close switch Set the Power switch to “POWER OFF” to turn off the camcorder. Slide EJECT to open the cassette holder, then remove the cassette. Close and lock the cassette holder by pressing PUSH. Press BATT. -
Page 47: Troubleshooting
Remove the cassette and disconnect the power source, then after a few minutes, try turning the power back on. If it still doesn’t come on, consult your nearest JVC dealer. RECORDING Recording cannot be performed. - Page 48 After a few minutes, try turning the power on again. If the error number still appears in the view- finder, consult your nearest JVC dealer. The image is out of focus. The diopter needs to be adjusted ( pg.
-
Page 49: Index
INDEX Controls $ % ^ & ! @ # ) q w e r Controls Multi-Function Control Recording Mode [SP/EP] Select [FAR/NEAR/+/– Buttons] ...... pg. 11 Button ..........pg. 13 EFFECT/PROG.AE Button ....pg. 26 COUNTER R [Reset]/M [Memory] PUSH Button ......... pg. -
Page 50: Connectors
p Q W Connectors Other Parts DC IN Jack ..........pg. 9 Video Light .......... pg. 19 JLIP (Joint Level Interface Protocol) Connector. Microphone ........pg. 45 •Connect the Editing Cable when performing Infrared beam sensor window ..... pg. 15 (Be careful not to cover this area;... -
Page 51: Viewfinder
INDEX Viewfinder 1 2 3 5 6 7 112min 1min 1 / 4 s PAUSE INDEX TAPE END Congratulations DEC 25. 96 PM 4:28:34 & ^ Viewfinder Indications Remaining Tape Time ......pg. 16 Clock Warning Recording Mode (SP/EP) Indicator ..pg. -
Page 52: Terms
INDEX Terms AC Power Adapter ........pg. 9 Playback ..........pg. 36 Animation Recording ......pg. 35 Program AE with Special Effects ....pg. 27 Audio Dubbing ........pg. 45 Provided Accessories ......pg. 6 Auto Focus ..........pg. 24 Quick Rec .......... -
Page 53: Cautions
6. Remove batteries from the unit if it is to be stored called a "Siemens Plug", as shown. for an extended period to avoid battery leakage For this AC plug adapter, consult your nearest JVC which can cause malfunctions. dealer. - Page 54 ..remove the battery pack or disconnect the power supply while the power is on. If malfunctioning occurs, stop using the unit ..leave the battery pack attached when the immediately and consult your local JVC dealer. camcorder is not in use.
-
Page 55: Specifications
14:1 power zoom lens with auto iris and macro * Some acccessories are not available in some control, filter diameter areas. Please consult your nearest JVC dealer for 46 mm details on accessories and their availability. Viewfinder : Electronic viewfinder... -
Page 56: Español
**REFRESCADO El adaptador de CA se caracteriza por la TIEMPO DE GRABACION APROXIMADO función REFRESH que le permite descargar totalmente el paquete de pilas antes de PAQUETE GR-AX910 GR-AX810 recargarlo. DE PILAS Para descargar las pilas . . . BN-V11U 1 h. - Page 57 GUIA PARA OPERACION RAPIDA Si la unidad comienza a funcionar mal, deje de usarla inmediatamente y consulte a su concesionario local de JVC. ALIMENTACION INSERCION DEL CASSETTE DE VIDEO Enganche. EJECT (eyección) Empuje. PUSH (presione) BATT. RELEASE (extracción de la batería) Inserte.
-
Page 58: For Servicing
If you ship the product... Pack your JVC unit in the original carton or one of equivalent size and strength. Enclose, with the unit, a letter stating the problem or symptom that exists and also a copy of the receipt or bill of sale you received when you purchased your JVC unit. -
Page 59: Warranty
WHAT WE WILL DO: If this product is found to be defective, JVC will repair or replace defective parts at no charge to the original owner. Such repair and replacement services shall be rendered by JVC during normal business hours at JVC authorized service centers. - Page 60 JVC COMPANY OF AMERICA DIVISION OF US JVC CORP. 41 Slater Drive, Elmwood Park, N.J. 07407 Printed in Japan COPYRIGHT© 1996 VICTOR COMPANY OF JAPAN, LTD. 0296TOV...