Advertisement
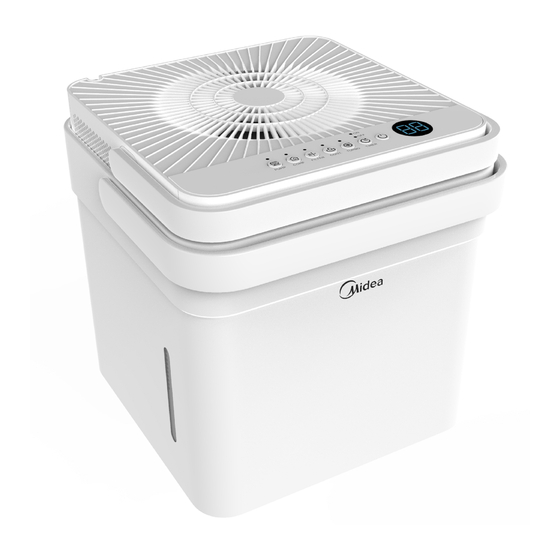
Cube Dehumidifier
MAD
Rated voltage: 115V
Frequency: 60Hz
Warning notices: Before using
this product, please read this
manual carefully and keep it
for future reference.
The design and specifications
are subject to change without
prior notice for product
improvement.
version E - 09 - 2022
version A - 12 - 2020
USER MANUAL
MAD20S1QWT
MAD35S1QWT
MAD50S1QWT
MAD50PS1QWT
MAD50PS1QGR
www.midea.com
en
Advertisement
Table of Contents

Related Manuals for Midea MAD


Summary of Contents for Midea MAD
- Page 1 The design and specifications MAD20S1QWT are subject to change without MAD35S1QWT prior notice for product MAD50S1QWT improvement. MAD50PS1QWT MAD50PS1QGR version E - 09 - 2022 version A - 12 - 2020 www.midea.com...
-
Page 2: Table Of Contents
Owner’s Manual Safety Precautions ................... 3 Unit Specifications and Features ..............6 Set Up Instructions ..................7 Installation Instructions .................. 8 Operating Instructions ................... 10 Care and Cleaning ................... 16 Nesting and Storing Instructions ............... 17 Troubleshooting Tips ..................18 App Instructions .................... -
Page 3: Safety Precautions
SAFETY PRECAUTIONS To prevent injury to the user or personal and property damage, these instructions must be followed. Incorrect operation due to ignoring of instructions may cause harm or damage. The level of risk is shown by the following indications. This symbol indicates a hazardous situation which, if not WARNING avoided, could result in death or serious injury. - Page 4 WARNING • Always ensure effective grounding. Incorrect grounding may cause electric shock. • Unplug the unit if strange sounds, smells, or smoke come from it. A damaged product may cause fire and electric shock. • Ventilate room before operating the unit if there is a gas leak from other appliances. •...
- Page 5 • Be aware that the refrigerants may not contain an odor. • Keep ventilation openings clear of obstruction. • Unit is only to be serviced by a Midea authorized servicer, please call Customer Service at 1-866-646-4332 for support. • Flammable refrigerant R32 is used within air conditioner. Please follow the instructions carefully to handle, install, clean, and service the air conditioner to avoid damage or hazard.
-
Page 6: Unit Specifications And Features
UNIT SPECIFICATIONS AND FEATURES Product overview r i A Storage Channel Bucket Pump Hose Outlet Handle (some models) Garden Relief Holes Hose Outlet Bucket Water Level Window Bucket Fig. 1 Bucket Dehumidifier Lock tabs Control panel and Display Air Outlet Unit Handle Air Filter Handle (Both Sides) -
Page 7: Set Up Instructions
SET UP INSTRUCTIONS Step 1: Separate dehumidifier & bucket from the nested shipping/storage position. Remove all packaging materials from the unit. Fig. 3a Nested Shipping & Storage Position Fig. 3b Step 2: Rotate dehumidifier 90° and align the arrows on the two labels (one on the bucket and one on the dehumidifier) and carefully sit the dehumidifier down onto the bucket. -
Page 8: Installation Instructions
INSTALLATION INSTRUCTIONS Positioning the Unit The dehumidifier should be placed in the area where dehumidification is desired most. Adjacent rooms in which dehumidification is also desired should allow adequate airflow in and out of the space containing the dehumidifier. • Do not use outdoors. - Page 9 To remove the casters: Use a flathead screwdriver to actuate the tab on the retaining block. 2. Remove the retaining block and slide the casters out of the slot on the bucket. Fig. 7 NOTICE With the casters attached, do not move the unit and bucket assembly while there is water in the bucket.
-
Page 10: Operating Instructions
OPERATING INSTRUCTIONS Key Pad Features Fill Level Network Power Button Filter Indicator Button and Connection (connect) Indicators Indicator Fan Button Timer Button Bucketless LED Display and Indicators and Indicator Indicator (reset filter) Pump Up/Down Mode Button Indicator Buttons and Indicators (some models) NOTICE The appearance of the control panel on your unit may vary slightly. - Page 11 Mode Button: NOTICE Press this button to change the mode of the dehumidifier between Set mode, Max mode, For accurate fill levels, ensure the bucket is empty before beginning operation. and Continuous run mode. Set – The dehumidifier runs until the humidity Bucketless mode: setpoint has been reached.
- Page 12 Timer Button: 3 minute compressor operation delay protection Press this button to activate the Timer After the unit has stopped, it can not be function. The Timer LED will illuminate restarted in the first 3 minutes to protect indicating timer mode is being set. compressor operation.
- Page 13 Removing Collected Water There are three ways to remove collected water: 1. Lift the unit off the bucket and 1. Emptying the bucket place it on a level surface. • When the bucket reaches the set Fill Level, the unit’s display will show P2 regardless of power status.
- Page 14 • When removing the drain hose, some water may remain in the hose or the drain outlet. Be sure this water will not spill by drying the wet area before moving the unit. NOTICE When using the continuous draining feature, ensure the unit is placed above the sink or drain being used.
- Page 15 • Make sure the hose is secure so there are no leaks. • Direct the hose toward the drain, making sure that there are no kinks that will stop the water flowing. • Place the end of the hose into the drain. •...
-
Page 16: Care And Cleaning
CARE AND CLEANING Turn the dehumidifier off and disconnect the plug from the power source before cleaning. 1. Clean the Grill and Case • Use water and a mild detergent. Do not use bleach or abrasives. • Do not splash water directly onto the unit. Doing so may cause an electrical shock, cause the insulation to deteriorate, or cause the unit to rust. -
Page 17: Nesting And Storing Instructions
NESTING AND STORING INSTRUCTIONS Step 1: Power off and unplug the unit. Then lift the dehumidifier off the bucket. Step 2: Empty all water from bucket. WARNING Make sure the bucket is empty before nesting the dehumidifier to avoid risk of electrical shock. Fig. -
Page 18: Troubleshooting Tips
TROUBLESHOOTING TIPS Before calling for service, review this list. It may save you time and money. This list includes common occurrences that are not the result of defective workmanship or materials in this appliance. Problem What to check Make sure the dehumidifiers plug is connected firmly into the wall outlet. Check the house fuse/circuit breaker box. -
Page 19: App Instructions
OS may or may not be supported until a new version is released. Your specific mobile phone or problems in your network may prevent the system from working and Midea will not be responsible for any problems that could be caused by incompatibility or network issues. - Page 20 SYSTEM OVERVIEW Devices required to use the Smart Dehumidifi er: 1. Smart Phone with compatible iOS or Android system. 2. Wireless Router 3. Smart Dehumidifier DOWNLOAD AND INSTALL THE APP Scan to download app. • You can also go to the Google Play or App Store and search for MSmart Home. NOTICE All the images in this manual are for reference only, your product and app may look slightly different.
- Page 21 CREATE YOUR ACCOUNT • Make sure your smartphone is connected to your wireless router and your wireless router has a working 2.4 GHz internet connection. • It is recommended to activate your account immediately to be able to recover your password by email.
- Page 22 ADDITIONAL APP AND SMART HOME FUNCTIONS For additional instructions regarding the features of the app and Smart Home skill capabilities, scan the QR code below. Page 22 ...
- Page 23 Declaration of conformity FCC ID:2ADQOMDNA21 IC:12575A-MDNA21 This device complies with Part 15 of the FCC Rules and it contains licence- exempt transmitter(s)/receiver(s) that comply with Innovation, Science and Economic Development Canada’s licence-exempt RSS(s). Operation is subject to the following two conditions: (1) This device may not cause interference.
-
Page 24: Warranty
limited Page 24 ...
Need help?
Do you have a question about the MAD and is the answer not in the manual?
Questions and answers