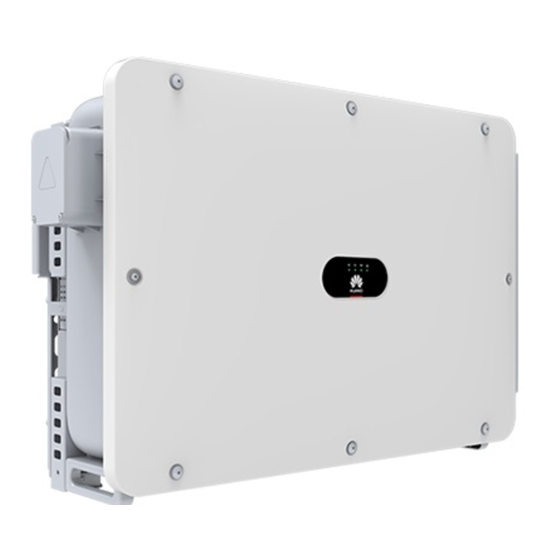
Summary of Contents for Huawei SUN2000-111KTL-NHM0
- Page 1 SUN2000-111KTL-NHM0 (large current) Quick Guide Issue: 01 Part Number: 31500HWT Date: 2023-03-30 HUAWEI TECHNOLOGIES CO., LTD.
-
Page 2: Front View
Before installing the device, read the user manual carefully to get familiar with product information and safety precautions. Huawei shall not be liable for any consequences caused by the violation of the storage, transportation, installation, and operation regulations specified in this document and the user manual. - Page 3 (7) (Optional) Screw hole for DC switch 2 (8) DC switch 2 (DC SWITCH 2) (9) Reset button 2 (RESET 2) (10) DC input terminal group 3 (PV15–PV20, controlled by DC SWITCH 3) (11) (Optional) Screw hole for DC switch 3 (12) DC switch 3 (DC SWITCH 3) (13) Reset button 3 (RESET 3) (14) Ventilation valve...
-
Page 4: Mounting Bracket Dimensions
Mounting Bracket Dimensions Installation Requirements If inverters are installed in a place with abundant vegetation, in addition to routine weeding, harden the ground underneath the inverters using cement or gravel (recommended area: 3 m x 2.5 m). Installation Angle... -
Page 5: Installation Space
Installation Space For ease of installing the SUN2000 on the mounting bracket, connecting cables to the bottom of the SUN2000, and maintaining the SUN2000 in future, it is recommended that the bottom clearance be between 600 mm and 730 mm. Installing a Solar Inverter •... - Page 6 1. Install the mounting bracket. It is recommended that anti-rust measures be taken on the positions for drilling holes. 2. Install the solar inverter onto the mounting bracket. 3. Tighten security Torx screws.
-
Page 7: Connecting Cables
Connecting Cables Do not connect loads between the inverter and the AC switch that directly connects to the • inverter. Otherwise, the switch may trip by mistake. If an AC switch is used with specifications beyond local standards, regulations, or the •... -
Page 8: Opening The Maintenance Compartment Door
Conductor Cross- No. Cable Type Outer Diameter Sectional Area • Copper cable − S: 70–240 mm AC output You are advised to use a single- • Aluminum alloy power cable core outdoor cable and M12 cable or copper- 14–32 mm (single-core) OT/DT terminals. - Page 9 1. Loosen the screws on the 2. Open the maintenance compartment door and maintenance compartment door. adjust the support bar. 3. Remove the accessories and set them aside. Removing the Rubber Rings from the Crimping Module Use scissors to cut off the joints of the rubber rings to remove them. All rubber rings are removed in the same way.
-
Page 10: Installing The Ac Output Power Cable
(Optional) Installing the Tracking System Power Cable • A switch-disconnector-fuse or fuse-switch-disconnector with a voltage of no less than 500 V, current of 16 A, and protection type of gG needs to be installed between the SUN2000 and the tracker controller for protection. •... - Page 11 Multi-core Connection Method (six rings) (five rings) (four rings) (three rings) (two rings) (one ring)
- Page 12 Single-core Connection Method The 32–36 mm cable is supported only (five rings) by some models. Refer to the (four rings) (three rings) corresponding label to get the (two rings) supported size. (one ring) Closing the Maintenance Compartment Door...
- Page 13 Installing DC Input Power Cables Selecting DC Input Terminals Before connecting the PV module output to the inverter, test the insulation resistance between the PV– cables and the ground to ensure that the PV module output is properly insulated to the ground.
- Page 14 Installing a DC Input Power Cable 1. Use the positive and negative Amphenol Helios H4 metal contacts and DC connectors supplied with the solar inverter. Using incompatible positive and negative metal contacts and DC connectors may result in serious consequences. The caused device damage is not covered under any warranty.
-
Page 15: Installing The Rs485 Communications Cable
Connector connection: Installing the RS485 Communications Cable When routing communications cables, separate communications cables from power cables to prevent communication from being affected. Port Definition Definition Description RS485A IN, RS485 RS485A OUT, RS485 Used for cascading differential signal+ differential signal+ solar inverters or RS485-1 connecting to devices... - Page 16 Connecting RS485 Communications Cables (4–8 mm Four-hole Rubber Plug) Number of communications cables When using the four-hole rubber plug, block the unused cable hole with a plug, and then tighten the locking cap.
-
Page 17: Verifying The Installation
Connecting RS485 Communications Cables (4–8 mm Two-hole or Three-hole Rubber Plug) One or two Three communications communications cables cables One communications cable Verifying the Installation Acceptance Criteria The solar inverter is installed correctly and securely. The DC switches and downstream AC switch are set to OFF. All cables are connected correctly and securely. - Page 18 • Before turning on the AC switch between the solar inverter and the power grid, check that the AC voltage is within the specified range using a multimeter set to the AC position. Do not turn the DC switch to the unloaded position •...
- Page 19 WLAN module, Bluetooth module, or USB data cable to provide functions such as alarm query, parameter settings, and routine maintenance. • Access the Huawei app store (http://appstore.huawei.com), search for FusionSolar or SUN2000, and download the app installation package. Scenario in Which Solar Inverters Are Connected to the FusionSolar Smart PV Management System 1.
- Page 20 • The SUN2000 app version must be 3.2.00.013 (Android) or later, and the FusionSolar app version must be 5.7.008 (Android) or later. The screenshots are for reference only. The actual screens may vary. WLAN • When the WLAN connection is used, the initial name of the WLAN hotspot is Adapter- module SN , and the initial password is Changeme.
- Page 21 Huawei Technologies Co., Ltd. Huawei Industrial Base, Bantian, Longgang Shenzhen 518129 People's Republic of China e.huawei.com...


