Table of Contents

Related Manuals for Philips EasySense SNS211 MC

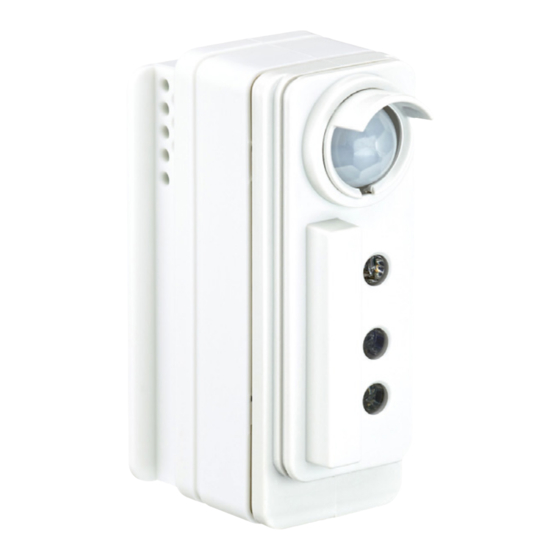
Summary of Contents for Philips EasySense SNS211 MC
- Page 1 Sensors EasySense SNS210 MC, SNS211 MC, and SNH211 MC Installer & End User Manual Single, compact, cost-effective luminaire control Philips EasySense SNS210 MC, SNS211 MC, and SNH211 MC PLt-20022UM - EasySense MasterConnect User Manual 09/22...
-
Page 2: Table Of Contents
Contents Introduction MasterConnect App Availability StandAlone System How it works Typical system components Commissioning Login Plan project and wireless groups Grouping Grouping - Flashlight commissioning Grouping - RSSI List based Installer test Identifying Groups and Nodes by blinking Group Configuration Zone Level Configuration Single Light Configuration Save a profile for re-use... -
Page 3: Introduction
MasterConnect App Availability Philips MasterConnect is available through the Google Play Store for Android smartphones and Apple Store for iPhones. Minimum Requirements: • Android version 8 or higher. -
Page 4: Standalone System
The system can be set up via a smartphone app called ‘Philips MasterConnect’ which makes the smartphone act as a gateway. Therefore, a stand-alone system simply comprises MasterConnect devices, a manual switch and a MasterConnect app. -
Page 5: Typical System Components
- With Bluetooth and ZigBee radio and no sensing (radio only), such as SNS410 MC, wireless drivers, or wireless MC lamp • Switches Two or four button Zigbee based switches, piezo powered (no batteries): - Philips branded switches - Compliant switches from external suppliers • Sensors Stand-alone Zigbee sensors for office and industry applications. -
Page 6: Commissioning
Although the same e-mail address is used, log-in via “Add a new account”. • If you also work with the Philips Field Apps for SNS200 or SNH200, use a different e-mail account to log-in to the Philips MasterConnect app. -
Page 7: Plan Project And Wireless Groups
Commissioning (continued) Plan project and wireless groups Purpose: Define a new lighting project and plan the luminaire groups, in which the luminaires and wireless components need to operate together. It is recommended to give meaningful names to “Projects” and “Groups." Project name can be associated with a building or a floor and the group names can be associated with rooms or areas within the building. -
Page 8: Grouping
Commissioning (continued) Grouping Purpose: To each defined group, selected lights are assigned. How to: • The “Lights” tab should be highlighted. Tap “+” and select “Lights” to start discovering all the luminaires that are in close reach for commissioning. • Please wait for about 10 seconds and when a flashlight (or a torchlight) shows up on a screen, lights have been detected but not added to the group yet. -
Page 9: Grouping - Flashlight Commissioning
Commissioning (continued) Grouping Flashlight (Torchlight) commissioning Purpose: Add a device to a group using a flashlight. How to: • Point a flashlight to the desired device sensor to add to a group. • The smartphone responds to detection of light with a sound and a brief vibration. Now the BLE connection starts to setup. -
Page 10: Grouping - Rssi List Based
Commissioning (continued) Grouping RSSI List based Purpose: To select the luminaires from a list of all the luminaires in reach. How to: • Instead of using a flashlight, click on the button “Discovered." A list of all the luminaires with wireless component in reach is shown. -
Page 11: Installer Test
Commissioning (continued) Installer test Purpose: To make a quick check that all luminaires in a group are well-commissioned and work as expected, a simple switch on/off or dimming command can be given to the group to verify that commissioning was done as desired. How to: •... -
Page 12: Identifying Groups And Nodes By Blinking
Commissioning (continued) Identifying Groups and Nodes by blinking You can easily identify a Group or a Light/Node with the command “Identify by blinking." Identify on Group level: • Press the three dots right of the group’s name. • A screen appears “Identify by blinking." •... -
Page 13: Group Configuration
Commissioning (continued) Group Configuration Purpose: To customize light levels, light behavior, and response times of all lights within a group to adapt to application needs. How to: • To modify configuration, navigate to the group to be configured, tap the icon as shown below. Choose “Edit configuration,"... -
Page 14: Zone Level Configuration
Commissioning (continued) Zone Level Configuration Purpose: To customize light levels, light behavior, and response times of a zone within a group to adapt to application needs. How to: • Go to the group of which the light is part of and click on settings icon of the Zone to be configured. Choose “Edit configuration,"... -
Page 15: Single Light Configuration
Commissioning (continued) Single Light Configuration Purpose: To customize light levels, light behavior, and response times of a single light within a group to adapt to application needs. How to: • To modify configuration, navigate to the group of which the light belongs and select the light to be configured. Tap the icon in the upper right corner. -
Page 16: Save A Profile For Re-Use
Commissioning (continued) Save a profile for re-use Purpose: • Profiles are used for saving a combination of configuration parameters (e.g. light levels, occupancy and daylight control and timers) for specific applications. It is recommended to provide meaningful names to the profiles based on associated application - e.g. -
Page 17: Zoning
Commissioning (continued) Zoning Purpose: A group of lights can be split into different zones which can be controlled by different switches, sensors, or occupancy triggers. For example: in a classroom, the teacher might want to have extra control over the school board light with a switch while the general lights in the room stay on. -
Page 18: Adding Switches
Commissioning (continued) Adding switches Purpose: A wireless Zigbee Green Power (ZGP) switch can be added to a group or zone for lighting control. How to: • Choose “Switches” on the page of a group that needs to be configured, “+” and again “Switch." From the drop-down list of compliant switches, select the brand of switch you'd like to add and indicate whether you would like to add to a zone or to the whole group. -
Page 19: Configuring Scenes
Commissioning (continued) Configuring scenes Purpose: Different lighting configuration settings can be stored in scenes. With any 4-button wireless switch, up to 2 scenes can be configured. You may add up to 5 switches to a group, all belonging to the same brand but only 2 scenes will be supported across all switches. -
Page 20: Tunable White - Configuring Cct Levels
Commissioning (continued) Tunable White - Configuring CCT levels Purpose: • When a SNS210 MC, SNS211 MC or SNH211 MC are used with a FlexTune SR driver, the Color Temperature (CCT) of the fixture can be configured in addition to the Brightness. This applies to the automatic/manual ON level as well as the two scene recall levels (short press of the scene buttons). -
Page 21: Generating Qr Code
Commissioning (continued) Generating QR Code Purpose: To provide lighting control access for end users via smartphone or tablet with the MC control app. How to: • Generating a QR code can be done on group or zone level. • To generate a QR code for a zone, click on the 3 dots on the zone tab and select “Generate QR Code.” •... -
Page 22: Maintenance
Maintenance Remove/Reset devices from a group – standard method Purpose: Each of the MasterConnect components are secure i.e. devices once claimed by a user cannot be used by another user. In case any adaptations are needed on an existing installation, these MasterConnect wireless components need to be released from the app. -
Page 23: Remove/Reset Devices From A Group - Safe Mode
Maintenance (continued) Remove/Reset devices from a group – safe mode Purpose: When the smartphone used to commission system is not available, components cannot be removed via the standard method. Instead, components shall be reset via the Safe Mode. How to: The luminaires must be powered ON for more than 15 seconds. -
Page 24: How To Check For App Version
Maintenance (continued) How to check for app version Purpose: Verify app version. How to: In the project start screen select the bottom right three bars and then select settings. Over the Air Update Purpose: To enable a firmware update of MasterConnect components such as EasySense SNS210 via the app without any effect on the existing group setup. -
Page 25: Project Back-Up And Access Sharing
Project Back-up and Access Sharing Purpose: The Philips Field App MC offers the capability to store user created projects in the cloud. This capability allows users to access their projects (even when a smartphone is lost) and give project access to specific contributors. - Page 26 • If a project is created with a newly registered email, it can take up to 30 minutes for access to be granted. • Be aware that only users who have already registered for Philips Field App MC can be added as contributors.
- Page 27 Maintenance (continued) Project Back-up and Access Sharing (continued) Usercase 1: User 1 creates a project and adds User 2 as contributor Create a new project. App will ask if you Create a group and App will ask if you want add devices to the to upload the Project.
- Page 28 Maintenance (continued) Project Back-up and Access Sharing (continued) Usercase 2: User 2 downloads a project, edits, and uploads again User Two edits Project 1 can be User 2 opens the Project 1 is User 2 gets a downloaded to Project 1, e.g. synced.
-
Page 29: Configuration Details
Configuration List of Configuration Parameters EasySenseSNS210 MC sensor can be configured using the MasterConnect App. The following parameters can be configured via MasterConnect App for an entire group of lights or a single light. Occupancy mode Field Task Level Field task Level can be tuned to reduce the maximum This feature can be configured to maximize lighting output of a luminaire to a certain percentage of the AOC control behavior with wireless switches. - Page 30 Configuration (continued) List of Configuration Parameters (continued) Hold time It is a configurable timer that begins once occupancy is not detected anymore. Lights continue to be at Eco-on level for a period set as Hold Time, before dimming down to Background Light Level. If occupancy is detected again during Hold Time, the timer stops and automated occupancy cycle re-starts.
-
Page 31: Daylight Regulation
Configuration (continued) Daylight Regulation Purpose: In the presence of daylight, a luminaire is dimmed to a fixed light level on the working plane to save energy. How to: • When day-light based control is switched on, the light output adjusts approximately to 500 lux (this value is highly fixture and application dependent) times the percentage value set for the Eco-on level. -
Page 32: Occupancy Sharing Within A Group Or A Zone
Configuration (continued) Occupancy sharing within a group or a zone Purpose: Individual lights with sensors within a group or a zone can share occupancy. If one light is triggered, it also triggers the other lights in the group or zone. How to: If ‘Group/Zone occupancy sharing’... -
Page 33: Occupancy Modes
Configuration (continued) Occupancy modes This feature can be configured to maximize lighting control behavior together with wireless switches. The mode options are auto-on/auto-off, manual-on/manual-off and manual-on/auto-off. Auto-on/Auto-off mode: Lights are switched on and off automatically based on occupancy detection and timer settings. - Page 34 Configuration (continued) Auto On / Off with Daylight Dimming Figure 2 Eco-on level Hold Time Background Level Prolong Time Switch On Sequence Switch O Sequence Figure 2 shows how daylight dimming takes place during Auto on/Auto off mode. Once occupancy is not detected anymore, the timers (Hold time and Prolong time) start.
- Page 35 Configuration (continued) Manual On / Auto Off Figure 4 Eco-On Level = 80 % Background light level = 20 % Grace Prolong time Hold time time Figure 4 shows how daylight dimming takes place during Manual on/Auto off mode. Occupancy detection starts to determine the light behavior soon after manual trigger.
-
Page 36: Summary Of Configuration Parameters
Configuration (continued) Summary of Configuration Parameters Available in MasterConnect App Parameter Name Default value Range Description Field task level 100% 1% – 100% Maximum trim level of power level of the luminaire. Eco-on level 100% 1% – Task Level A configurable switch-on light level. This parameter enables energy-savings and its value should be a percentage level between the field task level and background light level. -
Page 37: Energy Reporting
Energy Reporting The MasterConnect App can be used to retrieve energy usage reports at group level. Each reading stores the time stamp along with the total energy (in kWH) used by all the light fixtures in the group. The screen displays the previous and current readings along with the energy used for this time interval. - Page 38 Energy Reporting (continued) No. of Energy Project Group Selected Operative ID of all Operative User ID Timestamp Used Name Name Device ID Fixtures Devices in Group (kWH) in Group 2020-04- 13T09:17:57. username@ Building Room 899-05:00 43:347 14:70:A0:30:58:C8 14:70:A0:30:58:C8, xyzmail.com HTC 1 [America/ FC:D8:A0:BC:44:90 Chicago]...
- Page 39 Energy Reporting (continued) Remarks: • Energy reporting is supported for up to 20 devices. If more devices are used, the reported values may be compromised, as not all devices are taken into account. • In rare cases a report may fail to capture all the devices in the allotted time. If this happens, we recommend waiting for a few minutes and generating another report.
-
Page 40: Security
Security • MasterConnect devices out of the factory start out with open interfaces for BLE and Zigbee communication for easy set up. • Zigbee device communications become encrypted with secret keys (AES-128) and thus, secure on the first commissioning of MasterConnect devices into a project. •... -
Page 41: Troubleshooting Tips
Removal on group level may not • A complete reset is advised via the Safe fully succeed. Occasionally a device Mode. Please contact your OEM or Philips may not get reset leading to representative / customer care for further unsuccessful re-commissioning support. - Page 42 Out-of-the-box sensor behavior As our sensors include an auto- Commission the sensors using the Philips joining feature, they will join open MasterConnect app, finish the commissioning Zigbee networks in their surroundings. using the gateway (if applicable), or close the...
-
Page 43: Coming Soon
Enabling projects with central control via a gateway and dashboard. How to: • The Philips MasterConnect system can be setup in standalone way and works without a gateway. Out of the box, MasterConnect products – EasySense MC and Xitanium wireless drivers can be commissioned via MC App but are also open for joining Zigbee networks of gateways from partner companies like Ubisys GmBH. -
Page 44: Disclaimer
Telephone 800-668-9008 in reliance thereon. The information presented in this document Philips and the Philips Shield Emblem are registered is not intended as any commercial offer and does not form part of any quotation or contract, unless otherwise agreed by Signify.