
Related Manuals for klover SMART 80


Summary of Contents for klover SMART 80
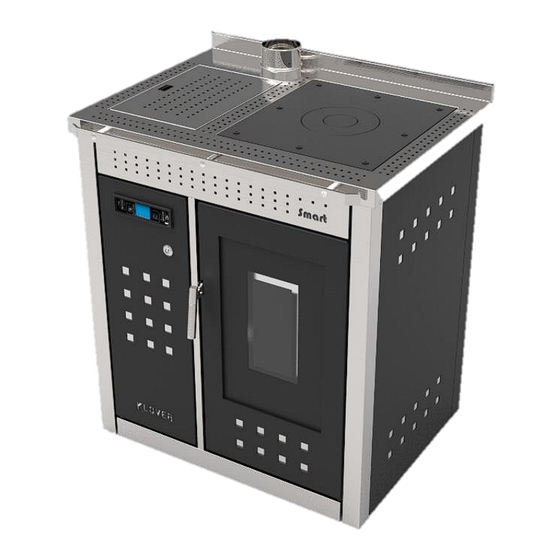
- Page 1 SMART 80 ENGLISH Pellet boiler Main Revision 2.2 FPS: 001 cooker INSTALLATION, USE AND MAINTENANCE, USEFUL TIPS Applies to: SM80 SM80-P (combi boiler with DHW) SM80-B SM80-BP (combi boiler with DHW)
- Page 3 DoP/KLOVER-004 Identification number : SM80 Model and/or lot no. and/or serial no. (Art.11-4) : SMART 80 Intended use of the product according to the relevant Home heating appliance fed with wood pellets harmonised technical specification which can also produce domestic hot water KLOVER s.r.l.
-
Page 4: Table Of Contents
CONTENTS CONTENTS ......................................1 INTRODUCTION .....................................4 ................................4 MPORTANT SAFETY INSTRUCTIONS ..................................5 MOKE ONTROL REAS .................................5 NSTALLATION EGULATIONS CO A ......................................5 LARMS ..........................6 ONTROL OF UBSTANCES AZARDOUS TO EALTH ..................................6 XTRACT VENTILATION .......................................6 EARTH ................................6 ISTANCE TO COMBUSTIBLES ..................................6 OMBUSTION AIR SUPPLY ............................6 ONNECTION TO THE CENTRAL HEATING SYSTEM ...................................6... - Page 5 EN - Rev. 2.2 SMART 80 PELLET BOILER COOKER ....................................38 EARLY CLEANING ................................39 LEANING THE CERAMIC GLASS ................................39 LEANING THE COOKING PLATE ..................................40 LEANING THE FLUE PIPE ....................................40 AINTENANCE PCB PARAMETERS .....................................41 WIRING DIAGRAM ....................................43 WARRANTY CONDITIONS ..................................44...
- Page 6 SMART 80 PELLET BOILER COOKER Dear Customer, First of all we would like to thank you for choosing a “KLOVER” product and we hope you will be satisfied with this product. Please read the warranty certificate carefully. This is found on the last page of this User Guide. Please contact the authorised Technical Assistance Centre (TAC) for the initial start-up of your stove and to validate the warranty.
-
Page 7: Introduction
- This user guide constitutes an integral part of the appliance. If the product is sold to another user, this manual must be passed on to the new owner. - The Smart 80/120 is a pellet boiler. The ability to cook is purely an incidental by-product of the production of heat when the boiler is in demand (see also “Working mode in Cooking plate / Oven... -
Page 8: Smoke Control Areas
Clean Air Act requirements” “The Klover SMART 80 (models – SM80, SM80-BP, SM80-P, SM80-B) have been recommended as suitable for use in smoke control areas when burning wood pellets.”... -
Page 9: Control Of Substances Hazardous To Health
EN - Rev. 2.2 SMART 80 PELLET BOILER COOKER alarm is fitted in any room through which the flue or chimney passes. Further guidance on the installation of the carbon monoxide alarm is available in BS EN 50292:2002 and from the alarm manufacturer’s instructions. Provision of an alarm must not be considered a substitute for either installing the appliance correctly or ensuring regular servicing and maintenance of the appliance and chimney system. -
Page 10: Commissioning And Handover
Health and Safety Care must be taken when installing a Klover pellet appliance to ensure that the requirements of the Health and Safety at Work Act are met. Adequate Handling facilities must be available for loading, unloading and site handling the appliance bearing in mind the weight of the appliance. - Page 11 EN - Rev. 2.2 SMART 80 PELLET BOILER COOKER Key for opening technical compartment. FRONT LEFT TECHNICAL COMPARTMENT Main switch ON/OFF. Safety thermostat with manual reset.
- Page 12 EN - Rev. 2.2 SMART 80 PELLET BOILER COOKER SIDE LEFT TECHNICAL COMPARTMENT Manual air vent valve. Anti-interference filter Connection for power supply cable with 2 built-in fuses (4A 250V). Safety valve calibrated 2.5 bar.
- Page 13 EN - Rev. 2.2 SMART 80 PELLET BOILER COOKER SIDE RIGHT TECHNICAL COMPARTMENT Expansion tank Manometer Boiler body and system System load and 8 l with pre-load 1 bar. (indicates the drain cock. boiler body. pressure of the heating system).
-
Page 14: Overall Dimensions / Connections Data Sheet (Model With Upper Flue Gas Outlet)
EN - Rev. 2.2 SMART 80 PELLET BOILER COOKER Overall dimensions / Connections data sheet (Model with upper flue gas outlet) REAR VIEW VIEW Description of connections M = Heating system flow 3/4" F R = Heating system return 3/4" M... -
Page 15: Overall Dimensions / Connections Data Sheet (Model With Rear Flue Gas Outlet)
EN - Rev. 2.2 SMART 80 PELLET BOILER COOKER Overall dimensions / Connections data sheet (Model with rear flue gas outlet) REAR VIEW VIEW Description of connections M = Heating system flow 3/4" F R = Heating system return 3/4" M... -
Page 16: Technical Specifications
EN - Rev. 2.2 SMART 80 PELLET BOILER COOKER Technical Specifications Nominal heat input kW (Kcal/h) 25,7 (22.100) Reduced thermal capacity kW (Kcal/h) 7,4 (6.400) Nominal thermal output kW (Kcal/h) 22,6 (19.400) Reduced thermal power kW (Kcal/h) 6,8 (5.800) Nominal power released to heating water kW (Kcal/h) 19,1 (16.400) -
Page 17: Pellet Properties
EN - Rev. 2.2 SMART 80 PELLET BOILER COOKER Pellet properties The appliance has been tested with all types of pellets available on the market. The pellets must have the following properties: - Diameter 6 mm. - Maximum length 35 mm. -
Page 18: Spaces Around And Above The Appliance
EN - Rev. 2.2 SMART 80 PELLET BOILER COOKER The unit must be installed on a floor with a suitable load capacity. If the existing building does not fulfil this requirement appropriate measures (e.g. load distribution plate) must be taken. - Page 19 If an extractor hood is installed along side a Klover then you must increase the area of ventilation with the outside air to meet the requirements of both appliances.
- Page 20 EN - Rev. 2.2 SMART 80 PELLET BOILER COOKER Orientation and initial vertical rise: The flue system should run as vertically as possible as any deviations off the vertical can adversely affect the draw. 45º is the maximum off-vertical angle than may be used. Non-vertical sections should make up no more than ¼...
-
Page 21: Chimney
EN - Rev. 2.2 SMART 80 PELLET BOILER COOKER Height and draught: In order for the appliance to perform satisfactorily the chimney height must be sufficient to ensure a draught of 12 Pa so as to clear the products of combustion and prevent smoke problems into the room. -
Page 22: Electrical Connection
Do not pass electric cables in the immediate vicinity of the flue gas pipe, unless they are insulated with suitable materials. KLOVER srl declines all responsibility for injury to persons and animals or damage to objects due to failure to connect the appliance to earth or to comply with IEC specifications. -
Page 23: Control Of Any Coupled Boiler
EN - Rev. 2.2 SMART 80 PELLET BOILER COOKER Control of any coupled boiler If the pellet appliance is to be coupled with a previously installed boiler in the system (e.g. wall-hung gas boiler), you must ensure that the standard boiler stops when the pellet appliance takes over the heating of the system. The electrical... -
Page 24: Connection To The Room Thermostat
EN - Rev. 2.2 SMART 80 PELLET BOILER COOKER N.B.: in the example above, the brown wire can be used to control a service relay. Connection to the room thermostat On the back of the appliance there is a bridged terminal which is used to connect the environment thermostat that will command the operation. -
Page 25: Plumbing Connections
EN - Rev. 2.2 SMART 80 PELLET BOILER COOKER PLUMBING CONNECTIONS The plumbing connections must be made in a rational way using the connections on the template of the appliance. To facilitate the connection of the pipes, all the plumbing connections have been fitted on the rear side, leaving space to make the appropriate connections. -
Page 26: The Display
EN - Rev. 2.2 SMART 80 PELLET BOILER COOKER THE DISPLAY The appliance's operating mode is displayed on the console. After turning on the menu, it is possible to choose from many types of display and available settings according to the selected menu. - Page 27 EN - Rev. 2.2 SMART 80 PELLET BOILER COOKER The following figure describes the meanings of the status signals appearing on the display left side (1st LED SERIES). ROOM THERMOSTAT: the LED is on when the thermostat contact is open.
-
Page 28: The Menu
EN - Rev. 2.2 SMART 80 PELLET BOILER COOKER The table explains how the buttons on the display work. DESCRIPTION MODE ACTION Programming mode.. Changes/increases the value of the selected menu item. Increase temperature (1) Working/off.. It increases the temperature of the room/water thermostat. - Page 29 EN - Rev. 2.2 SMART 80 PELLET BOILER COOKER Menu 02 – Set chrono Sub-menu 02 – 01 – Enable chrono Allows you to globally enable and disable all programmable thermostat functions. For the correct operation it is recommended to enable it (“ON”) when at least one on/off programme (daily, weekly or weekend programme) is activated.
- Page 30 EN - Rev. 2.2 SMART 80 PELLET BOILER COOKER PROGRAM 3 MENU LEVEL SELECTION MEANING POSSIBLE VALUES 02 – 03 – 20 START PROG-3 Turn-on time of the third programme Time – OFF 02 – 03 – 21 STOP PROG-3 Turn-off time of the third programme Time –...
- Page 31 (detected with KLOVER “Remote control”) is reached..to control the appliance with both the KLOVER “Remote control” room temperature and the boiler thermostat: - enable the room sensor on the “Remote control” (Stove settings menu +> Enable room sensor -> ON) - enable the boiler thermostat contact on the display of the appliance (Menu 4 - Enable contact ->...
-
Page 32: Initial Start-Up
EN - Rev. 2.2 SMART 80 PELLET BOILER COOKER Summary: REMOTE CONTROL MENU 04 – ENABLE R.T. CASE ACTION ROOM SENSOR CONTACT It works with room thermostat contact. It works with room thermostat contact. It works with remote control room sensor only. -
Page 33: Pellet Loading And Connection To The Mains Power Supply
EN - Rev. 2.2 SMART 80 PELLET BOILER COOKER In intensely cold periods it is good practice to leave the heating system running. In the event of a prolonged absence, anti-freeze must be added to the heating water or the system must be completely emptied. -
Page 34: Working Mode From Power 1 To Power 5
EN - Rev. 2.2 SMART 80 PELLET BOILER COOKER Working mode from power 1 to power 5 During the working phase, by pressing 1, you can set the “SET H2O” (maximum water temperature in the boiler). When this temperature is reached, the appliance enters economy mode operation “T-H2O ECONOMY”. -
Page 35: Switch-Off Cycle
EN - Rev. 2.2 SMART 80 PELLET BOILER COOKER set when you want to cook. Therefore, press keys 5 and 6 to set the desired output. During this operation, the display appears as in the figure below. O v e n... -
Page 36: Changing The Working Power
EN - Rev. 2.2 SMART 80 PELLET BOILER COOKER Changing the working power To change the working power simply select the "SET POWER" by pressing keys 6. Then press keys 5 and 6. During this operation, the display appears as it is shown in the figure herewith below POWER It is also possible to select one of five working powers ( "1", "2", "3", "4"... -
Page 37: Problems, Alarms, Useful Advices
EN - Rev. 2.2 SMART 80 PELLET BOILER COOKER PROBLEMS, ALARMS, USEFUL ADVICES Useful info… Listed below is some important information regarding the appliance: - It is normal for the appliance to emit a smell of paint during its first few days of operation. We recommend ventilating the installation room during the initial start-up. -
Page 38: Alarm Signals
EN - Rev. 2.2 SMART 80 PELLET BOILER COOKER If the outage lasts longer than Pr48, when power is restored, the appliance will enter the “STOP FIRE” (stand-by) mode running the entire switch-off cycle until cooling. When this phase is over, the appliance can be restarted resuming work at the set power. -
Page 39: Cleaning And Maintenance
EN - Rev. 2.2 SMART 80 PELLET BOILER COOKER CLEANING AND MAINTENANCE Precautions before cleaning Before carrying out any cleaning or maintenance operations, make sure that: - the appliance is off and has cooled down completely; - the ash is completely cold. -
Page 40: Non-Routine Cleaning
EN - Rev. 2.2 SMART 80 PELLET BOILER COOKER Thoroughly clean the brazier from combustion residues by taking it out from its position and removing any residues inside (Figure Use a suitable ash vacuum device to remove any ash deposited under the brazier... -
Page 41: Yearly Cleaning
EN - Rev. 2.2 SMART 80 PELLET BOILER COOKER After removing the ash drawer, extract the underlying base (Figure 6) and, using a suitable suction device, suck the deposit inside (Figure 7). Then re-position the base and ash drawer. To remove any deposits, it is also recommended that you scrape the inner walls of the combustion chamber with a spatula. -
Page 42: Cleaning The Ceramic Glass
EN - Rev. 2.2 SMART 80 PELLET BOILER COOKER Remove the left side (Figure Remove cap from rear TEE (Figure 10) and clean the entire flue pipe with a brush, sucking any soot deposit. Properly re- position the cap after cleaning, ensuring it is flue gas sealed. The rear TEE is only available in models with upper flue connection. -
Page 43: Cleaning The Flue Pipe
You must periodically check the seals because the latter guarantee the air- and water-tightness of the appliance and its good functioning; if they are worn or damaged you need to be replace them immediately by contacting a Klover Authorised technical assistance centre. -
Page 44: Pcb Parameters
The following parameters are already stored during the testing of the appliance directly in the factory; these parameters are the result of special tests using several types of pellets and must not be changed without the authorisation of Klover srl so as not to impair the operation of the appliance. - Page 45 EN - Rev. 2.2 SMART 80 PELLET BOILER COOKER BRAZIER Pr12 M – 9 – 6 – 12 Brazier cleaning duration Seconds 0 – 120 CLEANING Flue gas minimum temperature for considering THRESHOL Pr13 M – 9 – 6 – 13 °C...
-
Page 46: Wiring Diagram
EN - Rev. 2.2 SMART 80 PELLET BOILER COOKER WIRING DIAGRAM CABLE 4 x 0,75 (OPTIONAL) THREE-WAY CONNECTION LEGEND: FOR MOTORISED THREE-WAY BLUE = COMMON VALVE CONNECTION BLACK = OPENING PHASE BROWN =CLOSING PHASE YELLOW/GREEN = GROUND Earth YELLOW/GREEN GROUND... -
Page 47: Warranty Conditions
- A copy of the initial start-up report issued by the Authorised Technical Assistance Centre must be preserved along with the proof of purchase receipt. - KLOVER s.r.l. disclaims any liability for accidents resulting from failure to comply with the instructions contained the user and maintenance manual attached to the appliance. - Page 48 Cod. CS.IST.SM80-EN.FP KLOVER Srl Via A. Volta, 8 37047 San Bonifacio (VR) VAT No. 02324280235 www.klover.it...
Need help?
Do you have a question about the SMART 80 and is the answer not in the manual?
Questions and answers