Table of Contents
Advertisement
Available languages
Available languages
Quick Links
Operators Manual
4.5 HORSEPOWER
2000 PSI
2.0 GPM
HIGH PRESSURE WASHER
Model No. 580.768325
PRESSURE WASHER
CUSTOMER HELPLINE
1 - 8 0 0 - 2 2 2 - 3 1 3 6
HOURS: Mon. - Fri. 8 a.m. to 5 p.m. (CT)
CAUTION:
Before using this product,
read this manual and follow all Safety
Rules and Operating Instructions.
SEARS, ROEBUCK and CO., Hoffman Estates, IL 60179 U.S.A.
Part No. 187273 Draft 0 (8/25/2000)
Visit our Craftsman website: www.sears.com/craftsman
• Safety
• Assembly
• Operation
• Maintenance
• Parts
• Español
Advertisement
Chapters
Table of Contents

Related Manuals for Craftsman 580.768325


Summary of Contents for Craftsman 580.768325
- Page 1 CAUTION: Before using this product, • Parts read this manual and follow all Safety • Español Rules and Operating Instructions. SEARS, ROEBUCK and CO., Hoffman Estates, IL 60179 U.S.A. Visit our Craftsman website: www.sears.com/craftsman Part No. 187273 Draft 0 (8/25/2000)
-
Page 2: Table Of Contents
LIMITED WARRANTY ON CRAFTSMAN HIGH PRESSURE WASHER For one year from the date of purchase, when this Craftsman pressure washer is maintained and operated according to the instructions in the owner's manual, Sears will repair, free of charge, any defect in material and workmanship. -
Page 3: Safety Rules
SAFETY RULES • Some chemicals or detergents may be harmful if • Do Not operate the pressure washer above the rated inhaled or ingested, causing severe nausea, fainting pressure. or poisoning. The harmful elements may cause • Never move the machine by pulling on the high property damage or severe injury. -
Page 4: Assembly
WASHER has been serviced with the recommended oil will result in an engine failure. Your Craftsman high pressure washer was mostly assembled at the factory. However, you will need to REMOVE PRESSURE WASHER FROM perform these tasks before you can operate your... - Page 5 Add Engine Oil Add Gasoline IMPORTANT: Any attempt to crank or start the engine DANGER! Never fill fuel tank indoors. Never before it has been properly serviced with the fill fuel tank when engine is running or hot. Do recommended oil may result in an engine failure. Not smoke when filling fuel tank.
- Page 6 Connect Hose and Water Supply to Pump IMPORTANT: You must assemble nozzle extension and attach all hoses before you start engine. Starting engine without all hoses connected and water supplied will damage pump. • Uncoil high pressure hose and attach one end of hose to the base of the spray gun.
-
Page 7: Operation
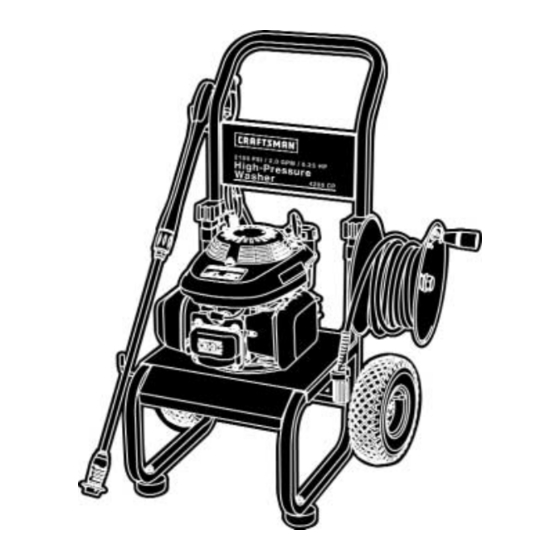
OPERATION KNOW YOUR PRESSURE WASHER Read the owner’s manual and safety rules before operating your pressure washer. Compare the illustrations with your pressure washer to familiarize yourself with the locations of various controls and adjustments. Save this manual for future reference. Spray Gun Detergent Pick–Up Tube and Filter... - Page 8 HOW TO USE YOUR PRESSURE • Grasp the spray gun with your left hand and squeeze the trigger on the spray gun. Water will WASHER flow out of the spray gun in a thin stream. Continue to squeeze the trigger. Your left hand will also If you have any problems operating your pressure serve to steady the unit.
- Page 9 How To Use the Adjustable Nozzle • Twisting the nozzle adjusts the spray pattern from a narrow pattern to a fan pattern. You now should know how to START your pressure • For most effective cleaning, keep the spray nozzle washer and how to STOP it.
- Page 10 For Rinsing: • Slide the nozzle backward to high pressure, press the trigger and wait for the detergent to clear. NOTE: You can also stop detergent flow by removing detergent siphoning tube from container. • Keep the spray gun a safe distance from the area you plan to spray.
- Page 11 NOTES...
-
Page 12: Maintenance
MAINTENANCE OWNER’S RESPONSIBILITIES Follow the hourly or calendar intervals, whichever occurs first. More frequent service is required when operating in adverse conditions noted below. MAINTENANCE SCHEDULE HOURLY OPERATING INTERVAL SERVICE DATES FILL IN DATES AS YOU COMPLETE REGULAR SERVICE Every 25 Every 100 Every 200 Before Each... - Page 13 BEFORE EACH USE 2. If the screen is damaged, the o-ring kit contains a replacement in-line filter screen and an o-ring. If • Check engine oil level. undamaged, reuse screen. • Check water inlet screen for damage. 3. Place the in-line filter screen into the threaded end •...
- Page 14 • Use the wire included in the kit or a small paper clip to free the foreign materials clogging or restricting the nozzle. NOTE: The above two o–rings are close in size. Please match carefully to assure proper o–ring usage. Insert wire into nozzle and turn back and forth to •...
- Page 15 Service Air Cleaner • Install spark plug, tighten securely. Your engine will not run properly and may be Carburetor damaged if you run it with a dirty air cleaner. If you think your carburetor needs adjusting, see your Replace the air cleaner once every 200 hours of nearest Sears service center.
-
Page 16: Storage
Do Not attempt to repair a • Add fuel stabilizer following manufacturer’s damaged hose. Replace the hose with the genuine instructions. Craftsman part. • Make sure you have water supply to pump inlet • Disconnect hose from gun and high pressure outlet connected and turned ON. -
Page 17: Troubleshooting
TROUBLESHOOTING Problem Cause Correction 1. Nozzle in low pressure mode. 1. Pull nozzle backward for high pressure mode. 2. Water inlet is blocked. 2. Clear inlet. 3. Inadequate water supply. 3. Provide adequate water flow. 4. Inlet hose is kinked or leaking. 4. -
Page 18: Replacement Parts
PARTS CRAFTSMAN 2000PSI Pressure Washer 580.768325 Main Unit — Exploded View... - Page 19 CRAFTSMAN 2000 PSI Pressure Washer 580.768325 Main Unit — Parts List Item Part # Qty. Description ENGINE, Honda 4.5 H.P. B1932 DECAL, Instructions 96307 DECAL, 1-800 Number EB5654 BASE, Polo Grn Powder Coated 50190 WASHER, Flat, .34" x 1" B5669...
- Page 20 CRAFTSMAN 2000 PSI Pressure Washer 580.768325 Pump — Exploded View...
- Page 21 CRAFTSMAN 2000PSI Pressure Washer 580.768325 Pump — Parts List Item Part # Qty. Description Item Part # Qty. Description B2218 O-RING, Engine Seal 185712 KIT, CHECK VALVES 97962 SHCS, M6 - 1 x 25 ..
- Page 22 ENGINE, 4.5 HP, Honda, GCV135 – Exploded View and Parts List - Cylinder Barrel and Oil Pan Item Part # Qty. Description Item Part # Qty. Description 12000-ZL9-405 CYLINDER ASSY. (010) 90013-883-000 BOLT, FLANGE (6X12) 12216-ZE5-300 CLIP, VALVE GUIDE 90014-952-000 BOLT, FLANGE (6X14) 12311-ZL8-000 COVER, HEAD...
- Page 23 ENGINE, 4.5 HP, Honda, GCV135 – Exploded View and Parts List - Crankshaft, Piston- Connecting Rod, and Recoil Starter Item Part # Qty. Description 13310-ZM1-600 CRANKSHAFT COMP 90402-ZL8-000 WASHER, THRUST Item Part # Qty. Description 13101-ZL8-000 PISTON 13111-ZE0-000 PIN, PISTON 13200-ZL9-000 ROD ASSY., CONNECTING...
- Page 24 ENGINE, 4.5 HP, Honda, GCV135 – Exploded View and Parts List – Air Cleaner and Fan Cover Item Part # Qty. Description 15721-ZM1-000 TUBE, BREATHER 17211-ZL8-000 ELEMENT, AIR CLEANER 17220-ZM0-000 CASE ASSY., AIR CLEANER 17228-ZM0-000 GASKET, AIR CLEANER 17231-ZM0-000 COVER, AIR CLEANER 90003-ZM0-000 BOLT, FLANGE (6X86) 95701-06014-08...
- Page 25 ENGINE, 4.5 HP, Honda, GCV135 – Exploded View and Parts List - Carburetor Item Part # Qty. Description Item Part # Qty. Description 16010-883-015 GASKET SET 16212-ZL8-000 GASKET, INSULATOR 16013-ZL1-003 FLOAT SET 16221-883-800 GASKET, CARBURETOR 16015-887-782 CHAMBER SET, FLOAT 16228-ZL8-000 GASKET, CARB (CHOKE 16016-ZG0-W00 SCREW SET...
- Page 26 ENGINE, 4.5 HP, Honda, GCV135 – Exploded View and Parts List - Flywheel and Camshaft Pulley Item Part # Qty. Description Item Part # Qty. Description 13331-357-000 KEY, SPECIAL 75113-ZM0-000 SPRING, BRAKE LEVER WOODRUFF (25X18) 90014-952-000 BOLT, FLANGE (6X14) 30500-ZL8-004 COIL ASSY., IGNITION 90018-ZE1-000 BOLT, FLANGE (6X23)
- Page 27 ENGINE, 4.5 HP, Honda, GCV135 – Exploded View and Parts List - Muffler and Control Linkage Item Part # Qty. Description 18310-ZM0-000 MUFFLER COMP. 18321-ZL8-000 PROTECTOR, MUFFLER 90004-ZL8-000 BOLT, FLANGE (6X79) 90013-883-000 BOLT, FLANGE (6X12) 18381-ZL8-305 GASKET, MUFFLER Item Part # Qty.
-
Page 28: Emission Control Warranty
EMISSION CONTROL WARRANTY STATEMENT Your Warranty Rights and Obligations • If you have any questions regarding your warranty rights and responsibilities, your should contact your nearest The California Air Resources Board ("CARB") and Sears authorized service center or call Sears at Roebuck and Co., USA, are pleased to explain the Emission 1-800-473-7247. - Page 29 NOTES...
-
Page 30: Español
Durante un año a partir de la fecha de compra, Sears reparará, sin cargo alguno, cualquier defecto en material y mano de obra, siempre y cuando esta máquina lavadora de alta presión Craftsman haya sido mantenida y puesta en funcionamien- to de acuerdo a las instrucciones suministradas en el manual del propietario. - Page 31 REGLAS DE SEGURIDAD • Algunos químicos o detergentes pueden ser nocivos si se presión superior a su clasificación de presión. inhalan o ingieren, causando náusea severa, desmayos o • Nunca mueva la máquina halando la manguera de alta envenenamiento. Los elementos nocivos pueden presión.
-
Page 32: Montaje
La gran mayoría de su máquina lavadora a presión Craftsman ha sido ensamblada en la fábrica. Sin embargo, RETIRE LA MAQUINA LAVADORA A usted deberá llevar a cabo los siguientes procedimientos PRESION DE LA CAJA antes de poner en funcionamiento su máquina lavadora a... - Page 33 Agregue Aceite de Motor Agregue Gasolina IMPORTANTE: Cualquier intento de hacer girar o arrancar ¡PELIGRO ! Nunca llene el tanque de combustible el motor antes de que se haya depositado el aceite en recintos cerrados. Nunca llene el tanque de recomendado puede resultar en falla del motor.
- Page 34 Conecte la Manguera y el Suministro de Agua a la Bomba IMPORTANTE: Usted deberá armar la extensión para boquillas y conectar todas las mangueras antes de darle arranque al motor. La bomba resultará dañada si arranca el motor sin tener todas las mangueras conectadas y el suministro agua abierto.
-
Page 35: Operacion
OPERACION CONOZCA SU MAQUINA LAVADORA DE ALTA PRESION Lea el manual del propietario y las reglas de seguridad antes de poner en marcha su máquina lavadora a presión. Compare las ilustraciones con su máquina lavadora a presión para familiarizarse con las ubicaciones de los diferentes controles y ajustes. - Page 36 COMO USAR SU MAQUINA Coloque la pistola de rociado en el gancho para almacenamiento. LAVADORA A PRESION • Coloque su pie izquierdo sobre el bastidor inferior de la Si tiene problemas con el funcionamiento de su máquina unidad. lavadora a presión, por favor llame a la línea de ayuda de la •...
- Page 37 • Mueva la palanca de la válvula del combustible a la posición "Off". • Apriete el gatillo de la pistola de rociado para eliminar la presión de la manguera. NOTA: Observará una pequeña cantidad de agua cuando elimine la presión. Cómo Usar la Boquilla Ajustable Usted ya debe saber como darle ARRANQUE a su máquina lavadora a presión y como DETENERLA.
- Page 38 • Asegúrese que la manguera de jardín esté conectada a Sistema de Enfriamiento Automático la entrada del agua. Revise que la manguera de alta (Alivio Térmico) presión esté conectada a la pistola de rociado y a la El agua que circula dentro de la bomba puede alcanzar bomba.
- Page 39 NOTAS...
-
Page 40: Mantenimiento
MANTENIMIENTO RESPONSABILIDADES DEL PROPIETARIO Siga el programa de mantenimiento según el número de horas o según el calendario, lo que suceda primero. Se requiere de servicio con mayor frecuencia cuando opere la unidad en las condiciones adversas descritas a continuación. HORARIO DE MANTENIMIENTO INTERVALO DE OPERACION POR HORA COLOQUE LAS FECHAS A MEDIDA QUE VA... - Page 41 ANTES DE CADA USO 3. Coloque el colador del filtro en línea en el extremo con rosca de la extensión para boquillas. Su dirección no • Revise el nivel de aceite del motor. importa. Coloque el colador ejerciendo presión con el •...
- Page 42 • Use el alambre incluido en el juego o un clip de papel pequeño para liberar los materiales extraños que están tapando u obstruyendo la boquilla. NOTA: Los dos anillos ‘o’ anteriores tienen un tamaño similar. Por favor compárelos y asegúrese de usarlos en el lugar correcto.
- Page 43 • Si el nivel del aceite se encuentra cerca o por debajo de • Retire y revise la bujía. la marca límite de la varilla de medición, deposite el • Cambie la bujía si los electrodos están desgastados, o si aceite recomendado hasta que llegue a la marca del el aislador está...
-
Page 44: Almacenamiento
Asegúrese de tener conectado y ABIERTO el suministro de reparar una manguera dañada. Remplace la manguera con la agua a la entrada de la bomba. parte Craftsman genuina. • Ponga en funcionamiento el motor en un área descubierta por •... -
Page 45: Reparacion De Daños
REPARACION DE DAÑOS Problema Causa Solución La boquilla está en el modo de baja Mueva la boquilla hacia atrás para el presión. modo de alta presión. La entrada de agua está bloqueada. Limpie la entrada. Suministro de agua inadecuado. Proporcione flujo de agua adecuado. -
Page 46: Garantía De Emisiones
GARANTÍA DEL SISTEMA DE CONTROL DE EMISIONES Sus Obligaciones y Derechos de Garantía • Si tiene preguntas acerca de sus responsabilidades y derechos de garantía, deberá ponerse en contacto con su centro de La Junta Directiva de Recursos Ambientales de California (“CARB”) servicio autorizado más cercano o llamar a Sears al y Sears Roebuck and Co. - Page 47 NOTAS...
- Page 48 For in-home major brand repair service: Call 24 hours a day, 7 days a week 1-800-4-MY-HOME (1-800-469-4663) Para pedir servicio de reparación a domicilio - 1-800-676-5811 In Canada for all your service and parts needs call - 1-800-665-4455 Au Canada por tout le service ou les pièces For the repair or replacement parts you need: Call 7 am - 7 pm, 7 days a week 1-800-366-PART...