
Related Manuals for Shot-Scope X5


Summary of Contents for Shot-Scope X5
- Page 2 Inside your box Contents Inside your box Thank you for buying a Shot Scope X5. Before turning on the device, please read our full user guide to ensure Navigation - Touchscreen and buttons the correct set up. Setting up your Shot Scope X5...
- Page 4 Touchscreen and buttons Touchscreen The responsive touchscreen is the preferred method for interacting with your X5 watch allowing you to seamlessly make selections using the screen along with the physical buttons on the side of the watch. The touchscreen works like your mobile phone - swiping up moves up a menu and swiping down moves down a menu.
- Page 5 Multi-function crown (top right button) If you prefer not to use the touchscreen for navigation you can use the crown and back button. To use the crown for navigation: Turn the dial clockwise to scroll up. Turn the dial anti-clockwise to scroll down. To confirm a selection press the crown button once (top right).
- Page 6 This feature locks the touchscreen and buttons whilst in play to avoid accidental operation. The device will lock after 5 seconds of inactivity. To unlock the X5 swipe up on the clockface from the bottom to the top of the screen or turn the crown 360° in a clockwise direction.
- Page 8 Setting up your Shot Scope X5 Step 1: Download and install the mobile app Shot Scope provides both an Android and iOS app. To download or install the Shot Scope app, simply search for Shot Scope on either the App Store or the Google Play Store.
- Page 9 During this process, you will turn on your X5 and pair the device with the app. You will choose the settings for your device and sync the watch to ensure it has the latest firmware installed.
- Page 10 Step 4: Check course maps We recommend that you check the mapping status of any courses you intend to play 48 hours before your tee off time. This is to ensure that the course is in the system and has been mapped. While most courses will be mapped and already downloaded to the watch, occasionally there will be a new course that isn’t on the system or your course may have an update pending.
- Page 11 Search Step 5: Searching for, subscribing and adding a course You can search our course database by entering the name of the course or using your location to find nearby courses. Either use the search bar or the filter at the top right of the screen to find courses by proximity to your Request current location.
- Page 12 Step 6: Syncing course changes If you have any course maps that need to be uploaded to the watch, or any updates that need to be transferred to the watch, you should see a red notification at the top of the courses screen.
- Page 14 Download or update your mobile app As we routinely update our mobile app to improve useability and add new features, please make sure you have the most recent version installed on your iOS or Android device. To upload rounds you must use the mobile app. You can still view and edit your round on the Performance Dashboard (shown on the right) which can be accessed via web browser on a...
- Page 16 Step 1: Charging your Shot Scope X5 Your X5 can be charged from any USB port or USB compliant wall charger. Please only use the USB charging cable provided with the X5 for charging. Plug the charger into the charging port on the back of the watch face;...
- Page 17 Step 2: Installing tags Your Shot Scope X5 comes with 16 tags, each labelled with an initial to identify the corresponding club. It is best practice to match the appropriate tag for each club. For example, the D tag would screw into your driver.
- Page 18 Step 3: Setting up My Bag My Bag is a feature on the Shot Scope dashboard and apps which allows you to create a database of all of the clubs you use and track their performance. To access My Bag on mobile it can be found in the ‘more’ section of the app on iOS and in the drop down menu on Android.
- Page 20 10cm range of each other at all times when a shot is being played. If you grip down the club or wear the watch high on the wrist, the range may become too great for the X5 to function and the shot may not be recorded. As the tracking technology is incorporated into the strap itself, having the strap closer to the tags will improve performance.
- Page 21 Step 2: Getting ready to play Power on: Turn on your X5 by pressing the crown (top right button) until you see the X5 logo appear. Play Golf: Rotate the crown or swipe up on the touchscreen to access the main menu. In this menu you can select ‘Play Golf’...
- Page 22 Keep score X5 will prompt you to choose whether you want to add your Step 3: Golf modes score while playing the round. Scoring can be toggled on/off in the settings menu - for example if you never want to keep Before playing, X5 will prompt you to select one of 2 different your score then you can turn this feature off altogether.
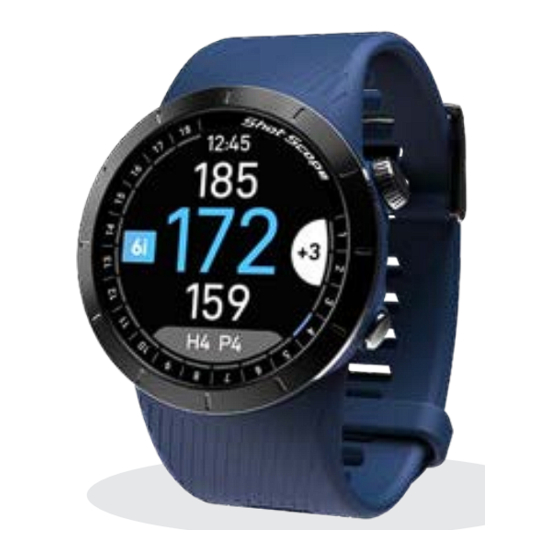
- Page 23 Score Widget Tag ID Lock during play Front Distance To unlock the X5 swipe up on the clockface Hole Indicator Hole Widget from the bottom to the top of the screen or turn the crown 360° in a clockwise direction.
- Page 24 Step 4: During play (cont) Hole indicator / change hole Tag ID / club detected The hole indicator is visible around the outside of The tag ID gives the golfer visual feedback during the screen allowing the golfer to quickly and easily the round and shows the last club tag the watch see what hole they are on.
- Page 25 Step 4: During play (cont) PinCollect PinCollect is a simple feature that allows you to get the most out of your statistics by collecting the position of the pin. When you reach a green your device will automatically change to the PinCollect screen. This screen will show by default 2 putts taken.Once you have holed out, stand over the hole and confirm the amount of putts taken, you can edit the number by using the touchscreen only.
- Page 26 Manual Putting An alternative way to track your putts is using manual putting. We recommend manual putting if you putt using an unconventional putting grip - such as cack-handed or an arm lock grip - where the distance between your watch and putter tag is greater than a conventional grip.
- Page 27 Step 4: During play (cont) Scoring X5 allows you to track your score whilst you play. You will be asked to confirm your score at the end of each hole once you confirm how many putts you have taken via PinCollect. After PinCollect a screen will show asking you to confirm if this is your total score on that hole (including putts).
- Page 28 In-play menu X5 features several different in-play screens to give the golfer detailed information on the course showing hazards, layups, doglegs and green view. When the watch is unlocked, you can access the in-play menu by swiping left or right on the touchscreen to navigate through the options or press the crown button.
- Page 29 Step 4: During play (cont) Hazards The first screen within the in-play menu is the hazards display which provides distance information to the closest hazards. To view all hazards on a hole, simply scroll up or down using the touchscreen or crown. Two values are provided for each hazard. The bottom number indicates the distance to the front, and the top number indicates the distance to the back of each hazard.
- Page 30 Green view X5 has green view functionality allowing you to see the shape and layout of the green on a hole. Within green view you can alter the position of the pin by clicking “move pin” then using your the touchscreen to move the pin, the crown can also adjust the position from side to side for a more accurate placement.
- Page 31 Step 4: During play (cont) Last Shot in GPS only mode Last Shot in GPS + Track mode When standing on the tee or beside your ball before hitting a This feature measures the distance of the last shot hit. shot, navigate to the last shot screen.
- Page 32 Step 4: During Play (cont) Pause tracking To pause tracking your round, navigate to the Game Menu and enter the ‘Pause Track’ screen, then tap on ‘Pause Tracking’ or press the crown button to confirm the pause. A pause icon will display on the GPS + Track screen to indicate the tracking is paused.
- Page 33 Step 4: During Play (cont) Scorecard You can access the scorecard and edit your score via the Game Menu or by tapping the score to par icon on the main yardages screen. End round After playing the 18th hole you will automatically be asked if you want to end the round.
- Page 34 Step 4: During play (cont) Play back 9 If you are playing a 9 hole course but continuing to play another 9 holes: Scroll down to “Play Back 9” on the End Round Screen, by selecting this option it will allow you to record another 9 holes on your watch.
- Page 36 Main menu To access the main menu swipe up on the clockface screen or press the crown button. You will then be shown the following options: Play Golf = Select a golf mode to play. Settings = Change settings on your watch such as turning scoring on/off or changing yards to metres.
- Page 37 Clockfaces X5 has a range of customizable clockfaces that can be used to display the time when the watch is not in golf mode. To change the clockface navigate to the settings menu and select “Clockface”. You can scroll left or right to change the watch face and press the crown or tap the tick to confirm a selection.
- Page 38 Steps X5 will track your daily step count and can be viewed by swiping left or right on the main clock face. The screen will display your daily step count and will be reset at the end of each day. At the...
- Page 40 Step 1: Uploading your data Before uploading your round, first make sure that you have your watch turned on and next to your mobile phone (ensure you have Bluetooth enabled on your phone settings). Next, log into your app and tap the ‘Connect Device’ button at the top of the screen.
- Page 41 Step 1: Select your handicap from the dropdown. Step 2: Select which tees you played from, several options are included on the drop down list. If the tees you played from aren’t present, click on the plus icon to create a new set. When creating a new set of tees, make sure all the pars for each hole are correct before going forward.
- Page 42 Compete against your friends in Leaderboards and unlock Medals When signing off your round you have the option to include the round in Leaderboards and Medals. You can compete and play against other Shot Scope users to gain medals and top our leaderboards. Opt into leaderboards via the ‘compete’...
- Page 43 Get the most out of your Shot Scope X5 Practice swings for optimum data To maximize data collection, it is vital that practice strokes are taken beside the ball. This allows for the refinement of the algorithm which detects shots. We...
- Page 44 of Shot Scope Technologies Ltd; (v) damage to a product that has been modified or altered without Shot Scope written permission of Shot Scope Technologies Ltd; or (vi) damage to a product that has been not been charged or powered in accordance with the charging and powering instructions provided by Shot Scope Technologies Ltd;...
- Page 45 SAFETY INFORMATION & HEALTH WARNINGS GPS NOTICE For your personal safety and to avoid damage to device follow safety information guidelines detailed below. The device may experience degraded performance if you use it in proximity to any device that uses a Failure to avoid the following potentially hazardous situations could result in serious injury: terrestrial broadband network operating close to the frequencies used by any Global Navigation Satellite •Always consult your Physician/Doctor before beginning or modifying any exercise program.
- Page 46 MODE, FREQUENCY AND POWER Operation is subject to the following two conditions: (1) this device may not cause harmful interference and (2) this device must accept any interference that may cause undesired operation of the device. This device has been tested and found to comply with the limits for a Class B digital device, pursuant to part 15 of the FCC rules.
- Page 47 Version 3 - 190523...
Need help?
Do you have a question about the X5 and is the answer not in the manual?
Questions and answers
Following last upgrade my X5 watch is now presenting info in French. How do I change back to English.