Table of Contents
Advertisement
Quick Links
1:12-SCALE 4WD BRUSHED RTR
ECX01010
INSTRUCTION MANUAL
BEDIENUNGSANLEITUNG
MANUEL D'UTILISATION
MANUALE DI ISTRUZIONI
Congratulations on your purchase of the ECX
RTR. This model introduces you to the sport of RC driving.
Herzlichen Glückwunsch zum kauf des ECX Barrage Doomsday 1:12 Scale 4WD Brushed RTR.
Dieses Modell ist der gelungende Einstieg in die Welt des RC Cars Sports.
Nous vous félicitons pour l'achat de l'ECX Barrage Doomsday 1:12 Scale 4WD Brushed RTR.
Ce modèle vous permettra de découvrir l'univers du RC.
Congratulazioni per l'acquisto dell'ECX Barrage Doomsday 1:12 Scale 4WD Brushed RTR.
Questo modello dà accesso al mondo degli automodelli radiocomandati.
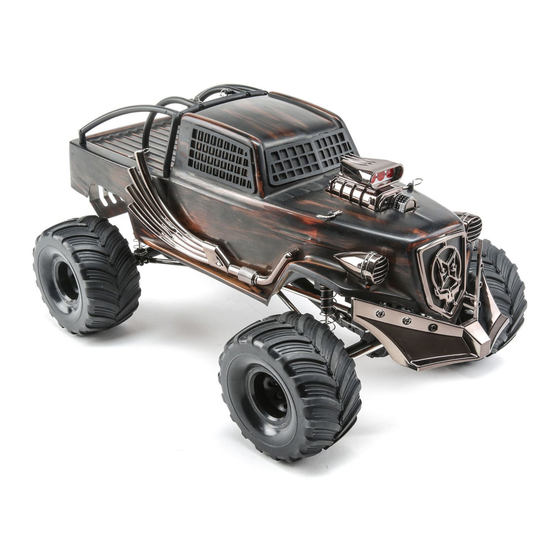
Barrage Doomsday
1:12 Scale 4WD Brushed
®
™
Advertisement
Table of Contents

Related Manuals for ECX BARRAGE DOOMSDAY


Summary of Contents for ECX BARRAGE DOOMSDAY
- Page 1 Herzlichen Glückwunsch zum kauf des ECX Barrage Doomsday 1:12 Scale 4WD Brushed RTR. Dieses Modell ist der gelungende Einstieg in die Welt des RC Cars Sports. BEDIENUNGSANLEITUNG Nous vous félicitons pour l’achat de l’ECX Barrage Doomsday 1:12 Scale 4WD Brushed RTR. Ce modèle vous permettra de découvrir l’univers du RC. MANUEL D’UTILISATION Congratulazioni per l’acquisto dell’ECX Barrage Doomsday 1:12 Scale 4WD Brushed RTR.
- Page 2 NOTICE All instructions, warranties and other collateral documents are subject to change at the sole discretion of Horizon Hobby, LLC. For up-to-date product literature, visit http://www.horizonhobby.com and click on the support tab for this product. MEANING OF SPECIAL LANGUAGE The following terms are used throughout the product literature to indicate various levels of potential harm when operating this product: WARNING: Procedures, which if not properly followed, create the probability of property damage, collateral damage, and serious injury OR create a high probability of superficial injury.
-
Page 3: Table Of Contents
65 g Output Torque 44 oz-in @ 4.8V (54 oz-in @ 6.0V) Size 40 x 20.3 x 38mm COMPONENTS • ECX Barrage Doomsday ® ™ • ECX 2.4GHz 2-CH V3 Transmitter ® • AA (4) Batteries • 100mAh NiMH Wall Charger with EC3 Connector ™... -
Page 4: Quick Start
QUICK START Please read the entire manual to gain a full understanding of the vehicle, fine-tuning the setup and performing maintenance. 1. Read the safety precautions found in this manual. 5. Power ON the transmitter and then the vehicle. Wait 5 seconds for the ESC to initialize. -
Page 5: Installing The Battery
INSTALLING THE BATTERY 1. Remove the vehicle body. 2. Install a fully charged battery. 3. Secure the battery pack using the hook and loop straps. 4. Connect the battery pack to the ESC power connector. CAUTION: Connecting the battery to the ESC with reversed polarity will cause damage to the ESC, the battery or both. -
Page 6: Binding
BINDING The included transmitter and receiver are bound at the factory. If you need to rebind, follow the instructions below. 1. Power off the transmitter and ESC. 2. Connect a fully charged battery pack to the ESC. 3. Power on the ESC. The RED LED on the receiver flashes. 4. -
Page 7: Operation
OPERATION • ALWAYS turn on your transmitter before you turn on the receiver • ALWAYS operate your vehicle in a wide open area. Operating the in the vehicle. Always power off the receiver before turning your vehicle in a small space or indoors can cause overheating at low transmitter off. -
Page 8: Maintenance
MAINTENANCE SETTING THE GEAR MESH The gear mesh has already been set at the factory. Setting the gear mesh is only necessary when changing motors or gears. You must remove the vehicle’s gear cover (A) to make this adjustment. Proper gear mesh (how the gear teeth meet) is important to the performance of the vehicle. -
Page 9: Troubleshooting Guide
TROUBLESHOOTING GUIDE Problem Possible Cause Solution Battery damaged/not charged Check/change battery Short Run Time Motor dirty Check/clean Motor dirty Check/clean Sluggish Action Bind in drivetrain Clean/adjust Vehicle battery is not charged Replace/recharge Controls Reversed ST. REV or TH. REV Change switch position Transmitter batteries low Replace/recharge Transmitter powered off... -
Page 10: Limited Warranty
LIMITED WARRANTY What this Warranty Covers that you may need any assistance. For questions or assistance, please visit our website at www.horizonhobby.com, submit a Product Support Inquiry, or Horizon Hobby, LLC, (Horizon) warrants to the original purchaser that the call the toll free telephone number referenced in the Warranty and Service product purchased (the “Product”) will be free from defects in materials and Contact Information section to speak with a Product Support representative. -
Page 11: Warranty And Service Contact Information
WARRANTY AND SERVICE CONTACT INFORMATION Country of Horizon Hobby Contact Information Address Purchase Horizon Service Center servicecenter.horizonhobby.com/ (Repairs and Repair Requests) RequestForm/ productsupport@horizonhobby.com Horizon Product Support 4105 Fieldstone Rd United States of America (Product Technical Assistance) Champaign, Illinois, 61822 USA 877-504-0233 websales@horizonhobby.com Sales... -
Page 12: Replacement Parts
ECX216003 Complete Hardware Set Kompletter Hardwaresatz Ensemble de matériel complet Set bulloneria completo ECX217001 Spindle/Hub Bearing Set ECX Spindelset/Lagerset Set de roulements de fusées Set supporto fusello/hub Käfig, Fenster und Supporto ammortizzatore, finestrino ECX220000 Cage, Window & Bumper Mount Cage, support de pare-chocs et fenêtre Stoßstangenbefestigung... -
Page 13: Optional Parts
Optional Parts / Optionale Teile / Liste des options / Elenco parti opzionali Part # Description Beschreibung Description Descrizione 7.2V 1750mAh NiMH 6C Flat Battery, Flache Akkus Ni-MH 7,2V 1750mA, Mini 1/18: Batterie plate Ni-MH 7,2V Batteria piatta 6C NiMH 1750 mAh 7,2 DYN1471 EC3: Minis EC3: Mini 1/18... -
Page 14: Parts Diagram
PARTS DIAGRAM | EXPLOSIONSZEICHNUNG | VUE ÉCLATÉE DES PIÈCES | ESPLOSO DEL MODELLO CON REFERENZA PEZZI ECX220000 ECX220000 ECX220003 ECX1048 ECX220001 ECX220001 ECX1048 ECX220002 ECX1048 ECX220000 ECX1048 ECX220001 ECX220001 ECX220000 ECX220002 ECX222004 ECX222004 ECX216003 – Complete hardware set | Kompletter Schrauben-Set | Set de visserie complet | Set completo viti ECX217001 –... - Page 15 PARTS DIAGRAM | EXPLOSIONSZEICHNUNG | VUE ÉCLATÉE DES PIÈCES | ESPLOSO DEL MODELLO CON REFERENZA PEZZI 1:12-SCALE 4WD BRUSHED RTR...
- Page 16 PARTS DIAGRAM | EXPLOSIONSZEICHNUNG | VUE ÉCLATÉE DES PIÈCES | ESPLOSO DEL MODELLO CON REFERENZA PEZZI FRONT AXLE | VORDERACHSE | HINTERACHSE | ASSE ANTERIORE ECX221000 ECX216003 ECX212027 ECX221000 ECX216003 ECX221000 ECX222002 ECX222000 ECX216003 ECX212020 ECX212009 ECX212028 ECX217001 ECX216003 ECX222000 ECX212010 ECX224000 ECX216003...
- Page 17 PARTS DIAGRAM | EXPLOSIONSZEICHNUNG | VUE ÉCLATÉE DES PIÈCES | ESPLOSO DEL MODELLO CON REFERENZA PEZZI REAR AXLE | ESSIEU AVANT | ESSIEU ARRIÈRE | ASSE POSTERIORE ECX1060 ECX222002 ECX221000 ECX216003 ECX217001 ECX222000 ECX216003 ECX217001 ECX212009 ECX212022 ECX212010 ECX216003 ECX217001 ECX222000 ECX217001 ECX217001...
- Page 18 PARTS DIAGRAM | EXPLOSIONSZEICHNUNG | VUE ÉCLATÉE DES PIÈCES | ESPLOSO DEL MODELLO CON REFERENZA PEZZI ECX222003 ECX212018 ECX222001 ECX212021 ECX212021 DYNS1206 DYNS1206 ECX221000 SPMS602 ECX216003 ECX211021 ECX221000 ECX216003...
- Page 19 1:12-SCALE 4WD BRUSHED RTR...
- Page 20 ECX01010 www.ecxrc.com © 2017 Horizon Hobby, LLC. ECX, the ECX logo, Barrage Doomsday, Dynamite, Speedpack, Prophet, Tazer, EC3, and the Horizon Hobby logo are trademarks or registered trademarks of Horizon Hobby, LLC. The Spektrum trademark is used with permission of Bachmann Industries, Inc.
Need help?
Do you have a question about the BARRAGE DOOMSDAY and is the answer not in the manual?
Questions and answers