Table of Contents
Advertisement
OWNER'S MANUAL
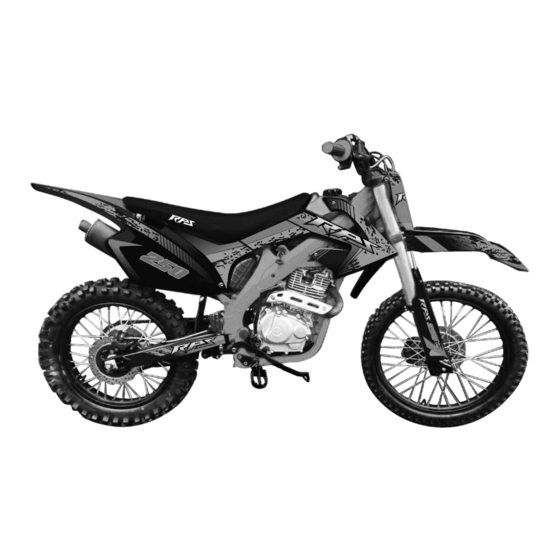
Hawk Dirt Bike
Minimum age requirement: 16
Always wear a helmet; It could save your Life!
This manual should be considered as a permanent part of the vehicle and should remain with the
vehicle when resold or otherwise transferred to a new user or operator. The manual contains
important safety information and instructions which should be read carefully before operating the
vehicle.
Advertisement
Table of Contents

Summary of Contents for RPS Hawk Dirt Bike
- Page 1 OWNER’S MANUAL Hawk Dirt Bike Minimum age requirement: 16 Always wear a helmet; It could save your Life! This manual should be considered as a permanent part of the vehicle and should remain with the vehicle when resold or otherwise transferred to a new user or operator. The manual contains important safety information and instructions which should be read carefully before operating the vehicle.
-
Page 2: Table Of Contents
Index Introduction ........................... 1 Safety ............................ 1 Safety Information ........................2 Safety Labels.......................... 3 Components Locations ......................4 Controls ..........................5 FUEL VALVE ........................... 5 IGNITION SWITCH ......................... 5 START BUTTON AND ENGINE STOP SWITCH ................5 Before Riding ......................... 6 Protective Clothing ........................ -
Page 3: Introduction
INTRODUCTION Congratulations on your purchase of the Ricky Power Sports LLC’ 250cc Dirt Bike. Take time to understand how your bike works before riding. Scheduled service is a must and it is important to follow the break-in guidelines and pre-ride instructions. Make certain that you read the warranty coverage information provided and understand your responsibilities. -
Page 4: Safety Information
SAFETY INFORMATION This user’s manual contains important safety and maintenance information. Read it carefully before riding. Failure to follow the warnings contained in this manual could result in INJURY or DEATH. ALWAYS WEAR A HELMET The operator and passenger (if any) of this vehicle should always wear a helmet approved by agencies such as the Department of Transportation (DOT), Safety Helmet Council of America (SHCA), or Snell Memorial Foundation (SNELL). -
Page 5: Safety Labels
SAFETY LABELS The safety labels on your bike provide you with important information do not remove them. If a label becomes too difficult to read or comes off contact Ricky Power Sports, LLC for replacements. -
Page 6: Components Locations
COMPONENTS LOCATIONS... -
Page 7: Controls
CONTROLS FUEL VALVE Fuel valve - Used to control the flow of gasoline from the fuel tank to the carburetor. ON - gasoline can flow to the carburetor. OFF - gasoline cannot flow to the carburetor. RES - gasoline can flow to the carburetor when you have run out of gas in the gas tank. Make sure to refuel as soon as possible. -
Page 8: Before Riding
BEFORE RIDING Before your first ride on your new bike we strongly recommend you: Read the owner’s manual. Understand all safety labels. Know how to operate all controls. Before you ride each time, make sure: You are in good physical and mental health. ... -
Page 9: Loading Guidelines And Load Limits
LEAKS and LOOSE ENDS - Check all hoses for leaks and cables that may be loose. CHAIN - Check the condition. Adjust the slack (if any) and lubricate (if needed). TIRES - Use an air pressure gauge to check the pressure. If needed add air. Look for excessive wear or damage. -
Page 10: Starting And Stopping The Engine
STARTING AND STOPPING THE ENGINE Always follow proper starting procedures. Never start the engine in a closed place as the exhausted gas form the vehicle contains toxic carbon monoxide. STARTING PROCEDURES Insert key into ignition, turn to “ON” position. ... -
Page 11: Starting And Stopping The Engine, Shifting Gears
STARTING AND STOPPING THE ENGINE, SHIFTING GEARS How to stop the engine Normal Engine Stop Shift into neutral and turn the ignition switch “OFF”. DO NOT leave the ignition switch “ON” while the engine stop switch if “OFF”, this will allow the lights to stay “ON”... -
Page 12: Braking
4th to 5th - 31mph (50km/h) Shifting down from: 5th to 4th - 22mph (35km/h) 4th to 3rd - 16mph (25km/h) BRAKING Your bike is equipped with a hand operated front hydraulic disc brake and a foot operated rear hydraulic disc brake. Your front brake provides 70% of your braking power. By using both front and rear brakes you will achieve faster, more stable and effective braking. -
Page 13: Maintenance Safety
Keep the owner’s manual, registration and insurance with the bike to help authorities find you if it has been stolen and recovered. Servicing your bike This section is provided to help you keep your bike in good running condition. The following table provides you with the three types of inspections recommended for your bike. -
Page 14: Maintenance Schedule
Including the regular maintenance and pre-ride inspection, perform the periodic checks once a month and once a week if you ride frequently. Check the mileage and perform any scheduled maintenance necessary. Tires - ● Check the air pressure and add air if needed. ●... -
Page 15: Maintenance Schedule A
MAINTENANCE SCHEDULE A I - Inspect, clean, adjust, lubricate or replace if necessary C - Clean A - Adjust L - Lubricate R – Replace... -
Page 16: Maintenance Schedule B
MAINTENANCE SCHEDULE B I - Inspect, clean, adjust, lubricate or replace if necessary C - Clean A - Adjust L - Lubricate R – Replace... -
Page 17: Maintenance Records
MAINTENANCE RECORDS To ensure proper maintenance keep record. If the Dirt Bike is sold be sure to include the maintenance records. All scheduled maintenance is considered normal operator cost if a service center performs these tasks you will be charged. Please use the tables below to keep track of all maintenance performed. -
Page 18: Tool Kit And Owner's Manual Storage
TOOL KIT AND OWNER’S MANUAL STORAGE Your tool kit is located in the tool kit bag. These tools may come in handy during minor roadside repairs and adjustments. Tools in tool kit: M8-M10 Fixed wrench M12-M14 Fixed wrench ... -
Page 19: Side Cover Removal
SIDE COVER REMOVAL Left Side Cover In order to clean and maintain the battery and fuses you must remove the right side cover. Removal 1. Remove bolt. 2. Remove cover. Installation 1. Align prongs 2. Reverse removal steps. Right Side Cover In order to clean and maintain the air cleaner you must remove the left side cover. -
Page 20: Fuel
FUEL Fuel Recommendation Type - Unleaded Octane number - 87 or above Unleaded fuel procedures fewer engine deposits and will extend the life of the exhaust system components. We suggest you use regular unleaded fuel. Be sure to only use an octane number of 87 or higher. -
Page 21: Engine Oil
ENGINE OIL Recommended Oil API classification Viscosity(weight) SAE 10W-30 Use the recommended oil, the oil does not need additives. Do not use graphite oil or oil with molybdenum additives. Do not use castor based racing oil, vegetable oil or non-detergent oil. - Page 22 Engine Oil Checking and Adding Oil 1. Park your bike on level ground and use the side stand for support. 2. Start the engine and let it run for 3-5 minutes. 3. Turn the engine off and wait for at least 3 minutes. 4.
-
Page 23: Air Cleaner
6. Hold the bike in an upright position, and check the oil level. 7. Make sure there are no leaks. AIR CLEANER Be sure to clean the air cleaner more frequently if you are ridding in dusty or wet areas. You local service center can help you determine the correct service interval for your riding conditions. -
Page 24: Crankcase Breather And Throttle
CRANKCASE BREATHER AND THROTTLE Crankcase Breather You should service the crankcase breather more often if you are riding at full throttle or in rain. Be sure to service, if there are deposits in the transparent section of the drain tube. Draining 1. -
Page 25: Clutch System
CLUTCH SYSTEM The proper free play adjustment of the clutch allows for a gradual, smooth engagement when shifting gears. Early wear can occur if you do not properly adjust the free play. Clutch Free Play Left handlebar inspection Check free play, if needed adjust to specified adjustment. Upper Adjustment Always adjust using the upper clutch cable adjuster before using the lower adjustment. -
Page 26: Engine Idle Speed
ENGINE IDLE SPEED For the best servicing you should visit your local service center. Adjusting the idle speed will not cure all problems in the engine fuel delivery system. Idle Speed Adjustment 1. If the engine is cold, start it and run for 10 minutes of stop and go riding. Turn the engine off. 2. -
Page 27: Brakes
BRAKES Your bike uses hydraulic disc brakes( front and rear). Hydraulic Liquid Front Brake The brake fluid will drop as the or if there is a leak. To ensure there are no leaks, often check the brake system. You should also check the brake pads for wear and the brake fluid level. If you feel abnormal free play in the brake lever, check for wear on the brake pads. -
Page 28: Rear Brake Pedal Free Play
REAR BRAKE PEDAL FREE PLAY Brake Pedal Height Adjustment The height of the brake pedal can be adjusted by using the stopper bolt. 1. Loosen lock nut and turn stopper bolts to adjust. 2. Tighten lock nut. Inspection 1. Park your bike on the side stand for support. 2. - Page 29 Pull to the side of the road if you drive over a pothole or any hard objects to inspect the tire for possible damage. Front ( from center of tread) 0.06 inch (1.5mm) Rear (from center of tread) 0.08 inch (2.0mm) You should replace the tires if the thread wear reaches the following limits: Replace tire immediately if the wear indicators are not visible.
-
Page 30: Drive Chain
DRIVE CHAIN There is a riveted master link on the chain which connects the counter-shaft to the rear wheel sprockets. To keep moisture and dirt out the O-ring chain uses rubber rings between the side plates of the pin and roller links to seal in the lubricating grease. -
Page 31: Adjustment
ADJUSTMENT Every 500 miles you should check and adjust (if needed) the slack of the drive chain. If you are riding at high speeds the chain may need adjusting more often. 1. Place the bike on level ground using the side stand. Make sure the transmission is in neutral and the ignition switch if in the “OFF”position. -
Page 32: Battery
BATTERY Your bike is equipped with battery. Please check the electrolyte level or add distilled water when they are shortage. NOTICE: If you remove the cap strip you can permanently damage the battery. Any electrical accessory will use currents from the battery. If you have electrical accessories on your bike and you ride often, be sure to charge the battery frequently. - Page 33 Charging the Battery Charging the battery incorrectly may cause damage. Always read the instructions that came with the battery charger and follow all directions on the battery. For home charging we suggest you use a trickle charger. A trickle charger can be left connects for a long period of time without causing damage to the battery.
-
Page 34: Vehicle Identification
VEHICLE IDENTIFICATION Serial Numbers The frame (VIN) and engine serial numbers will be required when you register your bike. You may also need this information when ordering parts, make sure to keep these numbers in a safe spot. Frame number (VIN- Vehicle Identification Number) can be found on the left side of the front forks stamped into a metal plate. -
Page 35: Specifications
SPECIFICATIONS Engine Engine Type Single cylinder, air-cooled, four stroke Displacement (ml) 229.2 Bore×Stroke (mm) 67×65 Compression Ratio 9.0:1 Max. Power (kw/rpm) 11/7500 Max. Torque (N.m/rpm) 16.5/5500 Max. Speed (Km/h) Lubrication Pressure splash Clutch Type Manual Ignition Starting System Kick / Electric start Transmission System Chain Chassis... -
Page 36: Wire Diagram
WIRE DIAGRAM... -
Page 37: Ricky Power Sports, Llc. - Emission Control System Warranty
RICKY POWER SPORTS, LLC. – EMISSION CONTROL SYSTEM WARRANTY YOUR WARRANTY RIGHTS AND OBLIGATIONS The emission control system warranty period for this vehicle begins on the date the vehicle is delivered to the first purchaser other than an authorized dealer, or the date it is first used as a demonstrator, lease, or company vehicle, whichever comes first and continues for 30 months after that date, or 5,000km, whichever comes first, provided there has been no abuse, neglect or improper maintenance of your vehicle. - Page 38 EXCLUSIONS AND LIMITATIONS This warranty does not cover the following: Failures or malfunctions of the emission control systems caused by abuse, alteration, accident, misuse, the use of leaded gasoline. Replacement of expendable maintenance items unless they are original equipment defective in material or workmanship under normal use, and the first required replacement interval for the item has not been reached.
- Page 39 Ricky Power Sports, LLC. 2425 Camp. Avenue, Carrollton, TX 75006 Toll Free: 844-250-2199 - 37 -...
Need help?
Do you have a question about the Hawk Dirt Bike and is the answer not in the manual?
Questions and answers