Samsung harmon/kardon HW-N950 Full Manual
Hide thumbs
Also See for harmon/kardon HW-N950:
- Full manual (175 pages) ,
- How to reset (16 pages) ,
- Full manual (142 pages)

Related Manuals for Samsung harmon/kardon HW-N950


Summary of Contents for Samsung harmon/kardon HW-N950
- Page 1 FULL MANUAL HW-N950 Imagine the possibilities Thank you for purchasing this Samsung product. To receive more complete service, please register your product at www.samsung.com/register...
- Page 2 SAFETY INFORMATION SAFETY WARNINGS CAUTION • TO PREVENT ELECTRIC SHOCK, MATCH WIDE TO REDUCE THE RISK OF ELECTRIC SHOCK, DO BLADE OF PLUG TO WIDE SLOT, FULLY NOT REMOVE THE COVER (OR BACK). INSERT. NO USER-SERVICEABLE PARTS ARE INSIDE. • This apparatus shall always be connected to a REFER SERVICING TO QUALIFIED SERVICE AC outlet with a protective grounding PERSONNEL.
- Page 3 However, if there is no alternative to cutting off the 2. During thunderstorms, disconnect the AC plug, remove the fuse and then safely dispose of plug from the wall outlet. Voltage peaks due the plug. Do not connect the plug to a mains to lightning could damage the unit.
-
Page 4: Table Of Contents
See this manual for safety instructions, product installation, components, connections, and product specifications. FULL MANUAL You can access the FULL MANUAL on Samsung’s on-line customer support centre by scanning the QR code. To see the manual on your PC or mobile device, download the manual in document format from Samsung’s website. - Page 5 Method 2. Connecting Wirelessly ------------------------- – Connecting a TV via Bluetooth ------------------------- – Connecting via Wi-Fi ------------------------- Connecting an External Device Connecting using an HDMI Cable (Dolby Atmos® supported) ------------------------- Connecting using an HDMI Cable ------------------------- Connecting using an Optical Cable ------------------------- Connecting a Mobile Device Connecting via Bluetooth...
-
Page 6: Checking The Components
• For Soundbar wall mounting components, see page 31. • To distinguish the left surround speaker from the right, check the label on the rear of each speaker. • To purchase additional components or optional cables, contact a Samsung Service Centre or Samsung Customer Care. -
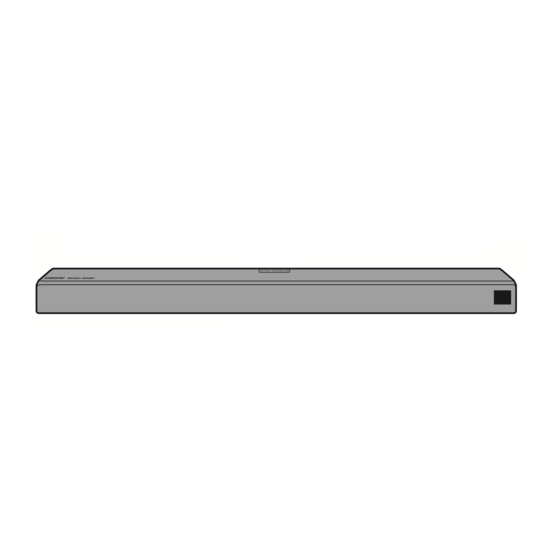
Page 7: Product Overview
02 PRODUCT OVERVIEW Front Panel / Top Panel of the Soundbar Position the product so that the "Samsung Harman Kardon" Panel logo is located on the top. (Power) Button Turns the power on and off. Source) Button Selects the source input mode. -
Page 8: Bottom Panel Of The Soundbar
DIGITAL AUDIO IN DIGITAL AUDIO IN DIGITAL AUDIO IN (OPTICAL) (OPTICAL) (OPTICAL) SERVICE SERVICE SERVICE Bottom Panel of the Soundbar POWER POWER POWER ID SET ID SET ID SET HDMI IN 1 HDMI IN 1 HDMI IN 1 (WOOFER/REAR) (WOOFER/REAR) (WOOFER/REAR) NETWORK NETWORK... -
Page 9: Connecting The Soundbar
03 CONNECTING THE SOUNDBAR Connecting Electrical Power Use the power components (1, 2, 3) to connect the Subwoofer, Surround Speaker, and Soundbar to an electrical outlet in the following order: 1 Connect the power cord to the Subwoofer. 2 Connect the power cord to the Left and Right Surround Speakers. 3 Connect the power cord to the Soundbar. -
Page 10: Connecting The Soundbar To The Subwoofer And Surround Speakers
Connect again. (Refer to the instructions on Connection failed manual connection on page 7.) Red and See the contact information for the Blinking Malfunction blue Samsung Service Centre in this manual. ENG - 6... - Page 11 • The ID SET message appears on the display of the Soundbar for a moment, and then it disappears. • The Soundbar will automatically power on when ID SET is complete. 5 Sec "Samsung Harman Kardon" logo is on the top ID SET ENG - 7...
- Page 12 3. Check if the LINK LED is solid blue (connection complete). LINK LED - Blue is On When the connection is successfully established, the blue indicators on the rear of the subwoofer and surround speakers turn on without blinking. NOTES •...
-
Page 13: Connecting To A Tv
• When the Soundbar is connected to selected Samsung TVs, the Soundbar can be controlled using the TV’s remote control. – This feature is available on 2017 and later Samsung Smart TVs that support Bluetooth when the Soundbar is connected to the TV using an optical cable. - Page 14 • If “TV ARC” does not appear in the display window of the Soundbar main unit, confirm that the HDMI cable (not supplied) is connected to the correct port. • Use the volume buttons on the TV’s remote control to change the volume on the Soundbar. NOTES •...
-
Page 15: Method 2. Connecting Wirelessly
4. You can now hear TV sound from the Soundbar. If the device fails to connect • If a previously connected Soundbar (e.g. “[AV] Samsung Soundbar Nxxx”) appears in the list, delete • Then repeat steps 1 through 3. ENG - 11... - Page 16 Disconnecting the Soundbar from the TV Press the (Source) button on the top panel or on the remote control and switch to any mode but “BT”. • Disconnecting takes time because the TV must receive a response from the Soundbar. (The time required may differ, depending on the TV model.) •...
-
Page 17: Connecting Via Wi-Fi
Connecting via Wi-Fi Pre-connection Checklist 1. Confirm that your Samsung Smart TV was released after 2013. This function is compatible only with Samsung Smart TVs released after 2013. 2. Make sure your Wireless router (Wi-Fi) is ready and working. 3. Make sure that the TV is connected to the Wireless router (your Wi-Fi network). - Page 18 Soundbar, use the TV menu to connect the TV to the network again. For TVs released in 2018 Home ( ) Settings ( ) Sound Sound Output [AV] Samsung Soundbar Nxxx (Wi-Fi) For TVs released in 2017 Home ( ) Settings ( ) ...
-
Page 19: Connecting An External Device
05 CONNECTING AN EXTERNAL DEVICE Connect to an external device via a wired or wireless network to play the external device’s sound through the Soundbar. Connecting using an HDMI Cable (Dolby Atmos® supported) • What is Dolby Atmos®? Atmos technology enhances existing 7.1 channel surround sound systems by adding an overhead speaker. -
Page 20: Connecting Using An Hdmi Cable
• Open the audio output options on the settings menu of your BD player or other device and make sure that “No Encoding” is selected for Bitstream. For example, on a Samsung BD Player, go to Home Menu → Sound → Digital Output and then select Bitstream (unprocessed). -
Page 21: Connecting Using An Optical Cable
Connecting using an Optical Cable Top of the Soundbar BD / DVD player / Set-top box / Game console D.IN DIGITAL AUDIO IN OPTICAL OUT Optical Cable (OPTICAL) (not supplied) Bottom of the Soundbar 1. Connect DIGITAL AUDIO IN (OPTICAL) on the main unit to the OPTICAL OUT jack of the Source Device using a digital optical cable (not supplied). -
Page 22: Connecting A Mobile Device
3. Play music files located on the device connected via Bluetooth through the Soundbar. If the device fails to connect • If a previously connected Soundbar (e.g. “[AV] Samsung Soundbar Nxxx”) appears in the list, delete • Then repeat steps 1 and 2. - Page 23 • You cannot connect the Soundbar to a Bluetooth device that supports only the HF (Hands Free) function. • Once you have paired the Soundbar to a Bluetooth device, selecting “[AV] Samsung Soundbar Nxxx” from the device’s scanned devices list will automatically change the Soundbar to “BT” mode.
- Page 24 Disconnecting the Bluetooth device from a Soundbar You can disconnect a Bluetooth device from the Soundbar. For instructions, see the Bluetooth device’s user manual. • The Soundbar will be disconnected. • When the Soundbar is disconnected from the Bluetooth device, the Soundbar will display “BT DISCONNECTED”...
-
Page 25: Connecting Via Wi-Fi (Wireless Network)
Connecting via Wi-Fi (Wireless Network) • Connect a single Soundbar to Wi-Fi to access a variety of music streaming services and Internet radio. Connect multiple Soundbars to Wi-Fi to use grouped playback or the stereo sound mode. • To connect a Soundbar to a mobile device via a wireless network (Wi-Fi), the SmartThings app is required. - Page 26 3. Launch the app, and then follow the instructions on the screen to register (add) your Soundbar in the app. • The automatic pop-up (the third illustration below) may not be available on some mobile devices. If this is the case, select and complete “Add device” from the app menu . Your Soundbar is now added to the app.
-
Page 27: Connecting An Amazon Product
07 CONNECTING AN AMAZON PRODUCT • This feature may not be available in some countries. • This service is provided by Amazon and can be terminated at any time. Samsung does not assume responsibility for service availability. Connect and use with an Amazon product (Amazon Echo) Use an Amazon Echo product to control your Soundbar and enjoy music services provided by Amazon Echo. - Page 28 2. In the Alexa app, search “Samsung Wireless Audio” in Skills, and then select “ENABLE”. • Skip this step if you have Skills set up already. Amazon Alexa app Select Skills Search Enable 3. In the Alexa app, tap “Smart Home → Devices → Discover” to complete the connection.
-
Page 29: Use Voice Commands To Control The Soundbar
Use voice commands to control the Soundbar • The Amazon Echo service you can use with your Soundbar is limited to music. Other services provided by Amazon Echo, such as news and weather, can only be accessed through your Amazon Echo product. Trigger + Command + Speaker name Use the Speaker name you changed in the SmartThings app. -
Page 30: Using The Remote Control
08 USING THE REMOTE CONTROL How to Use the Remote Control Turns the Soundbar on and off. Power Press to select a source connected to the Soundbar. PAIR • BT PAIRING mode Source To turn on “BT PAIRING” mode, press and hold the (Source) button for more than 5 seconds. - Page 31 Anynet+ and Auto Power Link are turned on and turned off by the Right and Left buttons respectively. – Anynet+ : If the Soundbar is connected to a Samsung TV through an HDMI cable, you can control your Soundbar with a Samsung TV remote control.
- Page 32 You can select from TREBLE, BASS, SYNC, CENTER LEVEL, SIDE LEVEL, FRONT TOP LEVEL, REAR LEVEL, REAR TOP LEVEL or VIRTUAL ON/OFF. • To control the volume of the treble or bass sound, select TREBLE or BASS in Sound Sound Control Settings, and then adjust the volume between -6~+6 by using the Up/Down buttons.
-
Page 33: Adjusting The Soundbar Volume With A Tv Remote Control
For more information, see the TV’s user manual. The default mode for this function is control by a Samsung TV remote. If your TV is not – Each time you push the WOOFER button a Samsung TV, follow the directions below to up and hold it for 5 seconds, the mode change the settings of this function. -
Page 34: Using The Hidden Buttons (Buttons With More Than One Function)
Using the Hidden Buttons (Buttons with more than one function) Hidden Button Reference page Remote Control Button Function WOOFER TV remote control On/Off (Standby) page 29 BT Pairing page 26 (Source) Auto Power Down On/Off page 27 (AUX mode) p (Play / Pause) BT Ready page 19 Left... -
Page 35: Installing The Wall Mount
09 INSTALLING THE Wallmount Components WALL MOUNT Installation Precautions Wall Mount Guide • Install on a vertical wall only. • Do not install in a place with high temperature or humidity. (M4 x L10) • Verify that the wall is strong enough to Holder-Screw Screw support the product’s weight. - Page 36 2. Align the Wall Mount Guide’s Centre Line 5. Push a screw (not supplied) through each with the centre of your TV (if you are Holder-Screw, and then screw each screw mounting the Soundbar below your TV), and firmly into a support screw hole. then fix the Wall Mount Guide to the wall using tape.
-
Page 37: Installing The Surround Speakers On A Wall (Sold Separately)
Brackets and the speakers on the wall. • For more information, please refer to the Wall Mount’s manual. • Samsung Electronics is not liable for any damage to the product due to the product being installed inappropriately. • Take care not to install the speakers sideways or upside down. -
Page 38: Software Update
10 SOFTWARE UPDATE When the Soundbar is connected to the Internet, software updates automatically occur even when the Soundbar is turned off. • To use the Auto Update function, the Soundbar must be connected to the Internet. The Wi-Fi connection to the Soundbar will be terminated if the Soundbar’s power cord is disconnected or the power is cut off. -
Page 39: Troubleshooting
11 TROUBLESHOOTING Before seeking assistance, check the following. The red LED on the subwoofer blinks and The unit will not turn on. the subwoofer is not producing sound. Is the power cord plugged into the outlet? This issue can occur if the subwoofer is not ;... -
Page 40: Licence
12 LICENCE ; Connected via Wi-Fi 1. Check if the TV is a compatible model. • Only Samsung Smart TVs released after 2013 are supported. 2. Check if the TV is connected to Wi-Fi. • If the TV is not connected to Wi-Fi, use... -
Page 41: Open Source Licence Notice
13 OPEN SOURCE LICENCE NOTICE For further information on Open Sources used in this product, please visit the website: http://opensource.samsung.com 14 IMPORTANT NOTES ABOUT SERVICE • Figures and illustrations in this User Manual are provided for reference only and may differ from actual product appearance. -
Page 42: Specifications And Guide
15 SPECIFICATIONS AND GUIDE Specifications Model Name HW-N950 Weight 8.8 kg Dimensions (W x H x D) 1226.0 x 83.0 x 136.0 mm Operating Temperature Range +5°C to +35°C Operating Humidity Range 10 % ~ 75 % AMPLIFIER Rated Output power 18W x 10 + 10W x 3, 4ohm LPCM 2ch, Dolby Audio™... - Page 43 NOTES • Samsung Electronics Co., Ltd reserves the right to change the specifications without notice. • Weight and dimensions are approximate. Precaution : The Soundbar will restart automatically if you turn on/turn off Wi-Fi. Overall Standby Power Consumption (W) 4.5W...
- Page 44 Business users should contact their supplier and check the terms and conditions of the purchase contract. This product and its electronic accessories should not be mixed with other commercial wastes for disposal. For information on Samsung’s environmental commitments and product specific regulatory obligations e.g. REACH, WEEE, Batteries, visit: http://www.samsung.com/uk/aboutsamsung/samsungelectronics/corporatecitizenship/data_corner.html...
- Page 45 EIRE UNITED KINGDOM EIRE his Samsung product is warranted for the period of twelve (12) months from the origi- s Samsung product is warranted for the period of twelve (12) months from the origi- beyond the control of Samsung. beyond the control of Samsung.
- Page 46 © 2018 Samsung Electronics Co., Ltd. All rights reserved. Contact SAMSUNG WORLD WIDE If you have any questions or comments relating to Samsung products, please contact the SAMSUNG customer care Centre. Country Contact Centre Web Site Country Contact Centre ...