Table of Contents
Advertisement
Quick Links
Advertisement
Table of Contents

Related Manuals for go-e Controller

Summary of Contents for go-e Controller
- Page 1 Installation and operating manual go-e Controller V 1.0...
-
Page 2: Table Of Contents
Important symbols Page 4 Charge smarter Page 4 Note before installation and commissioning Page 5 Safety regulations/notes Page 6 Product overview Page 8 Scope of delivery Page 9 Technical data Page 10 Installation Page 12 Installation (additional sensors) Page 16 Commissioning/operation on the device Page 18 Commissioning/operation via app... -
Page 3: Important Symbols
The activity may only be carried out by a qualified electrician. The go-e Controller can be controlled directly via a display. The go-e app makes it even more convenient to use. Read the instructions and the data sheet care- The Controller can be integrated into a network fully and keep them for future reference. - Page 4 Chargers. mers should point in the direction of the cur- The go-e Controller must be mounted by a qua- in the waste paper collection so that it can be Failure to comply with the safety regulations lified electrician in accordance with the comple- rent consumer.
-
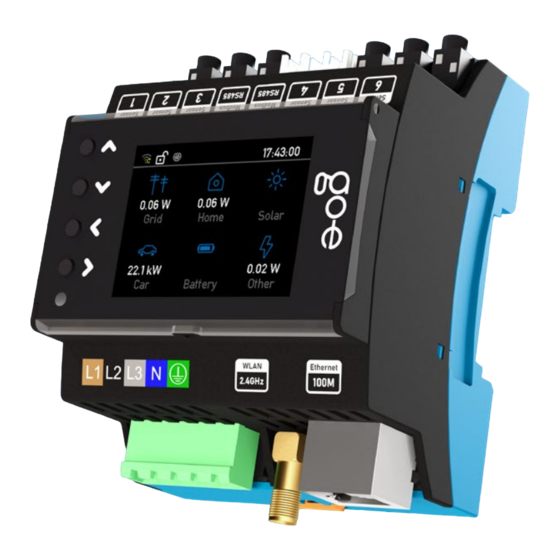
Page 5: Product Overview
Sensors 4-6 4 keys for menu navigation Ethernet 100 Mbit/s Brightness sensor Type plate Display switches off automatically with serial number of the Controller Back Connecting clamp 6 Current transformers foldable, 100 A with jack plug L1 L2 L3 N... -
Page 6: Technical Data
Charger in local network with mDNS number and password input Sinus Peak not via the go-e app / go-e cloud / max. measurable current 100 A 144 A Log data recording and export display. Own data acquisition via... - Page 7 0 6 5 1 0 After completing the installation, please note that the firmware of the go-e Charger and go-e Controller should always be up to date to ensure that they function as inten- ded at all times. The firmware of both pro- ducts can be updated, for example, via the go-e app in the menu item "Internet".
-
Page 8: Installation
" grid", the arrow should point from the power grid towards the house.* Please note: A maximum of one current Mount the go-e Controller on the DIN rail. We transformer may be attached to one pha- Optional recommend mounting according to the illus- tration. -
Page 9: Installation (Additional Sensors)
PV System Battery Sauna the Controller has to be in the same net- work as the Chargers. The Controller can be connected to an unlimited number of You want to measure and visualise You have an AC battery storage sys- Chargers. -
Page 10: Commissioning/Operation On The Device
Press the > button to select the menu item "De- through the menu on the display. vice". Here you can, for example, adjust the lan- guage or the display of the go-e Controller to If you are in a submenu in which a key- your wishes. - Page 11 If the power factors are the phase must be set correctly. Imagine that incorrect and, for example, only plus or minus Controller try to regulate it as much as possible the sensor measures 2 amps on your mains to zero during PV surplus charging.
- Page 12 If you simply measure a load, for example a re the categories. 3, the Controller then assumes 3 times the mea- boiler, you can assign it to a custom category, for example "Custom 1". You can rename the sured power, since we only measure one third.
- Page 13 > key. configure your Ethernet (LAN) to ensure a con- nection of the Controller to the network and to go-e Chargers. This is absolutely necessary for PV surplus charging or dynamic load balancing.
- Page 14 Advanced users can synchronise the time via an Press the > key to select the "Chargers" menu NTP server or the app. If the go-e Controller is item. Than you can theoretically connect an in- connected to the go-e Cloud via the Internet, it finite number of go-e Chargers.
- Page 15 PV surplus or with re- gard to dynamic load balancing needs to be de- fined directly for the respective Charger in the go-e app. 22. Settings / Outputs 25. Energies Press the > key to select the "Powers" menu In this submenu you can see for each category item.
- Page 16 "Firmware Update". start" in order to reboot the Controller. In this submenu, download the current firm- ware for your Controller, if a new version is available for your device. You can also do this in the app. 29.Settings / Factory Reset 32.
-
Page 17: Commissioning/Operation Via App
For experts and integrators: Press the > key to select the menu item "Modbus Slave". a) Use the "Initial setup for new go-e Control- ler" if your Controller has never been set up in In the submenu you can activate Modbus and a go-e app before. - Page 18 Con- Setup in app troller and view it on the PC. If you want to add an already set up go-e Cont- roller, select "Add an already set up go-e Cont- roller" and enter the serial number of the Con- troller.
- Page 19 Settings / Sensors / Sensors Configu- sors Configuration ration / Current Sensors As on the Controller itself, you can configure If you select one of the internals I1 to I6 (loads) the voltage and current sensors in the menu in the "Sensors" view, you will get to the data item "Settings", submenu "Sensors"...
- Page 20 Advanced users can synchronize the time via an If you tap on "Categories" in the "Settings" NTP server or the app. If the go-e Controller is menu, you will get to the sensor configuration connected to the go-e Cloud via the Internet, it view.
- Page 21 180° if you have mounted the Controller upside down due Tap the image of the Controller or its name at the upper left corner to go to the selection page to lack of space with the list of available devices.
-
Page 22: Pv Surplus Charging/Load Balancing
Controller After switching from your go-e Controller to Already installed go-e Controllers can be auto- the go-e Charger, you will be taken to its home matically integrated into the go-e app here. screen with the "Charging" view. Normally, Controllers are searched for auto- matically. - Page 23 You can also specify whether the Charger should adjust the phases with the help of the Controller depending on the power of You can also activate PV Surplus Charging in the PV system and from which power onwards Next Trip mode.
-
Page 24: Ce Declaration Of Conformity
If you want to use dynamic load balancing, tap plain about the defect. In the event of a justified notice of defect, go-e is obli¬ged to improve or replace the goods as soon as possible or to arrange this. In the (justified) case of the return of the defective product to go-e, go-e on "Settings"... - Page 25 Support go-e GmbH Satellitenstraße 1 9560 Feldkirchen AUSTRIA support@go-e.com +43 4276 6240010 www.go-e.com Online support Online support www.go-e.com...
Need help?
Do you have a question about the Controller and is the answer not in the manual?
Questions and answers