
Related Manuals for Beko WDA 961431


Summary of Contents for Beko WDA 961431
- Page 1 Washer-Dryer User Manual WDA 961431 Document Number= 2820524454_EN/ 29-11-17.(12:03)
- Page 2 Please read this manual first! Dear Customer, Thank you for preferring a Beko product. We hope that you get the best results from your product which has been manufactured with high quality and state-of-the-art technology. Therefore, please read this entire user manual and all other accompanying documents carefully before using the product and keep it as a reference for future use.
-
Page 3: Table Of Contents
TABLE OF CONTENTS 1 Important instructions for safety and environment 1.1 General safety ........................... 6 1.1.1 Electrical safety ..........................6 1.1.2 Product safety ..........................7 1.1.3 Warnings for dryer..........................8 1.2 Intended use ..........................9 1.3 Children's safety ........................9 1.4 Compliance with WEEE Directive .................... - Page 4 TABLE OF CONTENTS 4.7.7 Using gel and tablet detergent ......................26 4.7.8 Using starch............................. 26 4.7.9 Using bleaches ..........................26 4.7.10 Using limescale remover ........................ 26 4.8 Tips for efficient washing ......................27 4.9 Tips for efficient drying ....................... 28 5 Operating the product 5.1 Control panel ..........................
- Page 5 TABLE OF CONTENTS 5.12.2 Wardrobe dry ..........................43 5.12.3 Extra wardrobe dry ........................43 5.12.4 Delicate drying .......................... 43 5.12.5 Time-based drying ......................... 44 5.13 Time display ..........................44 5.14 End Time ..........................45 5.15 Starting the Programme ......................46 5.16 Loading door lock ........................
-
Page 6: Important Instructions For Safety And Environment
Important instructions for safety and environment This section contains safety instructions that will help protect from risk of personal injury or property damage. Failure to follow these instructions shall void any warranty. 1.1 General safety CAUTION • This product can be used by children at and above 8 years old and by persons whose physical, sensory or mental capabilities were not fully developed or who lack experience and knowledge provided that they are supervised or trained on the safe usage of the product and the risks... -
Page 7: Product Safety
Important instructions for safety and environment 1.1.2 Product safety DANGER • Never open the loading door or remove the filter while there is still water in the drum. Otherwise, risk of flooding and scalds from hot water will occur. CAUTION •... -
Page 8: Warnings For Dryer
Important instructions for safety and environment 1.1.3 Warnings for dryer DANGER • Do not touch the door glass with bare hands after drying. This may cause risk of burn. • To keep the laundry under a temperature at which they will not be damaged, a cooling step is carried out as the last stage. -
Page 9: Intended Use
Important instructions for safety and environment NOTE • Do not dry the unwashed laundry in the machine. • Do not use fabric softeners or antistatic products in the machine unless these are recommended by their manufacturers. • Fabric softeners and products alike should be used in accordance with the instructions of their producers. -
Page 10: Compliance With Weee Directive
Important instructions for safety and environment 1.4 Compliance with WEEE Directive • This product complies with EU WEEE Directive (2012/19/EU). This product bears a classification symbol for waste electrical and electronic equipment (WEEE). • This product has been manufactured with high quality parts and materials which can be reused and are suitable for recycling. -
Page 11: Your Washer-Dryer
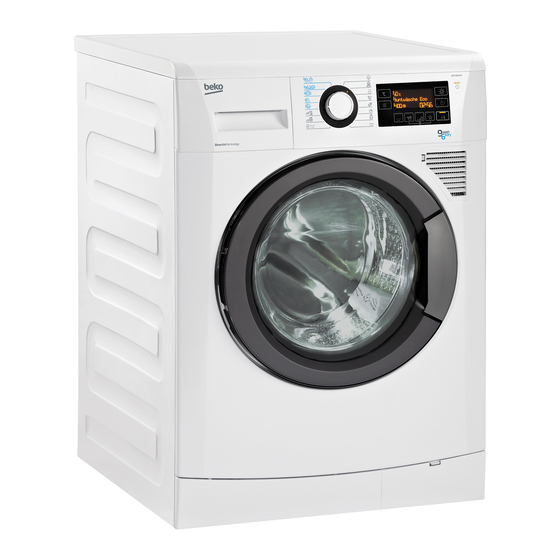
Your washer-dryer 2.1 Overview 1- Power cable 2- Top panel 3- Control panel 4- Air inlet filter 5- Draining filter lid 6- Adjustable feet 7- Loading door 8- Detergent drawer 9- Drain hose 11 / EN User‘s Manual... -
Page 12: Package Contents
Your washer-dryer 2.2 Package Contents 1- Power cable 2- Drain hose 3- Air discharge section 4- Transportation safety bolts* 5- Mains water inlet hose (One of the following filter types is used for the mains hose connection.) a- Electronic water shut-off b- Mechanical water shut-off c- Standard 6- Liquid detergent container**... -
Page 13: Technical Specifications
Complying Commission Delegated Regulation (EU) No.96/60/ EC/1996 Supplier name or trademark Beko Model name WDA 961431 Washer Dryer Energy efficiency class Washing Energy efficiency class (Washing & Drying) Energy Consumption - full load per cycle (kWh) 6.12 Washing Energy Consumption - full load per cycle (kWh) 1.03... -
Page 14: Installation
Installation Refer to the nearest Authorised Service Agent for installation of the product. To make the product ready for use, review the information in the user manual and take care that the electricity, tap water supply and water drainage systems are appropriate before calling the Authorized Service Agent. If they are not, call a qualified technician and plumber to have any necessary arrangements carried out. -
Page 15: Removing Packaging Reinforcement
Installation 3.2 Removing packaging reinforcement Tilt the machine backwards to remove the packaging reinforcement. Remove the packaging reinforcement by pulling the ribbon. DANGER • The product is heavy. Remove the packaging reinforcement as illustrated. • Pay attention not to squeeze your hand under the machine during this procedure. -
Page 16: Flush Usage With The Bench
Installation 3.4 Flush usage with the bench 65,5 cm 59,5 cm 84,0 cm 1,4 cm CAUTION • Your machine should never be operated without the top plate. • When the Washer-Dryer is placed under the bench, front of the machine should never be blocked by the cupboard door. -
Page 17: Connecting Water Supply
Installation 3.5 Connecting water supply NOTE • The water supply pressure required to run the product is between 1 to 10 bars (0.1 – 1 MPa). It is necessary to have 10 – 80 litres of water flowing from the fully open tap in one minute to have your machine run smoothly. -
Page 18: Connecting To The Drain
Installation 3.6 Connecting to the drain • Connect the end of the drain hose directly to the wastewater drain, sink or to the washbasin. CAUTION • Your house will be flooded if the hose comes out of its housing during water discharge. -
Page 19: Adjusting The Feet
Installation 3.7 Adjusting the feet CAUTION • In order to ensure that the product operates more silently and vibration- free, it must stand level and balanced on its feet. Balance the machine by adjusting the feet. Otherwise, the product may move from its place and cause crushing and vibration problems. -
Page 20: Electrical Connection
Installation 3.8 Electrical connection Connect the product to a grounded outlet protected by a 16 A fuse. Our company shall not be liable for any damages that will arise when the product is used without grounding in accordance with the local regulations. -
Page 21: Preparation
Preparation LAUNDRY WASH SYMBOLS Machine Wash Symbols WASH Maximum Water Temperatures Symbol(s) Drying Suitable for No Iron Do not dry- Sensitive / Do not dry Do not dry Symbols dryer clean Delicate dry with dryer DRYING... -
Page 22: Preparing Laundry For Washing
Preparation 4.2 Preparing laundry for washing • Laundry items with metal attachments such as, underwired bras, belt buckles or metal buttons will damage the machine. Remove the metal pieces or wash the clothes by putting them in a cotton laundry bag or cotton pillow case. -
Page 23: First Use
Preparation 4.4 First use Before starting to use the product, make sure that all preparations are completed in accordance with the instructions in sections "Important safety and environment instructions" and "Installation". To prepare the product for washing laundry, perform first operation in Drum Cleaning programme. If your machine is not featured with this programme, apply the method described in 6.2. -
Page 24: Loading The Laundry
Preparation 4.6 Loading the laundry 1 Open the loading door. 2 Place laundry items loosely into the machine. 3 Push the loading door to close until you hear a locking sound. Ensure that no items are caught in the door. NOTE •... -
Page 25: Detergent, Softener And Other Cleaning Agents
Preparation 4.7.2 Detergent, softener and other cleaning agents • Add detergent and softener before starting the washing programme. • Never leave the detergent drawer open while the washing programme is running! • When using a programme without prewash, do not put any detergent into the prewash compartment (compartment nr. -
Page 26: If The Product Does Not Have A Liquid Detergent Cup
Preparation 4.7.6.2 If the product does not have a liquid detergent cup • Do not use liquid detergent for the prewash in a programme with prewash. • Liquid detergent stains your clothes when used with Delayed Start function. If you are going to use the Delayed Start function, do not use liquid detergent. -
Page 27: Tips For Efficient Washing
Preparation 4.8 Tips for efficient washing Clothes Light colours Delicates/ Colours Dark colors and whites Woollens/Silks (Recommended (Recommended (Recommended (Recommended temperature range based temperature range based temperature range temperature range on soiling level: 40-90 on soiling level: cold -40 based on soiling based on soiling level: cold -40 oC) level: cold -30 oC) -
Page 28: Tips For Efficient Drying
Preparation 4.9 Tips for efficient drying Programmes Synthetics Cottons Drying Anti Allergy Wash&Dry Wash&Wear Drying Washes and Washes and Bed sheets, dries directly! dries directly! duvet covers, Bed sheets, Bed sheets, Lightly soiled baby clothes, duvet covers, duvet covers, and unstained t-shirts, baby clothes, baby clothes,... -
Page 29: Operating The Product
Operating the product 5.1 Control panel 1 - Programme Selection knob 2 - Temperature Adjustment button 3 - Display 4 - Drying Selection knob 5 - On / Off button 6 - End Time Adjustment button 7 - Start / Pause button 8 - Auxiliary Function buttons 9 - Spin Speed Adjustment button 29 / EN... -
Page 30: Display Symbols
Operating the product 5.2 Display symbols 180’ extra 1880 88:88 a. - Temperature indicator ( b - Information line c - Drying Levels indicator d - Drying Time indicator (minutes) e - Time indicator (hours:minutes) f - End Time indicator g - Lock indicator h - Spin Speed indicator (rpm) 5.3 Preparing the machine... -
Page 31: Washing Programmes
Operating the product 5.5 Washing Programmes Depending on the type of fabric, use the following main Programmes. NOTE • You can make drying directly after washing by pressing the Drying button after selecting the Programme you want to wash your laundry with. The step in which the drying will be made will be displayed on the information line every time you press the button, and the related symbol lights. -
Page 32: Pflegeleicht (Synthetics)
Operating the product • Pflegeleicht (Synthetics) extra SYNTHETICS 1200 88:88 Use this Programme to wash your synthetic clothes (shirts, blouses, synthetic/cotton blends, etc.). It washes with a gentle action and has a shorter washing cycle compared to the Cotton Programme. For curtains and tulle, use the Synthetic 40˚C Programme with prewash and anti-creasing functions selected. -
Page 33: Buntwäsche Eco (Cotton Economic)
Operating the product • Buntwäsche Eco (Cotton Economic) COTTON ECO 1000 88:88 Use this Programme to wash your normally soiled, durable cotton and linen laundry. Although it washes longer than all other Programmes, it provides high energy and water savings. Actual water temperature may be different from the stated wash temperature. -
Page 34: Express
Operating the product • Express DAILY XPRESS 1200 88:88 Use this Programme to wash your lightly soiled and unstained cotton laundry in a short time. NOTE • You can dry your laundry immediately after washing them (Automatic or scheduled drying can be made after washing). For this, you have to also select the drying function before starting the washing Programme. -
Page 35: Hemden (Shirts)
Operating the product • Hemden (Shirts) Step.1 SHIRTS 1000 88:88 Use this Programme to wash the cotton, synthetic and synthetic blended shirts together. NOTE • You can dry your laundry immediately after washing them (Automatic or scheduled drying can be made after washing). For this, you have to also select the drying function before starting the washing Programme. -
Page 36: Temperature Selection
Operating the product 5.6 Temperature selection 110’ 1200 88:88 Whenever a new Programme is selected, the recommended temperature for the Programme appears on the temperature indicator. It is possible that the recommended temperature value is not the maximum temperature that can be selected for the current Programme. Press the Temperature Adjustment button to change the temperature. -
Page 37: Selecting The Spin Speed
Operating the product 5.7 Selecting the spin speed 50’ 1000 88:88 Whenever a new Programme is selected, the recommended spin speed for the selected Programme is displayed on the Spin Speed indicator. NOTE • It is possible that the recommended spin speed value is not the maximum spin speed that can be selected for the current Programme. -
Page 38: Drying Programmes
Operating the product 5.8 Drying Programmes CAUTION • Fluff coming from the clothes during drying is automatically washed away by the machine. For this reason, the water tap of the machine should also be open during drying Programmes. NOTE • Spinning step already exists in the drying Programmes. Your machine carries out this process to shorten the drying time. -
Page 39: Wash+Wear
Operating the product For the 6Kg Wash & 6kg Dry cycle, we advise you to load the laundry to the appliance up to the level specified in the figure above (level arrow is shown with the door of the product open) for ideal drying conditions. -
Page 40: Programme And Consumption Table
Operating the product 5.10 Programme and consumption table (For washing) Auxiliary functions Selectable temperature Programme (°C) range °C Koch-/Buntwäsche 2.55 1600 • • • • • 90-Cold Koch-/Buntwäsche 2.05 1600 • • • • • 90-Cold Koch-/Buntwäsche 1.35 1600 • •... - Page 41 Operating the product Programme and consumption table (For drying) Auxiliary Drying level functions Selectable Programme (°C) temperature range °C Koch-/Buntwäsche Trocknen 2.7 1600 * • • • • Pflegeleicht Trocknen 2.45 • • • • BabyProtect+ Wash&Dry 2.9 1600 * • • • •...
-
Page 42: Auxiliary Function Selection
Operating the product 5.11 Auxiliary function selection 180’ extra 1880 88:88 Select the required auxiliary functions before starting the Programme. Whenever a Programme is selected, frames of the auxiliary function symbols that can be selected together with it illuminate. And when you select an auxiliary function, the interior area of the auxiliary function symbol also starts to illuminate and the name of the selected function appears on display for "3"... -
Page 43: Bügelleicht (Anti-Creasing)
Operating the product NOTE • When you select this function, load your machine with half of the maximum laundry specified in the Programme table. • Extra Spülen (Rinse Plus) This function enables the machine to make another rinsing in addition to the one already made after the main wash. -
Page 44: Time-Based Drying
Operating the product 5.12.5 Time-based drying You may select either of 10´, 20´, 30´, 60´, 90´, 120´ and 150´ drying times to reach the final drying degree at low temperature. NOTE • For drying laundry up to two pieces, you should select timed drying in the cotton or synthetic drying Programmes to be selected according to the type of the laundry. -
Page 45: End Time
Operating the product 5.14 End Time FINISH TIME ON FINISH TIME SETTING 1200 88:88 1200 88:88 With the End Time function, the startup of the Programme may be delayed up to 24 hours. After pressing End Time button, the displayed time is the Programme's estimated end time. If the End Time is adjusted, End Time indicator is illuminated. -
Page 46: Starting The Programme
Operating the product 5.15 Starting the Programme PROGRAM STARTS 1200 88:88 1. Press Start / Pause button to start the Programme. 2. The Start / Pause button which was flashing starts to illuminate steadily now, indicating that the Programme has started. “Programme started” appears on the display for "3" seconds. 3. -
Page 47: Changing The Programme Selection After Programme Has Started
Operating the product 5.17.3 Changing the Programme selection after Programme has started: The Programme change is not allowed when the current Programme is running. If you turn the Programme Selection knob while the Programme is running, "Pause to make changes" appears on the display. -
Page 48: To Deactivate The Child Lock
Operating the product 5.18.2 To deactivate the Child Lock: CHILD LOCK DISABLED 1200 88:88 Press and hold 2 and 4 Auxiliary Function buttons for 3 seconds. After the countdown as "Child Lock 3-2-1" on the display is over, "Child Lock Disabled" appears on the display. 5.19 Cancelling the Programme CANCEL 1200... -
Page 49: Changing The Language Selection
Operating the product 5.21.1 Changing the language selection S E T T I N G S 1. Press Temperature Adjustment button and Spin Speed Adjustment button simultaneously for 3 seconds to enter the Settings menu. “Select Language” menu is the first menu to appear on the display. E N G L I S H LANGUAGE SELECTION 2. -
Page 50: Turning On And Off The Audio Warning
Operating the product 5.21.3 Turning on and off the Audio Warning VOLUME SETTING ON S E T T I N G S 1. Press Temperature Adjustment button and Spin Speed Adjustment button simultaneously for 3 seconds to enter the Settings menu. Using the Drying button, open "Volume Setting" menu. 2. -
Page 51: Your Machine Is Equipped With A "Standby Mode
Operating the product 3. Press Start / Pause button to start your Favourite Programme. 5.23 Your machine is equipped with a "Standby Mode" In case of not starting any Programme or waiting without making any other operation when the machine is turned on by On/Off button and while it is in selection step or if no other operation is performed approximately 2 minutes after the Programme you selected has come to an end, your machine will automatically switch to energy saving mode. -
Page 52: Maintenance And Cleaning
Maintenance and cleaning Service life of the product extends and frequently faced problems decrease if cleaned at regular intervals. 6.1 Cleaning the detergent drawer Clean the detergent drawer at regular intervals (every 4-5 washing cycles) as shown below in order to prevent accumulation of powder detergent in time. -
Page 53: Cleaning The Loading Door And The Drum
Maintenance and cleaning 6.2 Cleaning the loading door and the drum For products with drum cleaning programme, please see Operating the product - Programmes. For products without drum cleaning, follow the below steps to clean the drum: Select Additional Water or Extra Rinse auxiliary functions. Use a Cottons programme without pre- wash. -
Page 54: Cleaning The Air Suction Filter
Maintenance and cleaning CAUTION • Never use sponge or scrub materials. These will damage the painted and plastic surfaces. 6.3 Cleaning the air suction filter To clean the air suction filter: Unplug the machine. 1 Attach the rear of the tool supplied in the Operation Manual bag to the place on the filter cap illustrated in Fig. -
Page 55: Cleaning The Body And Control Panel
Maintenance and cleaning 6.4 Cleaning the body and control panel Wipe the body of the machine with soapy water or non-corrosive mild gel detergents as necessary, and dry with a soft cloth. Use only a soft and damp cloth to clean the control panel. 6.5 Cleaning the water intake filters There is a filter at the end of each water intake valve at the rear of the machine and also at the end of each water intake hose where they are connected to the tap. -
Page 56: In Order To Clean The Dirty Filter And Discharge The Water
Maintenance and cleaning CAUTION • Foreign substances left in the pump filter may damage the machine or may cause noise problem. • If the product is not in use, turn the tap off, detach the supply hose and drain the water inside the machine against any freezing possibility in the region of installation. -
Page 57: Troubleshooting
Troubleshooting Program does not start after closing the door. • Start / Pause / Cancel button was not pressed. >>> *Press the Start / Pause / Cancel button. • It may be difficult to close the loading door in case of excessive loading. >>> *Reduce the amount of laundry and make sure that the loading door is closed properly. - Page 58 Troubleshooting Loading door cannot be opened. • Door lock is activated because of the water level in the machine. >>> Drain the water by running the Pump or Spin programme. • Machine is heating up the water or it is at the spinning cycle. >>> Wait until the programme completes.
- Page 59 Troubleshooting • Insufficient amount of detergent was used over a long period of time. >>> Use the recommended amount of detergent appropriate for water hardness and the laundry. • Washing was made at low temperatures for a long time over a long period of time. >>> Select the proper temperature for the laundry to be washed.
- Page 60 Troubleshooting • Insufficient amount of detergent is used. >>> Using insufficient amount of detergent for the water hardness can cause the laundry to become stiff in time. Use appropriate amount of detergent according to the water hardness. • Detergent is put in the wrong compartment. >>> If detergent is put in the prewash compartment although prewash cycle is not selected, machine can take this detergent during rinsing or softener step.
- Page 61 Troubleshooting Drying process lasts long. • Pores of the Air inlet filter in front of the machine might be clogged. >>> Wash the Air inlet filter with lukewarm water. • The Air inlet filter in front of the machine might be blocked. >>> Remove everything, if any, that is blocking ventilation in front of the Air inlet filter.
- Page 64 www.beko.com...