Advertisement
Quick Links
Advertisement

Related Manuals for Whirlpool AKW 301 IX


Summary of Contents for Whirlpool AKW 301 IX
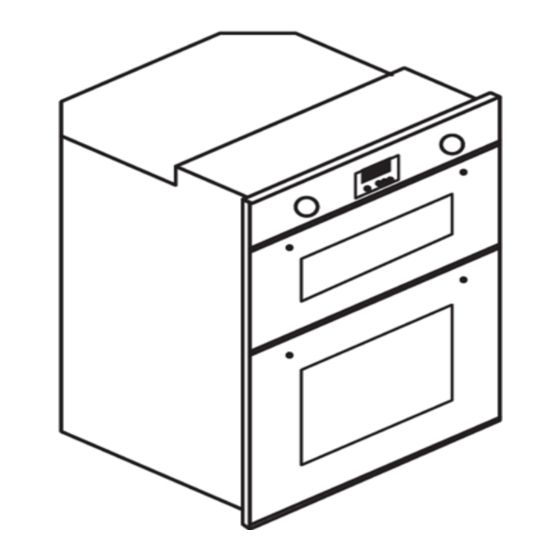
- Page 1 AKW 301 IX - AKW 401 IX - AKW 501 IX AKW 601 IX Users Guide & Installation Handbook...
- Page 2 CONTENTS & INTRODUCTION CONTENTS • SAFETY • USING THE PRODUCT • CLEANING • INSTALLATION INSTRUCTIONS • TECHNICAL DATA • CUSTOMER CARE INTRODUCTION Thank you for buying this British- built appliance from us. This guide book is designed to help you through each step of owning your new cooker, from installation to use.
- Page 3 SAFETY be made by children without BEFORE USING THE PRODUCT supervision. Make sure that you have removed all packaging and wrapping. Some of the WARNING: During use the items inside this appliance may have appliance becomes hot. Care additional wrapping. should be taken to avoid It is advised that you turn the ovens and/ or grill on for a short while.
- Page 4 SAFETY take pans off the heat, or switch off your hob. Don’t let yourself be distracted while cooking. If you do have a fire in the kitchen, don’t take any risks - get everyone out of your home and call the Fire Brigade If a pan catches fire: • Do not move it - it is likely to be extremely hot.
- Page 5 USING THE GRILL - ELECTRIC Caution: Accessible parts may be Using aluminium foil hot when the grill is used - young Using aluminium foil to cover the grill pan, children should be kept away. or putting items wrapped in foil under the grill creates a fire hazard.
- Page 6 USING THE TOP OVEN - ELECTRIC When you are cooking keep children Preheat the oven until the indicator light away from the vicinity of the oven. switches off for the first time, this will take up to 15 minutes depending on the Caution: The top element gets temperature selected.
- Page 7 USING THE TOP OVEN - ELECTRIC TOP OVEN BAKING GUIDE Cooking temperatures Cooking times The temperature settings and time given in the Baking Guides are based on dishes These times are based on cooking in a made with block margarine. If soft tub preheated oven.
- Page 8 USING THE MAIN OVEN - ELECTRIC Accessible parts may be Manual Operation (fanned only) hot when the oven is used. The programmer must be set to manual operation before the main oven can be Young children should be used. If A (Auto) is on the programmer kept away.
- Page 9 USING THE MAIN OVEN - ELECTRIC Slow cooking ( Setting or 100°C) This makes it ideal for batch baking - eg; when planning a party as all the items will • Make sure that frozen foods are thor- be cooked within the same length of time. oughly thawed before cooking.
- Page 10 USING THE MAIN OVEN - ELECTRIC There is no need to interchange dishes Be safe onto different shelves part way through Do not defrost stuffed poultry using this cooking, as with a conventional oven. method. To help the air circulate freely Do not defrost larger joints of meat and Position the shelves evenly within the poultry over 2kg/4lb using this method.
- Page 11 USING THE MAIN OVEN - ELECTRIC Note: This is a fanned oven, therefore conventional temperatures need to be some adjustment will have to be converted to fanned oven temperatures. made to conventional cooking tempera- For example, an item which would nor- tures.
- Page 12 USING THE MAIN OVEN - ELECTRIC Traditional fruit cakes Roast turkey It should be remembered that ovens can Roasting turkey involves cooking two vary over time, therefore cooking times different types of meat - the delicate light can vary, making it difficult to be precise breast meat, which must not be allowed when baking fruit cakes.
- Page 13 USING THE MAIN OVEN - ELECTRIC Roasting guide Notes: The times given in the roasting guide • When cooking stuffed meat or poultry are only approximate, because the size calculate the cooking time from the and age of the bird will influence cooking total weight of the meat plus the times as will the shape of a joint and the stuffing.
- Page 14 USING THE CLOCK/PROGRAMMER-ELEC( if fitted THE ALTERNATIVE PROGRAMMERS There are two types of programmer cov- ered in this section - push button & touch control. Both programmers have the same symbol variants & functions but may vary in their method of operation. Symbols on the LED display.
- Page 15 USING THE CLOCK/PROGRAMMER-ELEC( if fitted Setting the minute minder you are asked to enter in an end time, or when you would like the oven to switch itself off. To set the time of day • To set the Minute Minder, press the Function button once.
- Page 16 USING THE CLOCK/PROGRAMMER-ELEC( if fitted Semi-automatic cooking For the instructions on how to use both of these functions, please see the following There are two types of semi automatic page. cooking available on this appliance. Fully automatic cooking The oven must be switched on, and in use to use either of these functions success- This function incorporates both a duration fully.
- Page 17 USING THE CLOCK/PROGRAMMER-ELEC( if fitted SEMI-AUTOMATIC COOKING The duration method • Press the Function button twice,(1) which will skip past the Minute Minder. • The LED display will flash the word ‘dur’, (2) and the ‘A’ will flash on the left hand side of the display. • Use the Up and Down buttons to set the length of time you want to cook for.(3) This must be done within 5 seconds or the time of day will show...
- Page 18 USING THE CLOCK/PROGRAMMER-ELEC( if fitted FULLY AUTOMATIC COOKING (EX- AMPLE) This programming method is best suited for when a delayed start time is required. Unlike the semi automatic methods this requires both the duration and the end time to be entered. The timer will work out the start time and begin cooking.
- Page 19 USING THE MINUTE MINDER (IF FITTED) Setting the minute minder • Press and release the plus button to change the display from clock to min- ute minder - the bell symbol will light. • Use the plus and minus buttons to set the length of time before the alarm tone will sound.
- Page 20 CLEANING General Enamel surfaces & parts • If larger splashes of fat do not readily • It is important to clean the product disappear, you can use a mild cream regularly as a build up of fat can af- cleaner to remove them. fect its performance or damage it and may invalidate your guarantee.
- Page 21 CLEANING REMOVING OVEN PARTS FOR Shelf Runners CLEANING • Shelf runners can be removed to Inner Door Glass (glass doors only) enable you to clean them thoroughly. Make sure they are cool to touch and • Some models have a removable, in- then grasp the runners and slide out ner door glass.
- Page 22 INSTALLATION STEP 1 : PREPARE INSTALLATION Do not lift the appliance by the door handle. Whilst every care is taken to elimi- nate burrs and raw edges from this product,please take care when handling - we recommend the use of protective gloves during installation.
- Page 23 INSTALLATION - 70CM Before you start Please note that all dimensions and sizes given are nominal, some variation is to be Please read the instructions carefully - expected. planning your installation will save you time and effort. If this appliance is to be installed near to a corner where the adjacent cabinets run Look at the different ways the appliance at right angles forward of the appliance,...
- Page 24 INSTALLATION - 70CM METHOD 1: WITHOUT HOUSING 2. Make sure they are the right way up as UNIT(BETWEEN 2 BASE UNITS) shown. Before installing the appliance, check the 3. Take one of the side trims, hold it internal dimensions as shown. against the side of the base unit, and mark off 687mm from the top edge of the The space for the appliance must be clear...
- Page 25 INSTALLATION - 70CM METHOD 2: HOUSING UNIT WITH To fix the runners (if required) INTERNAL HEIGHT LESS THAN 1. Take the side trims, hold it against the 710MM side of the base unit, and use it to mark Note: You will not need the 2 side trims off the 687mm from the top edge of the (687mm long) or the appliance runners side unit, to the top edge for the runner.
- Page 26 INSTALLATION - 70CM Method 3: Housing unit with internal fixing to adjacent cabinets, floor or height 710mm or more worktop. Note: You will not need the 4 runners and 2 trims that are packed with the oven for this installation. 1. When installed in a typical 600mm deep built in housing unit, the false back should be removed from the housing unit to provide the necessary depth for...
- Page 27 INSTALLATION - 90CM STEP 1 : PREPARE INSTALLATION the back edge of the support shelf and the rear wall of approximately 80mm. Do not lift the appliance by the door If no gap occurs between the back edge handle. of the shelf and the wall behind the unit, Remove the fixing screws from the you must create a gap of at least 30mm polythene bag on the top of the appliance,...
- Page 28 INSTALLATION - 90CM Dimensions The appliance is designed to fit into a standard 600mm wide housing unit, with minimum internal dimensions as shown. Note: All sizes are nominal, some variation is to be expected.
- Page 29 INSTALLATION STEP 2 & 3 CONNECT TO THE ELEC- TRICITY SUPPLY We recommend that the appliance is connected by a competent person who is a member of a “Competent Person Scheme” & who will comply with the I.E.E. & local regulations. Important: Ensure that you route all mains electrical cables well clear of any adjacent heat source, such as an oven or...
- Page 30 INSTALLATION STEP 4: SECURE APPLIANCE INTO 70/90 fixing positions HOUSING UNIT Note : The unit housing the appliance must be appropriately fixed. Ensure that the appliance is centrally located. Take care not to damage the appliance or cabinetry. 70cm only Method 1 : Care must be taken to ensure the appliance runners are sufficiently engaged over the top of the runners on the base units.
- Page 31 INSTALLATION Anti-stain trim (if fitted) The anti-stain trim is factory fitted to the edges of the appliance front frame. This trim provides the cabinetry with extra protection from any escape of heat. - When Installing the product, ensure the anti-stain trim is correctly located on the edges of the front frame, before positioning and securing the appliance to the cabinet.
- Page 32 TECHNICAL DATA ELECTRIC PRODUCTS Electrical supply/load 220 - 240V ~ 50Hz 70cm / 90cm: load = 5.5kW Countries of destination GB - Great Britain, IE - Ireland Warning: This appliance must be earthed. Databadge is located at the bottom of the front frame, behind the door.
- Page 33 CUSTOMER CARE TROUBLESHOOTING GUIDE duce condensation when the oven is cooling down with food inside. What parts of the appliance can be washed in a dishwasher? Should the cooling fan continue to run once the appliance has been • Any enamelled parts such as the grill- switched off? pan can be cleaned in a dishwasher, as can oven shelves and shelf guides.
- Page 34 CUSTOMER CARE AFTER-SALES SERVICE Before calling the After-Sales Service: 1. See if you can solve the problem your- self with the help of the suggestions given in the “Troubleshooting guide”. 2. Switch the appliance off and back on again it to see if the fault persist. If after above checks the fault still occurs, get in touch with the nearest After-Sales Service.
- Page 35 CUSTOMER CARE CUSTOMER CARE CHANGING LIGHT BULBS This operation must be carried out Bulbs can be purchased from hardware by a qualified technician. stores (always take the old bulb with you). Please remember that bulbs are not cov- Warning: There is a risk of ered by your warranty.
- Page 36 Please keep this handbook for future reference, or for anyone else who may use the appliance. Whirlpool is a registered trademark of Whirlpool USA. Copyright Whirlpool Europe S.r.l All rights reserved 083249004 25/10/2016 5019 610 66104...