Table of Contents
Advertisement
Advertisement
Table of Contents

Related Manuals for Acumen XR10 4K

Summary of Contents for Acumen XR10 4K
- Page 1 XR10 4K USER GUIDE...
-
Page 2: Table Of Contents
Content XR10 4K Introduction Settings Notice & Warning Home Page Installation Notice Playback General Installation Guide Product Guide Troubleshooting Product Accessories Micro SD Card Disclaimer Specification Video Recording Features Wi-Fi and App Connectivity... -
Page 3: Xr10 4K Introduction
XR10 4K Thank you for choosing Acumen. XR10 4K is designed to protect the driver and passengers by providing a better view of the rear traffic with a digital rearview mirror display. Acumen XR10 4K features industry-leading tech- nology, such as ultra HD recording, seamless loop-recording, wide-angle camera, real-time playback, parking mode, WDR enchanced camera, impact sensor. -
Page 4: Notice & Warning
Notice As the specifications may be changed due to the technical upgrades, Acumen reserves the right to change, modify, add or remove portions of these terms at any time without prior notice. Please note that this product is for personal use only and may not be used in violation of national or international copyright/privacy laws. -
Page 5: Installation Notice
Installation Notice This product should be installed onto the windshield in order to obtain the best view of the front traffic. H owever, some states prohibit drivers from mounting devices on the windshield or on certain area of the windshield. I t is owner’... -
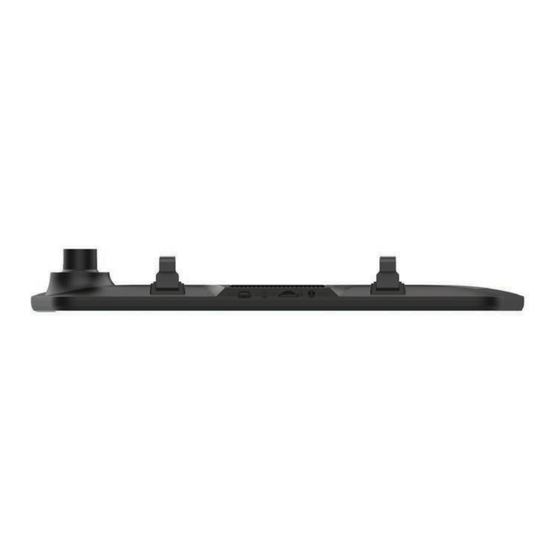
Page 6: Product Guide
Product Guide 1 2 3 4 1 2 3 4... - Page 7 Product Guide USB Port Plug the power cable into the mini USB port. Back Up camera Plug the rear camera cable into this port. Micro SD memory card slot make sure it is Memory card slot inserted in the correct direction. GPS Port Plug the GPS antenna into this port.
-
Page 8: Product Accessories
Product Accessories The following items are product accessories. I f there are any missing or damaged items, please contact seller immediately. H ardwire K it R ear C amera with 3 2ft cable G PS Antenna M emory C ard U S B C ard R eader U ser’... -
Page 9: Micro Sd Card
Please follow the direction on the device to insert the memory card. Push in the micro SD card until it clicks and locks in place. XR10 4K is a high bit-rate dash cam and supports up to 128GB micro SD cards but requires class 10 or above micro SD card. -
Page 10: Video Recording
Or use the REC button on The XR10 4K to manually stop recording, use Power button to turn off the device. Note: Choose either 1min, 2min, 3min video length in Settings ( set to 1min by default ), XR10 4K automatically deletes the oldest file when the memory card is full. -
Page 11: Features
Features Impact Sensor With the Impact Sensor turned on, the dash cam will automatically lock and protect footages after collisions. The locked footages will not be overwritten by loop recording. You may change the sensitivity level in the settings to off, low, medium or high. - Page 12 Visualize the location of your vehicle on the map during video playback and overlay speed on videos. Parking Assist Connect the red cable of the backup camera power cable to the positive line of the vehicle’s reverse light’s power cable to automatically activate the parking lines when reversing.
-
Page 13: Wi-Fi And App Connectivity
S D card. ON XR10 4K Please enter the X R 1 0 4 K settings menu and turn on W i- F i option. O nce the option is turned on, you will find out the network name and password will be displayed on the W i- F i settings. - Page 14 ON Y OU R M OB I L E D E V I C E 1 . Download the AcumenC am application on your smartphone. 2. N avigate to the W i- F i setting on your smartphone. 3 . S elect the corresponding network name and enter the password. The initial password is “...
- Page 15 A C U M E NC A M A P P U se the S e l e c t Toggle between C a m e r a S D Tap the icon option to select multiple c a r d and phone storage. to enter S ettings footages to download or F ootages will be available for...
-
Page 16: Settings
Settings Resolution: 3840 x 2160 (4K) Max. Footage Duration: Choose the duration of each footage, between 1min , 2min or 3min. Time-Lapse Recording FPS: Select the frame rate of time-lapse footages. Time-Lapse Recording Duration: Select the duration of time-lapse footages. Impact Sensitivity: Set impact sensitivity off, high, medium or low. - Page 17 Settings Frequency: If you are located in the US please set it to 60Hz. Display Icons: Show or remove the status icons from recording interface. Rear Camera Mirror: Reflect the rear camera image horizontally. Rear Camera Rotation: This allows for the rear camera to be mounted upside down. Language: Select language.
-
Page 18: Home Page
Home page 05/15/2021 SAT 7 8 9 10 11 12 13... - Page 19 1. Recording: The red dot indicates the camera is currently recording. 2. Resolution: Indicate the current recording resolution. 3. Brightness: Swipe left and right on the screen to adjust the display brightness. 4. Time and Date 5. Speed and Direction Info 6.
- Page 20 11. Brightness: Tap this icon to bring up brightness adjustment. Swiping left and right on the mirror display will adjust display brightness. 12. Playback: Tap this icon to enter playback menu. 13. Settings: Tap the settings icon to enter settings menu.
-
Page 21: Playback
Playback Normal Event Photo 20210515_091505_0.MP4 20210515_091505_1 .MP4 20210515_091605_0.MP4 20210515_091605_1 .MP4 20210515_091705_0.MP4... - Page 22 1. Video playback area: Selected video will be played here. 2. Select Camera View: Toggle between footages of Normal (Front and Rear) , Event and Photos. 3. Return: Return to main recording screen. 4. Lock/Unlock: Lock/unlock footages, locked footages will not get overwritten. 5.
-
Page 23: General Installation Guide
General Installation Guide The installation method will differ between different vehicle models and makes. Please watch our installation video on our website at www.acumen-camera.com under Footer Menu click Installation Guide. 1. Please start by locating where the backup camera will be installed. We recommend installing a backup camera above your license plate. - Page 24 General Installation Guide 4. Once the cables have been routed, test the power by plugging in USB power to the device. 5. Once the reverse light’s power cable is found, use a multimeter to determine the positive and negative wires of the reverse light power cable. 6.
-
Page 25: Troubleshooting
Troubleshooting 1. Digital mirror dashcam does not power on: Check if the cables are plugged in correctly; remove the memory card and reboot. Use the reset button if needed. 2. Dashcam randomly stops recording or no longer overwrites old files: Due to the large amount of video data, it is possible memory card cannot support the large amount of data. -
Page 26: Disclaimer
4. Major collision during recording may cause the memory card to loosen or disconnect which may lead to data loss. Acumen is not liable for any type of loss resulting from the use of this device. -
Page 27: Specification
Specification Model Name Acumen XR10 4K Recording Resolution 3840 x 2160 (4K) Max Footage Format .MP4 Memory Micro SD card up to 128GB C10 above Power Supply Included The Hardwire kit 5V 3A Battery Super Capacitor Display 12in IPS Touch screen (1920*440) - Page 28 FCC Warning Statement Changes or modifications not expressly approved by the party responsible for compliance could void the user’s authority to operate the equipment. This equipment has been tested and found to comply with the limits for a Class B digital device, pursuant to Part 15 of the FCC Rules. These limits are designed to provide reasonable protection against harmful interference in a residential installation.
Need help?
Do you have a question about the XR10 4K and is the answer not in the manual?
Questions and answers