Table of Contents
Advertisement
Owner's Manual
Original Instructions
Recreational Vehicle Air Conditioner
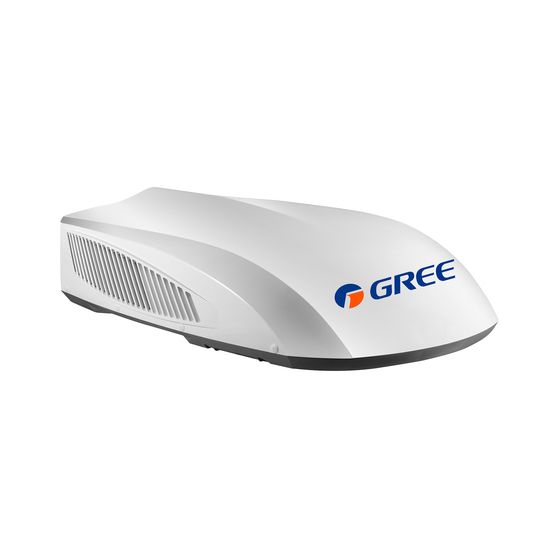
2-GREE-15KBO – Outdoor unit in black
2-GREE-15KWO – Outdoor unit in white
2-3-PLENUM-1 – Interior unit with controls
Thank you for choosing our product.
Please read this Owner's Manual carefully before operation and
retain it for future reference.
If you have lost the Owner's Manual, please contact
premierproducts.net or for technical support email
hvacsupport@premierproducts.net.
Advertisement
Table of Contents

Summary of Contents for Gree ECO-COOL 2-GREE-15KBO
- Page 1 Owner's Manual Original Instructions Recreational Vehicle Air Conditioner 2-GREE-15KBO – Outdoor unit in black 2-GREE-15KWO – Outdoor unit in white 2-3-PLENUM-1 – Interior unit with controls Thank you for choosing our product. Please read this Owner’s Manual carefully before operation and retain it for future reference.
-
Page 2: Table Of Contents
CONTENTS A FEW WORDS ABOUT YOUR NEW AIR CONDITIONING UNIT .......... 1 ELECTRICAL DATA ........................1 ELECTRIC DIAGRAM ........................2 PACKING LIST ..........................3 PARTS NAME ........................... 4 OPERATION OF WIRELESS REMOTE CONTROLLER ............5 CONTROL PANEL ..........................9 INSTALLATION INSTRUCTION ....................10 STEP 1-STICK SPONGE (SEALING STRIP) AND SPONGE ON THE OUTDOOR UNIT .......... - Page 3 Appliance filled with flammable gas R32. Before install and use the appliance, read the owner’s manual first. Before install the appliance, read the installation manual first. Before repair the appliance, read the service manual first. THE REFRIGERANT To realize the function of the unit, a special refrigerant circulates in the system. The used refrigerant is the fluoride R32, which is specially cleaned.
- Page 4 INSTALLATION PRECAUTION WARNING: Observe all governing codes and ordinances. Do not use damaged or non-standard power cord. Be caution during installation and maintenance. Prohibit incorrect operation to prevent electric shock, casualty and other accidents. Working temperature range Suggested working temperature range: 23 ~ 115℉(-5~46℃). (heating:23~75℉ (-5~24℃...
- Page 5 INSTALLATION PRECAUTION Requirements For electric Connection Safety precaution 1. Must follow the electric safety regulations when installing the unit. 2. According to the local safety regulations, use qualified power supply circuit. For appliances with type Y attachment, the instructions shall contain the substance of the following.
-
Page 6: A Few Words About Your New Air Conditioning Unit
A FEW WORDS ABOUT YOUR NEW AIR CONDITIONING UNIT Thank you for choosing the Recreational Vehicle Air Conditioner. This manual will supply you with all the information for installation, operation and maintenance. Take a few minutes to discover how to get the most in cooling comfort and economic operation from your new air conditioner. -
Page 7: Electric Diagram
ELECTRIC DIAGRAM Ceiling Assembly ROOM ROOM SENSOR DISPLAY BOARD DISP1 CONNECTOR SWING-L SWING-R WIFI YEGN MODULE TERMINAL WIFI BLOCK STEPPING STEPPING BK(BN) OPTIONAL MOTOR MOTOR WH(BU) GN(YEGN) POWER Roof Top Air Conditioner - 2 -... -
Page 8: Packing List
PACKING LIST Packing List of Indoor Unit L ED battery owner’s manual Sponge(air duct) remote controller (AAA 1.5V) Sunk screw Double-sided Screw cap gummed paper Remote controller holder (remote controller holder) use in use in indoor outdoor (bottom) (upper) Bolt sub-assy Tapping screw M8X135 Plate of air vent... -
Page 9: Parts Name
PARTS NAME Indoor Unit Filter sub-assy (Display content or position may be different from above graphics, please refer to actual products) remote controller Outdoor Unit Outer case Chassis Air-in grille Drainage outlet NOTICE: Actual product may be different from above graphics, please refer to actual products. -
Page 10: Operation Of Wireless Remote Controller
OPERATION OF WIRELESS REMOTE CONTROLLER Buttons on remote controller Introduction for icons on display screen Set fan speed Send signal Auto mode Cool mode Dry mode Fan mode Heat mode Sleep mode Light X-FAN function Indoor ambient temp. Clock Set temperature WiFi function Set time TIMER ON / TIMER OFF... - Page 11 Introduction for buttons on NOTE remote controller ● For preventing cold air, after starting up heat mode, indoor unit will delay 1~5 minutes to blow air (Actual NOTE delay time depends on indoor ambient temperature). ● This is a general use remote controller . It could be ●...
- Page 12 TIMER ON function Light function TIMER ON function can set the time for timer on. When selecting light function, light icon " " Under TIMER ON function status," " icon disap- flashes for 5s; press "SET" button within 5s to pears and the word "ON"...
- Page 13 Replacement of batteries in TURBO button remote controller Under COOL or HEAT mode, press this button to turn to quick COOL or quick HEAT mode. " " battery icon is displayed on remote controller. If start this signal sender function, the unit will run at super-high fan speed reinstall to cool or heat quickly so that the ambient tem- remove...
-
Page 14: Control Panel
CONTROL PANEL Note: If the remote controller is missing, operate on the control panel. TURBO HIGH Not available for cooling AUTO only model ON/OFF button unit.the temperature setting range is from 61~86℉( 16-30℃) .Press Operation starts when pressing this button, and TIMER button,then press +/- to stops when pressing this button again. -
Page 15: Installation Instruction
INSTALLATION BEFORE INSTALLATION Test run the unit with proper power supply. Refer to the operation instruction section in the Owner’s Manual Operation & Installation. Make sure all the controls operate correctly then disconnect the power supply of the unit. WARNING Moving parts may cause personal injury. - Page 16 Once the location for your air conditioner has been determined. A reinforced and framed roof. Hole must be cut (if there is no hole, please refer to CASE B) or you may use existing vent holes (See CASE A). CASE A. If a roof vent is already present in the desired mounting location for the air conditioner the following steps must be performed: Remove all screws which secure the roof vent to the vehicle.
- Page 17 CAUTION The roof top air conditioner must be mounted on a level plane from front to rear and side to side when the vehicle is parked on a level plane. Figure 2 shows maximum allowable degrees that the unit can be mounted above or below level. If the roof of the vehicle is sloped (not level) such that the roof top air conditioner cannot be mounted within the maximum allowable degree specifications, an exterior leveling shim will need to be added to make the unit level.
- Page 18 NOTE AIR CONDITIONER DIMENSIONS (ROOF OF UNIT) 42.4” 14-1/4” 4.2” (24”) (14-1/4”)x(14-1/4”) 28.3” OPENING Figure 4 - 13 -...
-
Page 19: Step3-Mounting Outdoorunit
STEP 3-MOUNTING OUTDOOR UNIT Open the package and take out the outdoor unit. 1) When taking out the outdoor unit after unpacking, do not lift the air outlet grille at the back of outer case (see Figure 4-1). Figure 4-1 Fix the outdoor unit at the roof of vehicle and then drill holes. -
Page 20: Step 4-Installing The Ceiling Assembly
STEP 4-INSTALLING THE CEILING ASSEMBLY Make sure that you have properly matched the roof top air conditioner and interior ceiling assembly. Caution before tightening bolts: The applicable thickness of vehicle roof ranges from 1.2”~3.1”. Before tightening bolts, screw in the four bolts manually and prohibit screwing forcibly. When screwing bolts, you can use automatic tool. -
Page 21: Step5-Electrical Wiring
STEP 5-ELECTRICAL WIRING ROUTING 115V AC WIRING WARNING Make sure that all power supply to the unit is disconnected before performing any work on the unit to avoid the possibility of shock or injury and/or damage to the equipment. When the interior ceiling assembly frame is properly secured to the roof top air conditioner, the following electrical connections must be performed. -
Page 22: Step 6-Completing The Installation
STEP 6-COMPLETING THE INSTALLATION To complete the installation and system checkout requirements, the following steps must be performed. Check the thermostat position. Make sure the thermostat is routed through the holding guide and is not touching any metal surface. Make sure the guide louver and the filters are properly positioned in the ceiling grille. Secure the ceiling grille to the ceiling assembly frame with 4 screws. -
Page 23: Troubleshooting Guide
TROUBLESHOOTING GUIDE If you have problems with your recreational vehicle air conditioner, check this guide before contacting your service representative. TROUBLE POSSIBLE CAUSE SOLUTION The unit can The unit may not be connected to the Check the power supply of the vehicle and make sure it is not start power supply correctly. -
Page 24: Error Code
ERROR CODE When air conditioner status is abnormal, temperature indicator on indoor unit will ation of error code. Above indicator diagram is only for reference. Please refer to Indoor actual product for the actual display indicator and position. Error code Error code Troubleshooting It can be eliminated after restarting the unit. -
Page 25: Normal Maintenance Procedures
NORMAL MAINTENANCE PROCEDURES ACTIVETY FREQUENCY Remove the cover and wash the condenser coil Twice a year. Clean the filter When the air conditioner FILTER CHECK (More frequent cleaning may be necessary light on. depending on the air quality) HOW TO REMOVE THE AIR FILTER Remove the air filters by pulling them as illustrated below. -
Page 26: Specialist's Manual
SPECIALIST’S MANUAL Aptitude requirement for maintenance Presence of fire extinguisher man(repairs should be done only be If any hot work is to be conducted on the refrige- specialists). ration equipment or any associated parts, approp- riate fire extinguishing equipment shall be available a. - Page 27 are constructed of materials which are inherently Replace components only with parts specified by resistant to being corroded or are suitably protec- the manufacturer. Other parts may result in the ign- ition of refrigerant in the atmosphere from a leak. ted against being so corroded.
- Page 28 followed, since flammability is a consideration. The the technician is completely familiar with the equipm- following procedure shall be adhered to: ent and all its detail. It is recommended good practice a) safely remove refrigerant following local and that all refrigerants are recovered safely. Prior to the national regulations;...
- Page 29 that only appropriate refrigerant recovery cylinders are employed. Ensure that the correct number of cylinders for holding the total system charge are available. All cylinders to be used are designated for the recovered refrigerant and labelled for that refrigerant (i.e. special cylinders for the recovery of refrigerant).
- Page 30 Premier Products 2904 Airport Parkway Elkhart, IN 46514 855-881-1800 Website: premierproducts.net Email: hvacsupport@premierproducts.net...
Need help?
Do you have a question about the ECO-COOL 2-GREE-15KBO and is the answer not in the manual?
Questions and answers
What size generator to run air condition with heat punp
I don’t understand how the auto mode works and how you get it to maintain a certain temp (so that it adjusts automatically by turning on and off instead of just running all of the time). The “auto” mode makes no sense to me thus far. Could you explain what its purpose is (and when:why you would use it)? Thank you.
In auto mode, the Gree ECO-COOL 2-GREE-15KBO air conditioner operates automatically based on the ambient temperature. The set temperature cannot be adjusted or displayed in this mode. The unit detects the room temperature and adjusts its operation automatically to maintain comfort without manual input.
This answer is automatically generated