
Related Manuals for Samsung UE55HU7200


Summary of Contents for Samsung UE55HU7200
- Page 2 Table of Contents Product Introduction (Overview, TV Line Up, Specifications) Key Features & Operation Front/Rear View (Component locations & Connections) Repair Preparations Layout Wiring Diagram Circuit Description (& testing) Factory Mode Troubleshooting (additional) 10. Parts & Disassembly (& Reassembly)
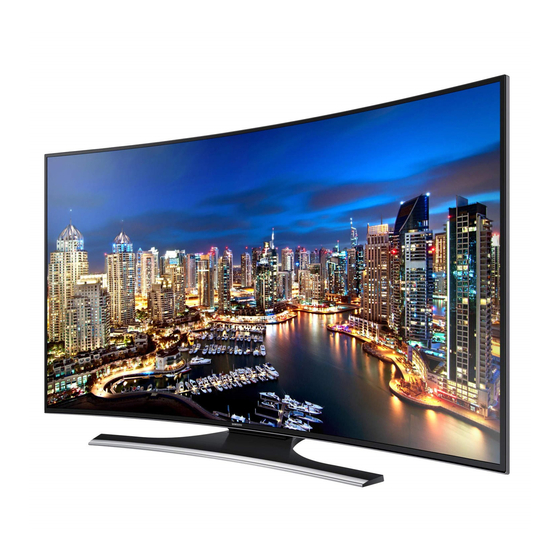
- Page 4 HU6900 Overview - 2160p Ultra HD - 4 HDMI, MHL support - 60Hz UHD Micro Dimming - Smart HUB, SI2.0 (Full browser, Media play) - Built-in WiFi/ BT - Voice Recognition - Smart Touch Control - Front Color : Black - Design : Timeless (Stand : Timeless) - Panel : 55”/65”...
- Page 5 TV Line Up UN**HU7200 Front Color Black 55” 65” Without Dimensions 1451.2*839.9*134.6 1233.0*714.6*111.4 Stand W x D x H (mm) With 1233.0*760.4*294.9 1451.2*881.0*298.5 Stand 55” 65” Without 18.9 Weight Stand (kg) With 21.8 31.7 Stand 3840*2160,HU7200 SDC 3840*2160,HU7200 SDC Panel Type RGB Vertical Stripe Internal Memory Flash 4G...
- Page 6 TV Line Up UN**HU7100 Front Color Black 55” 65” Without Dimensions 1451.2*839.9*134.6 1233.0*714.6*111.4 Stand W x D x H (mm) With 1233.0*755.5*261.7 1451.2*878.3*333.9 Stand 55” 65” Without 19.0 28.1 Weight Stand (kg) With 19.9 29.2 Stand 3840*2160,HU7200 SDC 3840*2160,HU7200 SDC Panel Type RGB Vertical Stripe Internal Memory...
- Page 7 Specifications UN55/65HU7200 ARM Cortex A9 Qual(1.2GHz, Quad Core) 2GB(4 X 512MB DDP), 800MHz Flash 4GB (eMMC 4.41) 4 Port, 1.4 ver, MHL 1.2 HDMI SIL9679 (Loopback circuit) Voice & Hand Gesture Recognition O(Voice Recognition (Server)) Camera Ready Eco Sensor/IR/LED Built-in bottom Frame Sound output 10W (Left), 10W (Right) Screen Mirroring...
- Page 8 Dimension •HU7200 55” Front View Dimension...
- Page 9 Dimension •HU7200 55” Rear View Dimension...
- Page 10 Dimension •HU7200 65” Front View Dimension...
- Page 11 Dimension •HU7200 65” Rear View Dimension...
- Page 12 Dimension •HU7100 55” Front View Dimension...
- Page 13 Dimension •HU7100 55” Rear View Dimension...
- Page 14 Dimension •HU7100 65” Front View Dimension...
- Page 15 Dimension •HU7100 65” Rear View Dimension...
- Page 17 Instant On Enabling the TV to Boot Faster MENU > System > General > Instant On Set Fast Boot on to have the TV boot up faster. Cold Boot Plug on 5.3sec Instant On Remocon on 1.3sec...
- Page 18 Multi-Link Screen -This allows you to search the Web, use apps, and much more while watching TV. Using Multi Screen requires an Internet connection. -Before using Smart Hub with Multi Screen, go to the On TV Settings (Smart Hub > On TV Settings > On TVSettings) and finish configuring Smart Hub.
- Page 19 ’14Y New Smart Hub UI Smart Hub Start After Smart HUB setup...
- Page 20 ’14Y Smart HUB Features ON TV Movie & TV Shows ⚫ View the current programs on TV at a glance and ⚫ Buy or rent movies and TV shows online view Program Recommendations by Channel or by Time ⚫...
- Page 21 ’14Y Smart HUB Features Multimedia Samsung Apps ⚫ Play back photo, video, and music files ⚫ Enjoy variety of free and for pay news, sports, from an external storage device or watch weather, and gaming apps...
- Page 22 ’14Y Smart HUB Features Games NewsOn ⚫ Confirm the optimizing game apps ⚫ NewsON provides real-world news and weather ⚫ Manage games that you have downloaded information all in on place or purchased...
- Page 23 ’14Y New System UI Network Device UI Videos contents All contents browser Photo contents...
- Page 24 ’14 Voice Interaction Improved Short-cut Improved Search Channel Shortcut (Low Depth) Expansion of Searching range 【 2013 】 【 2014 】 Change channel Channel 200 YouTube Weather Channel 200 Stocks Kids Sports Fitness Radio 【 2013 】 【 2014 】 Popular website/App Shortcut Search Function in Service Korea...
- Page 25 ’14 Smart control ( Only for HU7200 )
- Page 26 ’14 Smart control ( Only for HU7200 ) Pairing Button Low Battery (under back cover) (On Screen Warning) ■ Inserting the Batteries 1. Gently pull on the battery cover’s notch with a fingernail and then remove the cover completely once it comes loose. 2.
- Page 27 IR Blaster (Only for HU7200)
- Page 28 IR Blaster (Only for HU7200)
- Page 30 Front View : Turning on and controlling the TV...
- Page 31 Rear View : Connect Devices and Power Cable...
- Page 32 Rear View : IR Blaster...
- Page 33 Rear View : Common Interface...
- Page 34 Rear View : Common Interface...
- Page 35 Option : TV Upgrade using One Connect...
- Page 37 Diassembly Repair Preparations Disconnect Power Cord. 2. Lay the TV Face Down on Protective Table with a screen cushion 3. Remove the 4 Stand Screws and remove the stand 4. Remove the Rear Panel Screws and Rear Panel Cover. 5. Reconnect Power cord. Option: Can re-install stand to test the TV in the normal upright position.
- Page 39 Inside layout of HU6900 Main Board SMPS Speaker T-CON Board wifi Speaker LVDS Cable Lead Cable Speaker Cable...
- Page 40 Block Diagram of HU6900 PCM_CONTROL PCM_CONTROL PCM_NAND_IO<0:7> eMMC NAND BUFFER PCM_ADDR <0:14> PCM_DATA DDR3 I/F DDR3 DDR3 512MB 512MB TS_Parallel #0 NT14U TS_Parallel #1 EEPROM EEPROM Scrambled Clear 24C512 24C256 - ARM Cortex SPI FLASH CH1_DATA W25Q40CLS CH2_DATA A9 Qual,1.2 GHz TS_Serial #0 Dual SC_CVBS_IN / AV2_CVBS...
- Page 42 Wiring Diagram...
- Page 44 LAYOUT : Main board CN2701 CN2700 CN201_7K2 128MB IC2300 128MB CN401 128MB IC2601 CN502 CN500_AV2 512MB CN1800_LAN IC1400 512MB CN1200 NT14U CN800 CN1201_RS Flash 512MB IC2900 GOLF-N CN2101_IRB HDMI SWITCH MICOM ROUGE CN1902 CN1901 CN1900 CN3000 OP400 CN801 CN701 CN700...
- Page 45 PIN MAP : Main board CN2701 CN2700 CN201_7K2 CN401 CN502 CN500_AV2 CN1800_LAN CN1200 CN800 CN1201_RS CN2101_IRB CN1902 CN3000 CN1901 CN1900 OP400 CN801 CN701 CN700...
- Page 46 PIN MAP : Main board...
- Page 47 PIN MAP : Main board...
- Page 48 PIN MAP : Main board...
- Page 49 PIN MAP : Main board...
- Page 50 LAYOUT & PIN MAP : SMPS 1. CNM803(to Main board) 1 PWM_DIM_1 11 B13V 2 NC 12 B13V 3 GND 13 B13V 2. CNL802(to BLU) 4 GND 14 B13V 5 UD 15 B13V 6 BLU_On/Off 16 B13V 7 GND 17 GND CNL802 CNM803 8 Vamp...
- Page 51 PIN MAP : SMPS 1. CNM803(to Main board) 1 PWM_DIM_1 11 B13V 2 NC 12 B13V 3 GND 13 B13V 4 GND 14 B13V 5 UD 15 B13V 6 BLU_On/Off 16 B13V CNM803 7 GND 17 GND 8 Vamp 18 GND 9 Vamp 19 GND 10 Vamp...
- Page 52 LAYOUT & PIN MAP : T-CON BOARD T-CON Board :One LVDS Cables from Main Board CON5 13V DC Fuse CON2 CON3 CON4 CON1 T-CON TEST Test for 13VDC at both sides of the Fuse on the TCON Board. If no 13VDC on either side of the fuse, check feed from the LVDS Cables &...
- Page 53 LAYOUT & PIN MAP : T-CON Board...
- Page 54 LAYOUT & PIN MAP : T-CON Board...
- Page 55 LAYOUT & PIN MAP : T-CON Board 5. CON2 FB_33_4 US7O_N CPV2 CPV3 CPV4 AVDD_17V US11O_P AVDD_17V US11O_N VON_O_28V AVDD_17V US8O_P US8O_N VOFF_-7.6V HAVDD_8.5V V_RD_R P US12O_P FB_V_RD_R P US12O_N FB_V_RD_R P VCC_1.8V US9O_P VCS3 VCC_1.8V US9O_N VCS4 PORTNUM VCC_3.3V SFC2 SFC2 SDA_AMC2...
- Page 57 Test Patterns • Color Calibration Adjust spec. 1. Source : HDMI 2. Setting Mode : 1280 * 720 @ 60Hz 3. Pattern : Pattern #24 (Chess Pattern)
- Page 58 Service Mode (Power OFF->info->menu->mute->Power ON when TV is in ‘stand-by mode’)
- Page 59 Simple Flow Chart of Malfunction...
- Page 60 Case 1 : No Power º The LEDs on The front panel do not work when connecting The power cord. Symptom º The SMPS relay does not work when connecting The power cord. º The units appears to be dead. The IP relay or the LEDs on the front panel does not work when connecting the power cord if the cables are improperly connected or the Main Board or SMPS is not functioning.
- Page 61 Case 1 : No Power...
- Page 62 Case 2 : No Video (HDMI 1~4 – Digital Signal) Symptom º Audio is normal but no picture is displayed on the screen. º Check the HDMI source. Major º Check the HDMI switch. Checkpoint º This may happen when the LVDS cable connecting the Main Board and the Panel is disconnected.
- Page 63 Case 2 : No Video (HDMI 1~4 – Digital Signal) CN700 : HDMI3 CN701 : HDMI2 CN801 : HDMI1 CN800 : HDMI4 Caution Make sure to disconnect the power before working on the IP board.
- Page 64 Case 3 : No Video (Tuner_CVBS) Symptom º Audio is normal but no picture is displayed on the screen. º Check the Tuner CVBS source. Major º Check the Tuner. Checkpoint º This may happen when the LVDS cable connecting the Main Board and the Panel is disconnected.
- Page 65 Case 3 : No Video (Tuner_CVBS) CVBS_OUT_TP : IC1400 CVBS OUT Tuner_CVBS_OUT : L903 Caution Make sure to disconnect the power before working on the IP board.
- Page 66 Case 4 : No Video (Tuner_DTV) Symptom º Audio is normal but no picture is displayed on the screen. º Check the DTV source. Major º Check the Tuner. Checkpoint º This may happen when the LVDS cable connecting the Main Board and the Panel is disconnected.
- Page 67 Case 4 : No Video (Tuner_DTV) Pin #4 : B3.3V Pin #1 : A3.3V Caution Make sure to disconnect the power before working on the IP board.
- Page 68 Case 5 : No Video (Component) Symptom º Audio is normal but no picture is displayed on the screen. º Check the Component source Major º This may happen when the LVDS cable connecting the Main Board Checkpoint and the Panel is disconnected. Follow the flow chart to check a main board In detail on the next page...
- Page 69 Case 5 : No Video (Component) R1019, C1011 : COMP2_Y_CVBS Caution Make sure to disconnect the power before working on the IP board.
- Page 70 Case 6 : No Sound (Speaker/Monitor_out/Optical) Symptom º Video is normal but there is no sound. º When the speaker connectors are disconnected or damaged. Major º When the sound processing part of the Main Board is not functioning. Checkpoint º...
- Page 71 Case 6 : No Sound (Speaker/Monitor_out/Optical) R520 (Bottom side ) COMP2_AV2_SR_IN Pin #20 : LRclk Pin #15 : Bclk Pin #23,#24 : OP400 I2C_SDA/SCL OPTICAL JACK CN2101_IRB : IRB Blaster CN401 Speaker jack Caution Make sure to disconnect the power before working on the IP board.
- Page 73 Micom SW Version T-NT14UDEUC-621.8 Sub Micom SW Version T-NT14UDEUS-0230 BT Version NUDVBEUH-1.102 E-Manual Version Camera Version Blaster Version TESTING EU_UK,6900,NONE Verify SW Versions Verify Wired MAC Verify Wireless MAC Enter Factory Mode Verify CO, NFO, etc. UE40HU6900 Status are “O” (OK) Factory Remote Wired MAC (Status) Power TV ON...
- Page 74 UHU6900 6900 S_T2CS2_G Setting Option Bytes Enter Factory Mode with Service Remote (required to change all settings) and select Option screen. Check Option Byte Table settings located on GSPN (Fast Tracks or Tips) for latest exact model informatio n. (Do not use the Service Manual) Select each item needed to change (Type, Local Set, SW Model, BOM Model,...
- Page 75 ENTER: Factory mode -> SVC -> Info SVC Info SVC Info (Special Notes) Serial Number is Missing when Main Board is replaced. Main Micom SW Version Panel Hours Currently Paired Items Pass/Fail : Should Pass Increases count with each detected failure.
- Page 76 ENTER: Factory mode -> SVC -> Info -> ER Count ENTER: Factory mode -> SVC -> Self Test for HW) -> Voltage TESTING Check important and expanded Error Count Status Screen. Verify each item listed. Check important Voltage Status...
- Page 77 ENTER: Factory mode -> SVC -> Self Test(for HW) -> Voltage TESTING Verify A5V (Standby Voltage) is OK. Verify B5V & B12V (Switched Voltages) are OK. Check OK status of Audio Amp Voltages (B13V – 18V). Verify Inverter ON/OFF is OK. Verify A3.3V (Jog Shuttle) is OK Verify Panel B+ (13V) (T-CON Supply) is OK.
- Page 78 Press Return (Menu) Remove ALL HDMI connections Select EDID Write ALL & Enter Factory Mode → Control → EDID (Press Enter) Select EDID On/Off (Press Enter) Press Right Arrow Key to activate Screen changes Wait Success Press Menu-Confirm EDID WRITE HDMI Success Press Right Arrow Key to Turn EDID Off...
- Page 80 •HU7200 55”/65”...
- Page 81 •HU7200 55”/65” Torque : 7~8Kgf.cm.
- Page 82 •HU7100 55”/65”...
- Page 83 •HU7100 55”/65” Torque : 7~8Kgf.cm.