Advertisement
Electric Pressure Washer
CAUTION:
Read And Understand Operator's Manual. Save These
Instructions For Future Reference.
96050_IM_MF3N12300.indd 1
96050_IM_MF3N12300.indd 1
MF3N12300
0 0
2 3
S I
X P
M A
261-1672
OPERATOR'S MANUAL
To Reduce The Risk Of Injury, User Must
1 .5
P M
X G
M A
2020/12/10 上午10:47
2020/12/10 上午10:47
Advertisement
Table of Contents

Related Manuals for MasterForce MF3N12300


Summary of Contents for MasterForce MF3N12300
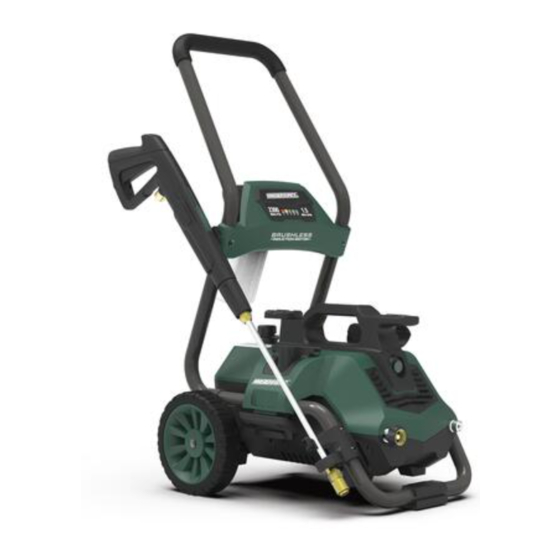
- Page 1 Electric Pressure Washer MF3N12300 1 .5 261-1672 OPERATOR’S MANUAL CAUTION: To Reduce The Risk Of Injury, User Must Read And Understand Operator's Manual. Save These Instructions For Future Reference. 96050_IM_MF3N12300.indd 1 96050_IM_MF3N12300.indd 1 2020/12/10 上午10:47 2020/12/10 上午10:47...
-
Page 2: Table Of Contents
Replacement Parts List ......................21 Limited Warranty ......................... 22 PRODUCT SPECIFICATIONS SPECIFICATIONS Max PSI Cold Max GPM Frequency Weight Model (lbs/sq. in.) (Gal/per min) Water Volts (Hz) Amps (lbs.) MF3N12300 2300 43.4 ✔ Page 1 96050_IM_MF3N12300.indd 1 96050_IM_MF3N12300.indd 1 2020/12/10 上午10:47 2020/12/10 上午10:47... -
Page 3: Package Contents
PACKAGE CONTENTS PW909383SS Soap – Black 0° – Red 15° – Yellow 25° – Green DESCRIPTION QUANTITY DESCRIPTION QUANTITY PART PART Hose Holder Spray Gun Trigger Lock Handle Spray Gun Holster Rotary Nozzle High Pressure Hose O-Ring Replacement Kit High Pressure Foam Cannon Quick Connect Nozzles Nozzle Cleaning Wire Pressure Washer Unit... -
Page 4: Safety Information
SAFETY INSTRUCTIONS Please read and understand this entire brick, use suitable hardware. manual before attempting to assemble and 6. Make sure no water or natural gas lines operate the product. are present where the mount is to be installed. Cutting or drilling into water or This manual contains information that relates natural gas lines could cause personal to PROTECTING PERSONAL SAFETY and... - Page 5 SAFETY INSTRUCTIONS 20. Watch your balance and footing while the high pressure involved, it cannot be using your pressure washer. Surfaces repaired if cut or damaged. become slippery when wet and are extra 34. Only use detergent specifically formulated slippery when using a detergent or cleaner. f o r p r e s s u r e w a s h e r s a n d f o l l o w 21.
- Page 6 SAFETY INSTRUCTIONS 45. Never use lances or other parts that are the operator. not compatible for this specific Masterforce 47. Never spray any electrical outlet with your unit. pressure washer. 46. Never use an extension power cord since 48. Inspect the power cord before using. Do...
- Page 7 PREPARATION Before beginning assembly of product, make Estimated Assembly Time: 10 minutes. sure all parts are present. Compare parts with Tools Required for Assembly (not included): package contents list and hardware contents Phillips screwdriver. list. If any part is missing or damaged, do not attempt to assemble the product.
-
Page 8: Assembly Instructions
ASSEMBLY INSTRUCTIONS Place a foot on the pad at the front of the lower Install nozzle holder (H) to lower frame (G). frame (G) and then lift the pressure washer Secure with two screws (BB). unit (F) off the frame. Set pressure washer (F) Hardware Used: to the side. - Page 9 ASSEMBLY INSTRUCTIONS Install hose holder (A) onto back side of upper Pull upward on latches that are located on handle (B). Secure with two screws (CC). sides of lower frame (G). Once upper latch is flush with the lower lip, push down until lower Hardware Used: latch clicks into place.
- Page 10 ASSEMBLY INSTRUCTIONS Attach nozzle (E) and rotary nozzle (*C) into Locking Spray Gun (before Lance installation) end of lance (*I) by pressing selected nozzle To lock trigger of spray gun (K), point gun into place. It will make a “click” sound when away from you and turn dial to lock (“3”...
- Page 11 ASSEMBLY INSTRUCTIONS Foam Cannon Installation Foam Cannon Storage Store the foam cannon (O) on the back of the The foam cannon comes with a straw which is hose holder (A). fitted into high pressure top. If you do not see the straw, look inside the foam cannon and attach it to the high pressure top.
- Page 12 ASSEMBLY INSTRUCTIONS Wall Mount Installation Insert extension lance (*I) into nozzle holder (H), and press spray gun (K) with extension After choosing an installation location, use a lance (*I) into spray gun holster (M). stud finder to locate and mark wall stud. FIG.18 Note: Wall mount screw holes are 16”...
- Page 13 ASSEMBLY INSTRUCTIONS Remove wall mount and drill four 1/8" pilot Put spray gun (K) on pressure washer unit (F). holes at marked locations. FIG.24 FIG.22 1/8" Place pressure washer unit (F) in place on wall mount (Q) until secure. Unit will click into place.
-
Page 14: Operating Instructions
ASSEMBLY INSTRUCTIONS Pull forward on latches that are located on FIG.26 each side of wall mount until latches snap in correct position, locking pressure washer unit to wall mount. Refer to pressure washer unit (F) owner’s manual for operation instructions for the pressure washer. - Page 15 OPERATING INSTRUCTIONS • Always test a small area to avoid chance of • When removing the detergent tank, squeeze damaging the surface. the clamp and remove the small hose from detergent tank. Pull the detergent tank straight out. To replace tank, push straight in and then reattach hose with clamp.
- Page 16 OPERATING INSTRUCTIONS Adjusting Soap Levels on Foam Removing Pressure Washer Unit from Cannon Wall Mount for Handheld Operation • Unlock latches by pulling downward on the Twist knob to adjust the level of soap as latches. and then lift the pressure washer indicated on the top of the Foam Cannon unit off the wall mount.
- Page 17 OPERATING INSTRUCTIONS How to Avoid Damaging Surfaces Operation Tips • Note: Test the GFCI before each use: • Damage to surfaces being cleaned occurs 1. Plug GFCI into power outlet. Indicator because the impact force of the water should turn green to show that cord has pressure exceeds the durability of the power.
-
Page 18: Care And Maintenance
CARE AND MAINTENANCE Cleaning Nozzles Detergents • Use detergents designed for pressure • A clogged or par tially clogged nozzle washers. Hardware stores or home centers can cause significant reduction of water also have pressure washer detergents for pressure coming out of the nozzle and/or different cleaning projects. - Page 19 CARE AND MAINTENANCE Storage • When your pressure washer session has been completed, turn off the power switch. Unplug the power cord from the outlet. Turn off the water supply. Pull the trigger on the spray gun 2-3 seconds to drain out the excess water and to release any remaining water pressure.
- Page 20 PUMP SAVER Pump Saver is a product that protects and 3) Turn the power on. prolongs the life of the pump. This will keep the internal parts of the pump lubricated and 4) Squeeze bottle to help it into the pump. protected from freezing while being stored in ALL climates.
-
Page 21: Troubleshooting
TROUBLESHOOTING If you have any questions regarding the product, please call customer service at 1-866-235-5112 PROBLEM CORRECTIVE ACTION Unit will not turn 1. Make sure the pressure washer is OFF. Plug in the electrical cord to a grounded 120 volt outlet (no electrical extension cord should be used). If the electrical cord will not plug into your outlet, your electrical outlet is not properly grounded and should not be used. -
Page 22: Replacement Parts List
REPLACEMENT PARTS LIST For replacement parts, call our customer service department at 1-866-235-5112, 8 a.m. - 5:00 p.m., CST, Monday - Friday or order online at www.arblueclean.com PW909383SS Soap – Black 0° – Red 15° – Yellow 25° – Green DESCRIPTION DESCRIPTION PART... -
Page 23: Limited Warranty
The Warranty of this product is coverd by A.R.North America. This product has a 3 (three) years limited warranty. Please read the following carefully to understand what each warranty entails: This product is under warranty to the original retail consumer against defects in material and workmanship for a period of 1(one) year.This warranty includs the spray gun,the high pressure hose and all accessories from the date of purchase. - Page 24 © 2021 Menard, Inc., Eau Claire, WI 54703 11/2020 96050_IM_MF3N12300.indd 23 96050_IM_MF3N12300.indd 23 2020/12/10 上午10:47 2020/12/10 上午10:47...
Need help?
Do you have a question about the MF3N12300 and is the answer not in the manual?
Questions and answers
Need a pump for masterforce preasure washer mfx3000 part number