Table of Contents
Advertisement
Scan for more details
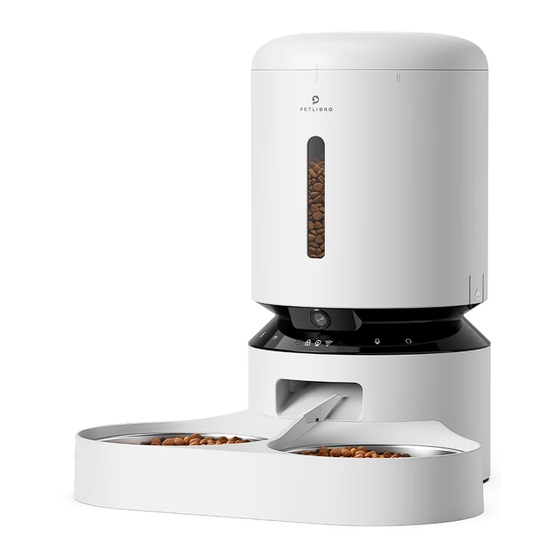
Granary Automatic Pet Feeder -
www.petlibro.com
Camera Monitoring 5L Double Food Tray
User Manual
PETLIBRO Granary Automatic Pet Feeder -
Model: PLAF203
Camera Monitoring 5L Double Food Tray
Model: PLAF203
©Libro Corp. All Rights Reserved.
Manufacturer: Shenzhen Libro Technology Co., Ltd.
Address: Building 3, Cloud Park, Shenzhen, China, 518129
CAN ICES-3 (B)/NMB-3(B)
FCC
ID:2A3DE-PLAF203
Made in China
PLAF203_V1.0
Read this manual before using the product, and keep it
for future reference.
This device complies with Part 15 of the FCC Rules. Operation is subject to the following
This product is intended for household use only.
two conditions: (1) this device may not cause harmful interference, and (2) this device
must accept any interference received, including interference that may cause undesired
operation.
Advertisement
Table of Contents

Related Manuals for Petlibro PLAF203


Summary of Contents for Petlibro PLAF203
- Page 1 Scan for more details Granary Automatic Pet Feeder - www.petlibro.com Camera Monitoring 5L Double Food Tray User Manual PETLIBRO Granary Automatic Pet Feeder - Model: PLAF203 Camera Monitoring 5L Double Food Tray Model: PLAF203 ©Libro Corp. All Rights Reserved. Manufacturer: Shenzhen Libro Technology Co., Ltd.
-
Page 2: Table Of Contents
SAFETY GUIDELINES ! WARNING • Dispose of all packaging materials properly. Some items may Contents be packed in plastic bags; these bags could cause su ocation; keep away from children and pets. • Do NOT allow small children to play with, in or around the pet feeder. -
Page 3: Warranty
This contact our brand after-sales sta via email: equipment generates, uses and can radiate radio frequency energy support@petlibro.com. and, if not installed and used in accordance with the instructions, If any questions related to orders, please contact the seller through may cause harmful interference to radio communications. -
Page 4: In The Box
IN THE BOX PRODUCT OVERVIEW 1. Lid 2. Seal Strip 3. Food Tank 4. Transparent Window 5. Tank Base 6. Anti-Clog Detector 7. Camera 8. Infrared Light 9. Control Panel 10. Display Panel 1 X Automatic Pet Feeder 1 X Double Food Bowls 11. -
Page 5: Buttons And Indicators Overview
BUTTONS AND INDICATORS OVERVIEW Buttons Overview Unlocked Button Manual Feeding Button To unlock the control In the unlocked state, press panel, press and hold the once to dispense 1 portion button for 5 seconds, the of food. device emits a Di, DiDi sound. -
Page 6: Set Up The Feeder
Indicators Overview SET UP THE FEEDER Assembly and Prepare for Setting 1. Insert the TF (Micro SD) card (Card NOT included) To enable the video recording function, insert a TF card rst, then enable the Local Recording option in the APP: tap icon in the upper right corner→Storage Settings→Local Recording. - Page 7 Notes: 2. Connect Power 1) Plug the 5V power adapter into a power socket and the USB cable • To remove the TF (Micro SD) Card, push in the TF card lightly. into the USB port on the back of the feeder. 2) The LED display will light up automatically to indicate the feeder For privacy, the video les in the TF card can only be checked is on.
- Page 8 3.Twist anticlockwise to open the lid. 5. Add dry pet food to the food tank. Notes: • To prevent uneven food dispensing, please add enough pet food to the visible level. • Recommended kibble size: 2-15mm/0.07-0.6 inch in diameter. Do not use canned, wet, or moist food. •...
- Page 9 7. Take out and install the double food tray. 1) To get equal amount of food, move the splitter to the right until it can't move. Attach the double food tray to the notch underneath the feeder base. Left = Right 2) To get uneven amount of food, move the splitter to the left, more food will be dispensed to the right bowl.
-
Page 10: Controlling Via App
System Requirements iPhone on iOS 10.0 or later; smartphone on Android 5.0 or later Install the APP & Log in 1. Search “PETLIBRO LITE” in App Store or Google Play download the App. 2. Sign up and log into your account. - Page 11 2) Choose PLAF203 Camera 3) Tap the icon in the top right 5) Add the device PLAF203 by entering WiFi account and password. corner and choose Bluetooth Feeder. mode. PLAF203 6) Feeder connected, start to set the feeding time and portions, record meal call, and set the times the meal call play.
- Page 12 2) Open the App, tap "Add Device" or "+" in the upper right corner, 4) Plug in the device, then hold the unlocked button for 5s to choose PLAF203 Camera Feeder. unlock, the lock indicator goes out. Keep holding the reset button until the WiFi indicator keeps ashing.
- Page 13 6) Use the camera of the feeder to scan the QR code on your 7) Wait for connection. phone. The distance between the feeder's camera and your phone is within 15-20cm/6-8 inches. 15-20cm/6-8 inches 8) Feeder connected, start to set the meal time and portion size, record meal call, and set the times the meal call play.
- Page 14 2) Open the App, tap "Add Device" or "+" in the upper right corner, 4) Plug in the device, then hold the unlocked button for 5s to choose PLAF203 Camera Feeder. unlock, the lock indicator goes out. Keep holding the reset button until the WiFi indicator keeps ashing.
- Page 15 6) Back to the App and wait for connection. About the Camera SD/HD: Standard De nition / High De ni- tion, the default video quality is HD (high de nition), tap SD or HD to select your preferred video quality. Full screen Screenshots: Tap to take a screenshot of the...
- Page 16 Motion Detection Alarm Manually Feeding the Pet When motion is detected, your phone will receive a noti cation. On Manual page, choose the portion you want to feed rst, then To enable motion detection, tap icon in the upper right tap the Feed icon.
- Page 17 Set Meal Plan View the Logs On Schedule page, tap the Add icon, choose feeding time, On Log page, you can view the feeding records and abnormal feeding days, and feeding portions. noti cations.
- Page 18 Record a Meal Call & Set Playback Times Share the Device icon in the top right corner → Share Device → Add icon in the upper right corner → Recording, then tap the Sharing. Add icon, follow the instructions on the screen to record a meal call, set the times the meal call play.
-
Page 19: Clean And Care
CLEAN AND CARE 2. Twist anticlockwise to remove the lid and take out the desiccant bag from the inner box under the lid. It’s recommended to clean the feeder regularly for the health of pets. The washable parts are as follows: lid, food tank, tank base, stainless steel bowl, and bowl holder. - Page 20 4. Twist anticlockwise to remove the tank base. 6. Re t them to the machine. Turn the tank base clockwise until it snaps into place 7. Then install the tank and lid. 5. Thoroughly rinse and air dry the lid, tank and tank base .
-
Page 21: Specifications
Clean the Bowls and Holder SPECIFICATIONS 1. Remove the bowl holder from the feeder base. Model PLAF203 Capacity 5 liters Power DC 5V power adapter; 3 x alkaline D batteries (not included) Power Adapter AC100-240V, 50/60Hz Input, DC 5V output Operating Temperature 0 - 55 / 32°F - 131°F... - Page 22 Live video not showing. 3. To ensure your phone can receive 2. If the network is poor, change the noti cations, enable the PETLIBRO LITE video quality from HD (high de nition) App noti cation on your phone rst. to SD (standard de nition).
Need help?
Do you have a question about the PLAF203 and is the answer not in the manual?
Questions and answers