
Summary of Contents for Gerhardt S Series
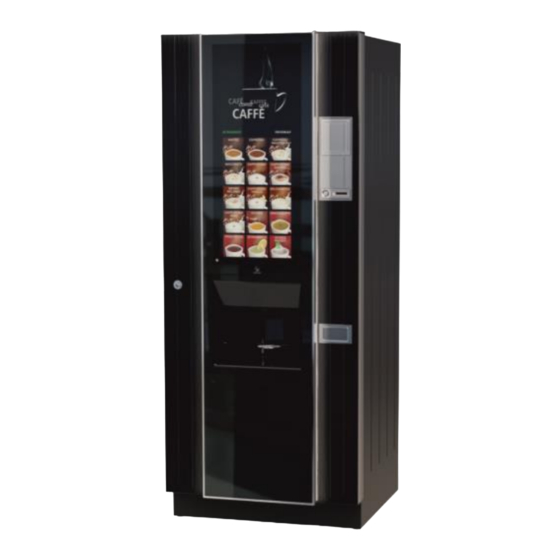
- Page 1 Instruction Manual Hot Drink Vending Machines S-Series SI 8, SE 7, SE 8 Translation of the Original Instruction Manual English Version: March 2020 Read instructions before starting any work!
- Page 2 © Jakob Gerhardt Automatische Verkaufsanlagen GmbH Am Raigerwald 18-20 D-72622 Nürtingen-Raidwangen Phone: +49 (0) 7022 94 39 90 Fax: +49 (0) 7022 94 39 922 Email: info@gerhardt-automaten.de Internet: www.gerhardt-automaten.de...
-
Page 3: Table Of Contents
Table of contents Table of contents Welcome ....................6 General information ..............7 Information about this manual ..........7 Explanation of symbols ............8 Limitation of liability ............... 9 Open source software ............10 Differentiation of the machine versions ....... 11 Safety and security .............. - Page 4 Table of contents Transport, installation and commissioning ......28 Transport ................28 Installation ................29 5.2.1 Setting up the machine .......... 29 5.2.2 Wall mounting ............31 5.2.3 Connecting the water hose ........32 5.2.4 Connect water filter (optional)........ 33 5.2.5 Connecting the power plug ........
- Page 5 Welcome 7.13 Cleaning the beverage outlet ..........58 7.14 “Clean Brewer” program ............59 7.15 Cleaning the brewer manually ..........60 Problems and solutions ............. 62 Decommissioning, storage and disposal ......... 63 Decommissioning ..............63 Storage ................63 Disposal ................63 Index .....................
-
Page 6: Welcome
Welcome Welcome Thank you very much for your purchase of a Gerhardt hot beverage vending machine. You have made a good choice because Gerhardt coffee speciality machines are among the best on the market in this performance class. Our systems are characterised above all by the following points: high quality of all component elements ... -
Page 7: General Information
General information 1 General information 1.1 Information about this manual This manual enables safe and efficient use of the machine. The basic prerequisite for safe working is compliance with all safety instructions and handling instructions given in this manual. In addition, the local industrial safety regulations and general safety regulations for the area of application of the machine apply. -
Page 8: Explanation Of Symbols
General information 1.2 Explanation of symbols This section contains an overview of the symbols and text highlights used. Warnings Warnings in this manual are identified by symbols. The information is introduced by signal words that express the extent of the hazard. Please be sure to observe the warnings and act cautiously to avoid accidents, personal injury and material damage. -
Page 9: Limitation Of Liability
General information Label Explanation without a fixed order. [Button] Identifies operating elements (e.g. buttons). 1.3 Limitation of liability All information and notes in this manual have been compiled taking into account the applicable standards and regulations, the state of the art and our many years of knowledge and experience. -
Page 10: Open Source Software
Jakob Gerhardt GmbH Mr Bernd Gerhardt ... -
Page 11: Differentiation Of The Machine Versions
The S-Series hot beverage vending machine is manufactured in two versions and described in this manual. Please note the differences. S Series I8 (SI8) Instant S Series E8 (SE8) Expresso Coffee is made from soluble coffee. Automatic machine with espresso brewer and bean container. -
Page 12: Safety And Security
Safety and security 2 Safety and security This section gives an overview of all important safety aspects for the protection of persons as well as for safe and trouble-free operation. Further task-related warnings are contained in the individual action sequences. 2.1 Intended use The machine is used exclusively for the preparation and dispensing of hot beverages in the commercial sector. -
Page 13: Risk Of Burns And Scalding
Safety and security Observe the following safety instructions to avoid hazards from electric current: Do not use a damaged power cord. Never plug the mains plug into the socket when it is wet or touch it with wet hands. A damaged power cord may only be replaced by the ... -
Page 14: Health Hazard
Safety and security 2.2.3 Health hazard The vending machine dispenses food. Observe the following safety instructions to avoid health hazards: Clean the machine regularly. Only use food-safe, approved agents for cleaning. Do not process products that have not been agreed with the ... -
Page 15: Technical Data
Technical data 3 Technical data 3.1 General information Indication Value/Unit Dimensions incl. 1830 x 755 x 750 mm bean container (H x W x D) Empty weight SI 180 kg Empty weight SF + SE 200 kg Dosage individually adjustable Number of products freely programmable Cup dispenser... -
Page 16: Operating Conditions
Technical data Indication Value/Unit On-site water pressure at the 2 to 6 bar installation site of the (at higher pressure a machine pressure reducer must be connected upstream) 3.3 Operating conditions Indication Value/Unit Temperature + 5 °C to max. + 35 °C (empty water system in frosty conditions) Relative humidity... -
Page 17: Nameplate
Technical data Nameplate The nameplate is located inside the machine on the upper left and contains the following information: Manufacturer Machine type Machine number CE Marking Date of manufacture (year of construction) Manufacturer address ... -
Page 18: Type Code
Technical data Type code Design Device type Floor-mounted device Grinding and brewing technology Espresso Instant Filter or freshly brewed coffee Number of product containers 7 product containers 8 product containers Mugs or cups Mugs Cups... -
Page 19: Structure And Function
Structure and function 4 Structure and function 4.1 Product overview 4.1.1 Exterior view Coin return button Edition Coin slot Lid dispenser (optional) Cup catch Door lock Coin return Touchscreen Cup holder... -
Page 20: Interior View
Structure and function 4.1.2 Interior view Powder container Coffee grounds container Powder slide Duo Collection box Powder slide Mono Cover plate Outlet of the mixing chamber Pressure gauge Drip tray Coffee powder chute Lime filter Mill Drainage drip tray Bean container Drip bucket Backup Rittal heating (optional) -
Page 21: Inner Door
Structure and function 4.1.3 Inner door Lid for cup dispenser Cash box Cup dispenser Coin switchgear (optional) Output housing Banknote reader (optional) Drip pan 1x USB interface Collecting beaker... -
Page 22: Rear
Structure and function 4.1.4 Rear Power connection Air intake Exhaust air opening MMX Network (optional) Water connection... -
Page 23: Description Of Components
Structure and function 4.2 Description of components 4.2.1 Rittal heating (optional) NOTE Follow the instructions in the separately enclosed operating manual from Rittal. 4.2.2 Service socket (optional) The service socket can be used to plug in auxiliary equipment needed at short notice for service and maintenance, such as Laptop, vacuum cleaner etc. -
Page 24: Menu Structure
Structure and function 4.3 Menu structure Menu level 1 Menu level 2 Description Cleaning NOTE: The automatic rinsing and cleaning programs do not replace manual cleaning of the components. Complete rinse Here you can automatically rinse the entire machine with water. Rinse MMX Here you can automatically rinse individual trays with water. - Page 25 Structure and function Menu level 1 Menu level 2 Description Counter Overview Here you can display an overview of the counter readings readings in the total period (Total) or for the last month. There are the following counter values: Sales: Number of products sold against ...
- Page 26 Structure and function Menu level 1 Menu level 2 Description Lime filter replaced Start product test Start brewer cleaning Start tablet cleaning Coin changer Here you can make various settings for the payment systems. Products Here you can make various settings for the layout, recipes and ingredients.
- Page 27 Structure and function Menu level 1 Menu level 2 Description port, which will be played after a defined duration in the menu item Display. The USB stick must remain permanently on the port. Calibration Here you can calibrate powder and water.
-
Page 28: Transport, Installation And Commissioning
Transport, installation and commissioning 5 Transport, installation and commissioning 5.1 Transport The machine is delivered from the factory in suitable transport packaging. To avoid damage during transport, suitable packaging must be used. In order to prevent water and cold damage during transport or during longer storage, the machine was emptied in the factory as a precaution. -
Page 29: Installation
Transport, installation and commissioning 5.2 Installation 5.2.1 Setting up the machine Installation conditions: The machine may only be installed and operated in dry, heated and well-ventilated rooms. General The machine is not suitable for outdoor installation. The machine must have reached room temperature before ... - Page 30 Transport, installation and commissioning Installation conditions: Spacing For the supply lines, a distance of approx. 50 mm to the wall is required at the rear. Further machines can be directly positioned at the side. In order to be able to open the machine door, approx. 750 ...
-
Page 31: Wall Mounting
Transport, installation and commissioning The connection water pipe must not be kinked. The statutory prevention of backflow into the water supply network must be provided by the customer. DIN EN 1717 must be observed. Installation condition: Mains voltage tolerance 230 V ± 10 % 50/60 Hz. ... -
Page 32: Connecting The Water Hose
Transport, installation and commissioning 5.2.3 Connecting the water hose ATTENTION Danger of water damage! A defect, material fatigue or incorrect installation in the water- bearing system may result in water damage. Always have installation and repair work carried out by ... -
Page 33: Connect Water Filter (Optional)
Transport, installation and commissioning Method Connect the water tap and the water connection of the machine with a suitable water connection hose. ATTENTION! The water connection must be carried out correctly and, if necessary, by an installation technician. The manufacturer accepts no liability for damage caused by a faulty water connection. -
Page 34: Connecting The Power Plug
Transport, installation and commissioning 5.2.5 Connecting the power plug The following instructions must be observed: Make sure that the mains voltage corresponds to the voltage indicated on the nameplate of the machine. The type plate is located at the top left on the inside of the machine. -
Page 35: Rinsing The Boiler
Transport, installation and commissioning 5.3.2 Rinsing the boiler NOTE To prevent water and cold damage during transport or storage, the water circuit was emptied in the factory as a precautionary measure. Method Unlock and open the automatic door with the key. If the boiler needs to be flushed (filled), the machine ... -
Page 36: Filling The Bean Container
Transport, installation and commissioning 5.3.4 Filling the bean container ATTENTION Danger of material damage! Coffee beans treated with additives (e.g. sugar) and pre- ground or freeze-dried coffee can damage the grinder. If unsuitable types of coffee are used, the grinder may stick together. -
Page 37: Fill Cup Dispenser
Transport, installation and commissioning 5.3.5 Fill cup dispenser Cup diameter Cup capacity 70 mm approx. 750 cups 80 mm approx. 500 cups Unlocking the cup dispenser Method Unlock and open the automatic door with the key. Support the top of the cup dispenser with one hand. Grasp the cup dispenser by the handle with one hand, lift it slightly and pull it slowly. -
Page 38: Setting The Grinding Degree
Transport, installation and commissioning Fill lid dispenser Method Unpack the lid according to the hygiene concept. Fill the lid into the lid shaft with the top of the lid facing upwards. Fill the lid regularly and horizontally into the lid shaft. Turn the drum until it reaches the next lid shaft. -
Page 39: Calibrating The Powder Container
Transport, installation and commissioning manufacturer accepts no liability for damage resulting from incorrect use of the handwheel. Check grinding degree (if the coffee flows evenly out of the coffee outlet and a fine, dense crema is formed, the setting is correct). If the desired setting has not yet been reached, repeat the grinding degree setting. -
Page 40: Calibrating The Coffee Grinder
Transport, installation and commissioning 5.3.9 Calibrating the coffee grinder Different roasts and varieties of coffee beans are ground differently. Poor calibration can lead to poor coffee quality. NOTE For the S-Variant Duo, carry out the same procedure for the second mill. Prerequisite The grinding degree has been set appropriately (... -
Page 41: Conduct A Test Sale
Transport, installation and commissioning Calibrating the coffee grinder Method Select Service menu > Calibration. Select the mill from the dropdown menu Hold a suitable container under the outlet of the mill and press [Start]. Weigh the delivered quantity and enter the weight in the input field. -
Page 42: Operation Of The Vending Machine
Operation of the vending machine 6 Operation of the vending machine 6.1 Switching on the coffee machine Method Switch on the machine at the main switch. The main switch is located at the top left on the inside of the machine. As soon as the device is ready for operation, the ... -
Page 43: Dispensing Hot Water (Optional)
Operation of the vending machine 6.5 Dispensing hot water (optional) ! CAUTION Danger of scalding due to hot liquid! During dispensing, hot water runs out of the beverage spout and can cause scalding on contact. Do not reach under the beverage spout during ... - Page 44 Operation of the vending machine Method Unlock and open the automatic door with the key. Pull out the coffee grounds container. Empty the coffee grounds container (if necessary, remove and dispose of the bag of coffee grounds container). Clean and dry the coffee grounds container with hot water and a sponge.
-
Page 45: Cleaning And Care
Wash hands and disinfect well before handling food. Only use food-safe cleaning agents approved by the manufacturer for cleaning the machine: Cleaning tablets Gerhardt ESX Brewing group Part No.: 9003 After cleaning, parts that come into contact with food must not be touched. - Page 46 Cleaning and care ! CAUTION Danger of food poisoning and diseases due to perishable food! Observe the best before dates specified by the manufacturer of the products. Replace expired products with products with a valid best-before date. Do not use products with an expired sell-by date. ...
-
Page 47: Haccp Concept
Cleaning and care 7.2 HACCP concept The Hazard Analysis and Critical Control Points (HACCP) concept is a preventive system designed to ensure the safety of food and consumers. The HACCP concept includes precautions and measures that ensure that food is safe to eat from a hygienic point of view. This is the prerequisite for compliance with food hygiene requirements. - Page 48 Cleaning and care Proof of quality to customers NOTE The filling and cleaning personnel must be instructed in the rules of the HACCP concept. Compliance with the measures must be verified. On the next page we have prepared an exemplary list for you for compliance with the HACCP concept for hot beverage vending machines.
- Page 49 Cleaning and care...
-
Page 50: Cleaning List
Cleaning and care 7.3 Cleaning list The following sections describe the cleaning work required for optimum and trouble-free operation of the machine. If increased soiling can be detected with regular cleaning, the manufacturer recommends shortening the required cleaning intervals according to the actual soiling. If you have any questions about cleaning work and intervals, contact your dealer. -
Page 51: Cleaning The Powder Container (If Necessary)
Cleaning and care 7.4 Cleaning the powder container (if necessary) Removing the powder container Method Unlock and open the automatic door with the key. Switch off the machine at the main switch. Pull the powder chute forward at the handle wings. The powder container is automatically unlocked. -
Page 52: Cleaning The Output
Cleaning and care Cleaning the output Removing components Method Unlock and open the automatic door with the key. Remove the drip cup and replace it with a fresh cup. Remove the drip tray. Unlock and remove the drip grid. Unlock and remove the bracket. Remove the cup table. -
Page 53: Cleaning The Housing And Touchscreen
Cleaning and care 7.6 Cleaning the housing and touchscreen The machine must be cleaned regularly and kept in a clean and hygienic condition. ATTENTION Risk of material damage due to unsuitable cleaning agents! Abrasive cleaning agents can scratch the housing and touchscreen. -
Page 54: Cleaning The Drip Tray
Cleaning and care Method Unlock and open the automatic door with the key. Empty drip tray and reinsert. Select Service menu > Cleaning > Complete rinse. Follow the instructions on the touchscreen. Close the automatic door and lock it with the key. 7.8 Cleaning the drip tray Method Unlock and open the automatic door with the key. -
Page 55: Cleaning The Coffee Grounds Container
Cleaning and care 7.9 Cleaning the coffee grounds container Method Unlock and open the automatic door with the key. Pull out the coffee grounds container. Empty the coffee grounds container (if necessary, remove and dispose of the bag of coffee grounds container). Clean and dry the coffee grounds container with hot water and a sponge. -
Page 56: Rinse Brewer" Program
Cleaning and care Method Unlock and open the automatic door with the key. Empty drip tray and reinsert. Select Service menu > Cleaning > Flush complete system. Follow the instructions on the touchscreen. Close the automatic door and lock it with the key. 7.11 “Rinse brewer”... -
Page 57: Cleaning The Mix-Mix-System Mmx
Cleaning and care 7.12 Cleaning the Mix-Mix-System MMX Removing the Mix-Mix-System Method Unlock and open the automatic door with the key. Pull off the powder slide (1) on the grip wing to the front. Depending on the model, remove either the outlet angle (5) or the outlet hose from the mixing chamber (4). -
Page 58: Cleaning The Beverage Outlet
Cleaning and care Cleaning the Mix-Mix-System Method Clean mixing chamber (4), mixer disc (8), powder trap (7), rinsing nozzle (2) and separating nozzle (3) thoroughly with hot water and dry well with a clean tea towel. Knock out the powder slide (1). If necessary, rinse under hot running water to remove heavy soiling. -
Page 59: Clean Brewer" Program
The program takes about 3 minutes and must not be interrupted. Only use cleaning agents approved by the manufacturer to clean the machine: Cleaning tablets Gerhardt ESX Brewing group Part No.: 9003 ! CAUTION Risk of burns and scalding! Escaping liquids and vapours can be very hot. -
Page 60: Cleaning The Brewer Manually
Cleaning and care Method Unlock and open the automatic door with the key. Empty drip tray and reinsert. Select Service menu > Cleaning > Clean brewer. Place cleaning tablets in brewing chamber. Follow the instructions on the touchscreen. Close the automatic door and lock it with the key. NOTE After using the cleaning tablet, be sure to prepare a coffee and test for taste and smell. - Page 61 Cleaning and care Installing the brewer Method Place the brewer in the vending machine. To insert the brewer into the vending machines, grasp the brewer with one hand at the lock of the base, support with the other hand up and slide into the vending machines. To lock the brewer, fold the lower lock backwards.
-
Page 62: Problems And Solutions
Problems and solutions 8 Problems and solutions Before you contact your specialist dealer due to a fault in the machine, check the following table to see whether you can rectify the fault yourself. Fault Cause Measure No drink is Mixing chamber is clogged Cleaning the Mix-Mix-System MMX (... -
Page 63: Decommissioning, Storage And Disposal
Decommissioning, storage and disposal 9 Decommissioning, storage and disposal 9.1 Decommissioning ! CAUTION Risk of burns from hot boiler or hot water! Let the boiler cool down first. Do not reach into the water. Do not spill water. ... -
Page 64: Index
Index 10 Index Water filter ........... 33 Water hose .......... 32 Counter reading Automatic machines Resetting ..........36 Versions ..........11 Cup dispenser filling ............. 37 locking ..........37 unlocking ..........37 Basic hazards ..........12 Bean container Filling ........... 36 Beverage outlet Decommissioning ........ - Page 65 Index General ..........29 Calibration ..........39 Mains voltage ........30 Cleaning ..........51 Spacing ..........30 Filling ........... 35 Water ........... 30 Installation ..........51 Intended use ..........12 Removal ..........51 Interior view ..........20 Problems ............. 62 Product overview ........
- Page 68 www.gerhardt-automaten.de...
Need help?
Do you have a question about the S Series and is the answer not in the manual?
Questions and answers