Panasonic WORKIO DP-8035 Operating Instructions Manual
Digital imaging system
Hide thumbs
Also See for WORKIO DP-8035:
- Operating instructions manual (196 pages) ,
- Specifications (4 pages) ,
- Operating instructions manual (34 pages)
Table of Contents
Advertisement
Operating Instructions
(For Copy & Function Parameters)
Digital Imaging Systems
DP-8060 / 8045 / 8035
Model No.
Before operating this machine, please carefully read this manual, and keep this
documentation in a safe place for future reference.
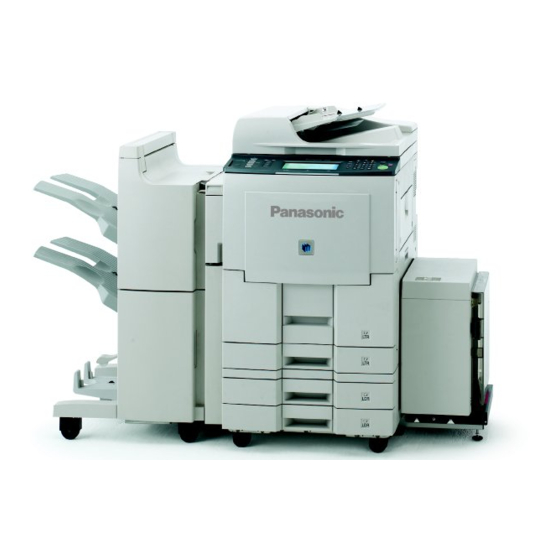
(Illustration shows optional accessories that may not be installed on your machine.)
English
Advertisement
Table of Contents

Related Manuals for Panasonic WORKIO DP-8035


Summary of Contents for Panasonic WORKIO DP-8035
-
Page 1: Operating Instructions
Operating Instructions (For Copy & Function Parameters) Digital Imaging Systems DP-8060 / 8045 / 8035 Model No. Before operating this machine, please carefully read this manual, and keep this documentation in a safe place for future reference. (Illustration shows optional accessories that may not be installed on your machine.) English... -
Page 2: Getting To Know Your Machine
Operating Instructions The following Operating Instruction manuals are included with this machine. Please refer to the appropriate manual and keep all manuals in a safe place for future reference. If you lose a manual, contact an authorized Panasonic dealer. Accessories... -
Page 3: Symbols/Icons
Symbols/Icons The following Symbols/Icons are used throughout this operating instructions manual. Place original(s) on the ADF Place original(s) on the Platen (Book) Place original(s) on the Platen (Sheet) Press any Hard Key on the control panel, or touch any Button on the touch panel display Press Hard Key Touch any Button... -
Page 4: Table Of Contents
Operating Instructions Symbols/Icons Getting To Know Your Machine Getting To Know Your Machine Table of Contents Getting To Know Your Machine Making Copies Basic Menu ... 6 2-Sided/Original Sort/Finish ... 36 Zoom/Effects ... 38 Insertion/Overlay ... 50 ■ Operating Instructions ... 2 ■... - Page 5 ■ Using Function Modes to Change the Initial Settings ... 68 ■ Procedure ... 70 ■ General Settings ... 72 ■ Copier Settings ... 73 ■ Scanner Settings ... 74 ■ Printer Settings ... 75 For Key Operator ... 76 ■...
-
Page 6: Making Copies
Sheet Bypass. ● During the copy operation and after making copies, the fan motor may start spinning. This is a NOTE normal operation and is used to cool down the copier. Touch the PAPER TRAY button. If original size If set to other... - Page 7 Adjust the Contrast (7 levels) Select type of Original(s) Select HEAVY PAPER. Mainly Text Text and Photo combined Mainly Photo Number of Copies (Max. 999)
-
Page 8: Copying With Preset Ratios (Reduction/Enlargement)
Making Copies Basic Menu ■ ■ ■ ■ ■ Copying with Preset Ratios (Reduction/Enlargement) Letter Ledger Ledger ■ ■ ■ ■ ■ Proof Copying Allows you to make one proof set, before proceeding to copy a large multi-set with various settings. Ex: 100 copies Proof copy Multi copy... - Page 9 The Correct ratio is automatically selected. Reduction and enlargement ratios (%) COPY SIZE ORIGINAL SIZE Ledger Legal Letter-R Invoice-R Ledger Legal Letter-R Invoice-R Select Copy Job settings ● Press the PROOF SET button again if the Proof Copying mode was reset. NOTE Number of Copies (Max.
-
Page 10: Tandem/Remote Copying
■ ■ ■ ■ ■ Tandem/Remote Copying When using the Tandem/Remote Copy function. Requires network setup (see pages 77-78). The selected Remote printing copier must be either DP-8060/8045/8035. For the copier to function as a Remote/Tandem Copier it has to be setup in advance. - Page 11 Number of Copies (Max. 999) For Tandem For Remote Select a Tandem or Remote Copy function Tandem Copying: Half of the copy job is printed out by the remote machine. Remote Copying: All of the copy job is printed out by the remote machine.
-
Page 12: Parameter Registration (Tandem User Parameter)
Basic Menu ■ ■ ■ ■ ■ Parameter Registration (Tandem User Parameter) Requires network setup (see pages 77-78). The selected Remote printing copier must be either DP-8060/8045/8035. For the copier to function as a Remote/Tandem Copier it has to be setup in advance. - Page 13 Button Names on the QWERTY Keyboard To input upper case letter(s). To input numbers and/or symbols. Scroll to 08/13 Machine name (up to 15 characters) To move the cursor (_) to the left or right side. To erase the character before the cursor.
-
Page 14: Parameter Registration (Tandem Destination)
Basic Menu ■ ■ ■ ■ ■ Parameter Registration (Tandem Destination) Requires network setup (see pages 77-78). The selected Remote printing copier must be either DP-8060/8045/8035. For the copier to function as a Remote/Tandem Copier it has to be setup in advance. - Page 15 Scroll to 05/05 ∗ Enter the key name ∗ (up to 15 characters). IP Address ∗ ∗ By default, the key name will be up to 15 characters of the station’s name. Scroll to 05/05 Ex: 192.168.0.1 When entering a 1 or 2-digit number segment, add "00"...
-
Page 16: Editing The Tandem/Remote Machine
Making Copies Basic Menu ■ ■ ■ ■ ■ Editing the Tandem/Remote Machine To edit the registered machine’s settings (IP Address, machine name or key name). ■ ■ ■ ■ ■ Deleting the Tandem/Remote Machine To delete the registered machine. Open the Function Parameters screen by following the procedures 1 to 4 on pages 14 and 15. - Page 17 Scroll to 05/05 Scroll to 05/05 Select the registered machine name Select the registered machine name...
-
Page 18: Job Queue
Making Copies Basic Menu ■ ■ ■ ■ ■ Job Queue Use when the desired print job is not executed immediately. Refers to a list of jobs waiting to print, delete or change their priority (Change for print job only). Select the job(s) ●... - Page 19 (0000). NOTE: ● Default Password is set to 0000, please consult the Panasonic authorized dealer to change it. ● The Print Job Queue password can be disabled by setting "11 Print Queue Delete" (Printer Settings for Key Operator) to "Free".
-
Page 20: Completion Notice
[All Programs] -> [Panasonic] -> [Panasonic Document Management System] -> Communications Utility to activate the Communications Utility icon, and/or select [All Programs] -> [Panasonic] -> [Job Status Utility] -> [Job Status Utility] to activate the Job Status Utility icon. Select the desired PC Name... - Page 21 Number of Copies (Max. 999) Setting desired copy mode. Copy Job Completed Notice will be displayed on your PC.
-
Page 22: 2-Sided/Original Copy
2-Sided Copy NOTE: ● The standard setting of the 2-Sided/Original -> Copy can be changed. Refer to "04 2-Sided Mode Default" of the Copier Settings. (See page 73) ● Special paper such as cardboard cannot be used for 2-Sided Copy. Copy... - Page 23 (Landscape) ● When clearing the 2-Sided Copy mode: NOTE Select Bind position Long Edge Short Edge (Portrait) (Portrait) (Landscape) button or press the Reset key. Number of Copies From Platen: When "Last Original?" message is displayed. Ex: 2 originals Touch "NO" button. Place next original on the platen.
-
Page 24: Book 2-Sided Copy
(2nd and 3rd pages are copied onto the next paper.) NOTE: ● The standard setting of the 2-Sided / Original -> Copy can be changed. Refer to "04 2-Sided Mode Default" of the Copier Settings. (See page 73) Copy Platen Ex: Ledger size original Letter ∗... - Page 25 When "Last Original?" message is displayed. Ex: 2 originals Touch "NO" button. Place next original on the platen. Press Start Key. Touch "YES" button. Original format Copy format...
-
Page 26: Page Copy
Making Copies 2-Sided/Original ■ ■ ■ ■ ■ 2 Page Copy Two facing pages or a Ledger size original can be copied, and separated into 1-Sided sheets. Copy Platen Ex: Ledger size original Letter ∗ Ledger Letter Ledger ∗ ∗ ∗ ∗ ∗ For a Ledger size, Center the book by length and width according to the Letter size marks. - Page 27 When "Last Original?" message is displayed. Ex: 2 originals Touch "NO" button. Place next original on the platen. Press Start Key. Touch "YES" button. Copy Format...
-
Page 28: N In 1 Copy
Making Copies 2-Sided/Original ■ ■ ■ ■ ■ N in 1 Copy From two/four/six 1-Sided originals, side by side, to 1-Sided pages. ● ● ● ● ● 2 in 1 Copy ● ● ● ● ● 4 in 1 Copy ●... - Page 29 ∗ Original Copy direction N in 1 mode layout Ex. 2 in 1 Reduction/ Enlargement only When 2 in 1 copying with different original size, select desired copy size with COPY SIZE Key (not PAPER TRAY button on the LCD Touch Panel). ●...
-
Page 30: Booklet Copy
Making Copies 2-Sided/Original ■ ■ ■ ■ ■ Booklet Copy Formats the output in a manner so that documents can be folded and/or saddle stitched ∗ like a book. Letter or Invoice originals only ∗ When optional 1/2-Bin Saddle-Stitch Finisher (DA-FS355A/FS605) is installed. - Page 31 1-bin saddle finisher as shown below. Staple position • Default copy size is reduced, copy size can be selected as 100 % or reduced. • Refer to "11 Booklet Default Mag." of the Copier Settings. (See page 73) Saddle tray...
-
Page 32: Multi-Size Feeding
Making Copies 2-Sided/Original ■ ■ ■ ■ ■ Multi-Size Feeding Use this function when copying mixed size originals (Ledger or Letter and Legal) using the ADF, original size can be detected automatically then can be copied to the same size or one specified size. Combination of Multi-Size Feeding (1 Copies Originals... - Page 33 Copy Images (1 2 copy mode) Ex. Bind Position is SHORT EDGE Face Letter Blank (Portrait) Letter (Portrait) Bind position Back Ledger (Landscape layout) *1 Ledger size will be reduced to Letter size. *2 Legal size will be reduced to Letter size. Number of Copies...
-
Page 34: Job Build And Sadf Mode
Job Build and SADF Mode. If the Job Build and SADF buttons are not shown on the Touch Panel display, the Job Build and SADF Modes must be enabled in the copier function settings. Please consult with the Key Operator. (See page 80) Example: To make 5 sets of sorted copies of 100 sheets of originals. - Page 35 When all the pages are read by the ADF, "Another Original? YES or NO" message appears. Select the "NO" button. Select Sorting/Finishing settings or etc. When all the pages are read by the ADF, after approximate 5 seconds "Another Original? YES or NO"...
-
Page 36: Sort/Finish
Making Copies Sort/Finish Sort/Finish ■ ■ ■ ■ ■ When using Sort Mode Available for Functions without an optional Finisher Copy is stored on the Tray. Non-Sort Sort Multiple copy sets are sorted automatically. Available for Functions with an optional Finisher Shift-Sort When optional Finisher is installed. - Page 37 Original Staple Position Ex. Top left corner ● Overflow When overflow indicator appears on the display, remove excess copies from the bin. Sort mode When the optional Finisher is installed, this screen will change as follows: For DA-FS330 For DA-FS600/FS605 Number of Copies For DA-FS355A...
-
Page 38: Zoom/Effects
An incorrect exposure may occur when there is a black line at the edge of the original, or an image which the copier interprets as a black pattern in the skyshot mode. An incorrect position detection of the original may occur when a strong light shines onto the glass during skyshot mode. - Page 39 Same vertical and Different vertical and horizontal ratio horizontal ratio 25% - 400% ∗ or Keypad Enlarged or reduced according to the vertical/ horizontal size of the paper. Enlarged or reduced according to both vertical/horizontal size of the paper. ● When changing the paper size after setting the zoom ratio, use the PAPER TRAY button. ATTENTION If paper size is changed with Copy size key, zoom ratio will be changed.
-
Page 40: Edge
Making Copies Zoom/Effects ■ ■ ■ ■ ■ Edge Unnecessary edge can be erased by setting a blank edge. NOTE: When "ZOOM" is selected, the erasing width varies depending on the zoom ratio. ■ ■ ■ ■ ■ Book When copying original such as the center of folding position may be shaded. - Page 41 Same vertical and horizontal void value 5 - 99 mm or Keypad 5 - 99 mm or Keypad Different vertical and horizontal void value 5 - 99 mm or Keypad Number of Copies Number of Copies...
-
Page 42: Margin
An incorrect position detection of the original may occur when a strong light shines onto the glass during the Centering and Image Repeat mode. Also an image which the copier interprets as a black pattern in the Centering and Image Repeat modes. - Page 43 5 - 99 mm Margin area or Keypad Paper Size (Paper Tray) Number of Copies Number of Copies...
-
Page 44: Image Repeat
An incorrect position detection of the original may occur when a strong light shines onto the glass during the Centering and Image Repeat mode. Also an image which the copier interprets as a black pattern in the Centering and Image Repeat modes. - Page 45 Paper Size (Paper Tray) Number of Copies Number of Copies...
-
Page 46: Stamping
NOTE: ● The default is -n- (number) format. To change to n/m (number/maximum) format, refer to "16 Page Numbering Style" of the Copier Settings. (See page 73) ■ ■ ■ ■ ■ Stamping (Date Stamp) The original can be copied with a printed date. The date is printed in MM/DD/YYYY format. - Page 47 ORIENTATION Stamping position ORIENTATION Stamping position Number of Copies Stamping start page (Max. 999) From 1, 2 or 3 From 3rd page From 2nd page ● Multiple copy sets will be From 1st page sorted automatically. Number of Copies (Max. 999) Changing the stamp date Select the CHANGE ●...
-
Page 48: Stamping (Issue Number Stamping)
Making Copies Zoom/Effects ■ ■ ■ ■ ■ Stamping (Issue Number Stamping) The original can be copied, and printed in consecutive numbers from 001 to 999. ● When copying with the Stamping mode combined with N in 1 mode, the Stamping mode can NOTE be used from the platen too. - Page 49 ORIENTATION Stamping position Number of Copies (Max. 999) Stamping the starting issue number ● Multiple copy sets will be sorted automatically. Keypad (up to 999)
-
Page 50: Insertion/Overlay
● Certain types of transparency film may not be compatible with, and may damage your machine. NOTE Consult with an authorized Panasonic dealer for advice regarding non-standard media. (Panasonic has tested "3M PP2500" transparency film and found it to be compatible.) ADF only Copied... - Page 51 Cover Page mode Cover (Front) Cover (Front+Back) Paper Size ∗ Paper Tray Blank Copy Page Insertion mode Paper Size ∗ Paper Tray Blank Copy ∗ The size and orientation of the printed copy and recording paper should match. NOTE ∗∗ Blank page is inserted before the indicated selected page number.
-
Page 52: Ohp Interleaving
● Certain types of transparency film may not be compatible with, and may damage your machine. NOTE Consult with an authorized Panasonic dealer for advice regarding non-standard paper types. (Panasonic has tested "3M PP2500" transparency film and found it to be compatible.) OHP1 OHP2... - Page 53 Load Transparency film onto the Sheet Bypass OHP Interleaving mode Blank Copy (OHP: Transparency film) Load Transparency film onto the Sheet Bypass Presentation mode Blank Copy (OHP: Transparency film) ∗ The size and orientation of the printed copy and recording paper should match. NOTE Number of Copies Paper Size ∗...
-
Page 54: Overlay
Making Copies Insertion/Overlay ■ ■ ■ ■ ■ Overlay The first original is used as an overlay for the remaining originals. The first page is called the overlay original, and the second page onwards are called the scanned originals, respectively. For overlay original NOTE: ●... - Page 55 Number of Copies Density for 1st page image (Max. 999) Density for registered Select a file image (Register only) From Platen: Same procedure as for Form Overlay. (See page 56 and Enter the file name Select the overlay image to store into memory for later use.
-
Page 56: Form Overlay
Making Copies Insertion/Overlay ■ ■ ■ ■ ■ Form Overlay Overlay an image stored in memory onto the copy. FORM The scanned Data original NOTE: ● Only Letter size is available for Form Overlay. ● If the orientation of the original is different than of the Form, the original is copied by automatically rotating when overlaid. - Page 57 Select a file From Platen: If “Another Original? message is displayed, touch the "YES" or “NO” button. Ex: 2 originals Number of Copies (Max. 999) Touch "YES" button. Place the next original on the Platen. Press Start Key. Touch "NO" button.
-
Page 58: Other Features
NOTE: When the M5 Key is used, the Double Exposure Mode should be set to "Off" in the Copier Settings "19 Double Exposure". (See page 73) ● JOB MEMORY mode will not be deleted even if the power switches are turned Off. - Page 59 M1, M2, M3, M4, M5 M1, M2, M3, M4, M5 M1, M2, M3, M4, M5 (See NOTE on page 58) Number of Copies (Max. 999) (See NOTE on page 58)
-
Page 60: Double Exposure
● When using the double exposure mode, the M5 is turned On and other job requiring memory NOTE cannot be used. ● The default setting of Double Exposure Mode is "ON" in the Copier Settings "19 Double Exposure". If this setting is changed to "OFF", this mode cannot be used. Original Guide •... - Page 61 Other jobs requiring memory cannot be performed, while M5 is being used for the Double Exposure function. Back Side of Original Number of Copies (Max. 999) The following steps illustrate how to make multiple copies when the Sort Mode is selected.
-
Page 62: Skyshot Mode
Digital Skyshot. Parallel : A copy is made straightened if the original is placed at an angle, with Digital Skyshot. (within 5 degrees) Manual Skyshot Mode ● Set 07 Manual Skyshot Mode in Copier Settings first. (See page 73) - Page 63 Open the ADF more than 45 degrees wide. Platen Upper- Left Corner Number of Copies (Max. 999) Custom size ∗ ∗ Default M1/M2 size can be changed in the Function mode. (See page 80) Number of Copies (Max. 999)
-
Page 64: Reserve A Job
Making Copies Other Features ■ ■ ■ ■ ■ Reserve a Job The next copy job can be reserved even if the current copy job is not completed. 1st job Reserve 2nd job 1st job 1st job Copy 2nd job 2nd job Select Copy Mode... - Page 65 Select Copy Mode Job Waiting List can be confirmed with Job Queue. (See page 18) Scanning is completed...
-
Page 66: Energy Saver (Power Save Mode, Sleep/Shutdown Mode)
Making Copies Other Features ■ ■ ■ ■ ■ Energy Saver (Power Save Mode, Sleep/Shutdown Mode) These modes save power while the copier is not in use. ● The machine will not go into Sleep/Shutdown Mode when the Weekly Timer is selected. - Page 67 To clear Other Copy Job is completed...
-
Page 68: Function Parameters
Function Function Parameters ■ ■ ■ ■ ■ Using Function Modes to Change the Initial Settings General Copier Settings Settings General Copier Settings for Settings for Key Operator Key Operator General Settings: Printer Fax/Email Settings Settings Input Password Printer Fax/Email... - Page 69 Copier Settings: Changing the Initial Copy Modes ● Default function of each copy mode (See page 73) For Key Operator: Paper size priority, Original mode, Contrast, Job Build and SADF mode, etc. (See pages 79 and 80) Printer Settings: Changing the Initial Printer Modes ●...
-
Page 70: Procedure
Function Parameters ■ ■ ■ ■ ■ Procedure Select the desired Function Mode Select the desired Function ● Please refer to the appropriate operating instructions manual for function settings on options. NOTE... - Page 71 Set the desired Function Parameter(s). When selecting the Key Operator Mode: Password (8 digits: alpha-numerical; alphabet (case-sensitive), numbers, symbols (@, ., _, and SPACE)) Set the desired Function Set the desired Function Parameter(s).
-
Page 72: General Settings
Function Parameters ■ ■ ■ ■ ■ General Settings Screen Modes 00 Power On Default Mode 01 Manual Add Toner 02 Sort Memory Status 01/02 03 Departmental Counter 04 Data Security Kit Info. 02/02 09 Key Operator Mode ∗ When the optional Fax Communication Board is installed. NOTE Function Selects mode. -
Page 73: Copier Settings
■ ■ ■ ■ ■ Copier Settings Screen Modes 00 Margin Value Default 01 Edge Value Default 02 Book Value Default 01/05 03 Margin Reduction Def. 04 2-Sided Mode Default 05 Reduce N in 1 For Space 06 Digital Skyshot Mode... -
Page 74: Scanner Settings
09 XMF File Type ∗ Address Book is not necessary to set in this function setting. Your PC can be registered with NOTE Panasonic-DMS. Function Sets the original setting. ● Text, T/P (Text/Photo), Photo Sets the default compression mode setting. -
Page 75: Printer Settings
■ ■ ■ ■ ■ Printer Settings Screen Modes 00 Number Of Prints 01 Paper Size 02 Paper Tray 01/04 03 Print Direction 04 Auto Tray Selection 05 2-Sided Print 06 Bind Edge 02/04 07 Resolution 08 Font (PCL) 09 Symbol Table (PCL) 10 Pitch (PCL) 11 Point Size (PCL) 12 Lines/Page (PCL) -
Page 76: For Key Operator
Sets the output bin. ● Upper, Bottom Sets the output bin. ● Upper, Bottom Copier will automatically rotate image and print when selected paper tray is empty. ● Off, On Beep sounds when touching the panel. ● Off, Soft, Loud Beep sounds when original is set on the Platen. - Page 77 ■ ■ ■ ■ ■ General Settings Screen Modes 15 Fold Position (A3/LDR) 16 Fold Position (B4) 04/13 17 Fold Position (A4/LTR-R) 19 Language Sel. Priority 20 Date Time Setting 21 Weekly Timer 22 DHCP Default 05/13 23 TCP/IP Address 24 TCP/IP Subnet Mask 25 TCP/IP Default Gateway 26 DNS Server Address...
- Page 78 Function Parameters For Key Operator ■ ■ ■ ■ ■ General Settings Screen Modes 30 Sleep/Shutdown Select 31 Print General Settings 32 Corona Wire Cleaning 07/13 33 MAC Address 34 Address Book Group ID 35 Tandem User Parameter 36 Community Name (1) 37 Community Name (2) 08/13 38 Device Name...
-
Page 79: Copier Settings
59 Logon Attempts* 60 Lockout Time* 13/13 61 User Auth. Domain * No. 56, 58, 59, 60 are only available when No.55 setting is set to On. ■ ■ ■ ■ ■ Copier Settings Screen Modes 00 Paper Size Priority 01/05 01 Original Mode Default ●... - Page 80 “Level 1 or 2” setting consumes less Toner than “None” setting, however, the copy quality will diminish slightly. Toner saving is based on the Panasonic 6 % density Test Chart (N910653): Level 1: Uses approximately 10 % less Toner than None setting.
-
Page 81: Printer Settings
■ ■ ■ ■ ■ Printer Settings Screen Modes 00 Job Completion Time 01 Page Protection 02 Error Page Print 01/03 03 Spool Function 04 Text Print 05 PS Configuration Print 06 Printer Settings Print 07 Font List Print (PCL) 02/03 08 Font List Print (PS) 09 Mailbox Data Holding... -
Page 82: Examples
Function Parameters Examples ■ ■ ■ ■ ■ Weekly Timer Key Operator can administer the weekly On/Off timers. Scroll to 05/13 Start time ● Set the time the machine automatically starts the Sleep/Shutdown mode. - Page 83 End time ● Set the time the machine automatically wakes up from the Sleep/Shutdown mode. Input time Ex.: 1700 Password (8 digits: alpha-numerical; alphabet (case-sensitive), numbers, symbols (@, ., _, and SPACE)) Input time Ex.: 0800...
-
Page 84: Registering A Department Counter
Function Parameters Examples ■ ■ ■ ■ ■ Registering a department counter The Department Counter feature can limit the number of copies, administer counters and Identification Code numbers for each department. (Maximum Number of Departments: 300) Contact your authorized service provider to enable the Department Counter feature. - Page 85 For Identification Code Select Page Select Department Input a Department Name (up to 25 characters) using the QWERTY Keyboard, and touch the OK button. (See page 13, How to use the QWERTY Keyboard) Password (8 digits: alpha-numerical; alphabet (case-sensitive), numbers, symbols (@, ., _, and SPACE)) ID Code (8-digit)
-
Page 86: Verifying A Department Counter
Function Parameters Examples ■ ■ ■ ■ ■ Verifying a department counter Scroll to 03/13... - Page 87 For Total Counter Displays the sum of all the Prints all the active department counters. active department counters. To clear the total counter, touch the INPUT button, enter 0 and touch the OK button. Password (8 digits: alpha-numerical; alphabet (case-sensitive), numbers, symbols (@, ., _, and SPACE)) For Department Counter...
-
Page 88: Combined Function Table
Function Parameters Combined Function Table 2-SIDED/ORIG. COPY Next Selections First Selections Book 2 Page N in 1 Booklet Multi-Size Feeding Job Build and SADF Sort Shift-Sort Rotate-Sort Staple-Sort Shift-Group Rotate-Group Non-Sort Punch Zoom Auto Zoom Edge Book Margin Stamping Image Repeat Centring Inverse Cover... -
Page 89: Index
Button Names on the QWERTY Keyboard ... 13 Centering ... 42 Completion Notice ... 20 Copier Settings ... 73 Copier Settings (For Key Operator) ... 79-80 Copying the Same Size Originals (1:1) ... 6 Copying with Preset Ratios (Reduction/Enlargement) ... 8 Cover ... - Page 90 Others Saddle Stitch ... 36 Scanner Settings ... 74 Selecting the type of Original(s) ... 6 Shift-Group ... 36 Shift-Sort ... 36 Shutdown Mode ... 66 Skyshot Mode ... 62 Sleep Mode ... 66 Sort ... 36 Sort/Finish ... 36, 73 Stamping ...
- Page 91 memo...
- Page 92 RISK AND SHALL NOT BE SUBJECT TO LIABILITY FOR ANY DAMAGE, INCLUDING, BUT NOT LIMITED TO DIRECT, INDIRECT, SPECIAL, INCIDENTAL OR CONSEQUENTIAL DAMAGES OR LOSS OF PROFITS SUSTAINED BY THE CUSTOMER IN CONNECTION WITH THE USE OR APPLICATION OF THIS PANASONIC MACHINE. SEE YOUR DEALER FOR DETAILS OF DEALER’S WARRANTY.